
Designing a text with a glass effect in Photoshop is very simple. To start, create a new project. Next, type the text you want to apply the effect to.
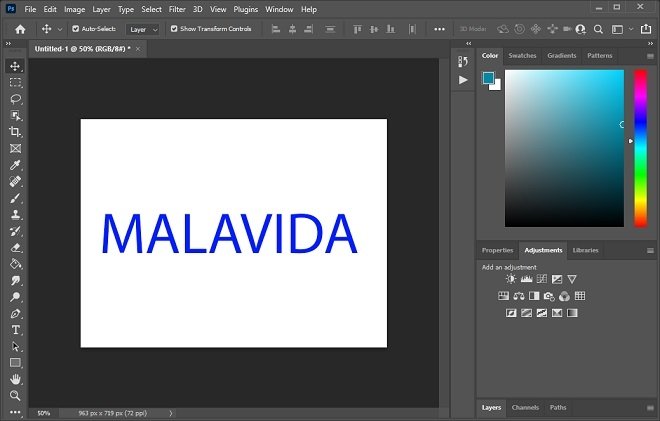 Create a new text
With the text created on the canvas, it is time to get to work with it. To open the layer settings, known as Layer Styles, you must double-click on the layer in the Layers section.
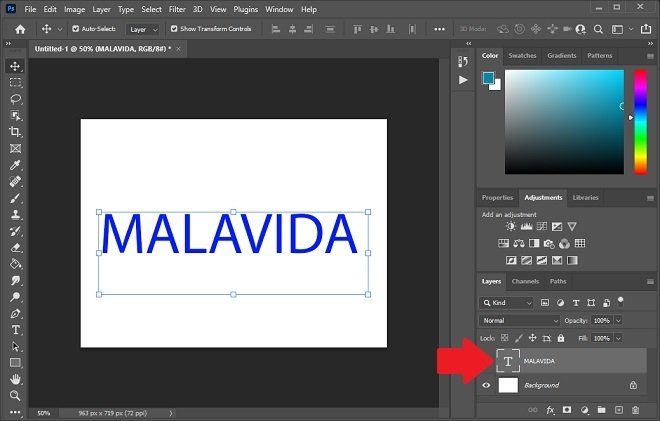 Open Layer styles
In the pop-up window, you will see a large number of values that you can modify. Start with Blending options, where you should set Fill Opacity to 0%.
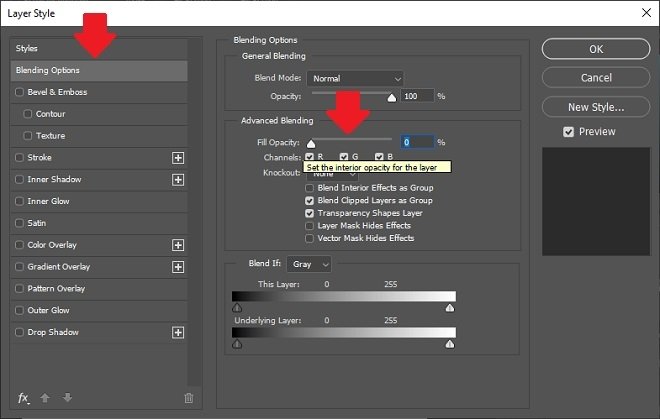 Zero fill
Continue with Bevel & Emboss. Modify Depth by adjusting it to 90% and Size by 6 pixels. In the Gloss Contour option, select the Ring pattern. Finally, modify the two opacity values that you will see at the bottom of the window. They should be between 70% and 50%, as you can see in the following image.
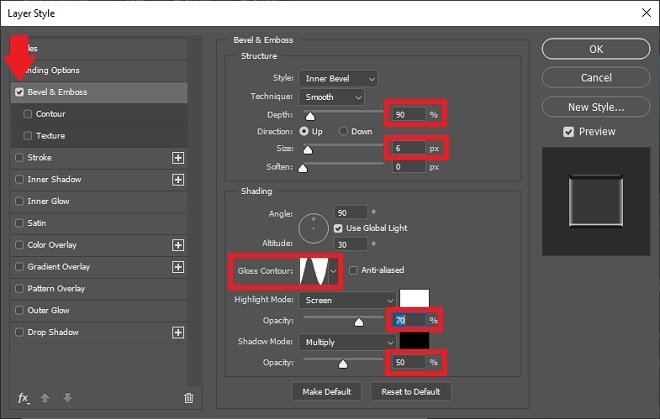 Change the bevel and emboss values
Now it is time to move on to Stroke. There, set Size to 1 pixel and Opacity to 50%.
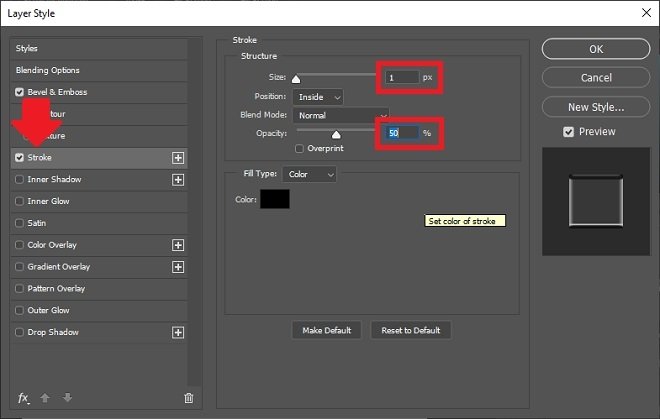 Trace options
Finally, change the settings related to Drop Shadow. The opacity should be at 40%, the distance at 6 pixels, and the size at 4 pixels.
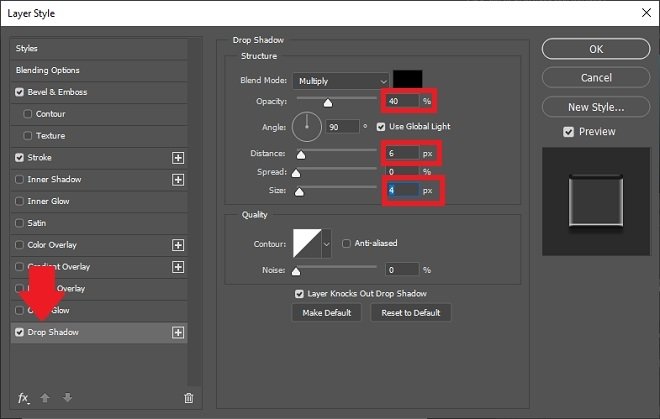 Parallel shadow options
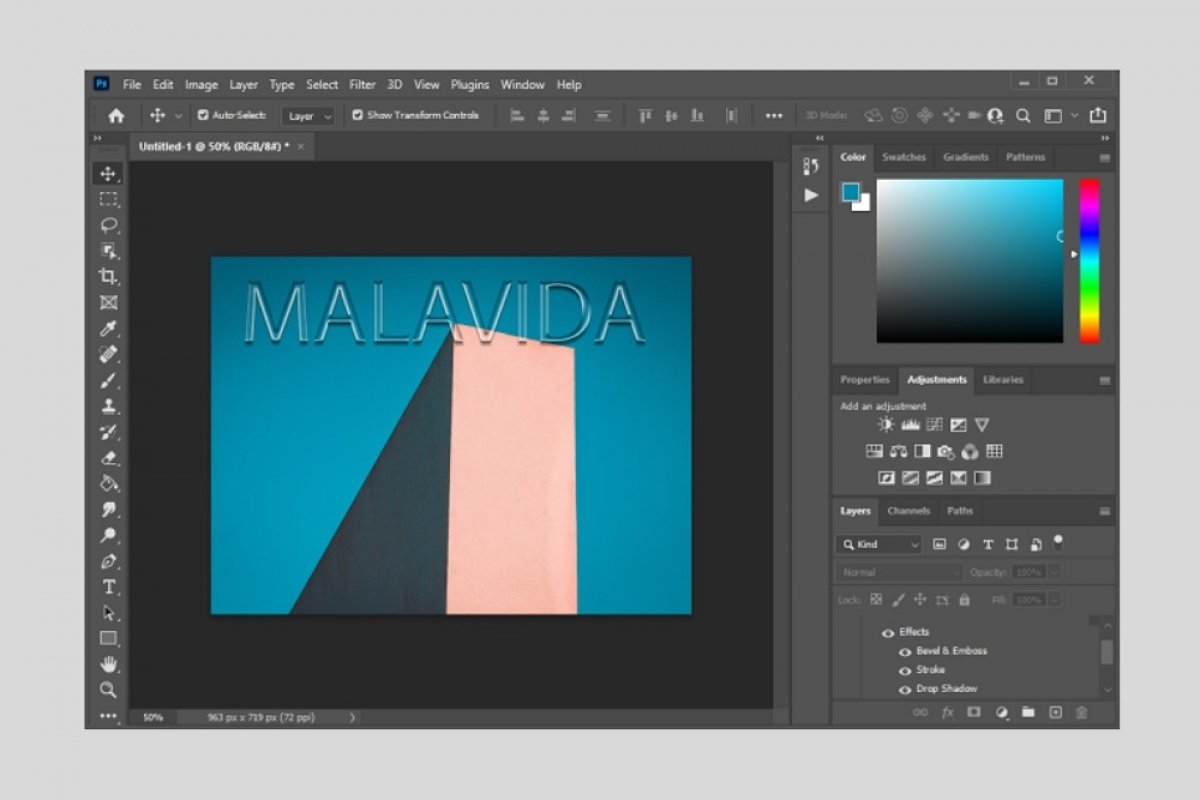
Do not forget to click OK to apply the changes. By now, the text will have acquired a very striking glass effect. However, we recommend that you use a pattern or a background image to better appreciate the result.
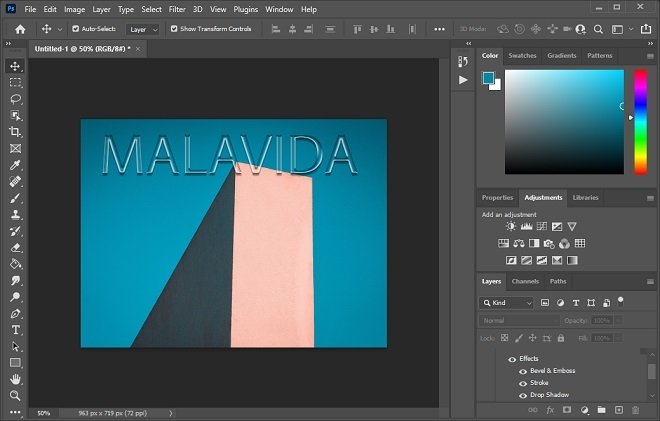 Result of the effect
Note that you can apply the same effect repeatedly by copying the layer style. It is also interesting to know that the font and text size can be changed at any time. So, the ideal thing to do is to apply the effect and then find the typography that best suits your project.
