
Cortana is Microsoft's voice assistant system. Although it was initially presented as a good alternative to Alexa and Google Assistant, it was never really accepted by most users. If this is your case, you are probably wondering how to disable this utility on your computer. Below, we show some ways to do it.
Disabling Cortana from Windows 11 settings
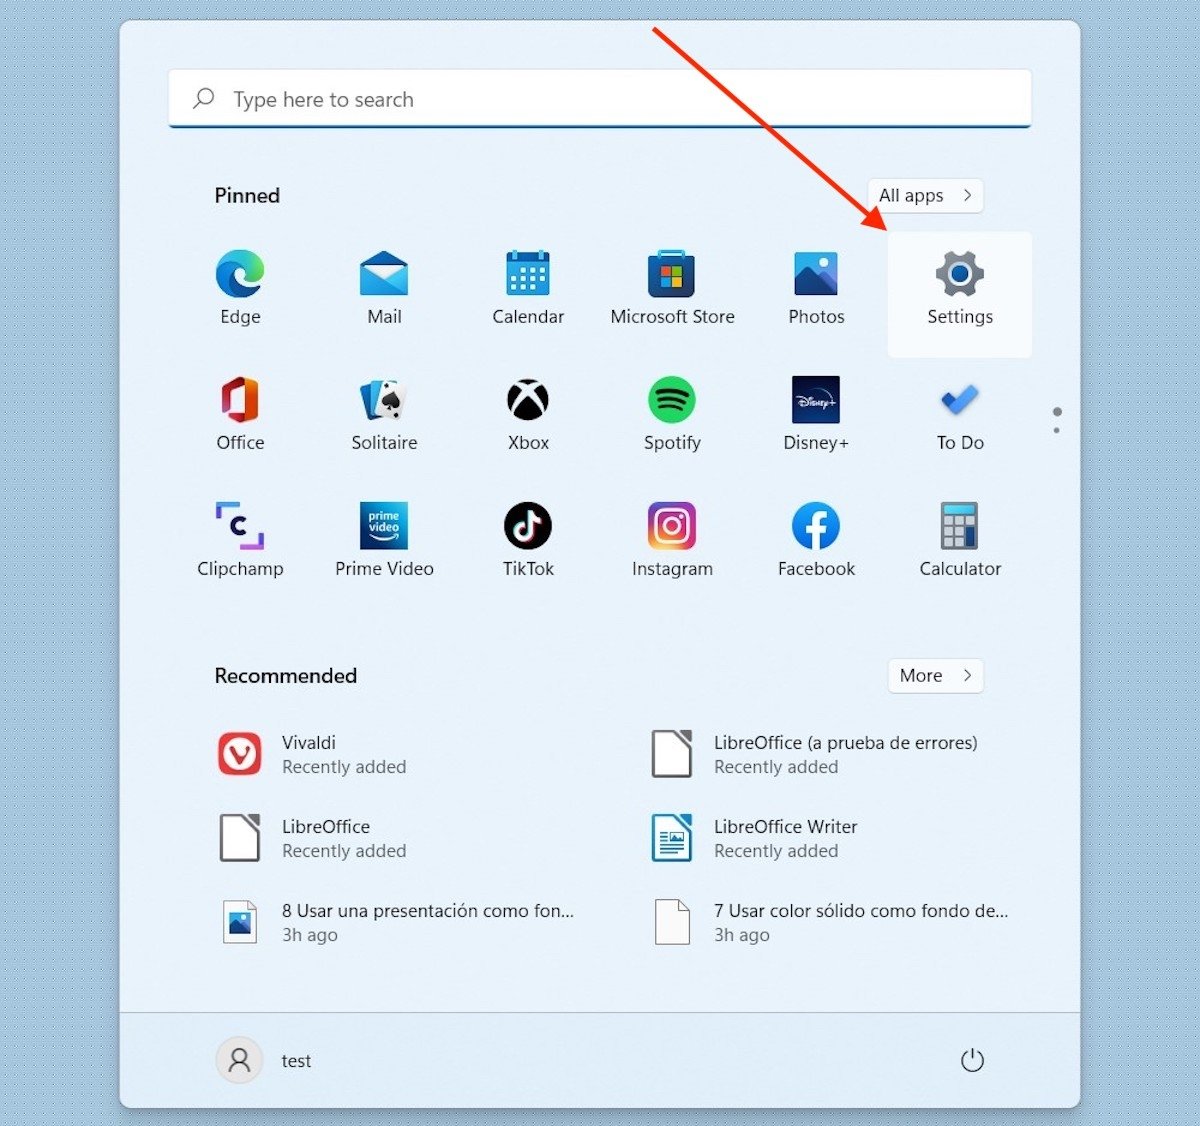
The first method involves accessing the Windows 11 settings. Do it from the Start menu or with the keyboard combination Windows + I.
 Open the Windows 11 settings
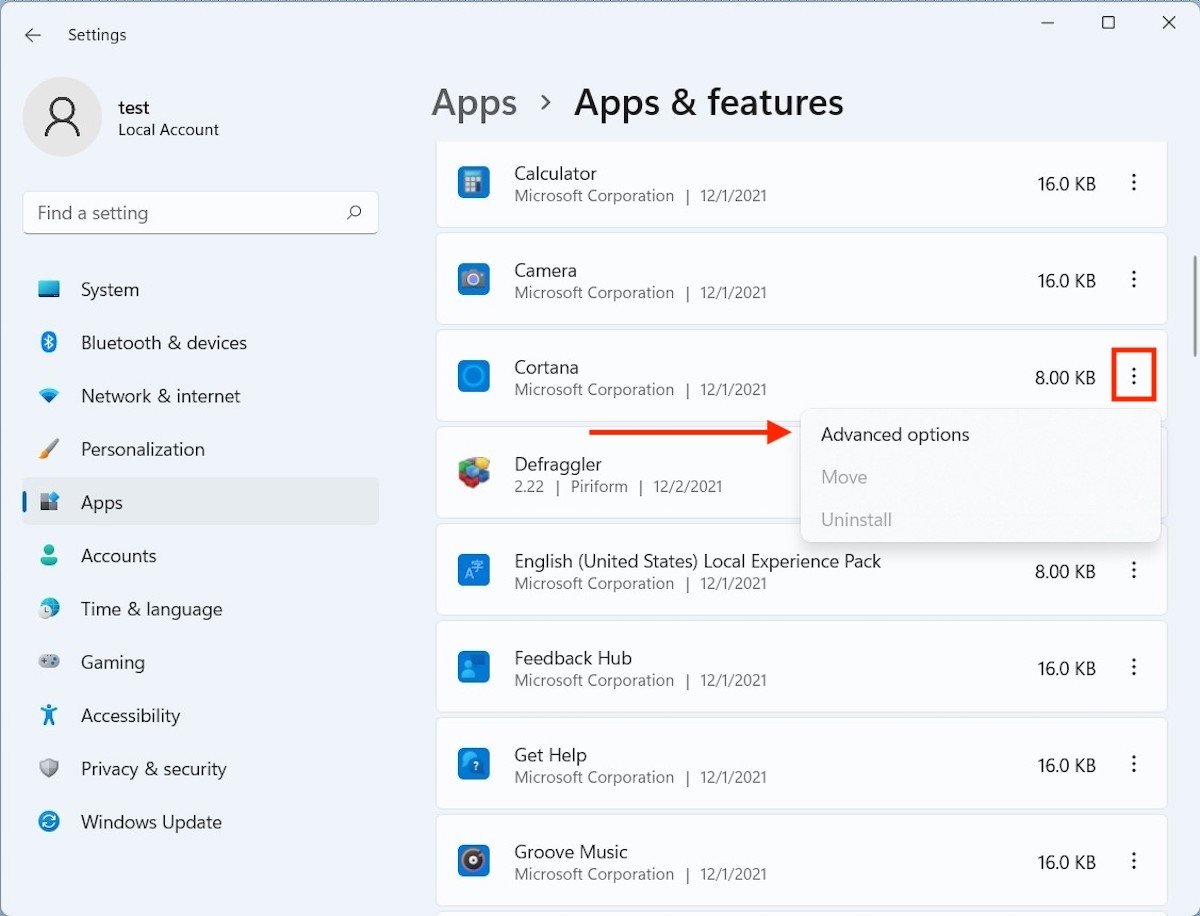
Then, click on the Apps section and then on Apps & features.
 Windows applications and features
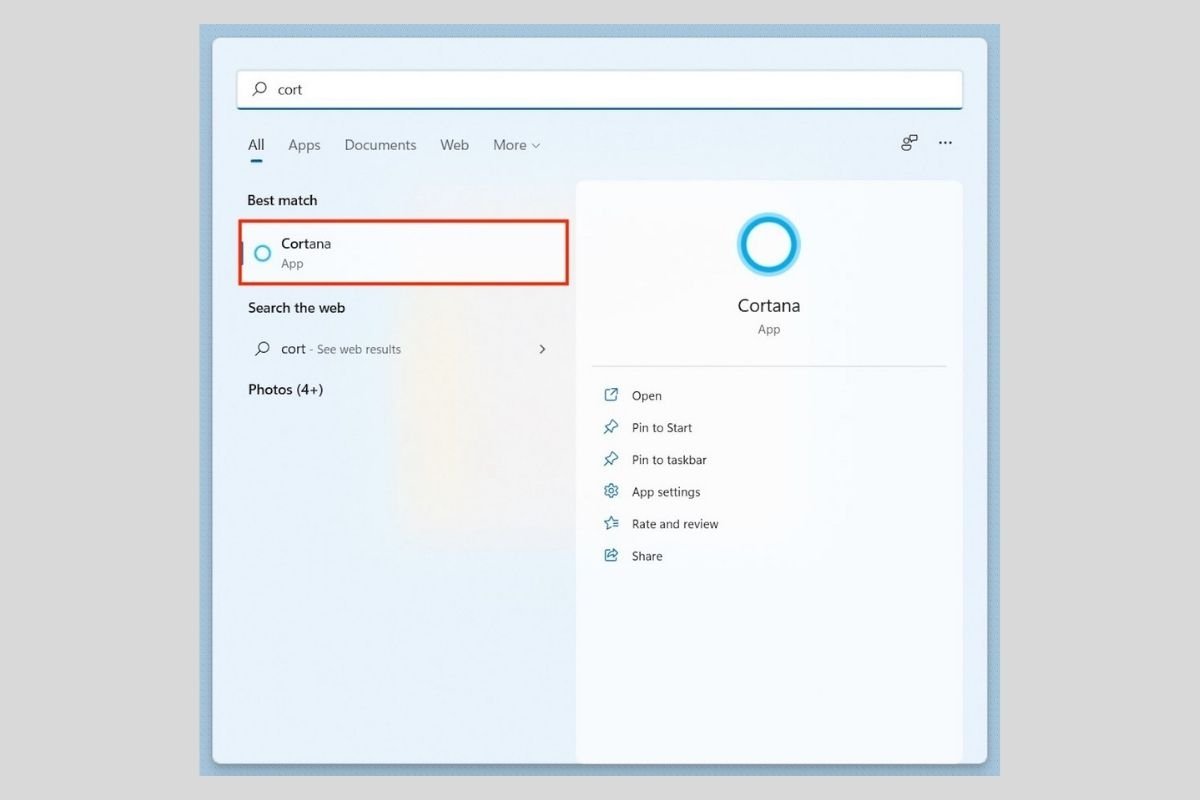
Wait for the application to load the complete list of programs installed on your computer. Now, search for Cortana in the list. It is very easy to do this because the applications are sorted alphabetically. When you have Cortana visible, click on the three vertical dots that you will see on the right side of the window. Finally, click on Advanced options to continue.
 Advanced options for Cortana
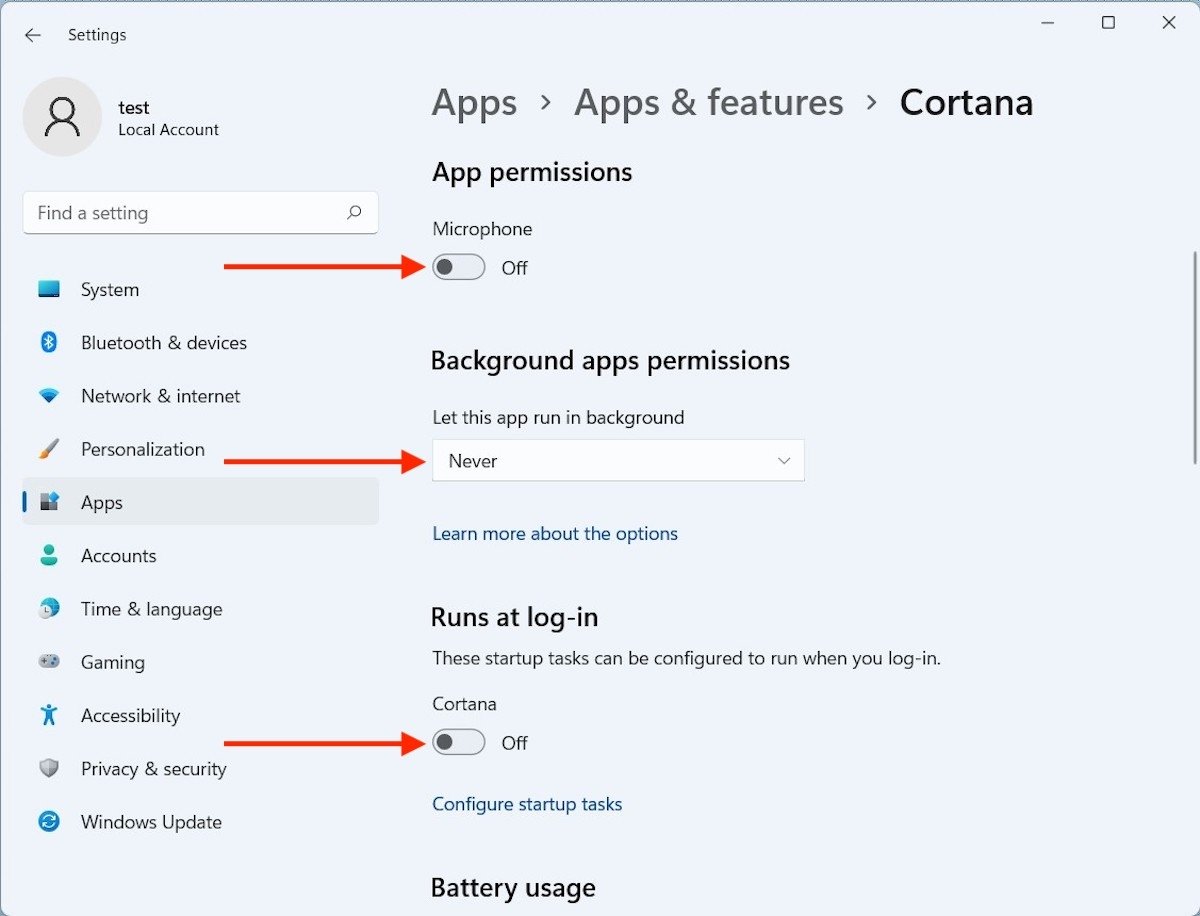
Disable the Microphone and Cortana options, as shown in the screenshot below. Also, set the Let this app run in background option to Never.
 Remove Cortana from the Start menu
By making these changes, Cortana will be disabled from your computer. Yet, if you do a quick search you will notice that it has not gone away completely.
 Cortana available in Windows
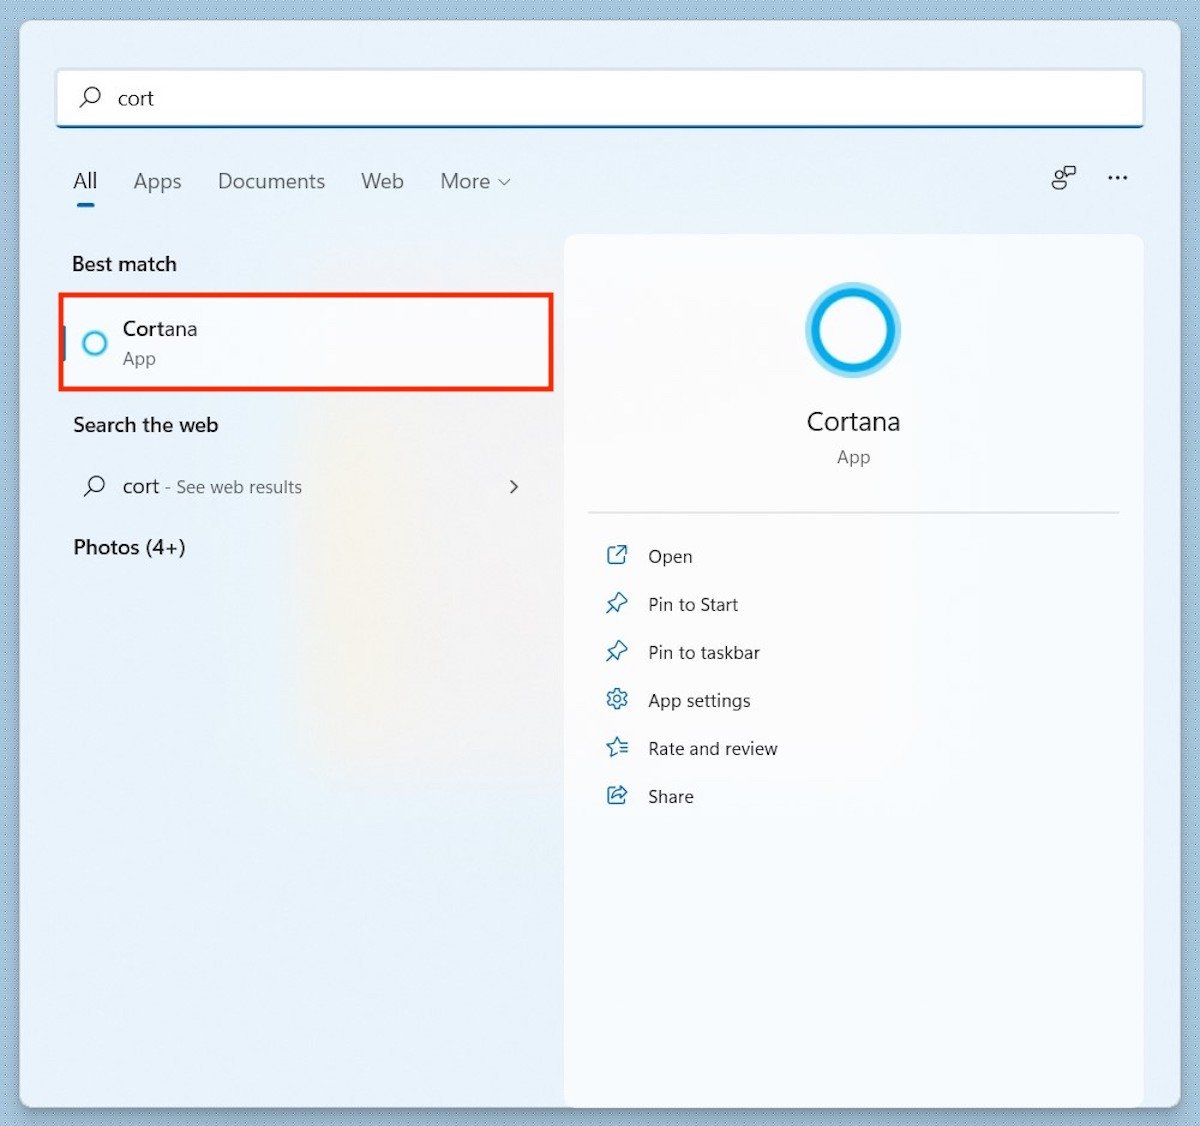
Is there any way to remove Cortana completely? Yes, thanks to a command launched from PowerShell.
Removing Cortana completely with the PowerShell
To access PowerShell, just search for it and click on Run as administrator.
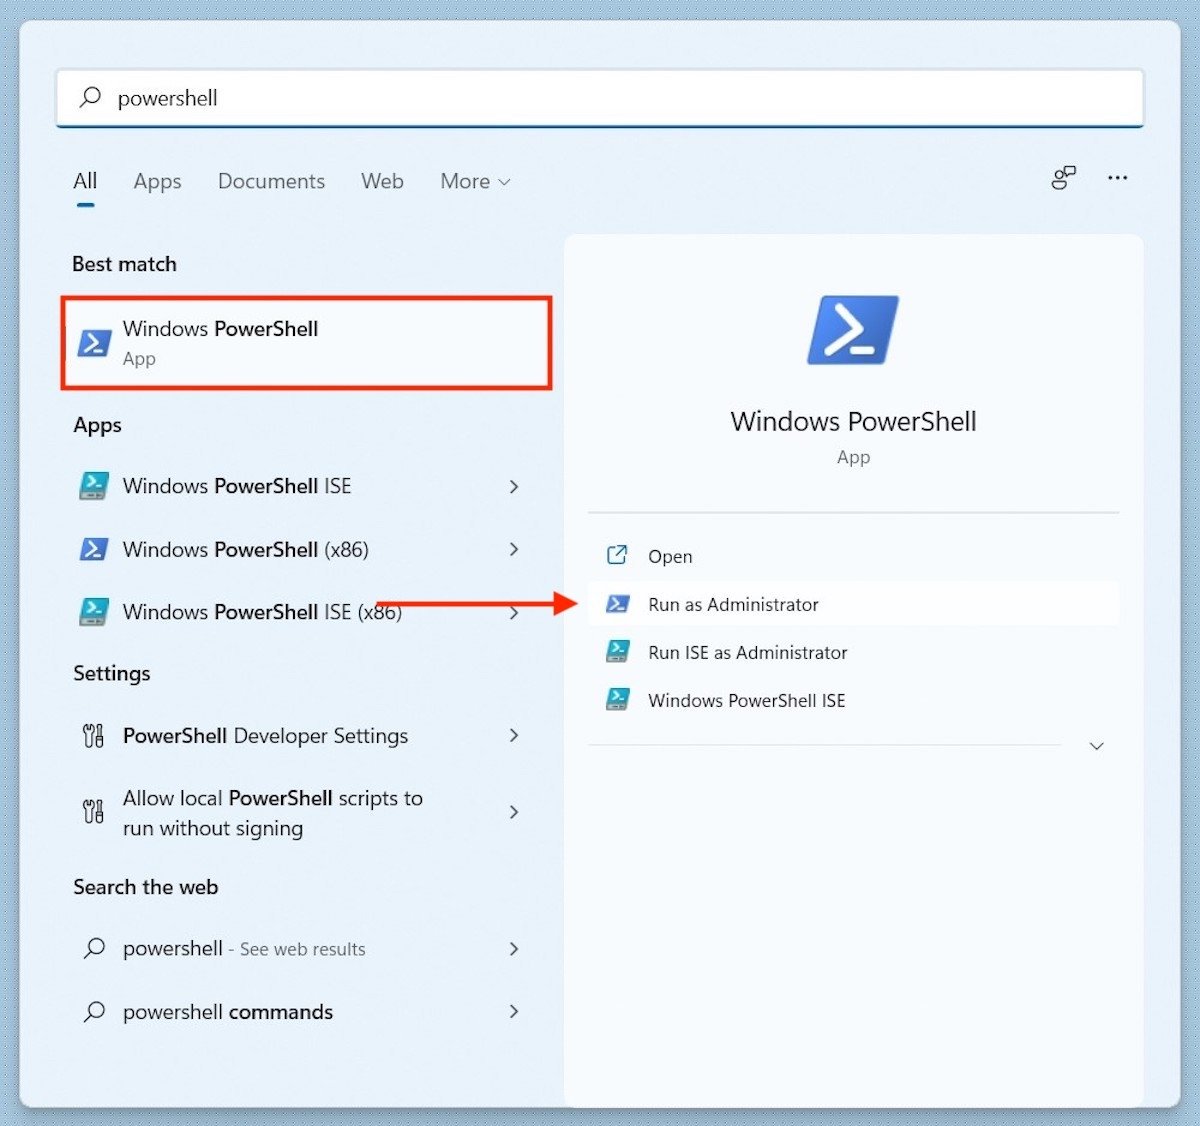 Run PowerShell as an admin
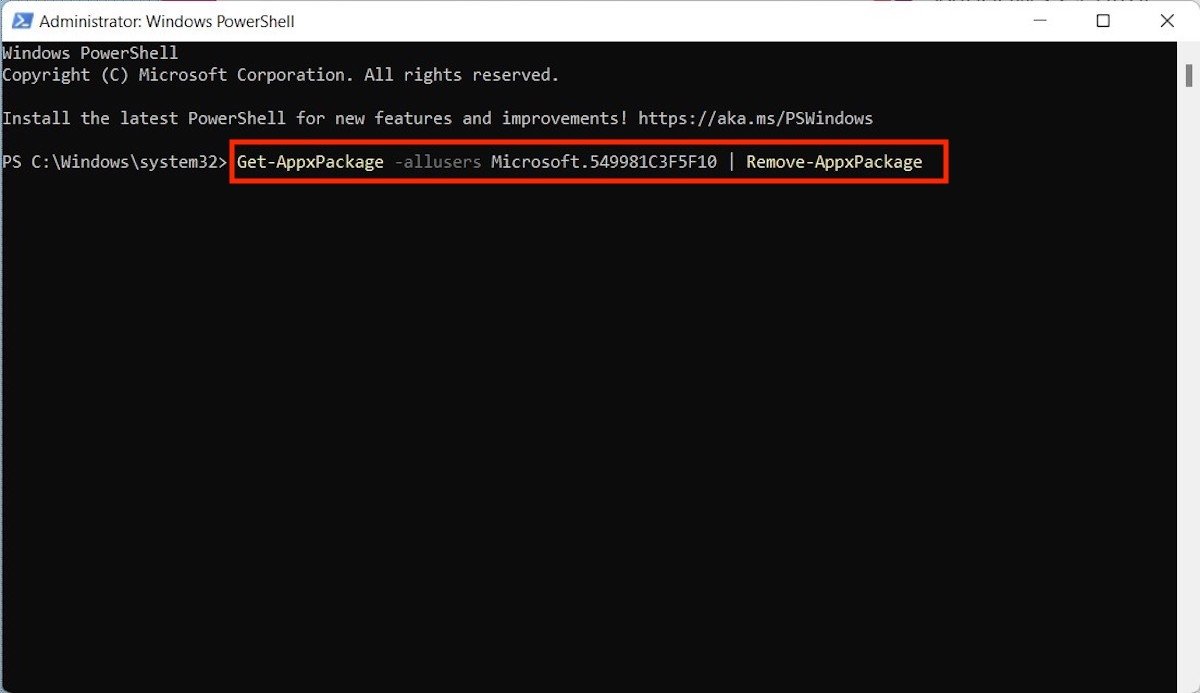
Then, type the following command:
Get-AppxPackage -allusers Microsoft.549981C3F5F10 | Remove-AppxPackage
 Uninstall Cortana for good
By pressing the Enter key, the command will take effect, and Cortana will be completely removed from your computer. Note that if you want to restore this tool at any time, it is available in the app store.
