
To remove the imperfections of a face in a photograph thanks to the potential of Photoshop, all you have to do is open it. Then, duplicate the layer to avoid working with the original image. Right-click on the layer and select Duplicate layer.
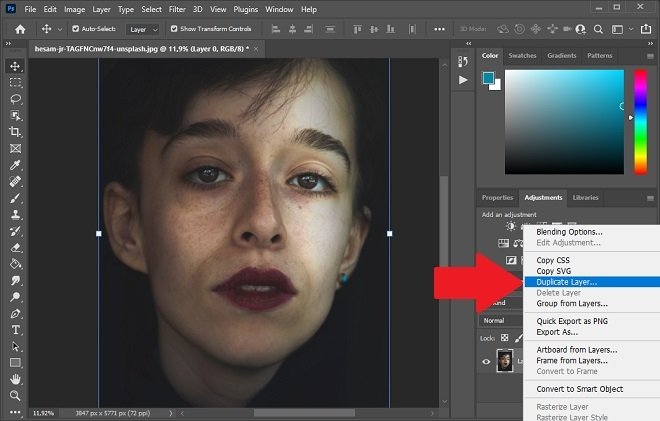 Duplicate the original layer
Now, select the layer you just created and invert the colors with the Control + I key combination.
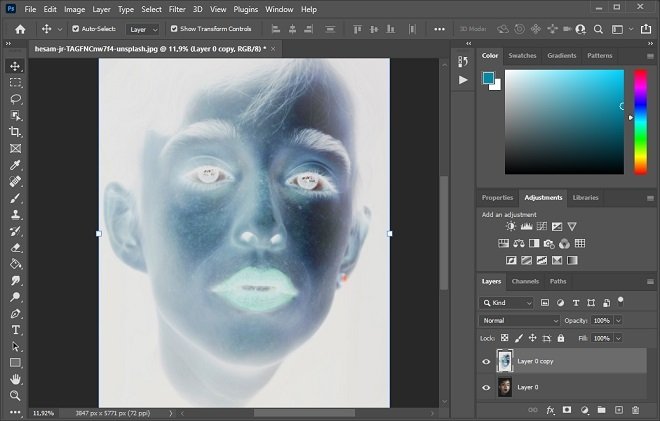 Invert colors
Change the image mode with the drop-down that you will see on the layer. Select Vivid Light. The picture will turn gray and you will probably barely make out the silhouette of the face.
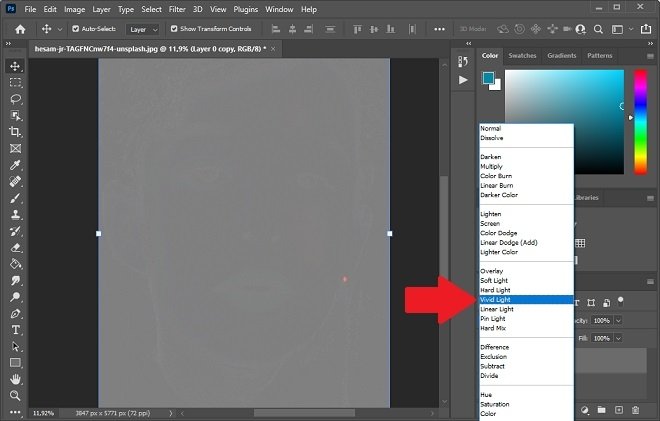 Intense light mode
To visualize the relief of the face, apply the Gaussian Blur filter. You can access it from Filter and then Blur.
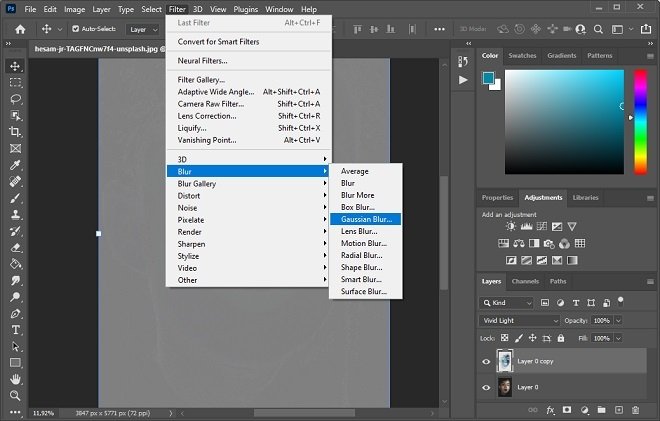 Apply a blur
Increase the radius of the effect until you can make out the silhouette of the face.
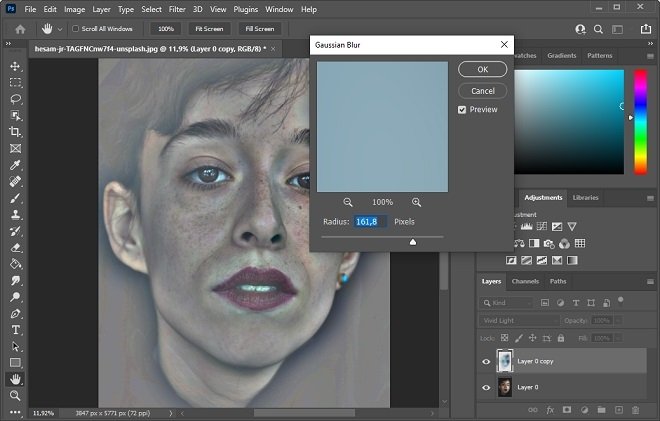 Upgrade the radius until the silhouette is outlined
Immediately apply the High Pass filter. Thanks to this effect, you will be able to merge the gray embossed layer with the layer below. Then, you will see the image a bit blurred. This effect is the one that blurs facial imperfections. For a natural look, you should play with the filter ratio to dilute the imperfections. Avoid overdoing it. When you think you have the right level, click OK.
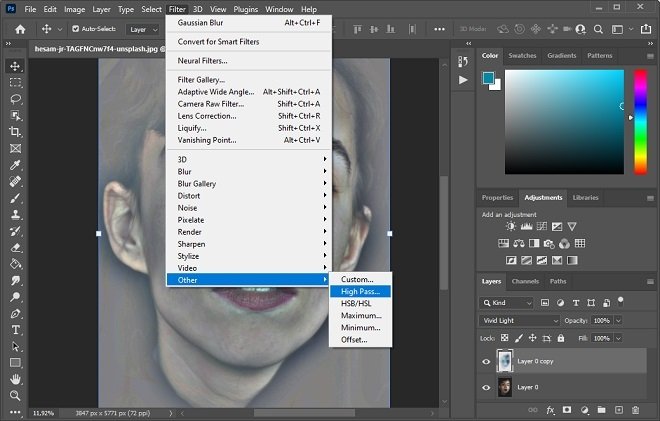 Apply a high pass filter
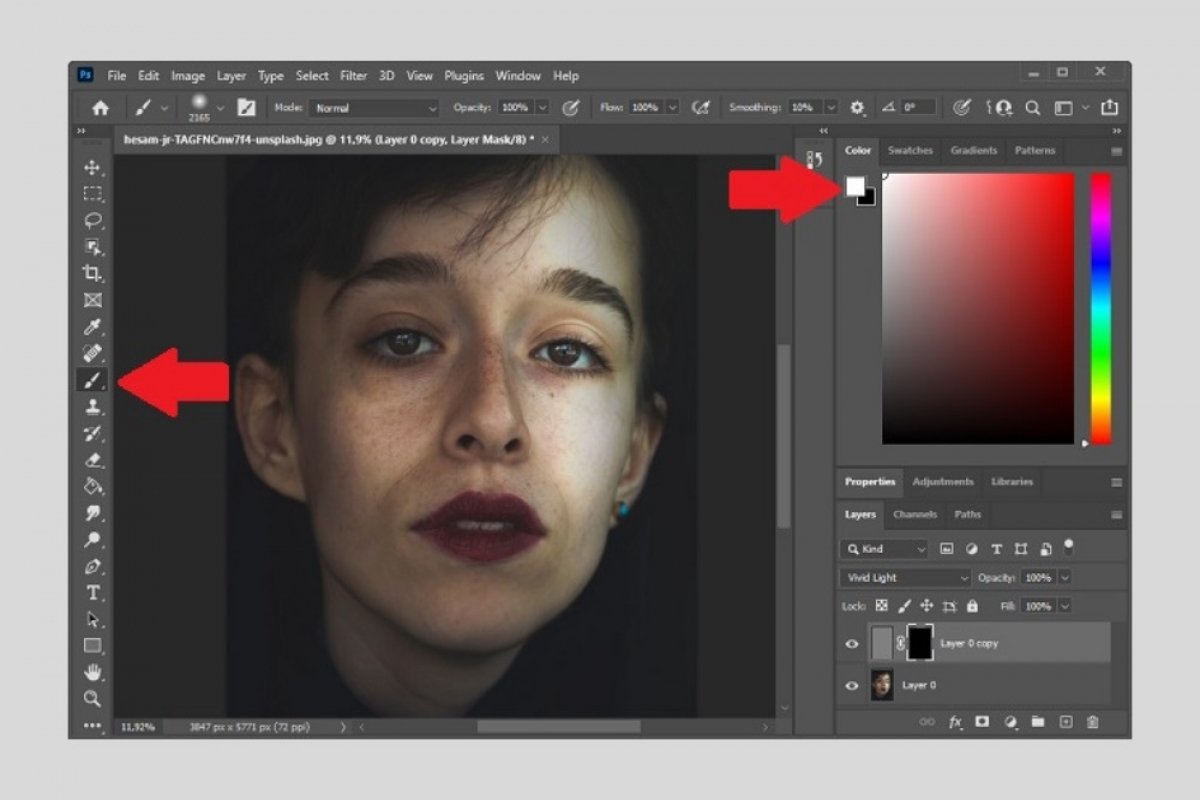
Once all this is done, it is time to retouch certain parts of the face. It is necessary to create a mask so that the changes only affect the areas we are interested in. To create a mask, click on the mask creation button.
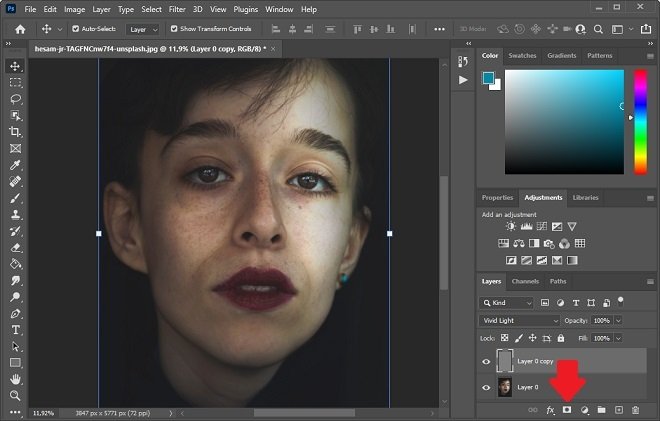 Create a layer mask
Select the mask you just created, enable the paint bucket tool, and fill the mask with black.
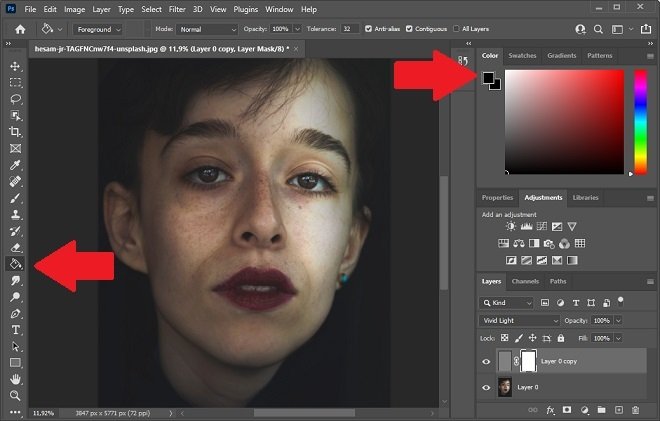 Fill the selection mask with black color
Then, choose a brush, change the color to white, and paint the areas you want to improve.
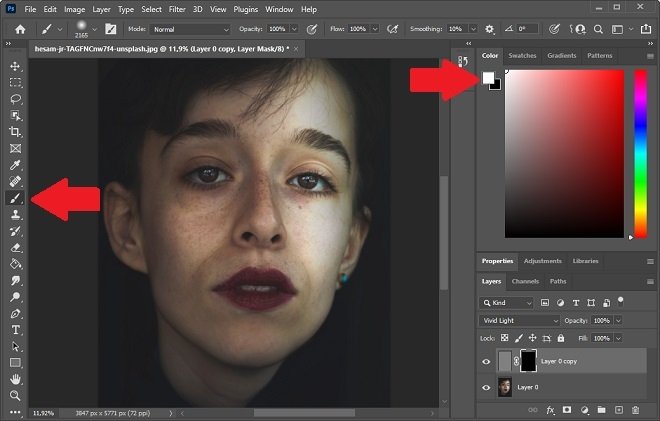 Paint areas with the brush to remove flaws
When you are done, remember to save the changes in a PSD file. This way, you can modify the image again in the future.
