
Windows 11 updates provide system improvements in areas as varied as the interface, integrated applications, and other functions. However, they are also essential to keep the computer safe from possible external attacks. Updates are the means Microsoft uses to close security gaps. For this reason, Windows comes equipped with an automatic update system that downloads and prepares new versions for installation. Do you want to get rid of this tool? Do you find that your computer is running slow due to automated updates? In this article, we tell you how to deactivate them step by step.
Pause updates from the configuration application
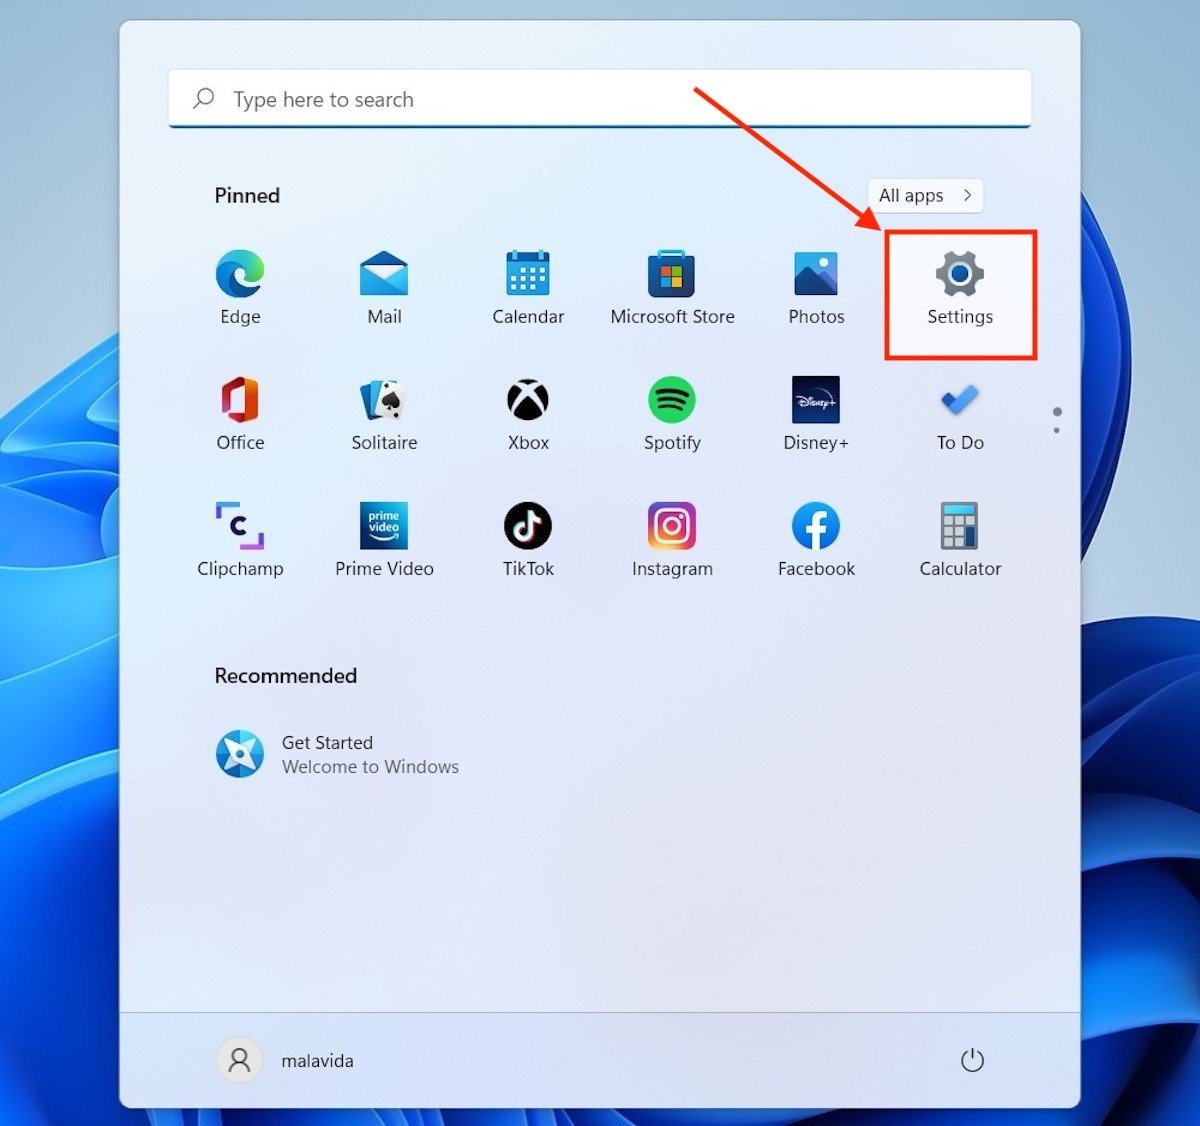
The first method you can use to pause downloading updates is located in the system settings. Locate its shortcut in the Start menu or use the keyboard shortcut Windows + I to enter.
 Open the Windows 11 settings
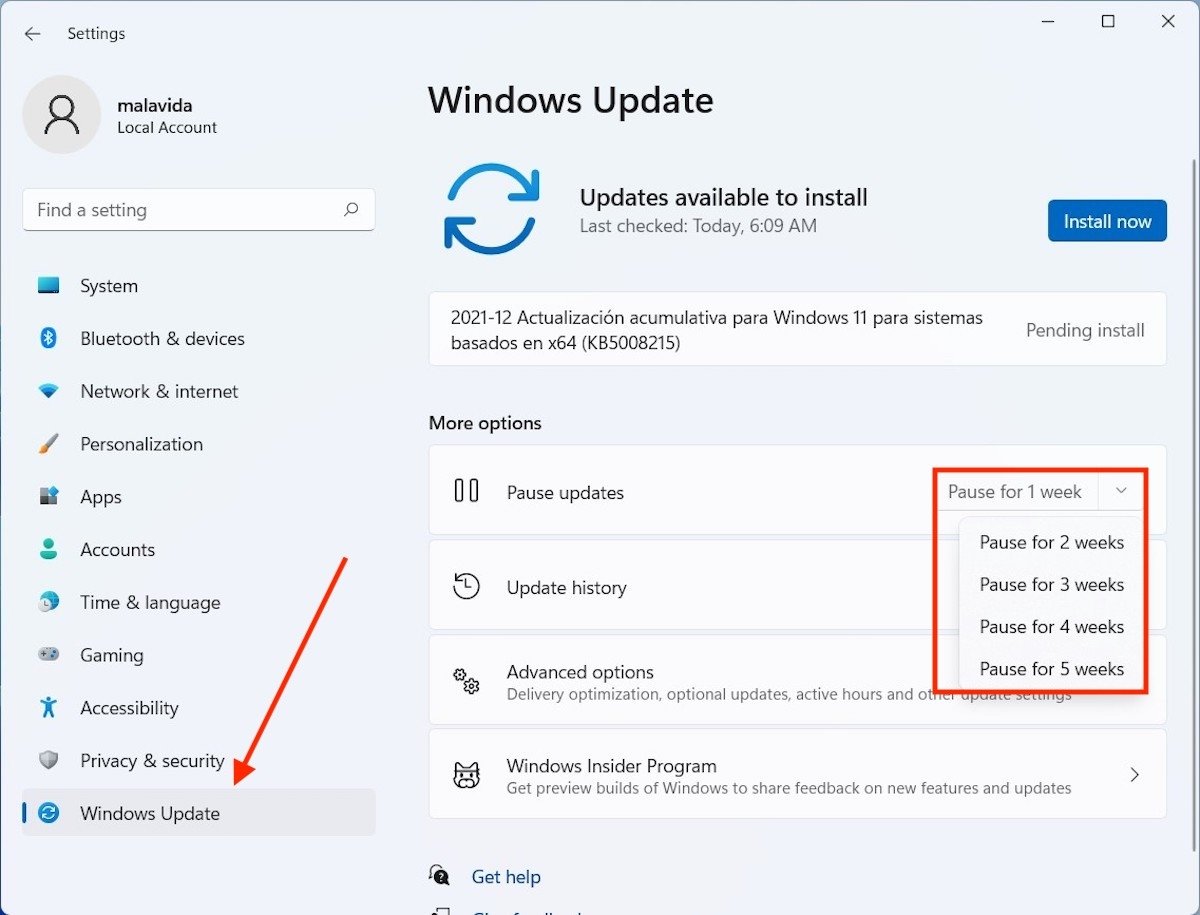
Click on Windows Update to see all the options related to updates. In the Pause updates section, indicate how long you want to stop automatic updates.
 Pause updates during a certain period of time
This pause can be set for a maximum of five weeks. During this time, Windows Update will stop checking for available updates, although you will be able to perform this check manually on your own.
Disable the Windows Update service
As an alternative method, you have at your disposal the deactivation of the Windows Update service. Unlike the previous method, this method is applied indefinitely. In addition, it requires administrator privileges to be performed.
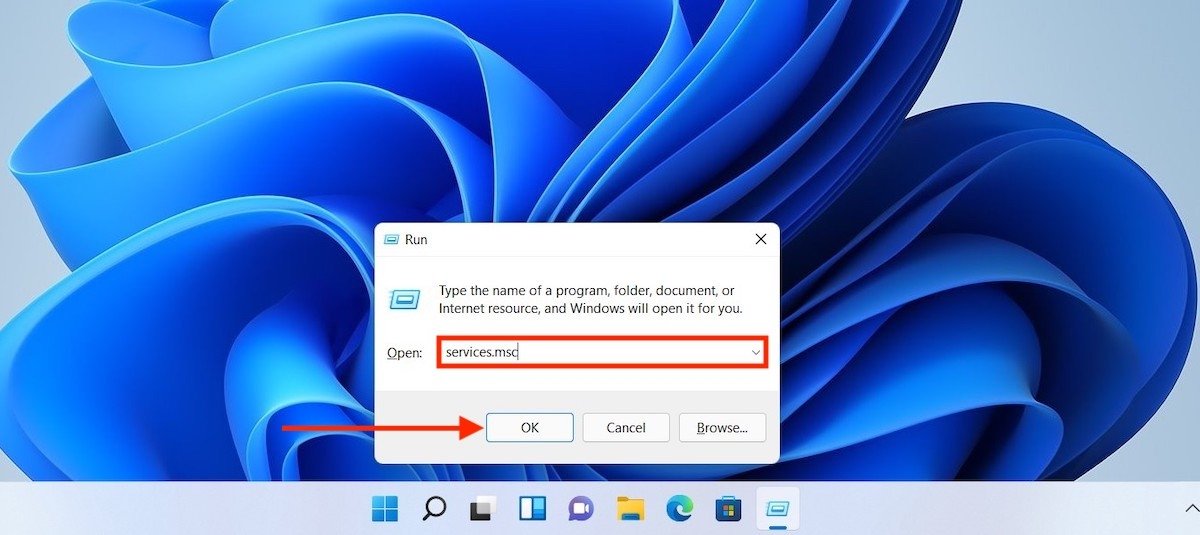
First, open the Run dialog with the Windows + R key combination. Type the command services.msc and click Ok.
 Open the Windows 11 service manager
In the list of services, find the Windows Update entry. Double click on it to see all the parameters.
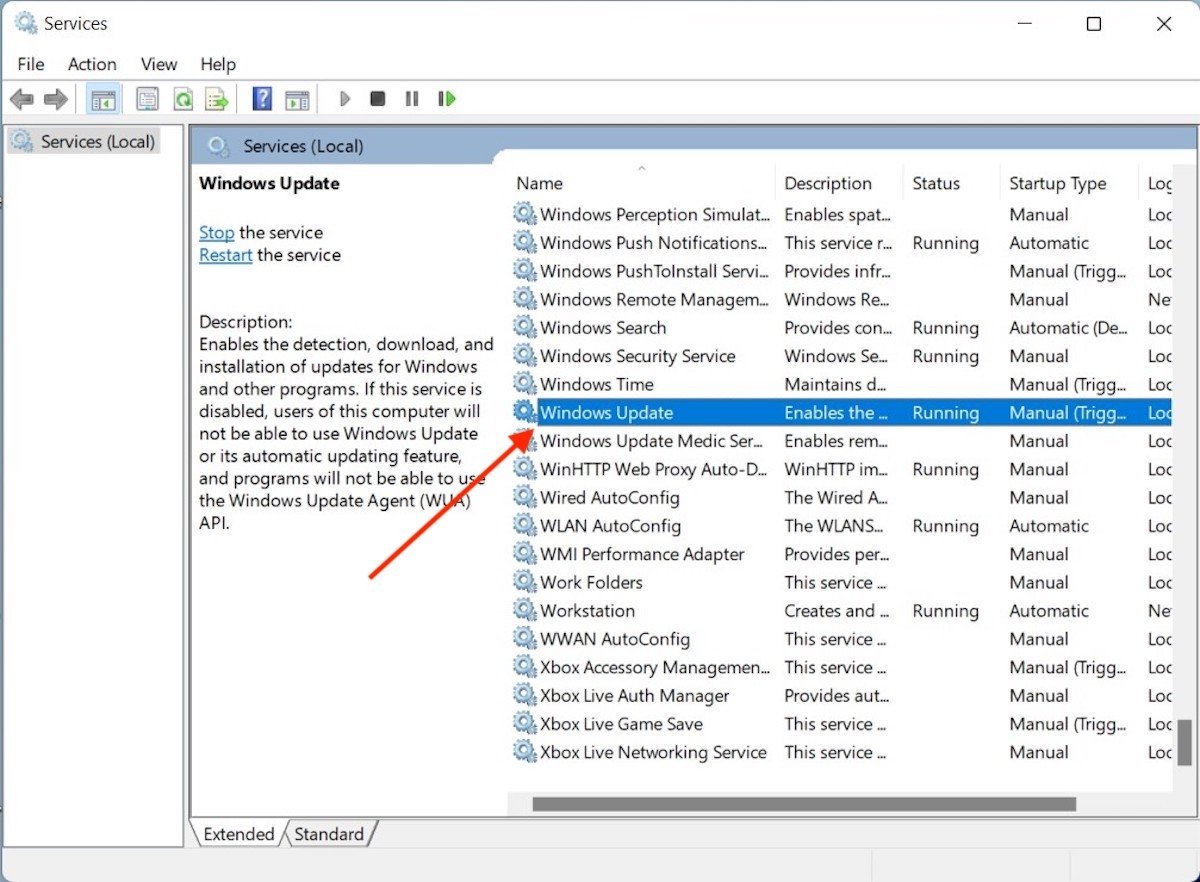 Windows Update service
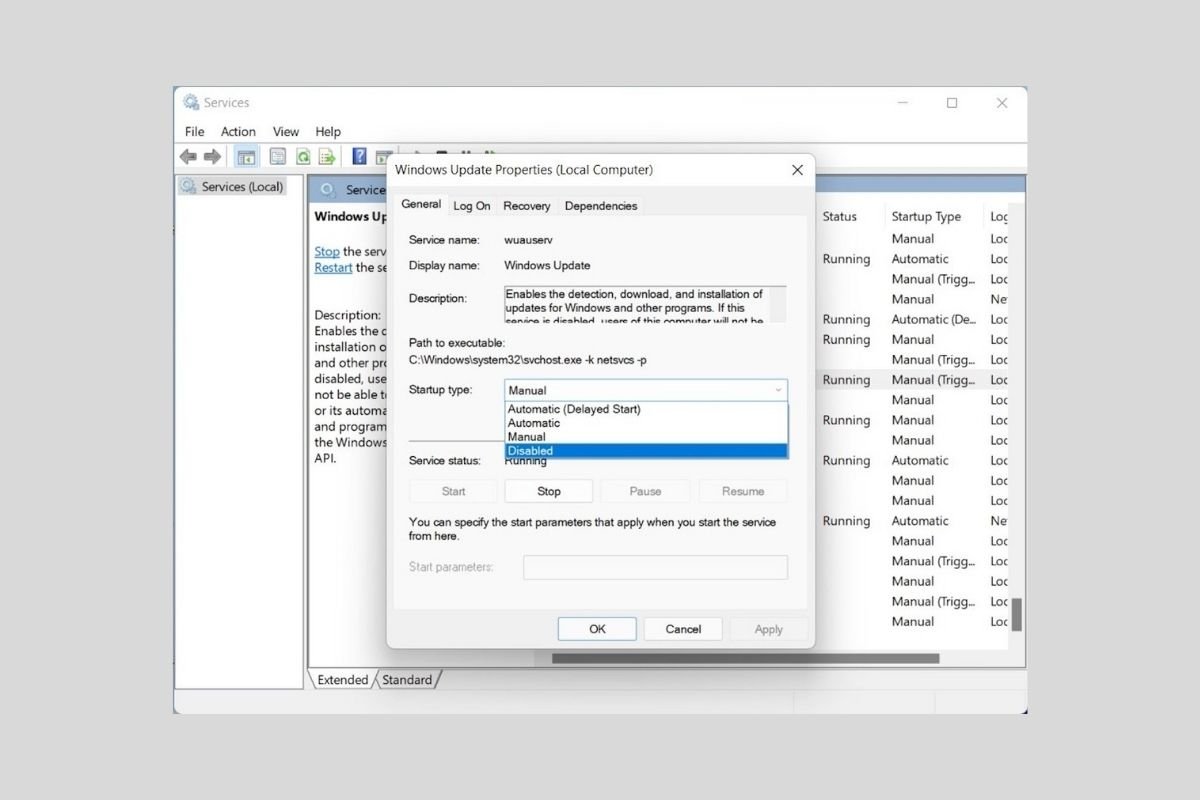
Immediately, a pop-up window will open. There, you must deploy the list of options located next to Startup type. Select Disabled to prevent the service from running automatically at startup.
 Disable the update service
Restart the computer for the changes to take effect. Remember that if you want to enable automatic updates again in the future, you will have to set this parameter to Automatic or Manual.
How to disable updates from regedit
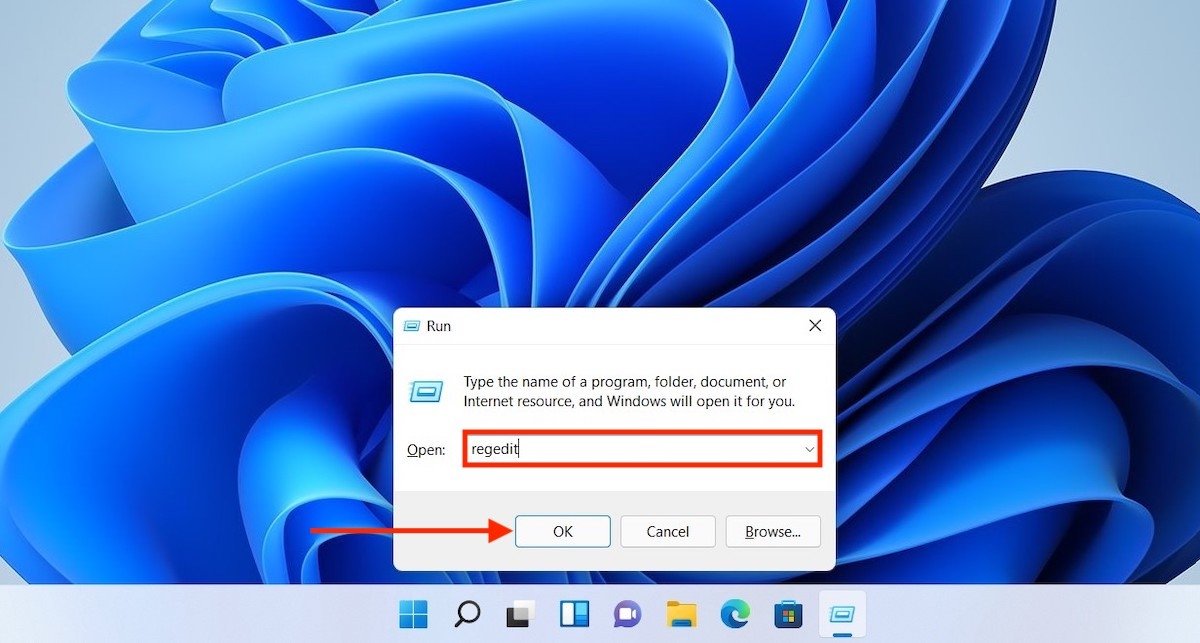
The last way to disable automatic updates is to modify the Windows registry. To do this, you need to run the editor. It is as simple as opening the Run window and typing the regedit command. In this case, you will also need to have administrative privileges to make the changes.
 Open the registry editor
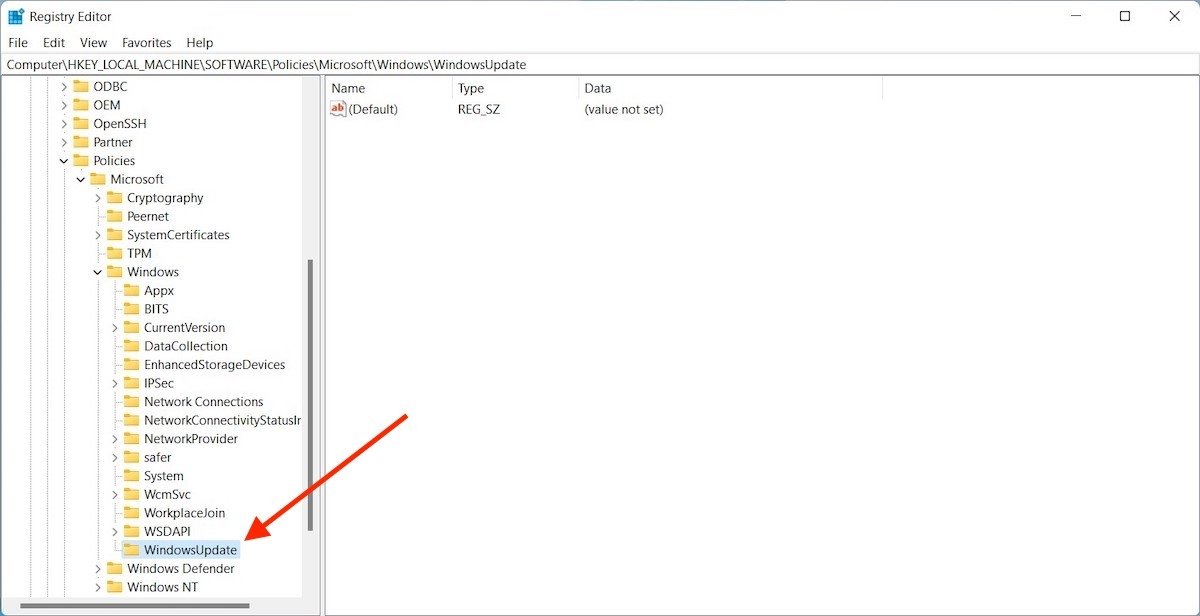
In the registry editor window, go to the following path:
ComputerHKEY_LOCAL_MACHINESOFTWAREPoliciesMicrosoftWindows
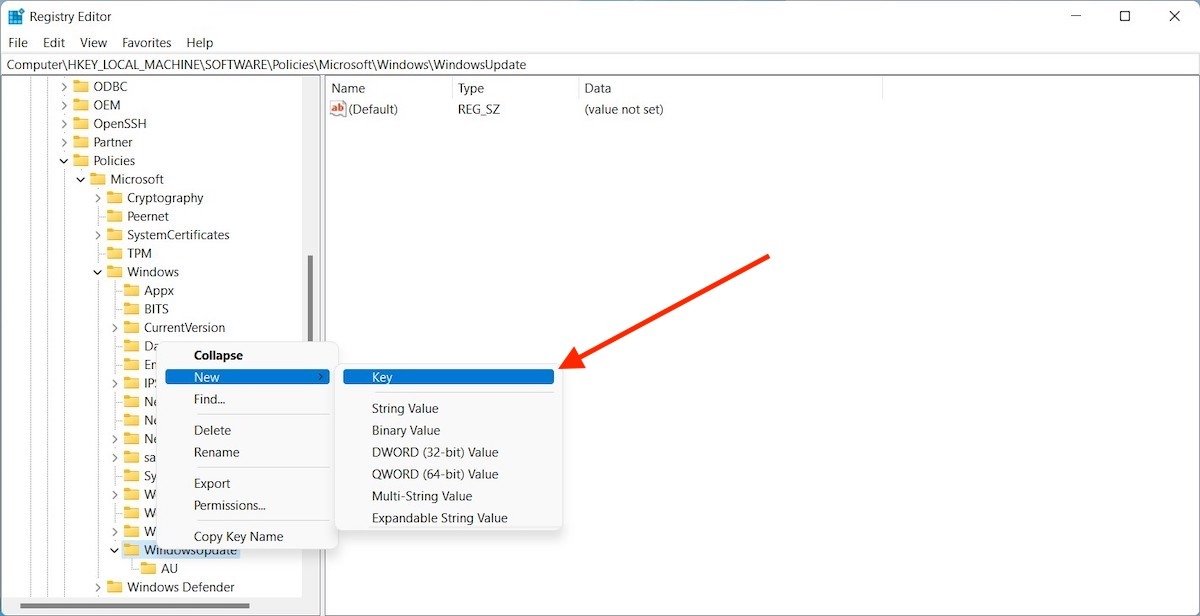
Within the key Windows, you will find a nested key called Windows Update. If you do not, create it yourself by right-clicking on Windows, placing the cursor on New, and selecting Key.
 Create a new key
As a result, you will have a key called Windows Update inside Windows.
 WindowsUpdate key created
Repeat the process, but this time, to generate a key named AU within Windows Update.
 Create the AU key within Windows Update
Inside the AU key, add a DWORD (32-bit) Value.
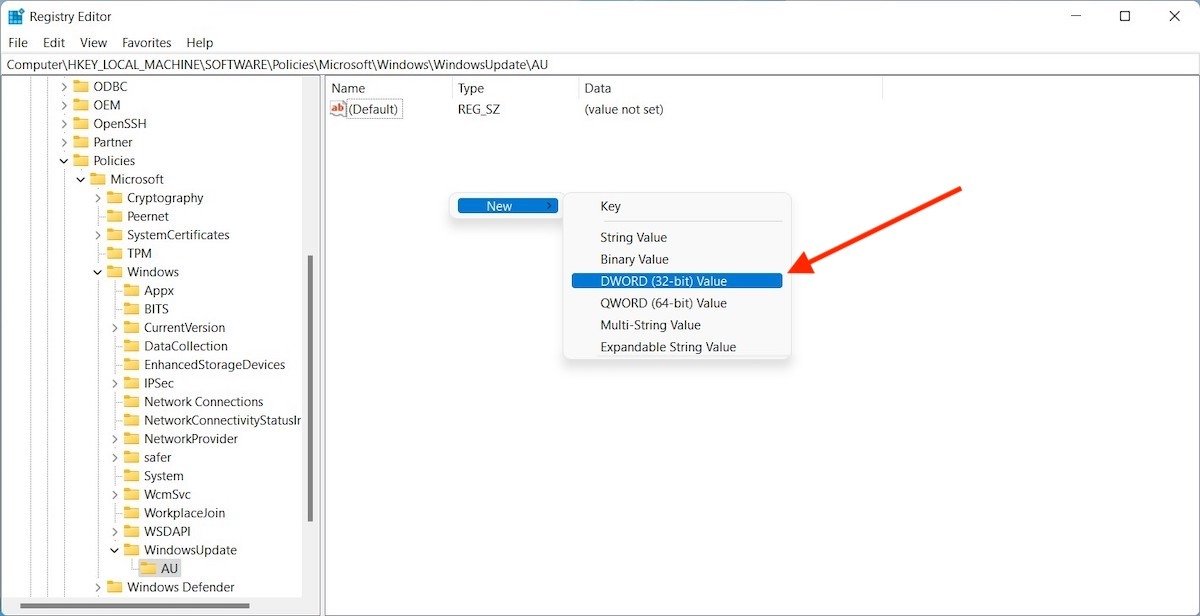 Create a new 32-bit value
Rename it to NoAutoUpdate and double-click on it. Then, modify the value to 1.
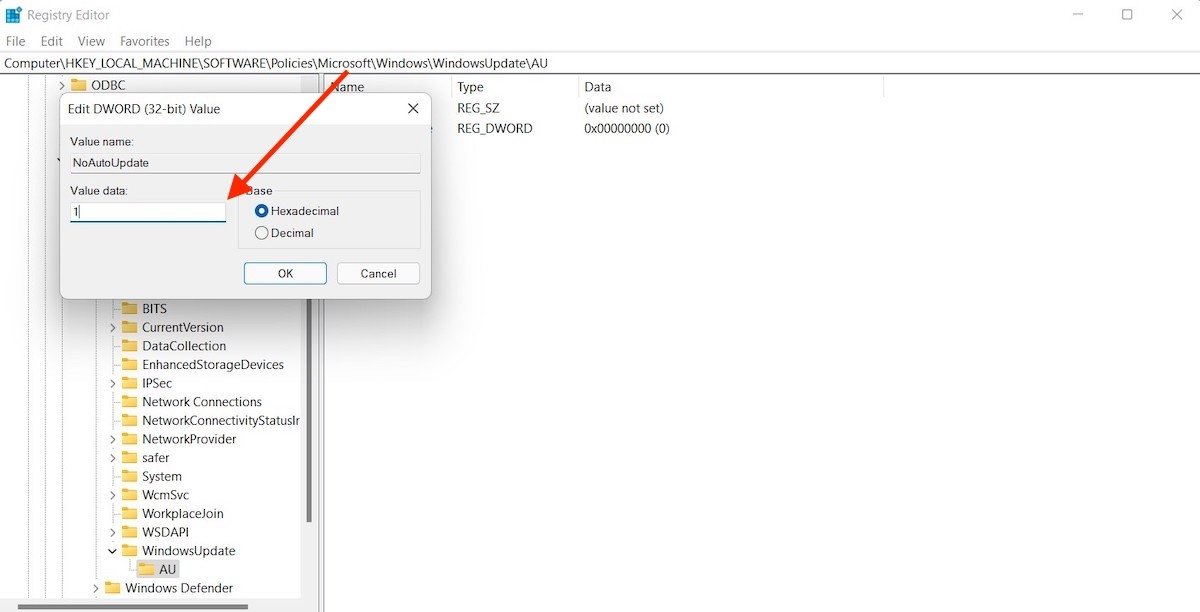 Change the value to 1
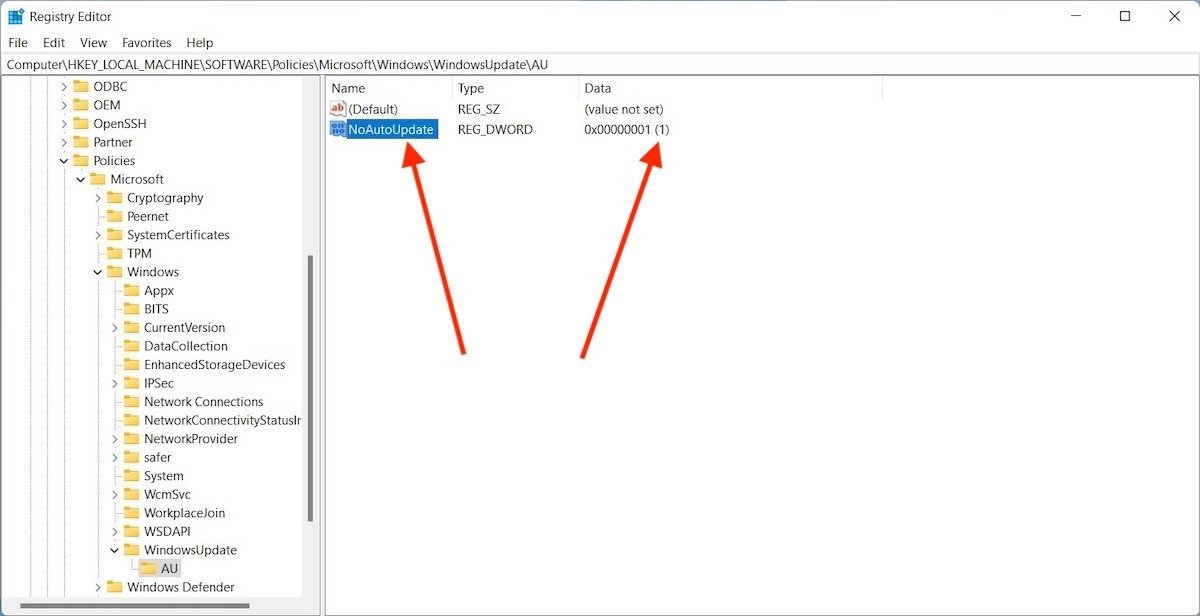
After taking these steps on the route ComputerHKEY_LOCAL_MACHINESOFTWAREPoliciesMicrosoftWindowsWindowsUpdateAU, you will have to find the value NoAutoUpdate on 1. As you can see in the following screenshot.
 Changes applied to the registry
Restart the computer for the changes to take effect. From now on, updates will never be downloaded automatically. Instead, you will have to go to the Windows Update section in the system settings.
Is it advisable to disable automatic updates?
We can only advise following these methods in very specific cases, such as on test equipment or computers with low power. You should not disable versioning on a PC that you use at home or work. Why? There are several reasons:
- Performance is usually fine-tuned with upgrades. If you want to enjoy the best possible performance, it is best to keep your computer up to date.
- You will receive improvements and new features through Windows Update. Developers use automatic updates to implement improvements and features that, for example, enhance productivity or improve the interface.
- Upgrades are essential to keep equipment safe. The vulnerabilities found by Microsoft are solved thanks to the patches that arrive with the new versions of the system.
