
At the time Windows 11 was released, Microsoft promised that it would be a faster and lighter operating system when compared to its predecessor. However, it may not always be a reality, either because the company has released poorly optimized updates or because your computer's performance is a bit slow. If you notice that Windows 11 is running a bit laggy and buggy, let us give you some tips on how to make it run fast in this article.
Disable transparencies
Windows 11's first effective measure to improve performance is to disable transparency. This effect improves the user experience and the visual appearance of the system. However, it is completely unnecessary and consumes resources that can be used for other applications.
To proceed, go to the equipment settings. Do it from the Start menu or with the keyboard shortcut Windows + I.
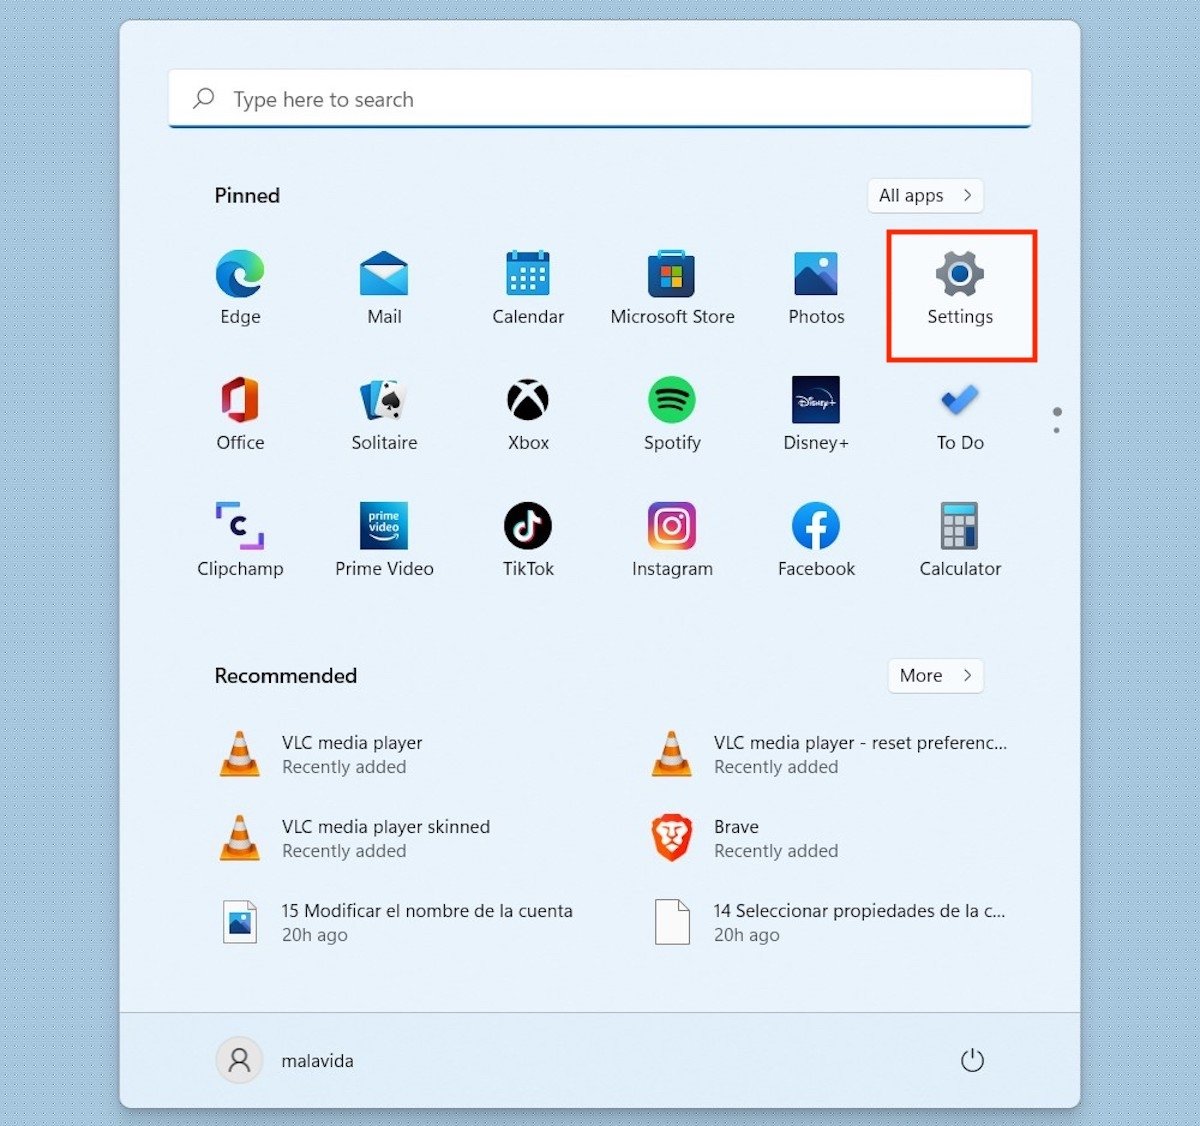 Open the system settings
Then, click on Personalization, and then, on Colors.
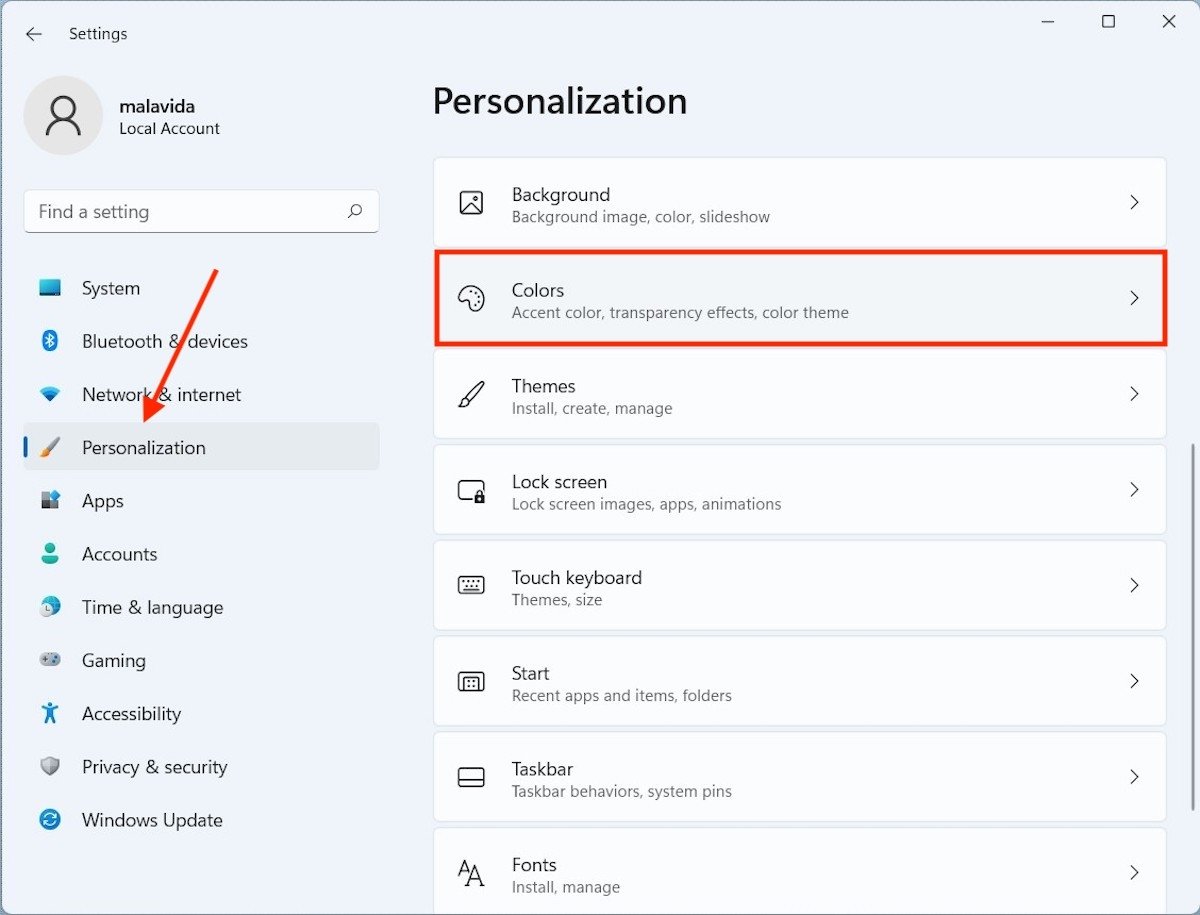 Open the color settings
Click on the slider next to Transparency effects and make sure it is set to the Off position.
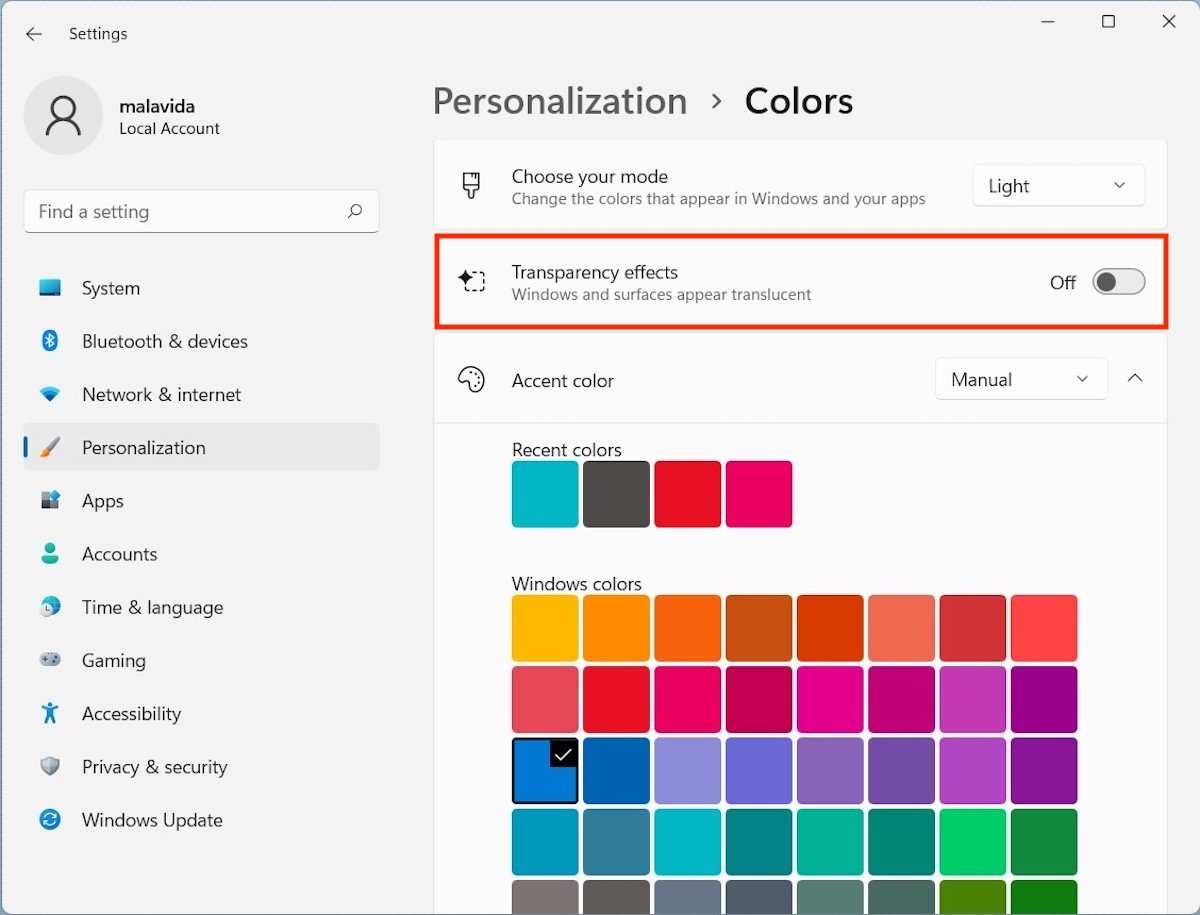 Disable transparencies
From now on, the interface will be rougher, but also less demanding.
Disable animations
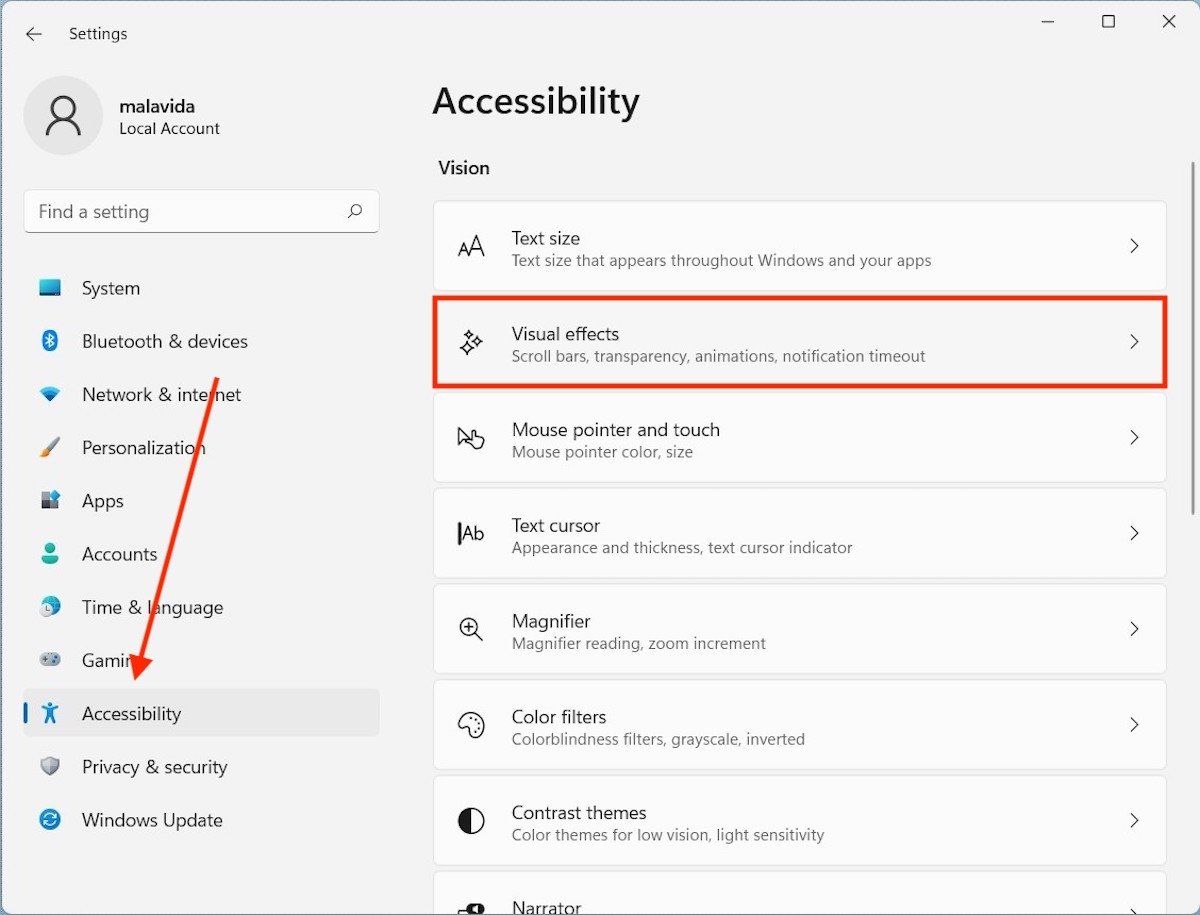
Something similar to the above happens with animations. In this case, it is possible to disable them from the Accessibility section. There, click on Visual effects to continue.
 Visual effects settings
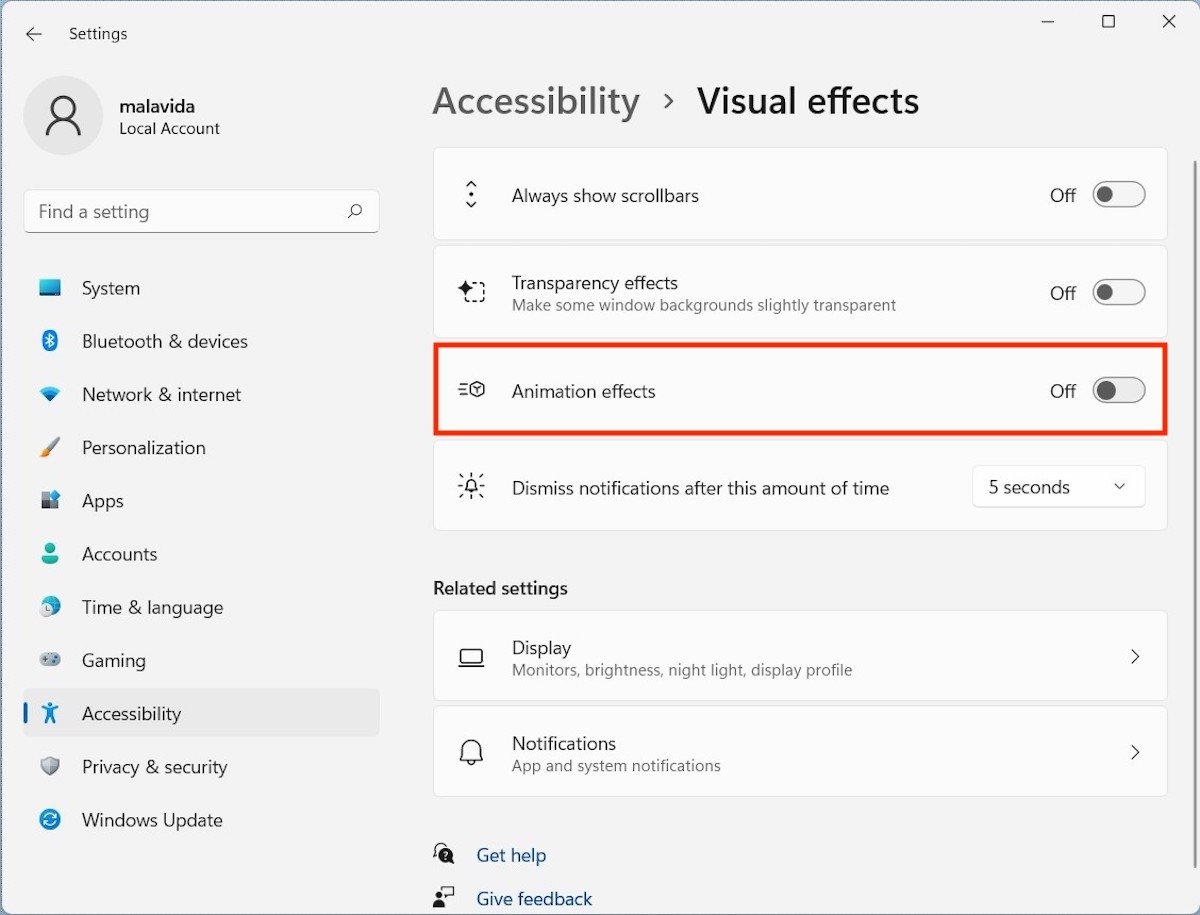
When all the options are displayed, click on the slider that you will see on the right side of Animation effects.
 Disable animation effects
Now, window transitions and the opening of certain elements will be executed without the corresponding animation.
Remove startup and background programs
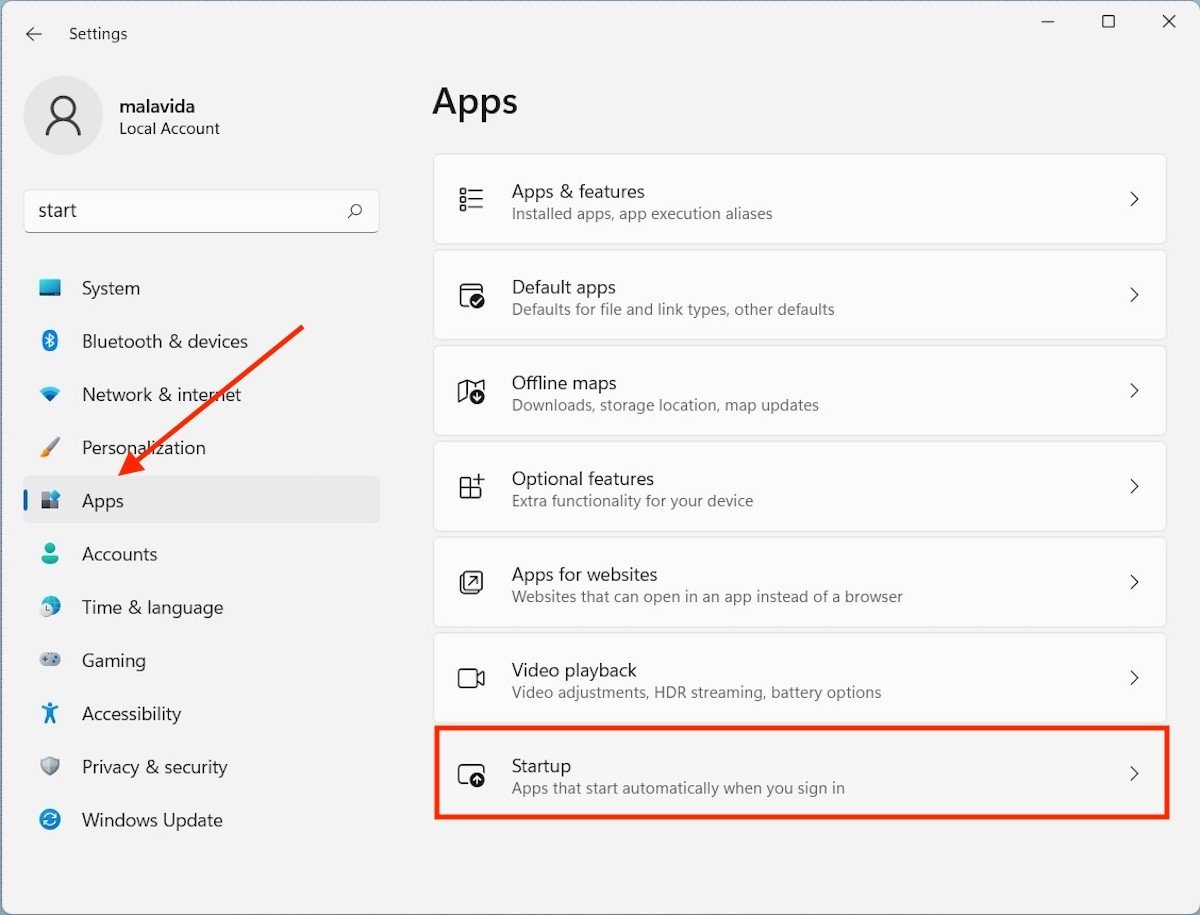
Another common problem experienced by users is slow system startup. A good way to mitigate this inconvenience is to deactivate applications that start automatically with the system. Without leaving the settings, go to Apps and then to Startup.
 Applications settings
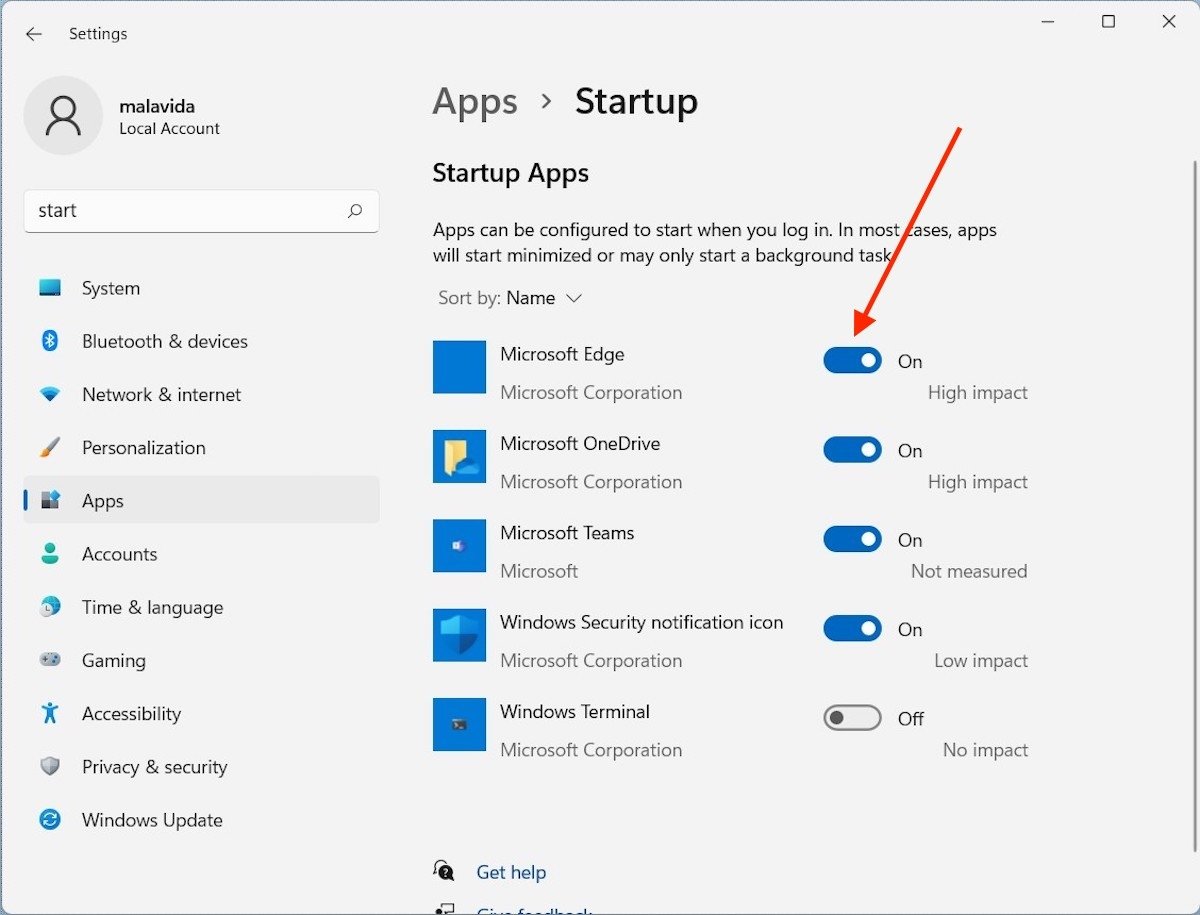
Take a look at all the applications that start with your computer and judge which ones are unnecessary. When you are sure, use the slider on the side to deactivate each of them.
 Disable unnecessary start applications
Remember that disabling applications such as Google Drive, OneDrive, and other similar applications, will stop automatic file synchronization at startup.
Enable fast startup
Let's keep on with the start-up of the computer. For some versions now, Windows has incorporated a fast startup system. This feature is enabled by default in most cases. But, just in case, these are the steps to enable it.
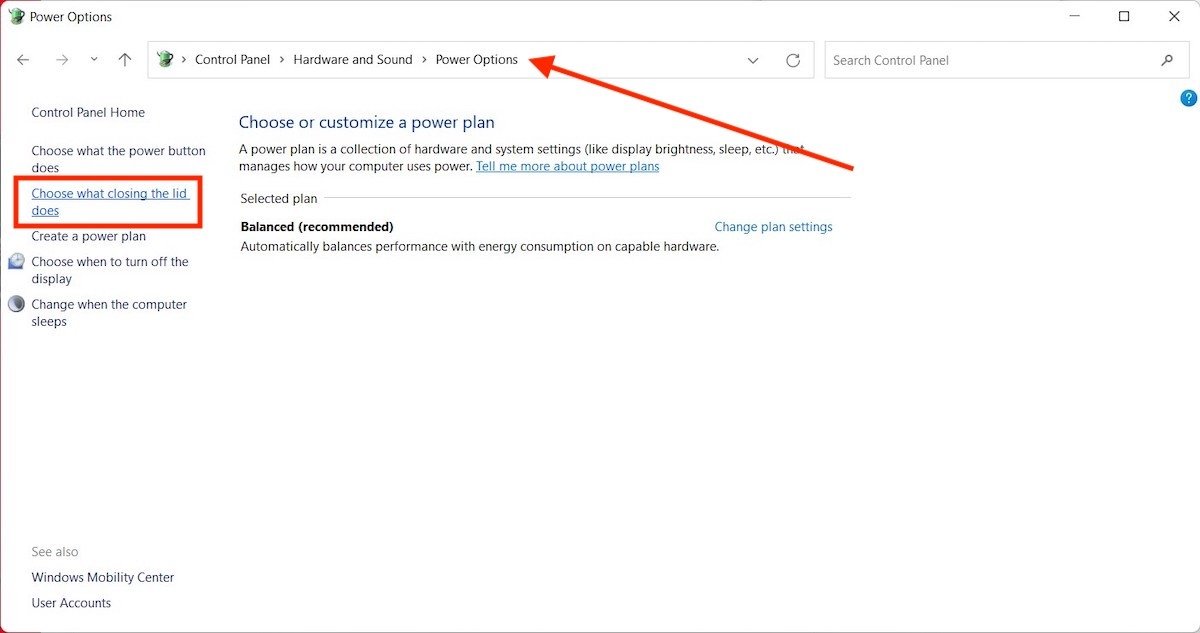
Open the Control Panel and follow this path:
Hardware and sound/Power Options
Then, click on the link Choose what closing the lid does.
 Start settings in Windows 11
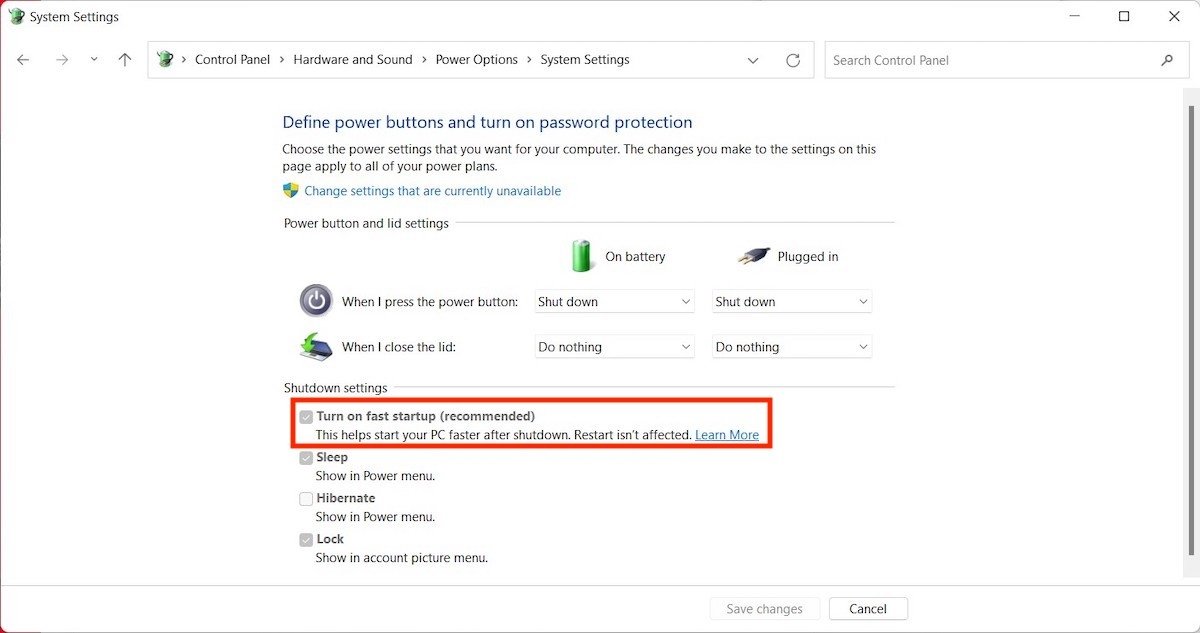
Verify that the check box next to Turn on fast startup (recommended) is checked.
 Enable quick start
As you may notice, sometimes it is not only enabled by default but cannot even be disabled.
Remove unneeded files from the hard disk
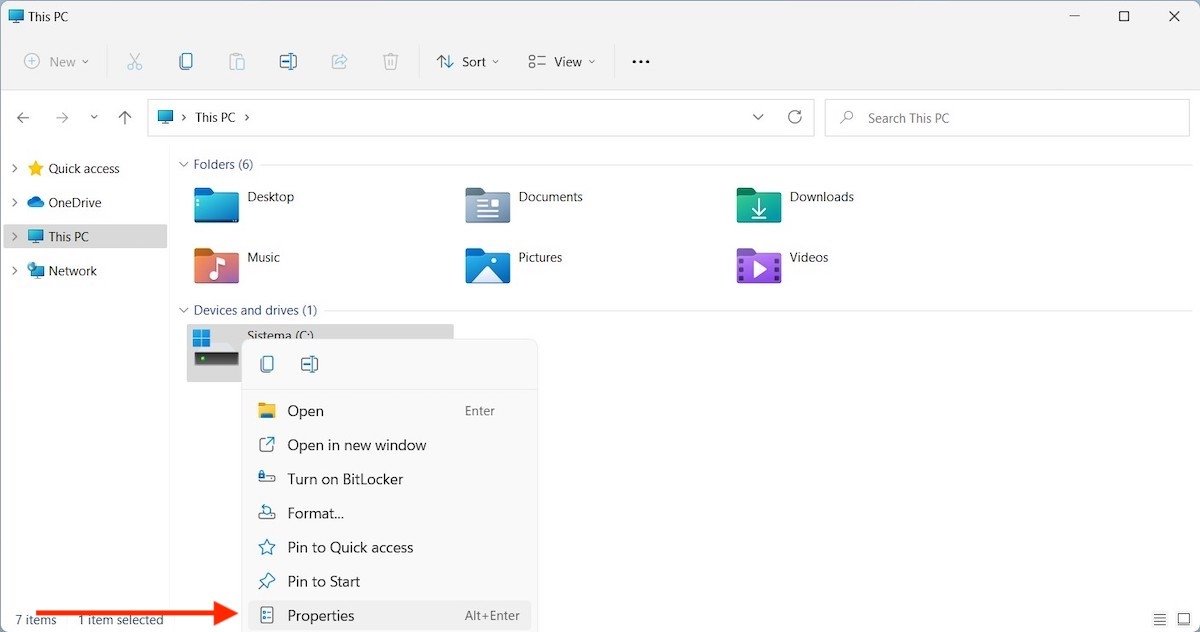
If the storage disk does not have enough space, the system will not work properly. If you think that this may be one of the reasons for the poor performance of your computer, open the file explorer, right-click on the main drive, and click Properties.
 Drive properties
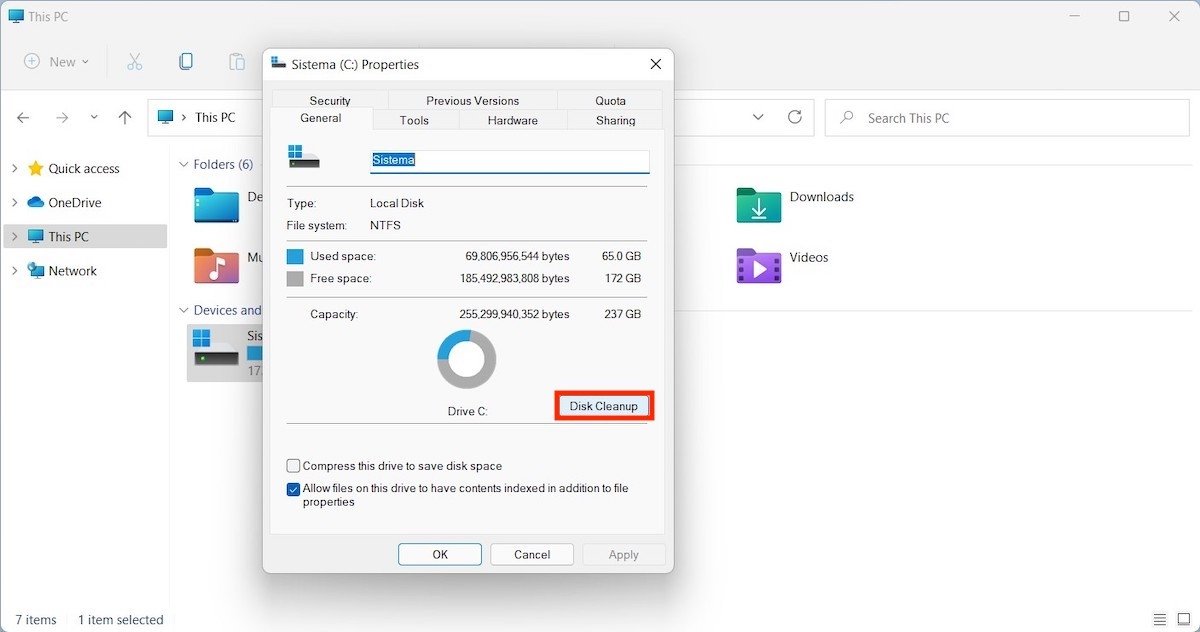
Go to the General tab and click on the Disk Cleanup button.
 Clean the drive
Select all unnecessary files that Windows 11 should delete and use the OK button to confirm.
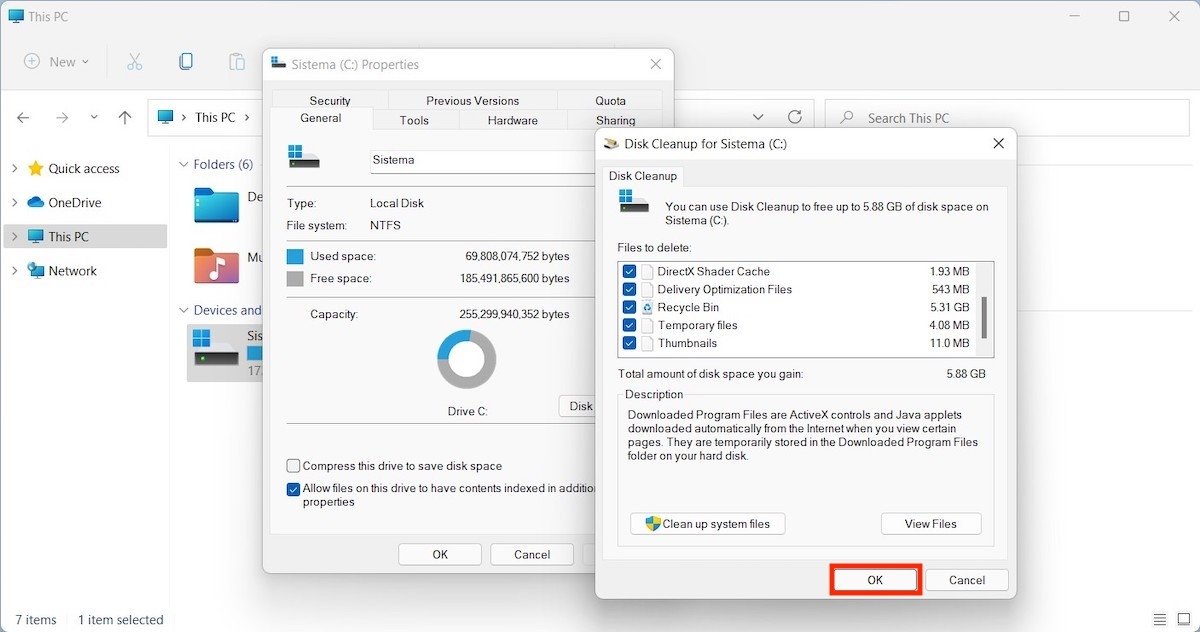 Remove unnecessary files
Wait for the wizard to clean the unit.
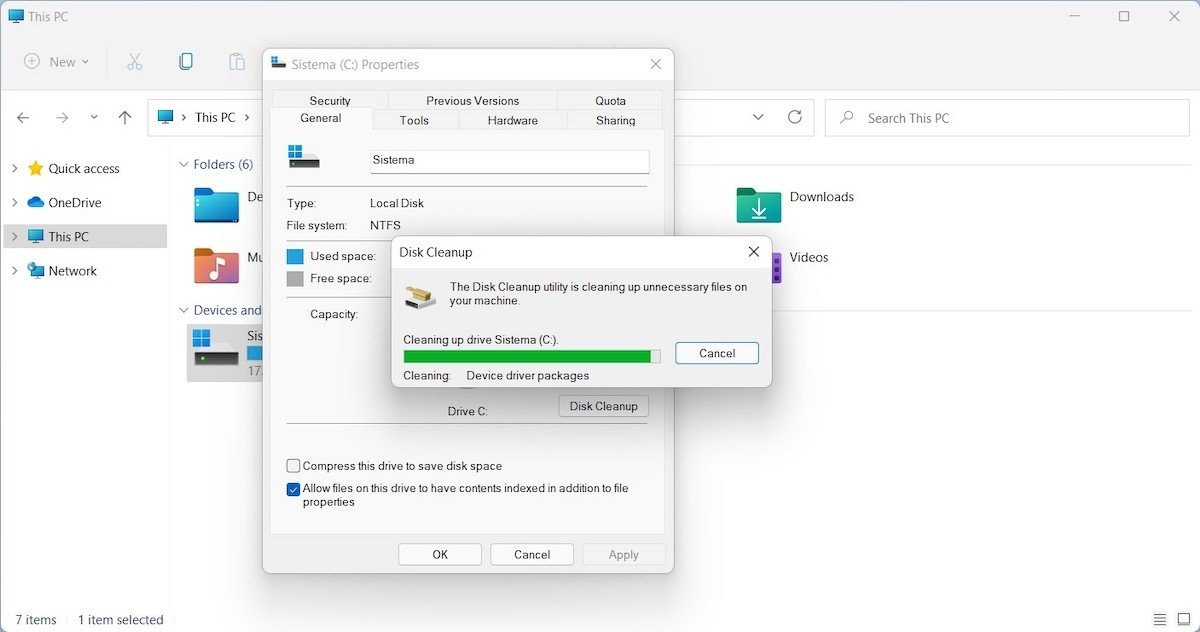 Cleaning process
Sometimes, it is possible to get some additional GB just by using this method. However, you may also need to delete large files that you no longer use or copy them to another hard drive to avoid cluttering the main drive.
Disable additional visual effects
By now, we have removed the transparencies and animations from the interface to improve performance. However, there are still some additional effects that can be disabled.
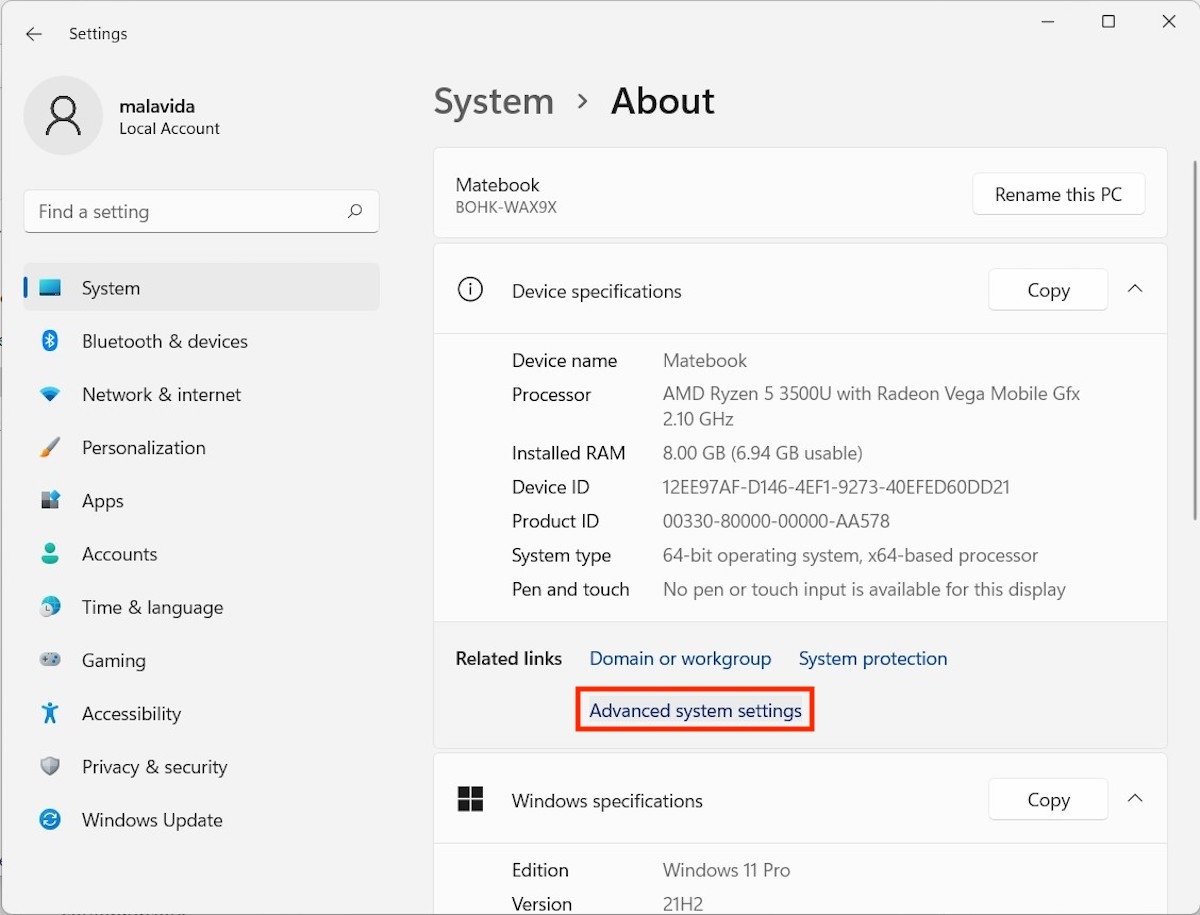
You will find them in the System section of the configuration, in the About section.
 About this PC
When you are there, click on the Advanced system settings link.
 Advanced system options
Next, click on the Advanced tab and the Settings button. Select Adjust for best performance to use the setting that prioritizes performance.
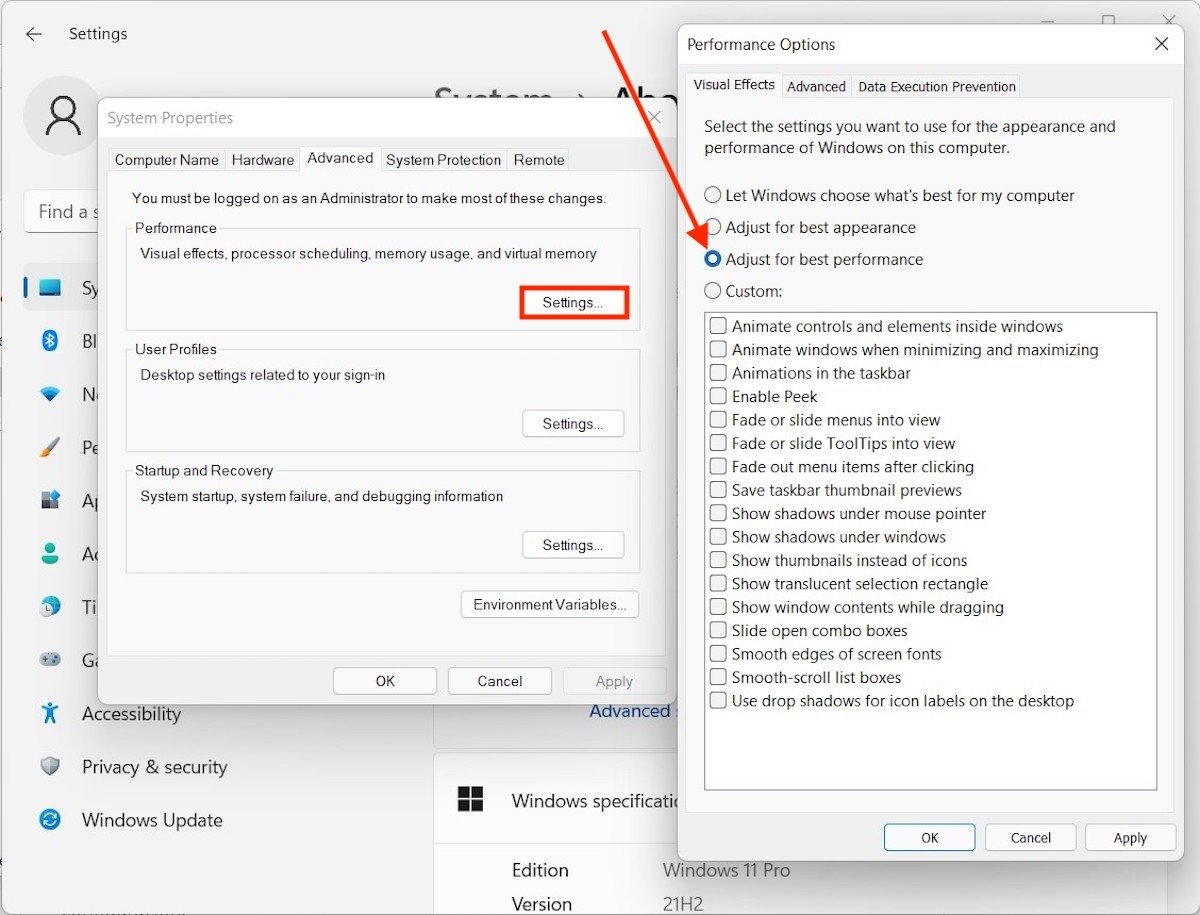 Disable other Windows 11 effects
Do not close this window because it will help you in the next step.
Add virtual RAM to your computer
Without leaving Performance Options, click on Advanced. Then, click on Change.
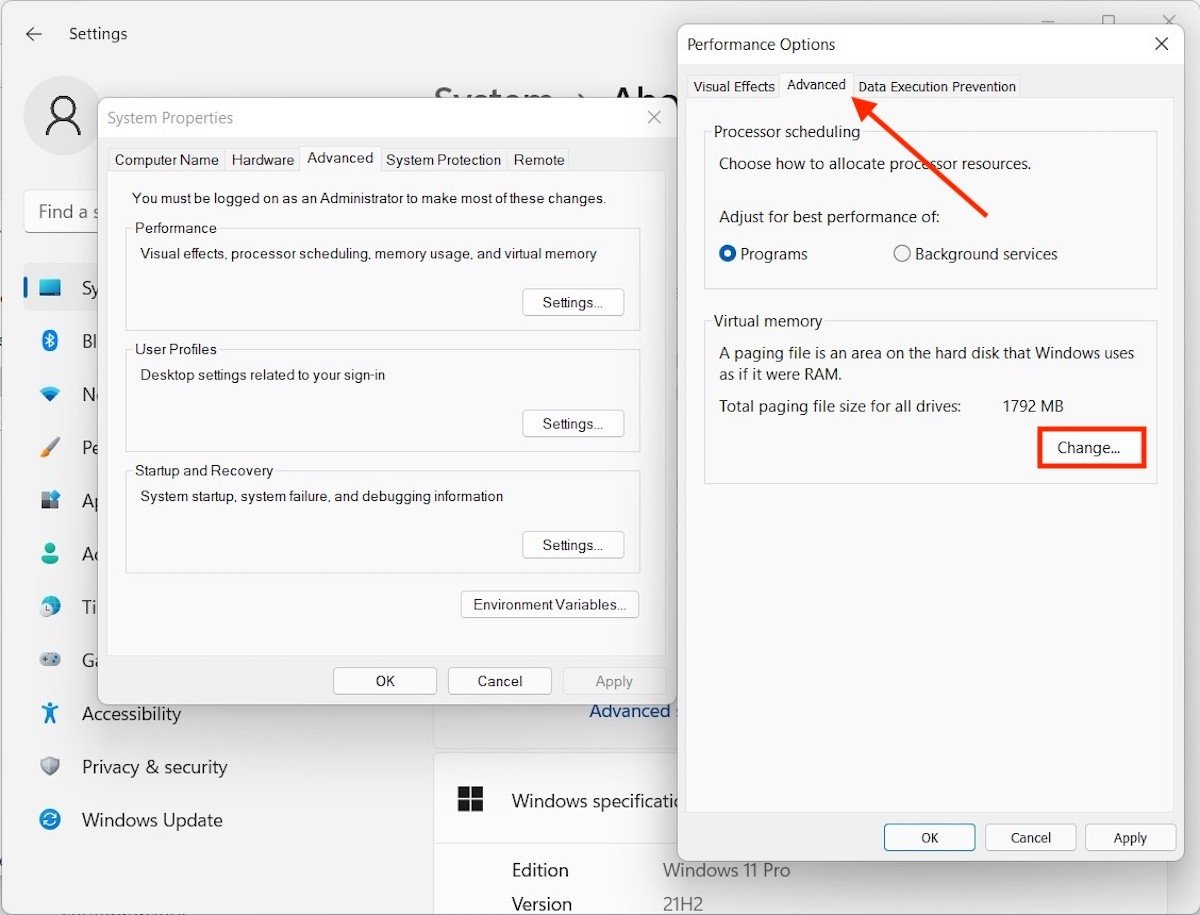 Add virtual RAM memory
Check the top box to enable Windows to use the SSD as RAM.
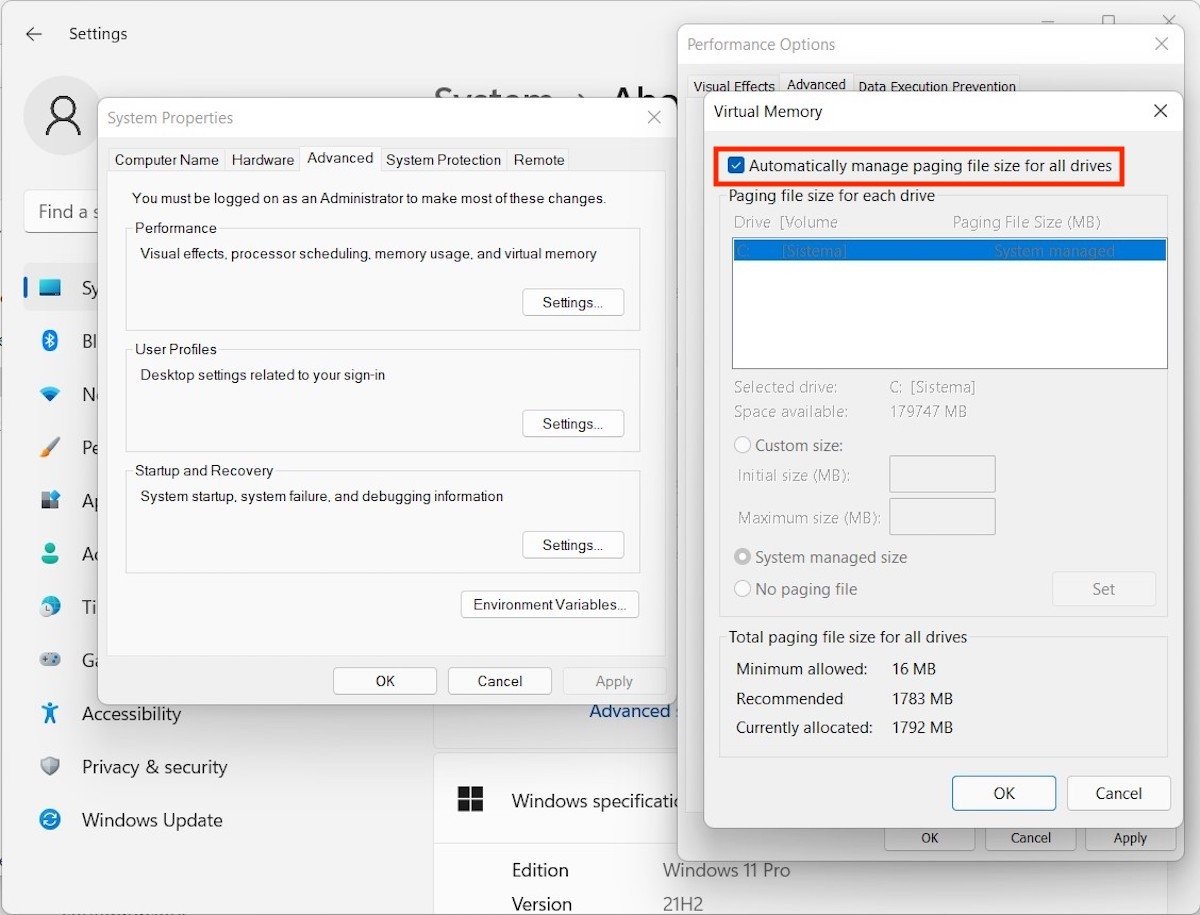 Automatic allocation of RAM memory
At times when your computer runs out of space in the main RAM, it will use the internal disk as additional virtual memory.
End the tasks you do not need
Finally, we come to the end of this review of the best tricks to boost the performance of your computer with Windows 11 talking about a classic: end the tasks running in the background. Do this by opening the task manager, selecting the process, and clicking on the End task button.
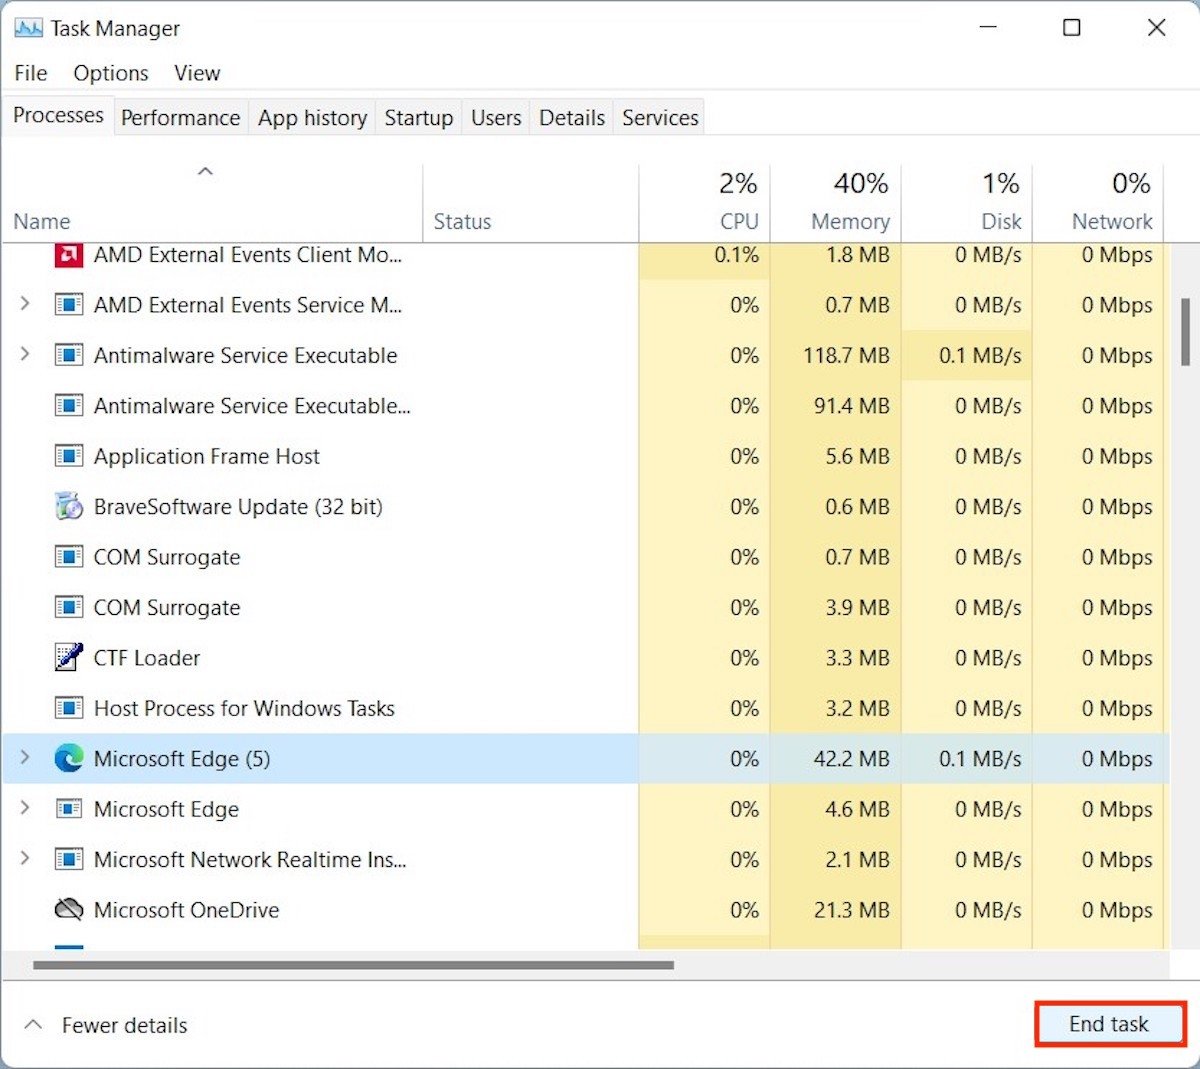 End a task
Remember to save changes before closing a task in this way. Otherwise, you could lose important information.
