
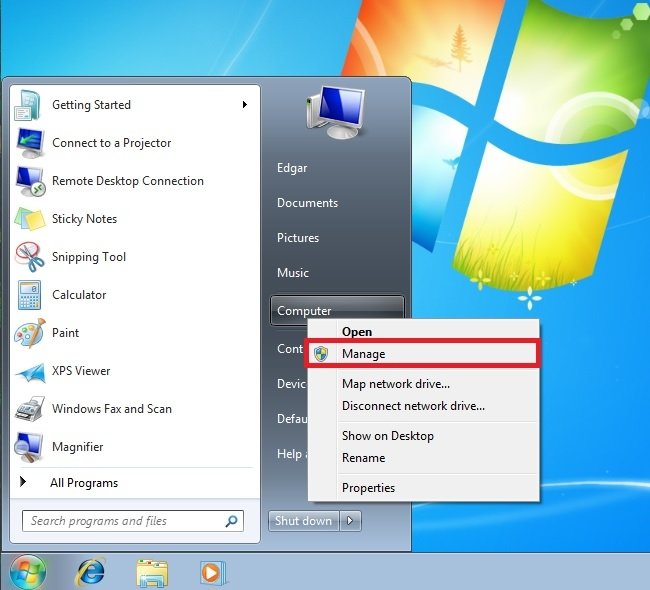
Enabling the Administrator account in Windows 7 is very easy. To do so, it is necessary to go to the device administration options. Therefore, open the Start menu, right-click Computer, and select Manage from the context menu.
 Computer management in Windows 7
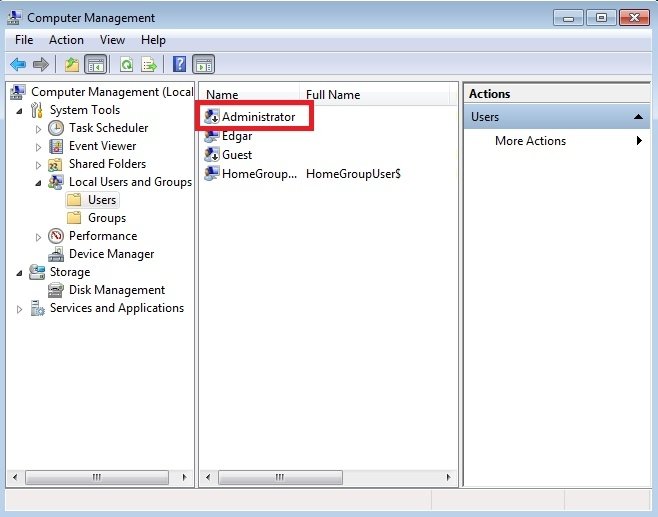
In the Computer Management window, select Local Users and Groups. It is located in the left column. Immediately, two folders will appear in the center column. Double click on Users.
 Manage users
Click on Administrator to view the user account options.
 Administrator options
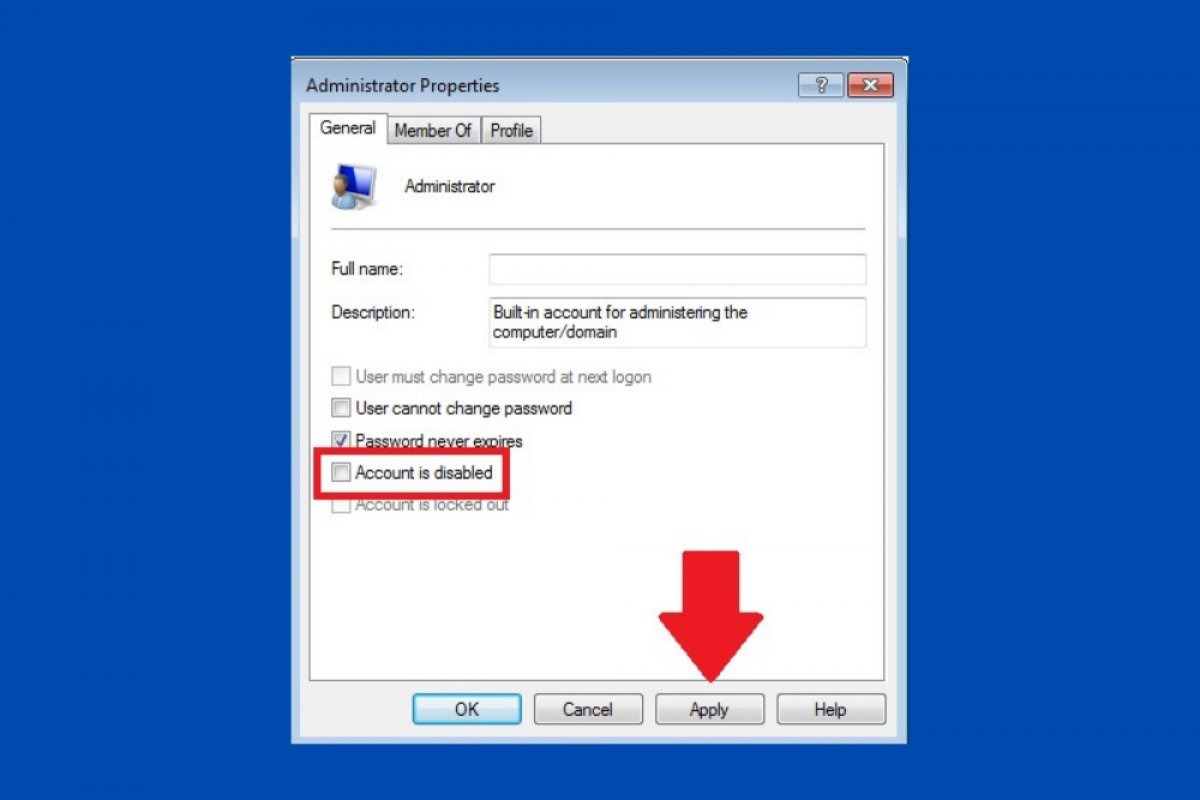
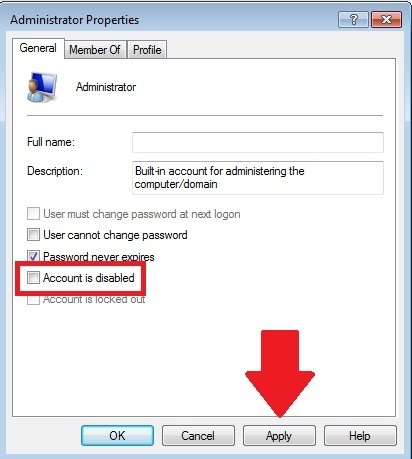
In the pop-up window, uncheck the Account is disabled box. To save the changes, click on the Apply button.
 Enable administrator account
By doing this, the administrator account will be successfully enabled.
Alternatively, it can be activated by a command executed from the system console. Use the start menu to quickly locate the CMD. Open the context menu, and run the console as Administrator.
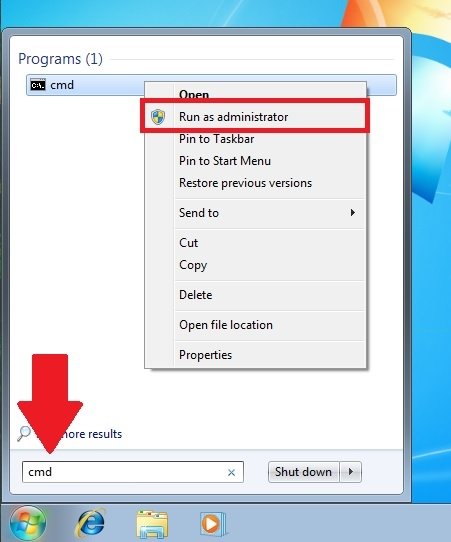 Run CMD as an administrator
Then, type and launch the following command:
net administrator /active:yes
The appearance of the command line should be similar to what you see in the following image.
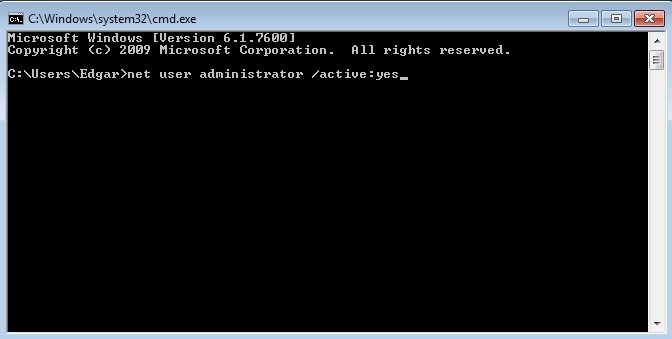 Enable the administrator account through the command prompt
After running the command, the administrator account will have been activated. It is also possible to disable it by typing the following:
net administrator /active:no
Remember that the administrator account must be used with caution. It can be used to modify an infinite number of system parameters that have a direct influence on the device's performance. Keep in mind that the administrator account lets you install all kinds of programs, modify security settings, or have access to the OS reserved files. We only recommend using the administrator account for very specific tasks.
