Depending on which elements are inserted in a Word document, it will have a larger or smaller size. For example, a file that only includes text occupies much less space than one that incorporates a multitude of graphic resources. If you have created a Word document and its size has grown considerably, the tricks we give you in this article will help you reduce it.
First of all, we explain how to know from Word how much a document weighs. Start by clicking on the File menu.
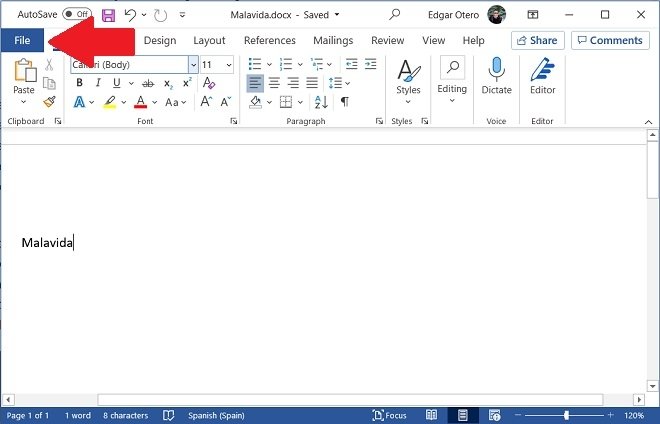 Open the File menu
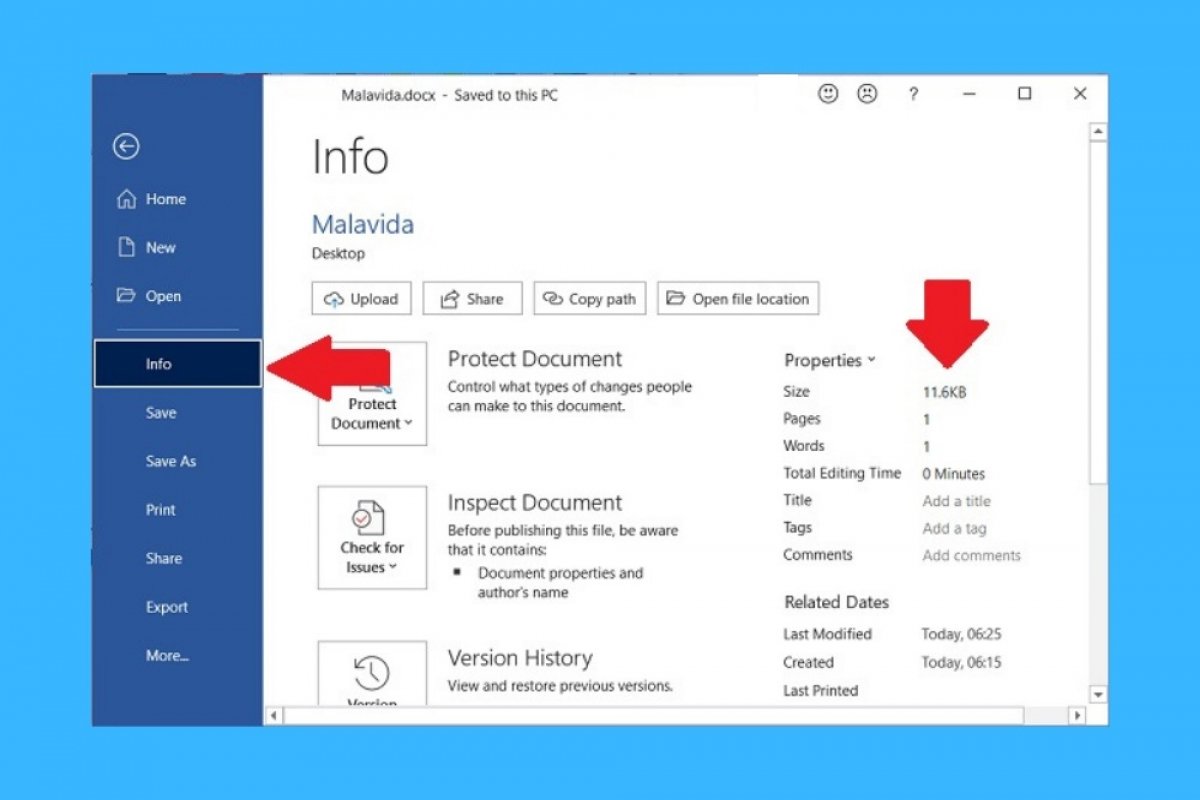
In the left sidebar, select the Info option. This section shows all the information of the document you have open. Just look at the value next to Size.
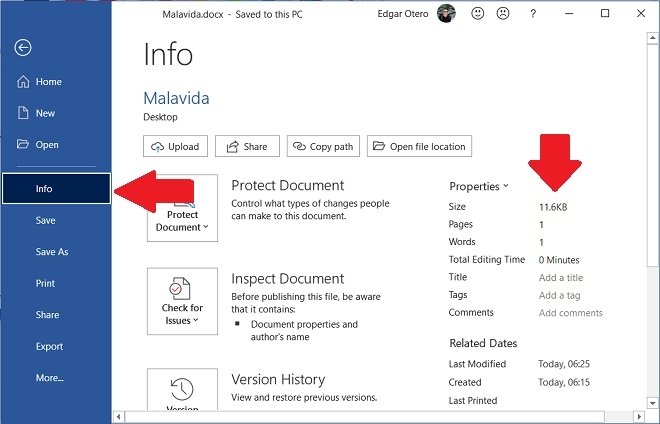 Info section
Once you know exactly how much space your document takes up, decide whether to reduce its size or not. If so, start by disabling the integration of fonts in the file. The purpose of this function is to maintain the same appearance of the document regardless of whether or not the fonts are available on the computer that opens it. To do this, go to File and click on Options. In the settings window, go to the Save section and check that the Embed fonts in the file checkbox is unchecked.
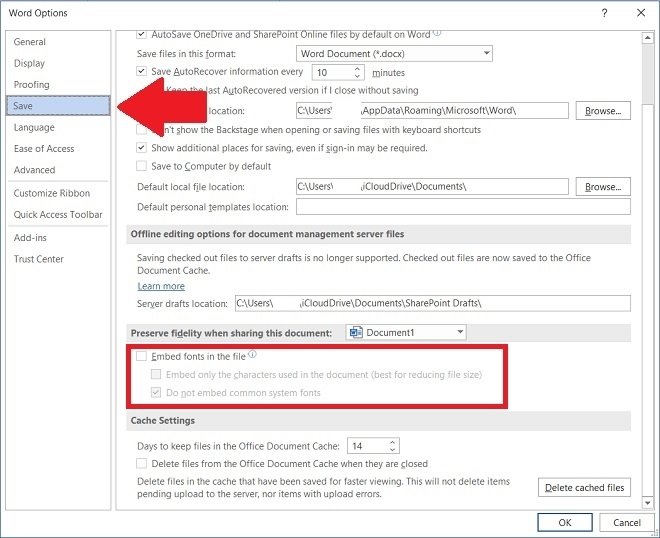 Do not save the fonts on the document
Once this is done, another recommended action is to apply compression to the images. To do this, click F12 and wait for the Save As window to appear on the screen. There, click on Tools, and in the context menu, on Compress Pictures.
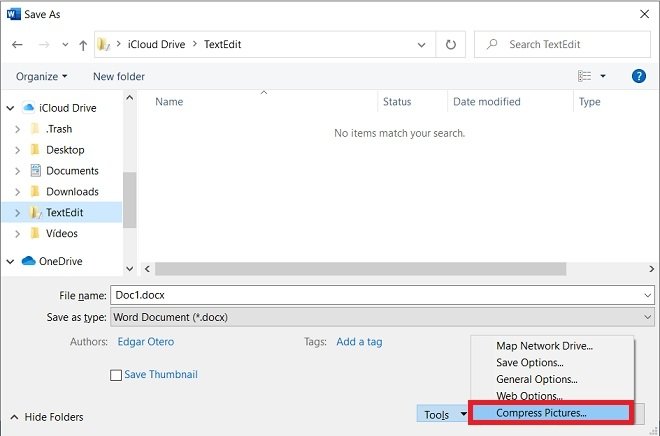 Image compression
In the pop-up dialog, select the option that uses the highest compression.
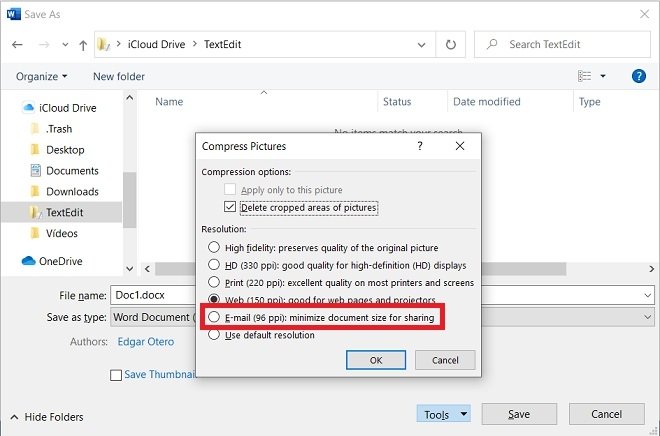 Email compression option
Without leaving the current window, be sure to save the document in DOCX format. It ensures the best possible optimization.
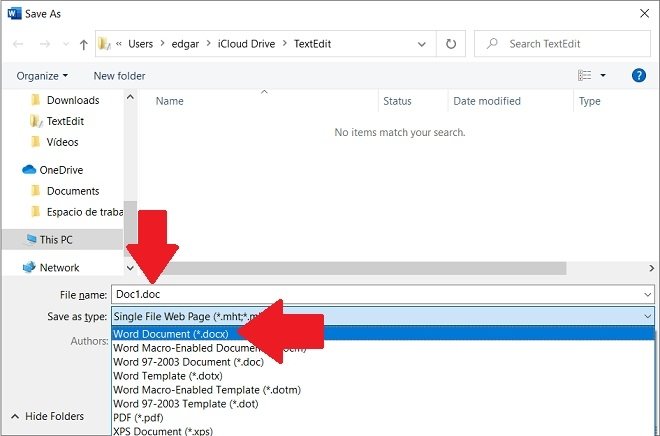 Choose DOCX format
After taking these steps, you will see the size of your document reduced. If you want to minimize its size, even more, we recommend that you compress it in a ZIP folder or a RAR file. It is also advisable to always use small images in JPG format. Avoid PNG or SVG graphics.

