
In this guide, we will explain how to move files from Windows to BlueStacks. In other words, we will show you how to import any file from your PC to the emulator's Android virtual machine. In addition to showing you the exact steps for each method, we give you some ideas on how to make the most out of the file transfer between Windows and BlueStacks.
How to import files from your PC to BlueStacks
As we will see below, importing files from your PC to BlueStacks offers many advantages. Moreover, since this is a virtual machine running on Windows, its file system is independent of your computer's. So, any file transfer you want to do, either from Windows to BlueStacks or vice versa, must be done manually. There are indeed platforms for creating virtual machines (such as VirtualBox) that facilitate the creation of shared directories between the guest and the host system. However, that is not the case with BlueStacks.
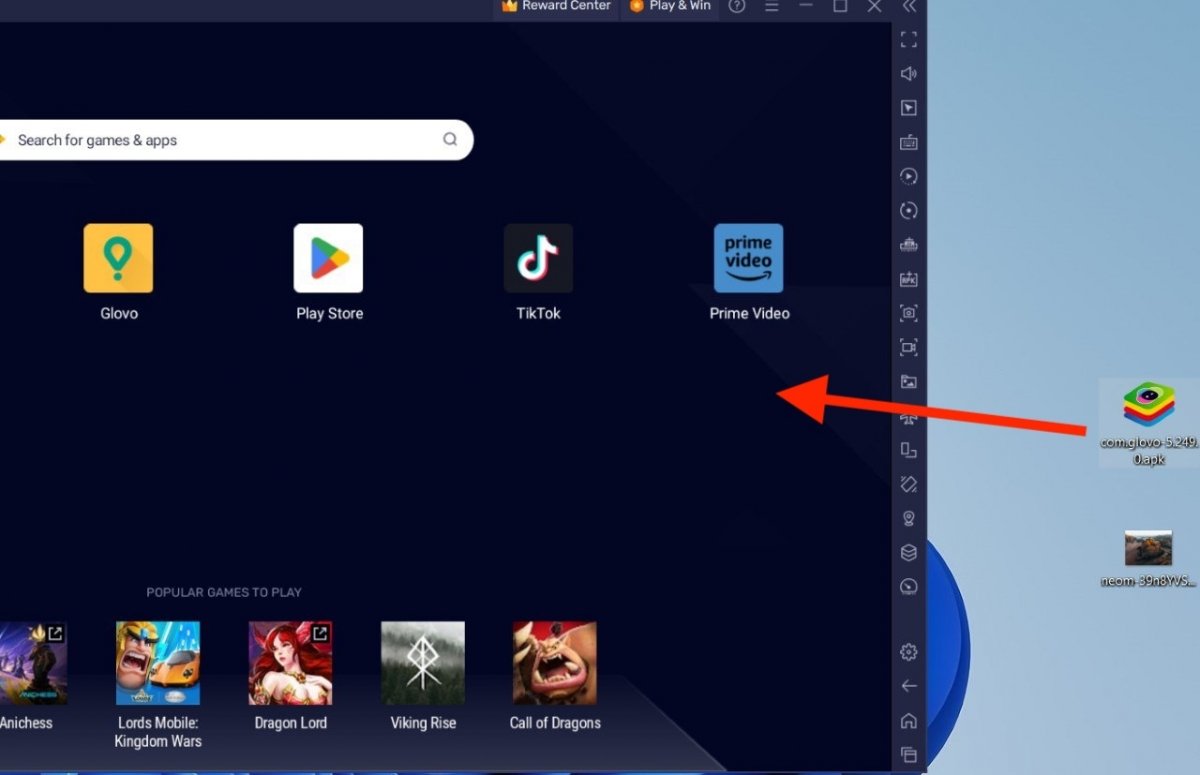 If you want to send an APK, just drag it to the BlueStacks window to install it
The easiest way to do this is to drag the files you want from Windows File Explorer. You can do it like this:
- Open the folder on your computer where the file you want to import to BlueStacks is located.
- If it is an APK file, send it directly to the home screen of the Android virtual machine, as shown in the image above.
- Immediately, the APK will be installed, and the application will appear in the launcher, along with the rest of the games and tools you have installed.
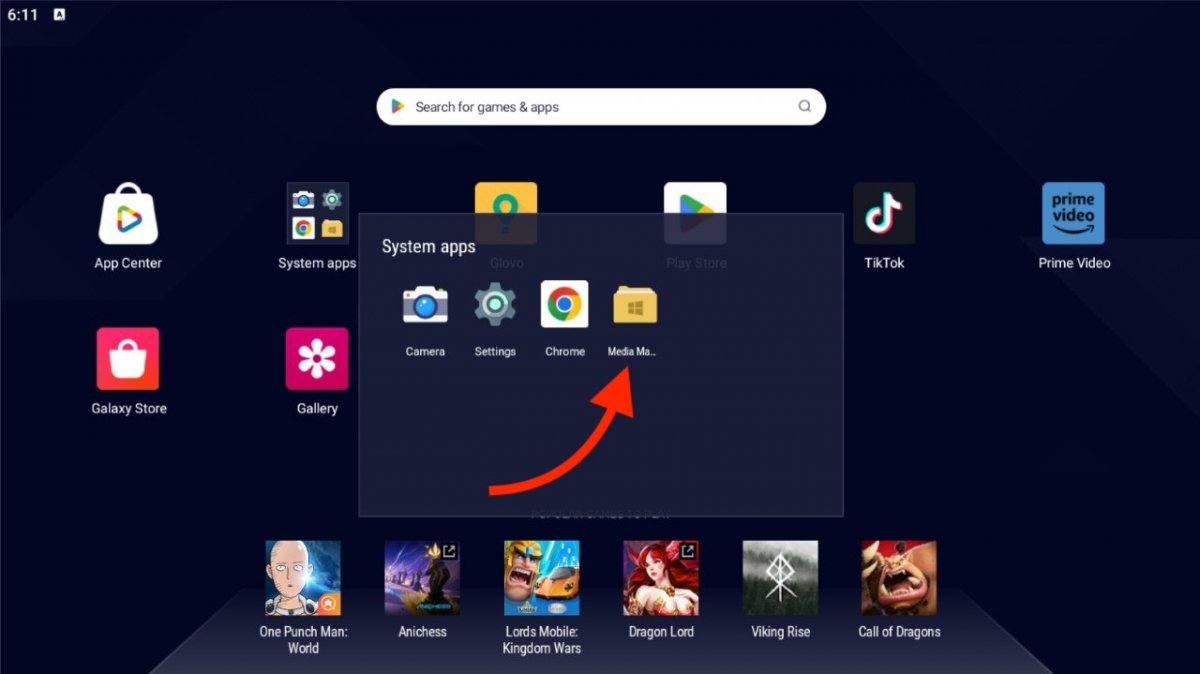
- If you want to move another kind of file, open the System Applications folder and click Media Manager.
- Drag the files from Windows to the emulator, like you did with the APK file.
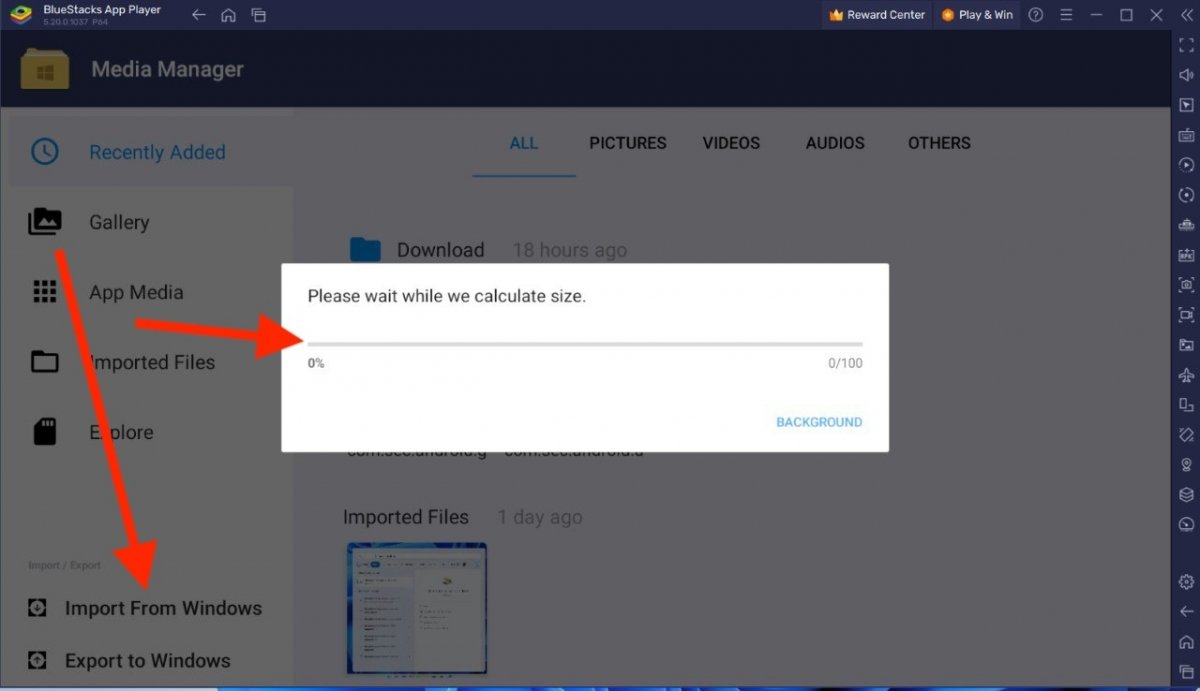
- Wait for the transfer to complete and the files to appear in the Media Manager explorer.
As you saw, the drag-and-drop function makes sending files to your Android virtual machine really easy. However, this is not the only way to do it. Do you want to know an alternative method?
How to move files from Windows to BlueStacks with the Media Manager
The Media Manager, the application featuring the icon of a folder with the Windows logo, has a button to import files from Windows. This is another way of achieving the same result as the method shown in the previous section.
 The Bluestacks media manager
All you have to do is this:
- In the System Applications folder, click Media Manager.
- Click on the Import from Windows button.
- Immediately, the file explorer of your PC will open, allowing you to select a file.
- Notice that in the lower right corner of the browser window, the text All Files (*) appears. That means you can send any file to the virtual machine, be it an image, a video, an APK, or any other kind of file.
- Once you have selected the file, click Open and wait for the transfer to complete.
- You can check all the items you have sent to the virtual machine from the Imported Files area of the BlueStacks Media Manager.
 Option to import files from your PC
These methods to bring your files from your computer to the BlueStacks virtual machine offer several advantages. In fact, we can think of several cases where you will need to import files from Windows to BlueStacks:
- Install Android applications downloaded from Windows: BlueStacks has a browser to download files, including APKs. However, it is far more convenient to do so with your computer and then import the APK file to install it on the virtual machine.
- Transfer documents and multimedia files. The import feature is a lifesaver if you have documents, images, music, or videos on your PC that you want to open in BlueStacks. For example, if you like to use a photo editor that is only available on Android, you can send the photos you want to modify to BlueStacks and edit them with your favorite photo editing app.
- Restore backups. You can transfer backup files from your Windows system to BlueStacks to restore settings and data in specific applications. This can help you send saved games that you have played previously on another device. It is also useful for sending files containing the ROM of a game running on an emulator.
- Manually update files or applications in BlueStacks. If you have newer APKs or patches for specific apps on your PC, you can send them from Windows to BlueStacks to keep your apps up-to-date. This is useful if you use the emulator on a computer without an Internet connection or if you have problems downloading the latest versions of a game from the app store.
