
In this guide, we will explain how to clear the cache in Kodi. We show you why and how this section of the media player's storage space fills up and why you should delete all the files here. We also teach you some methods to do this and even explain how to reset the app on Android if it presents serious problems.
Why and how the cache is filled in Kodi
In Kodi, the cache is filled to enhance the multimedia content playback experience. For example, when you play a video, the application temporarily caches data to speed up loading and avoid interruptions during playback. This is useful when the content is to be replayed, as it avoids having to download it again.
Therefore, the cache stores already downloaded data fragments to provide a smoother user experience without constant waiting for new information to download. The cache also stores images, thumbnails, or other files that Kodi needs to work.
Why you should clear Kodi's cache if it is running slow
Clearing the cache in Kodi is crucial when the application performs poorly, especially during content playback. As the cache stores temporary data, it accumulates and negatively affects speed. Cleaning the cache regularly removes these temporary files, freeing up space and improving the system's efficiency.
By clearing the cache, you also ensure that Kodi has enough space to store new temporary data, thus optimizing loading speed and providing a faster viewing experience. However, you should not need to wipe the cache if the media center is working as intended, as the app has mechanisms to manage this data.
How to clear Kodi's cache using add-ons
To clear Kodi's cache, you can use many add-ons. Several tools will let you clean the current media center installation of unnecessary files, making it run faster.
Although there were many add-ons to clear Kodi's cache in the past, nowadays, many of them no longer work. Generally, the reason is that they were small projects maintained by individual developers.
 How to add a source to download new repositories and third-party add-ons
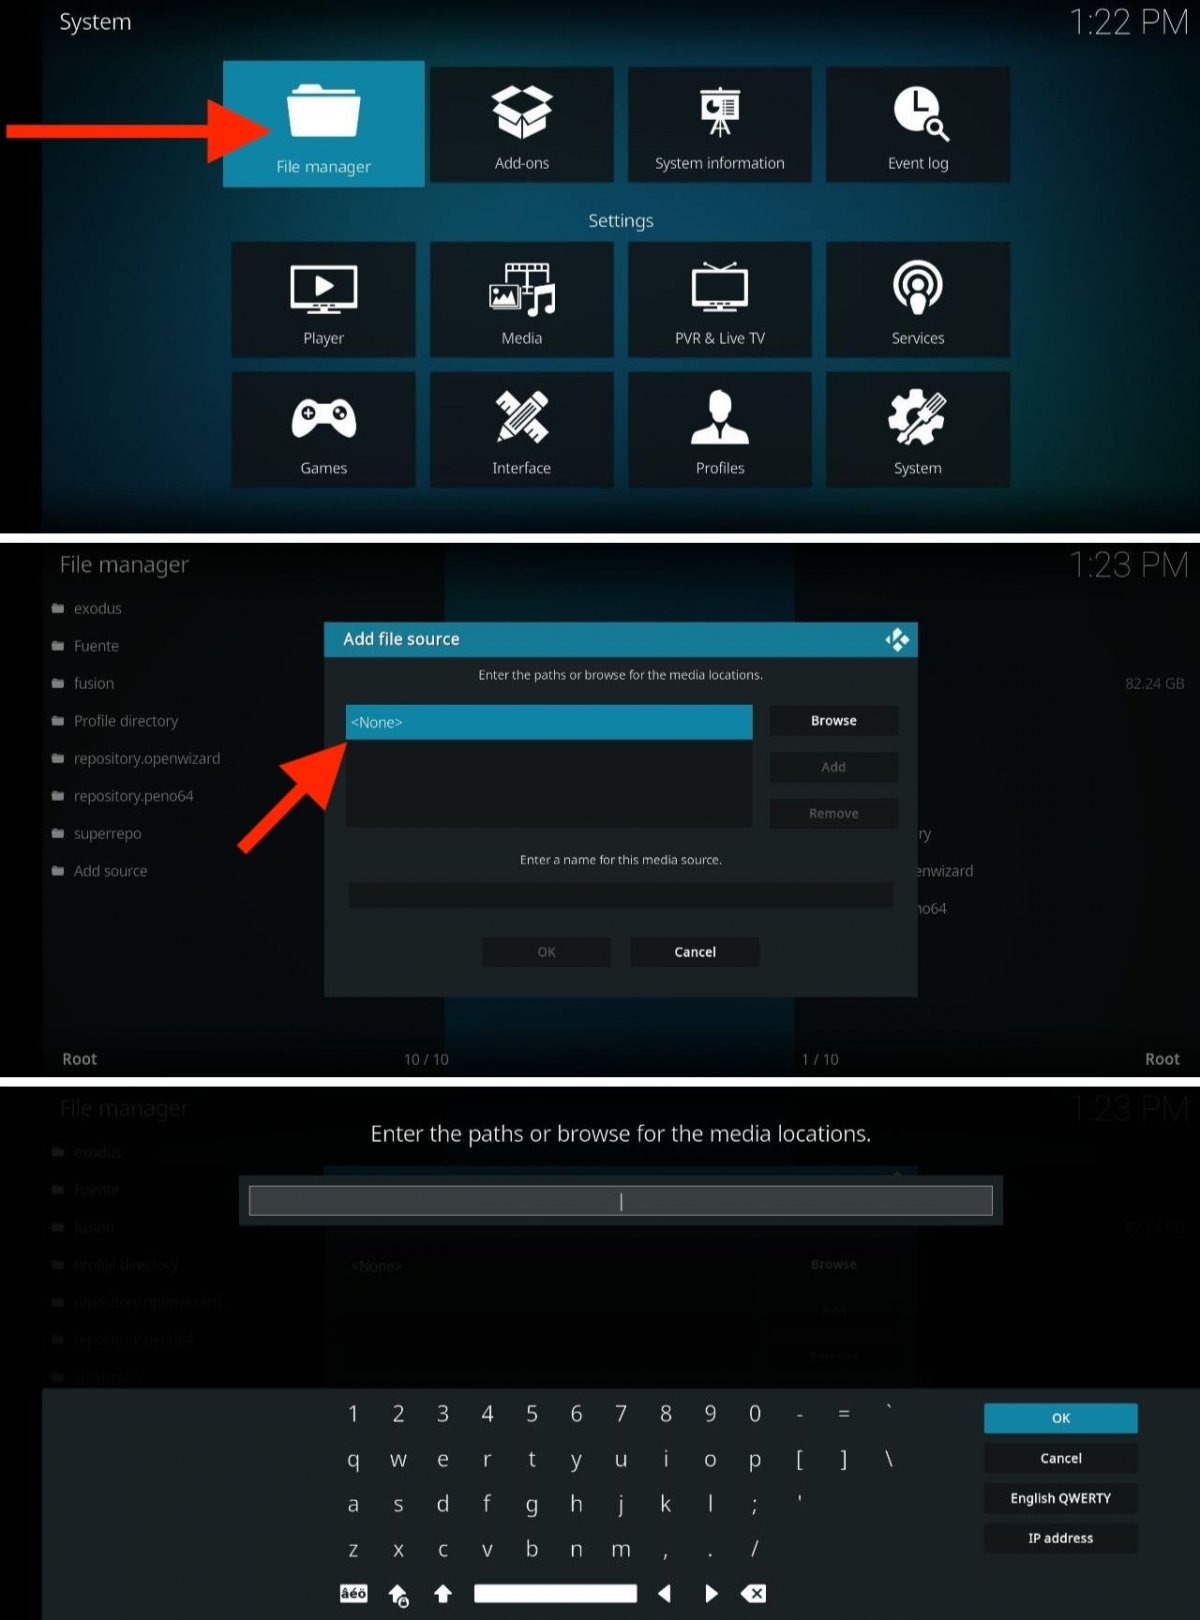
Many of these add-ons must be installed from external repositories. In each section, we will leave you the URL of the repository that you must add to Kodi following these steps:
- Open the application settings.
- Tap on File Explorer.
- Select the Add source option.
- In the pop-up window, choose None to enter the repository URL.
- Then, enter a name for the repository and save the changes.
- Go back to the main menu and open the Add-ons section.
- Tap on the box icon.
- Open the Install from ZIP file section.
- In the list, select the repository you just added.
- Finally, choose the ZIP file of the add-on to install it on Kodi.
When you are done, you can find the repository you installed under the Install from repository option in Add-ons.
How to clear Kodi's cache with Luar
Luar is one of the few remaining maintenance add-ons currently in active development. To install it on Kodi, you must add the following source in the File Manager:
You must respect and use HTTPS in the address and keep the capitalization. Once you have it, install the add-on with the Install from ZIP file option. When finished, Luar will be placed in the Program Add-ons section.
 With Luar, deleting cache is very easy
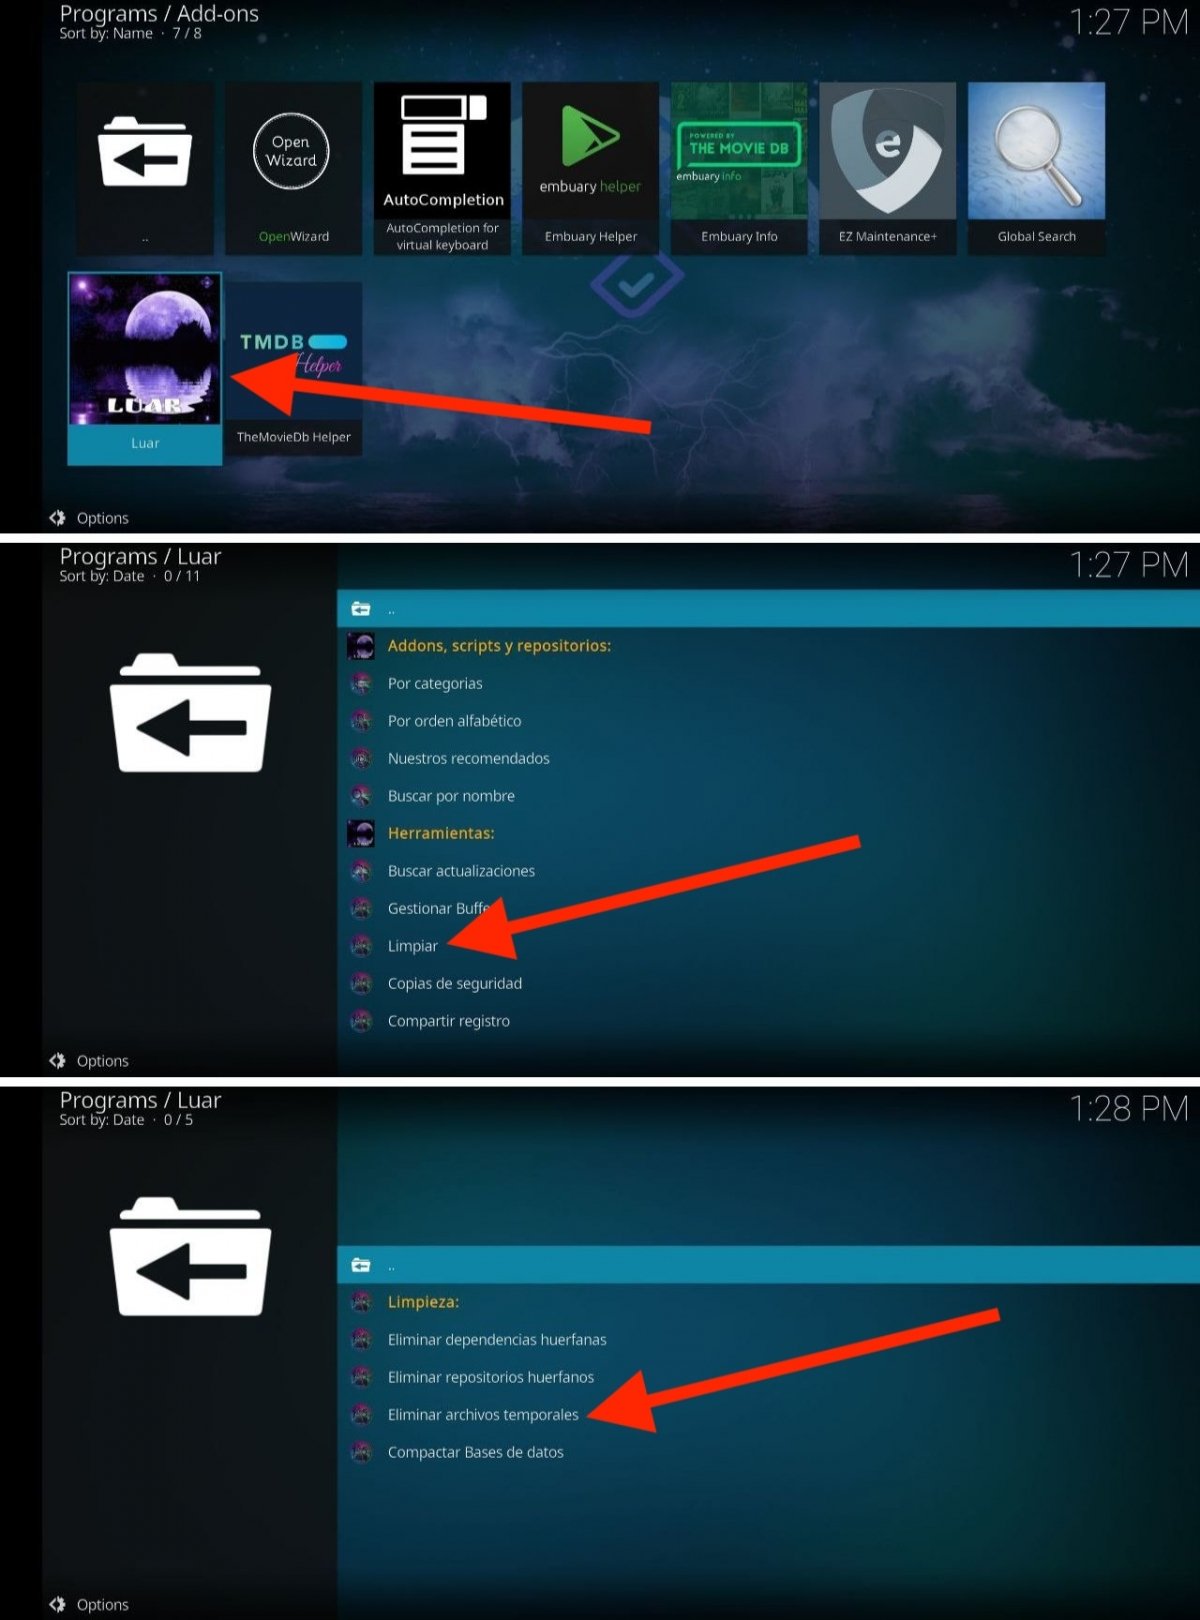
Now, open the Luar add-on and follow these steps to clear Kodi's cache:
- Locate the Clean option in the Cleaning section.
- Tap on the Delete temporary files option.
- Confirm in the pop-up dialog that you want to do this.
- That's how easy it is to clean Kodi's cache with Luar.
How to clear Kodi's cache with EZ Maintenance+
EZ Maintenance+ is another add-on to keep the Kodi installation on your device in tip-top shape. To install it, you must first add the following source:
Once you have it, install the repository with the Install from ZIP option in Add-ons. Then, you can download the add-on from the repository that should already be available in the installation section.
 How to delete the cache with EZ Maintenance+
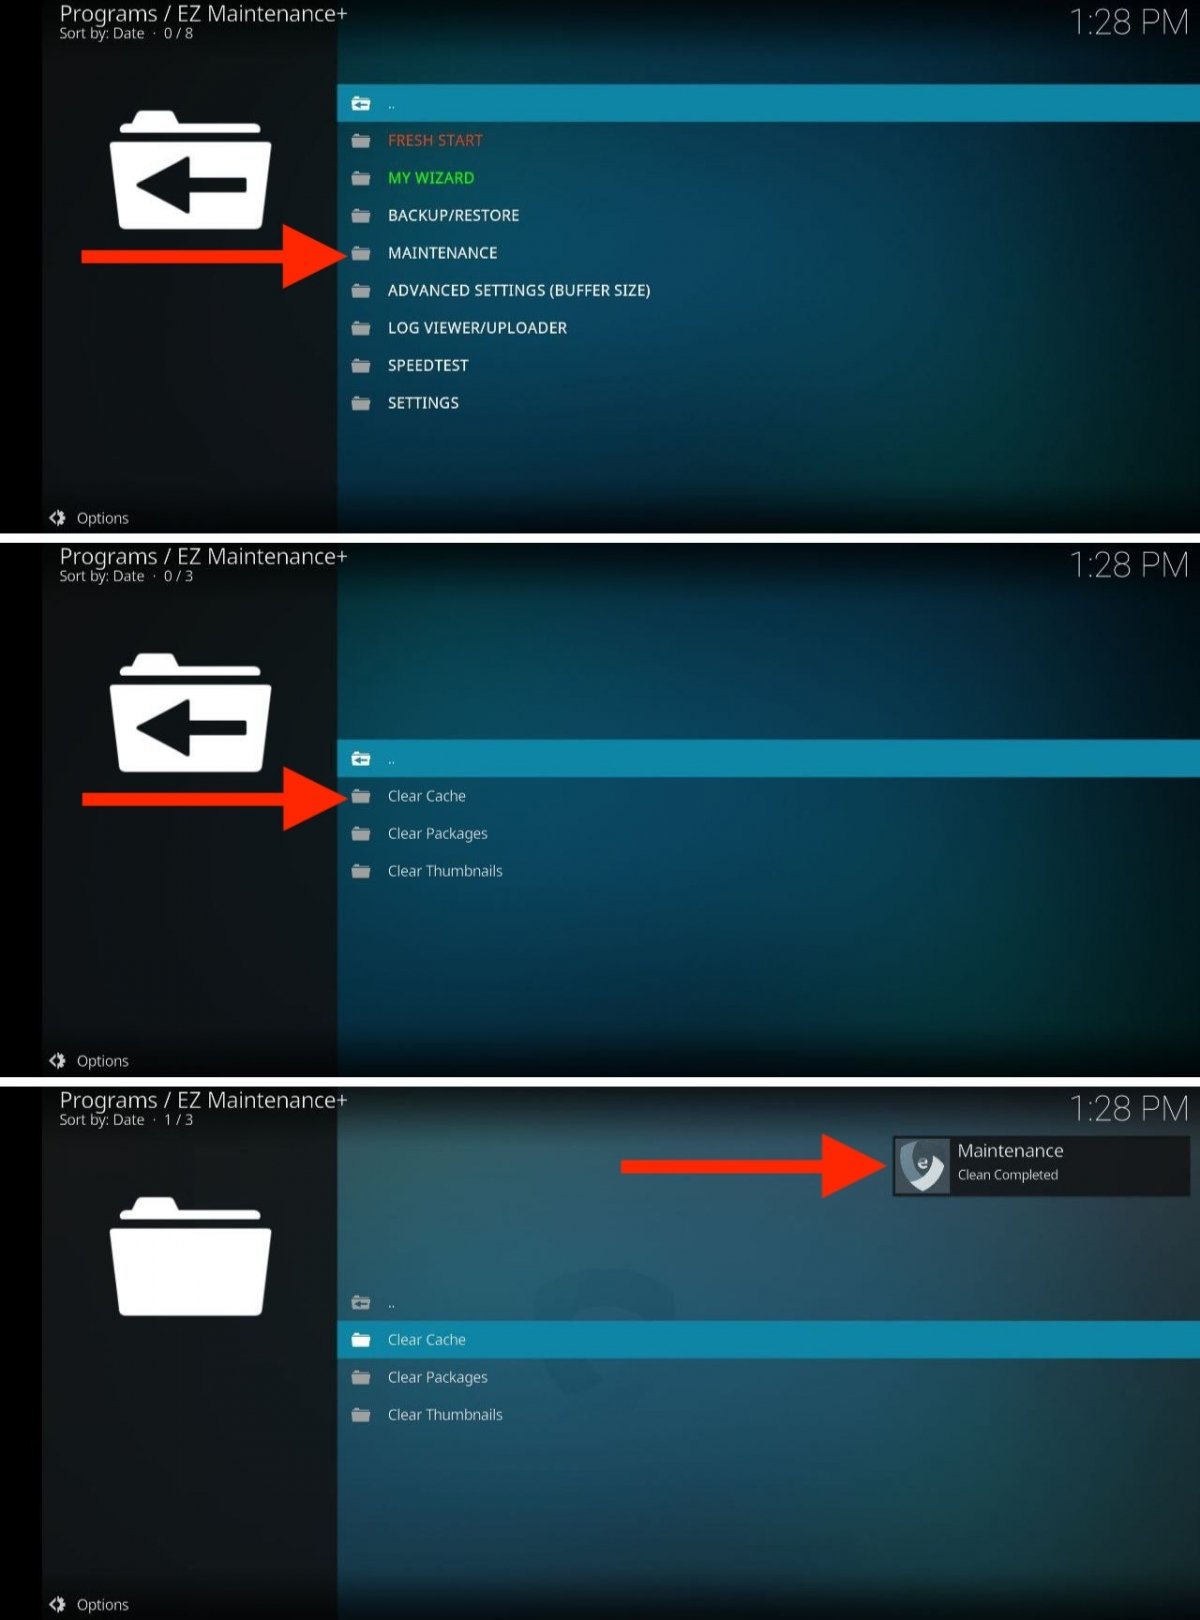
Once you have EZ Maintenance+ in Kodi, open it and follow these steps to wipe the cache:
- Open the Maintenance folder.
- In the options list, select Clear cache.
- Look at the upper right corner of the screen. A confirmation message will appear there when the cleaning is complete.
You can also perform other maintenance tasks with this add-on, like deleting all thumbnails or doing a clean install of Kodi.
How to clear Kodi's cache with Open Wizard
Open Wizard is the last add-on we recommend to clean Kodi's cache. This and the previous add-ons are working replacements for other add-ons that have fallen by the wayside, such as Covenant, Exodus, Indigo, Merlin Wizar, Simtech Wizard, or Ares Wizar.
To install Open Wizard, first add this source:
Then, from the repository you just added, install Open Wizard.
 Steps to clear the cache with Open Wizard
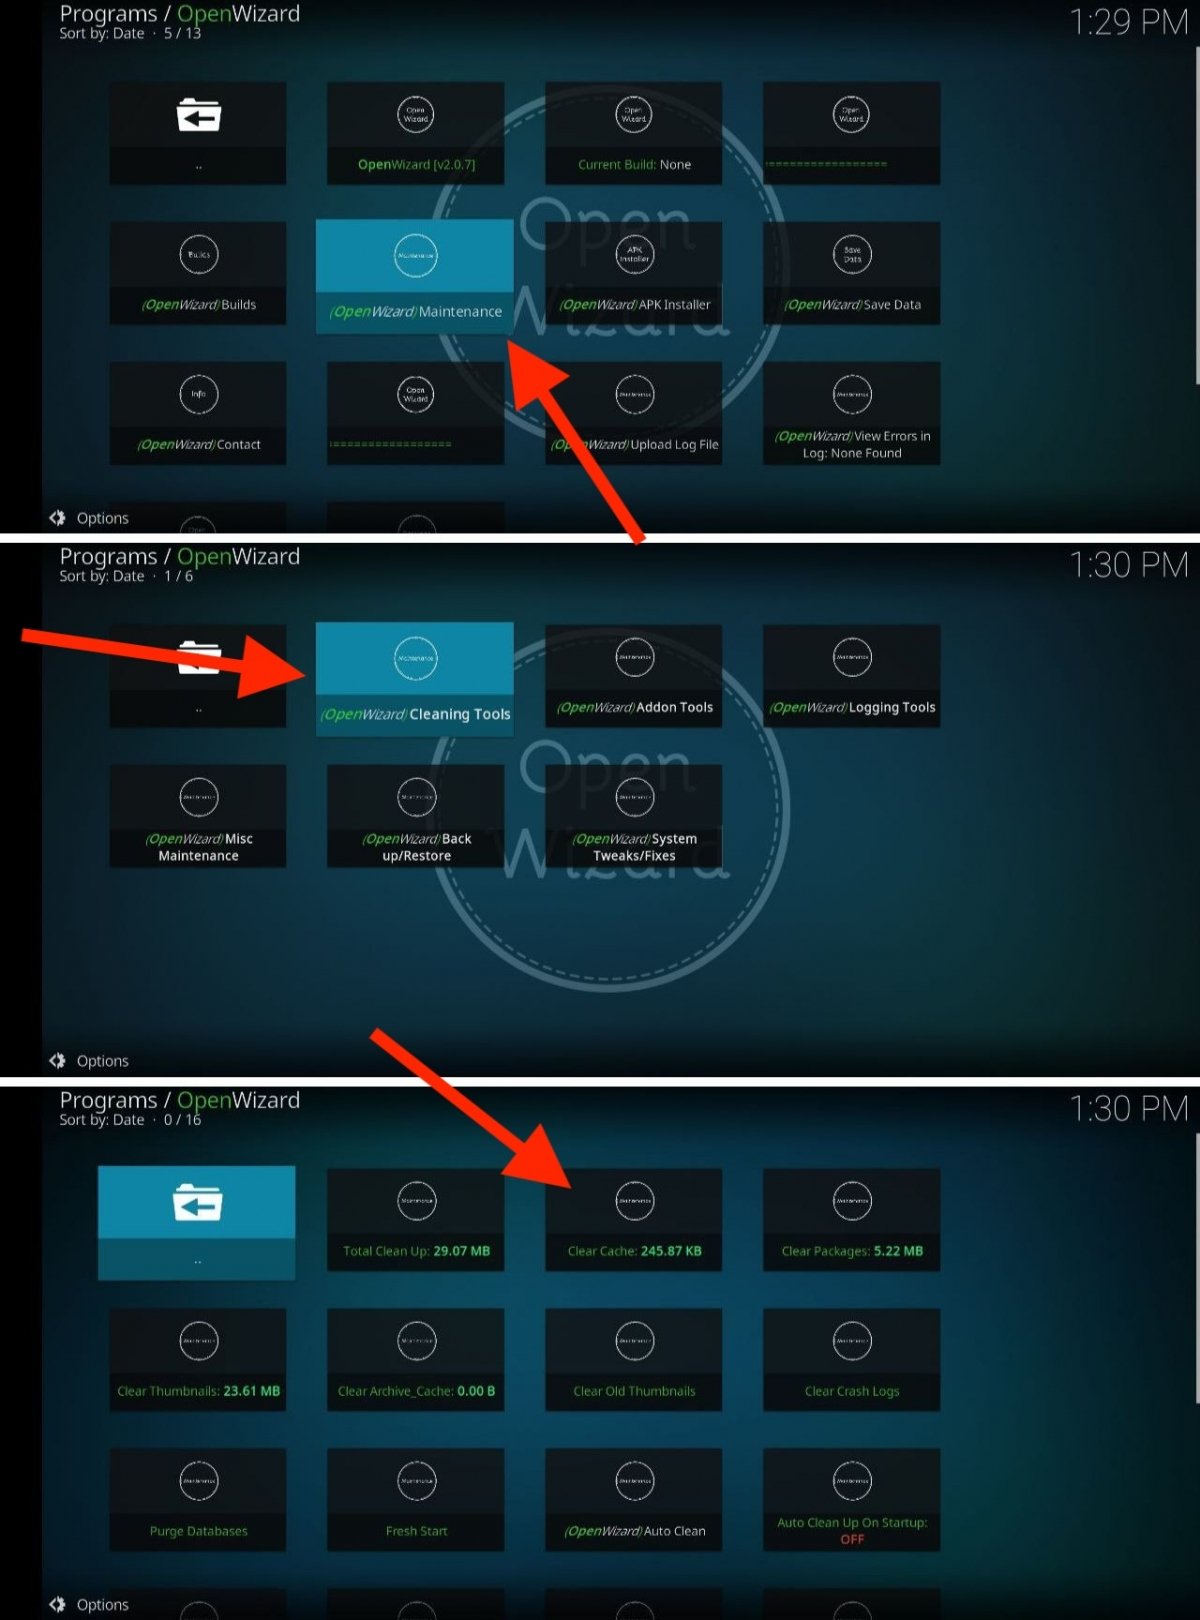
Once the add-on is installed, open it and follow these steps:
- Tap on the Maintenance option.
- Tap on Cleaning Tools.
- Select Clear cache.
In addition to this tool, Open Wizard includes many other functions. For example, it will let you clean Kodi completely, wipe the cache automatically at each startup, or deactivate several installed add-ons with a single tap.
How to clear Kodi's cache by resetting the application
When Kodi is working properly, it is rare for users to look for ways to clear the cache. However, you may have come to this guide because something is wrong with your Kodi installation. In that case, if you have an Android device, you have one last option to make Kodi work as intended: reset the application. This will clear the cache and all other data. In other words, you can start from scratch with no errors or problems.
 If something goes wrong with Kodi, we recommend you reset the app
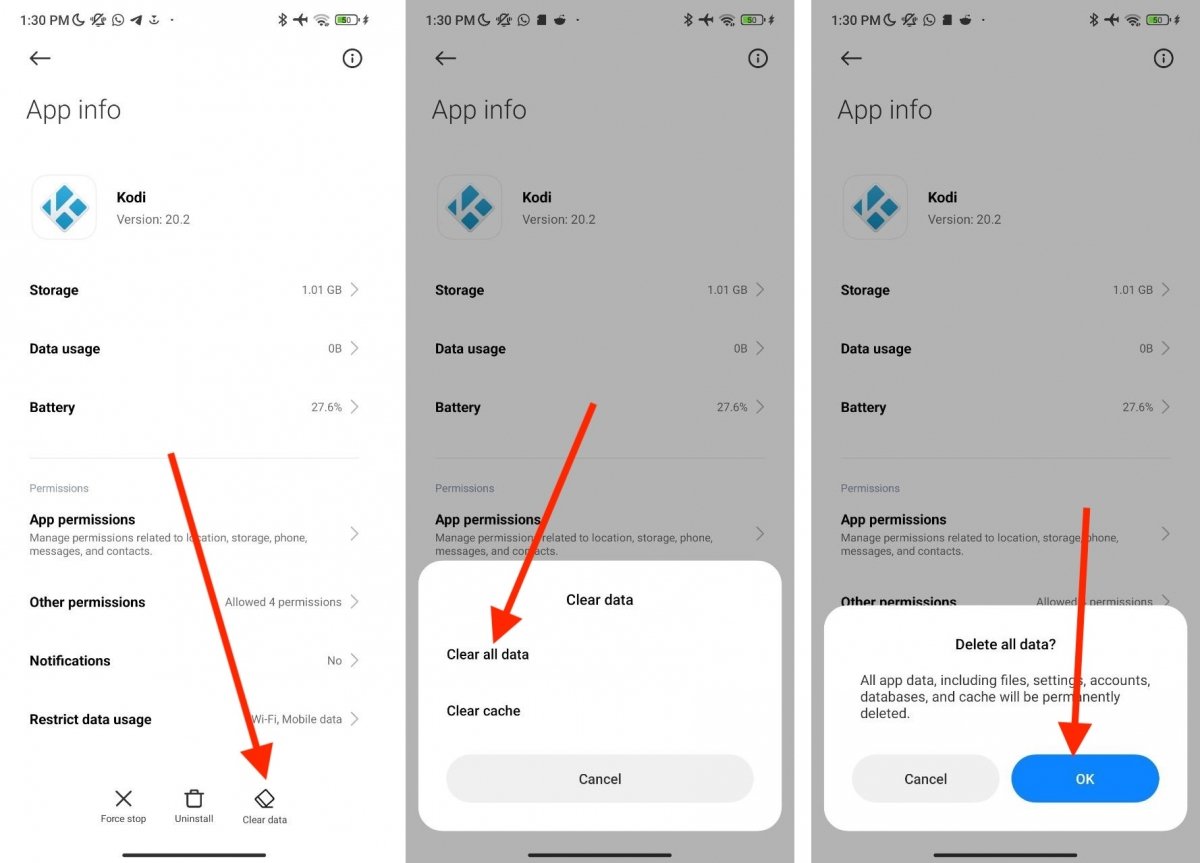
You can do this from an Android smartphone by following these steps:
- Locate the Kodi icon.
- Tap and hold it.
- Tap on Application information.
- Select the Clear data option. On some devices, it will be under Storage.
- Tap on Delete all data.
- Confirm the operation.
Now, Kodi is ready to be configured from scratch. Please note that this option is not available on other platforms. Generally, you can do this on any Android smartphone or media player with this operating system, such as Google TV or Fire TV.
