
DNS servers are crucial for surfing the Internet. Thanks to them, the web browser can convert domains, e.g. www.malavida.com, into the correct server IP address. Most commonly, it is the Internet provider itself that provides a server to assign domain names. However, the user can define its own DNS for some reason. For example, you may want to improve network performance or enjoy greater privacy. In any case, in this article, you will find all the available ways to change the DNS on your Windows 11 computer.
How to change DNS from the configuration application
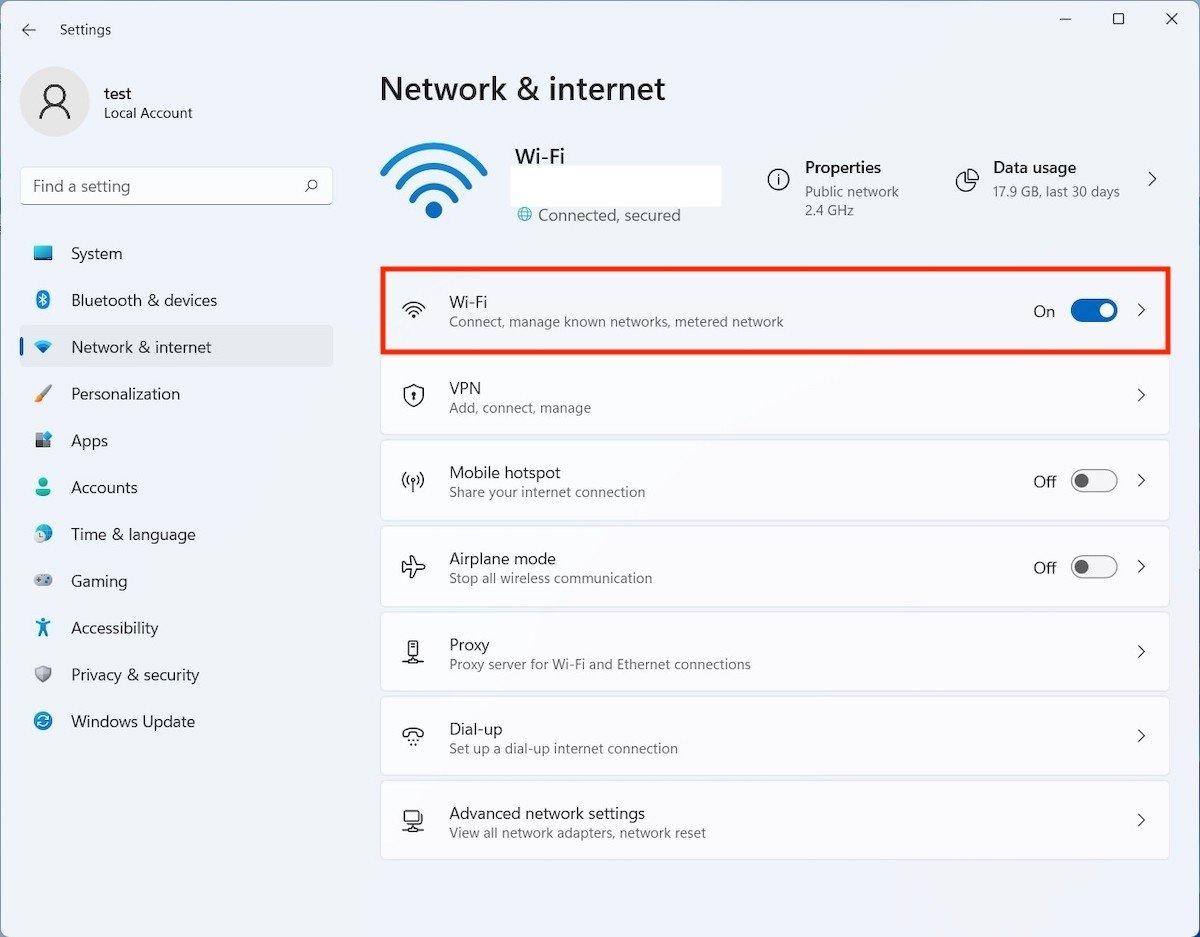
We start, as usual, with the simplest method. Open the configuration application and visit the Network & Internet section. There, click on the adapter options. If you use a cable, you will see Ethernet here. In our test equipment, we connected via wifi. Therefore, we had to click on Wi-Fi.
 Open the network adapter configuration
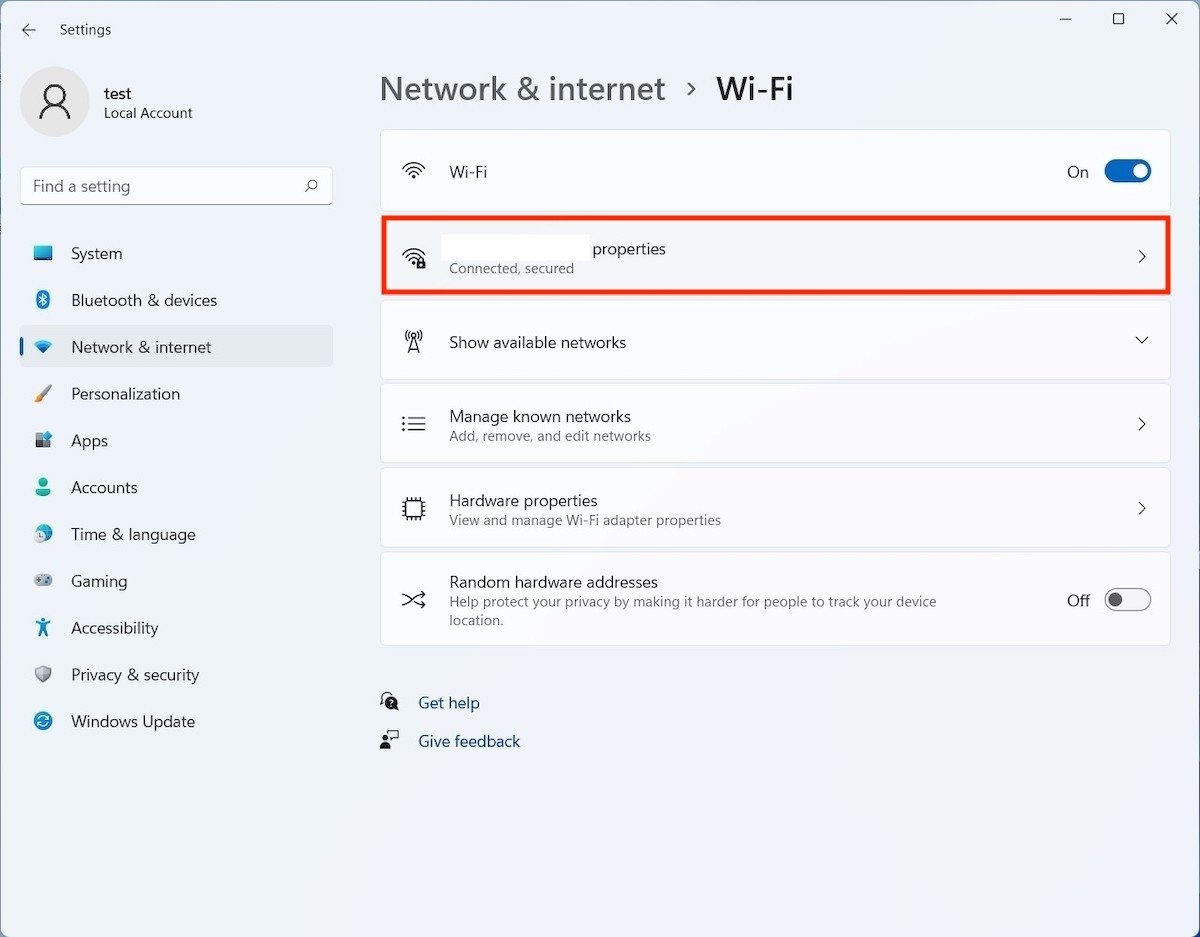
Click on the name of the network to which you are connected to continue.
 Open network options
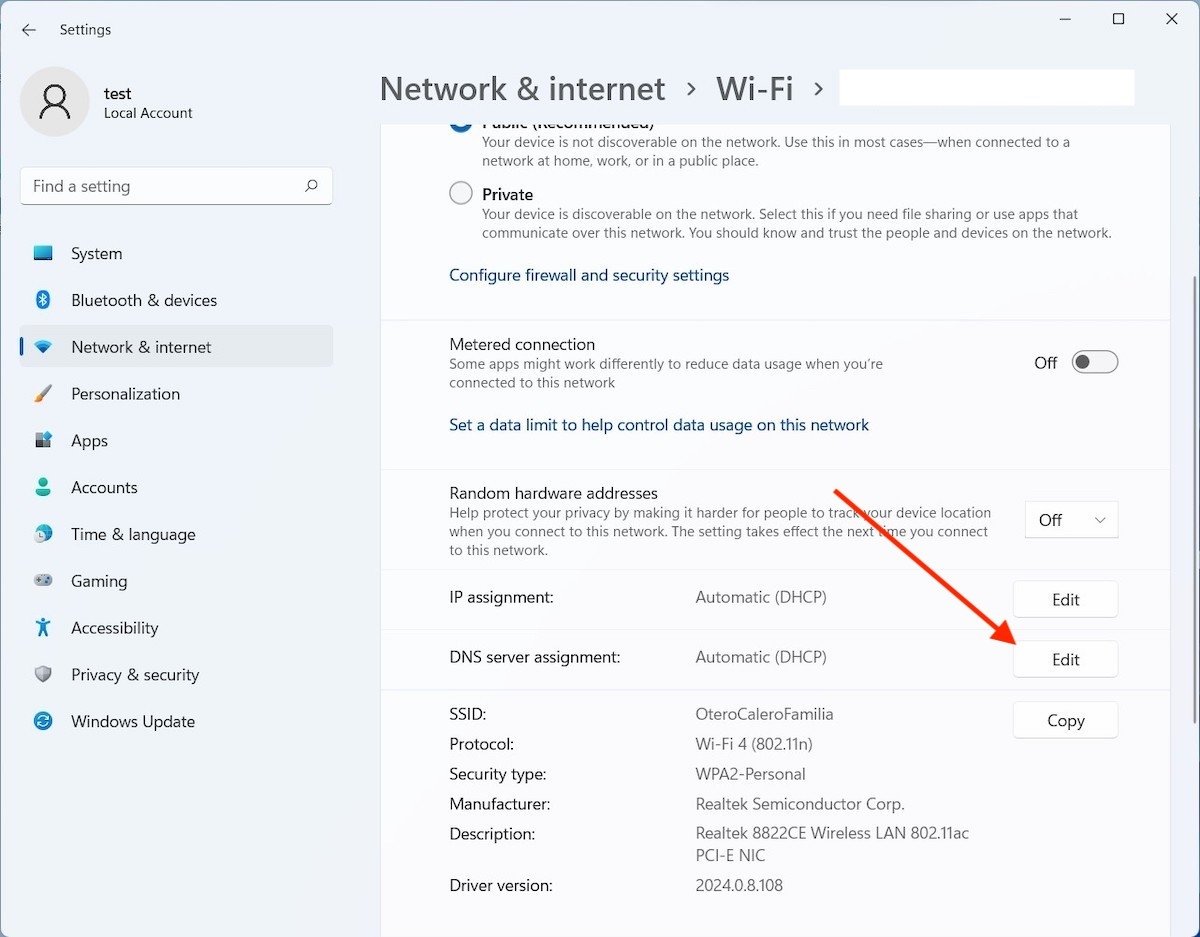
Scroll through the list of options until you find a DNS server assignment. Click on the Edit button to change the settings.
 Edit the DNS address
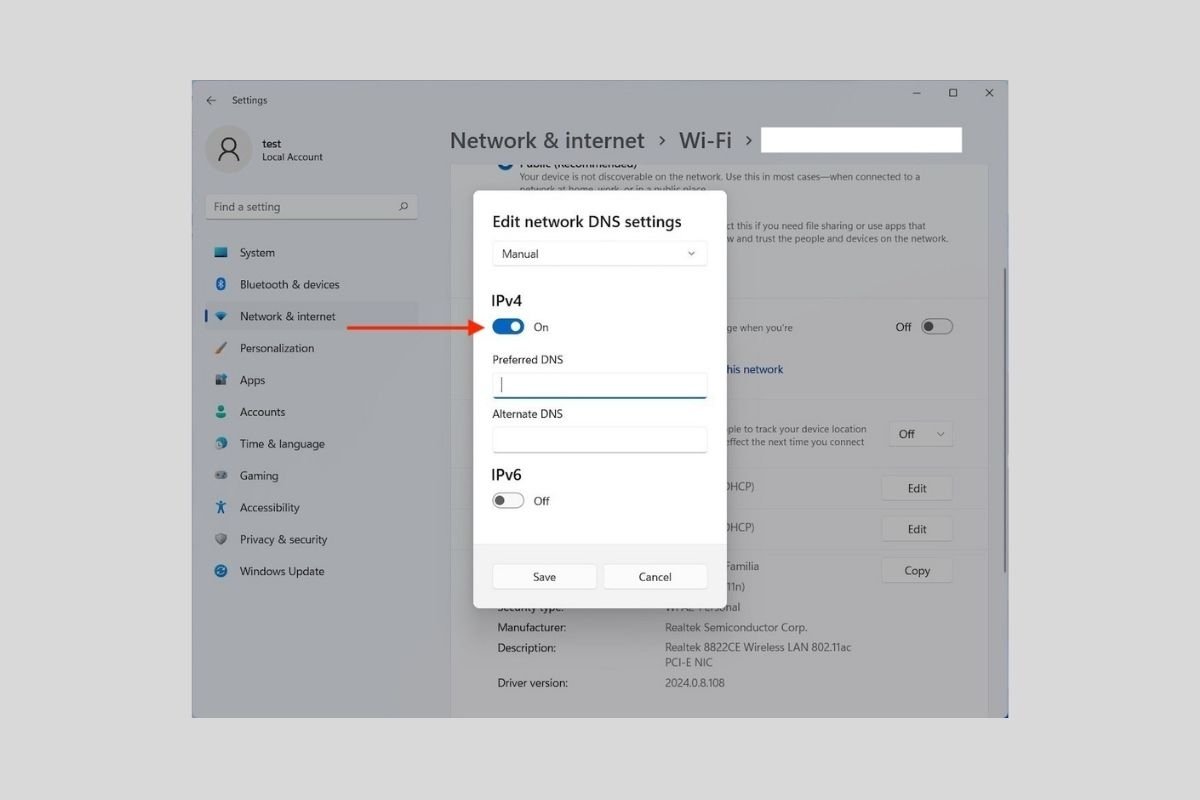
Modify the DNS server assignment and set the Manual option.
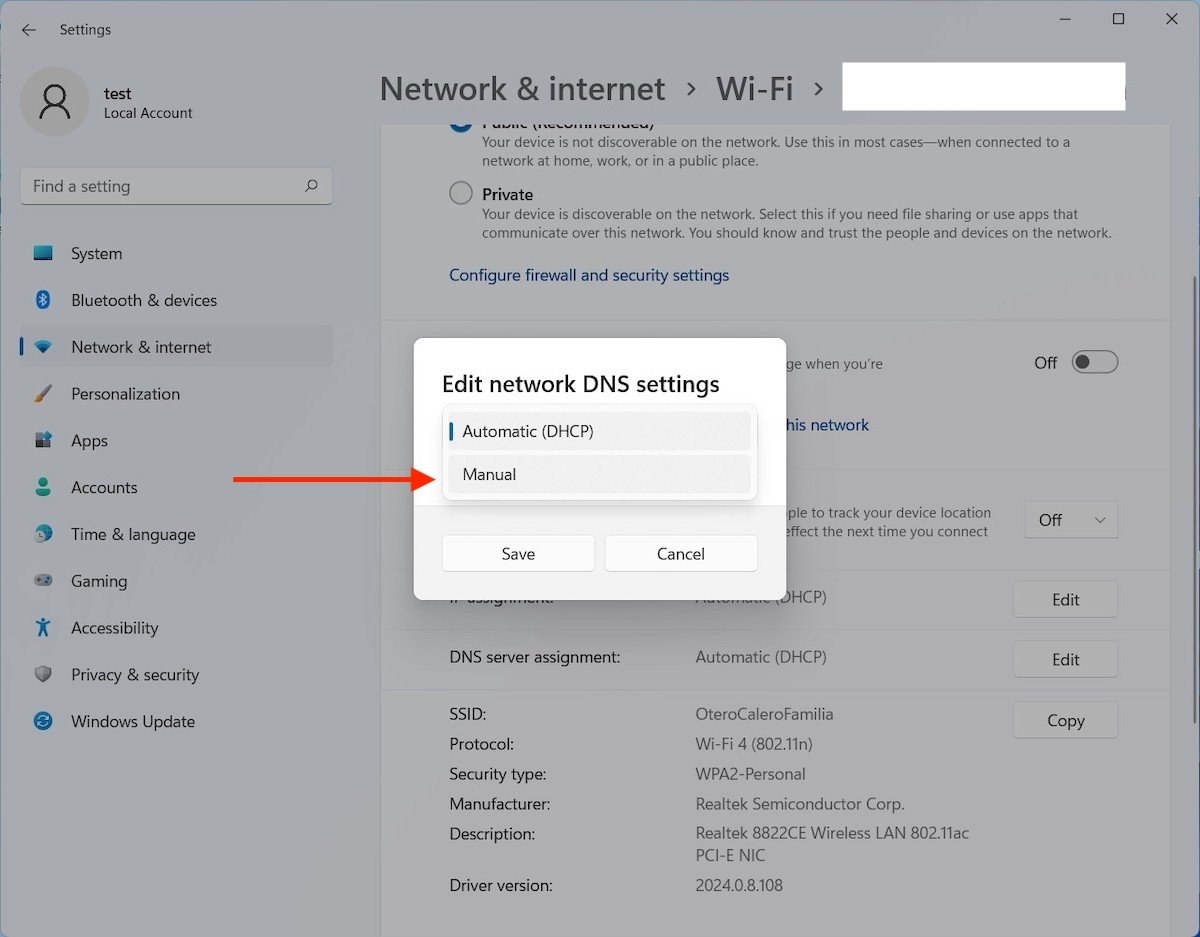 Select Manual
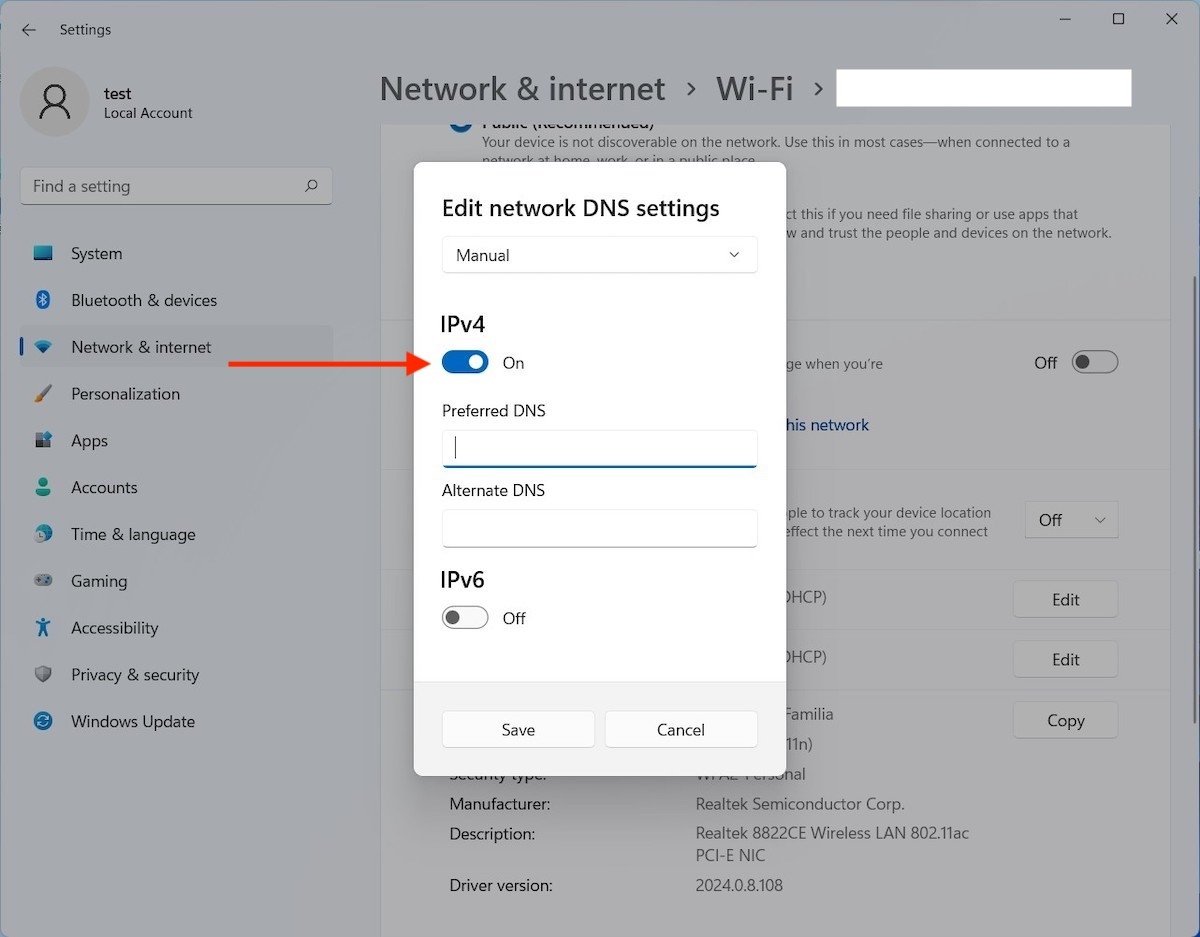
Activate the IPv4 section and enter the IP of the DNS server you want to use. You can set up a primary and an alternate server in case the first one fails.
 Indicate the DNS servers
Use Save to save the changes. From that moment on, you will be using the DNS you have specified.
How to change DNS server from Control Panel
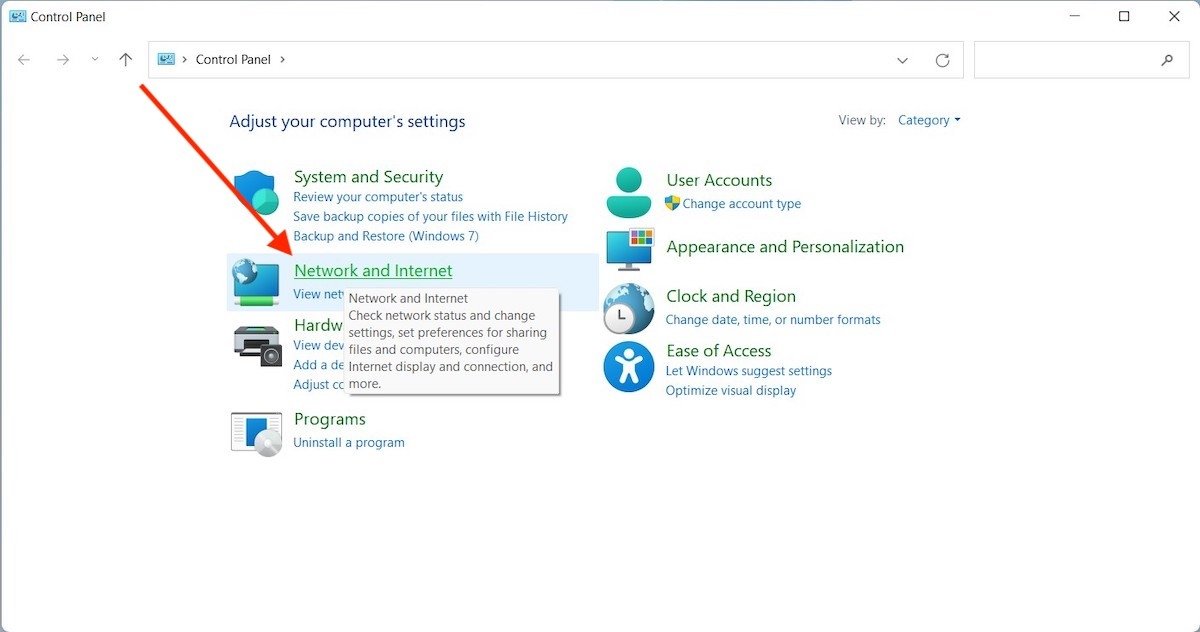
The Control Panel still has a wizard to modify the DNS of any network you are connected to. Just click on Network and Internet.
 Network options
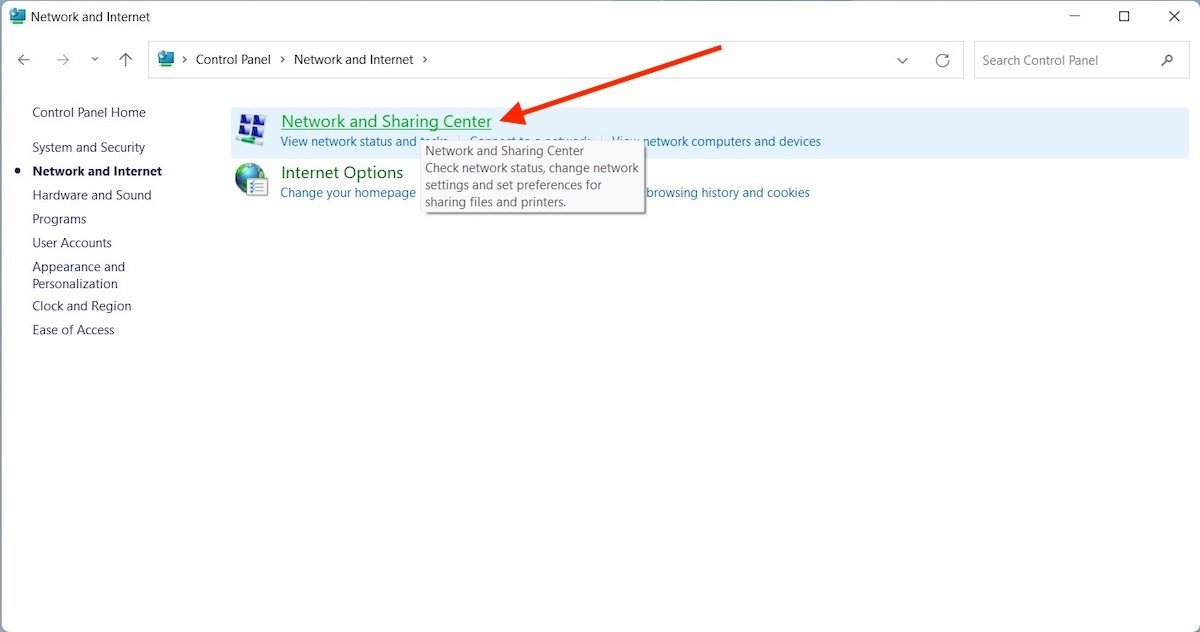
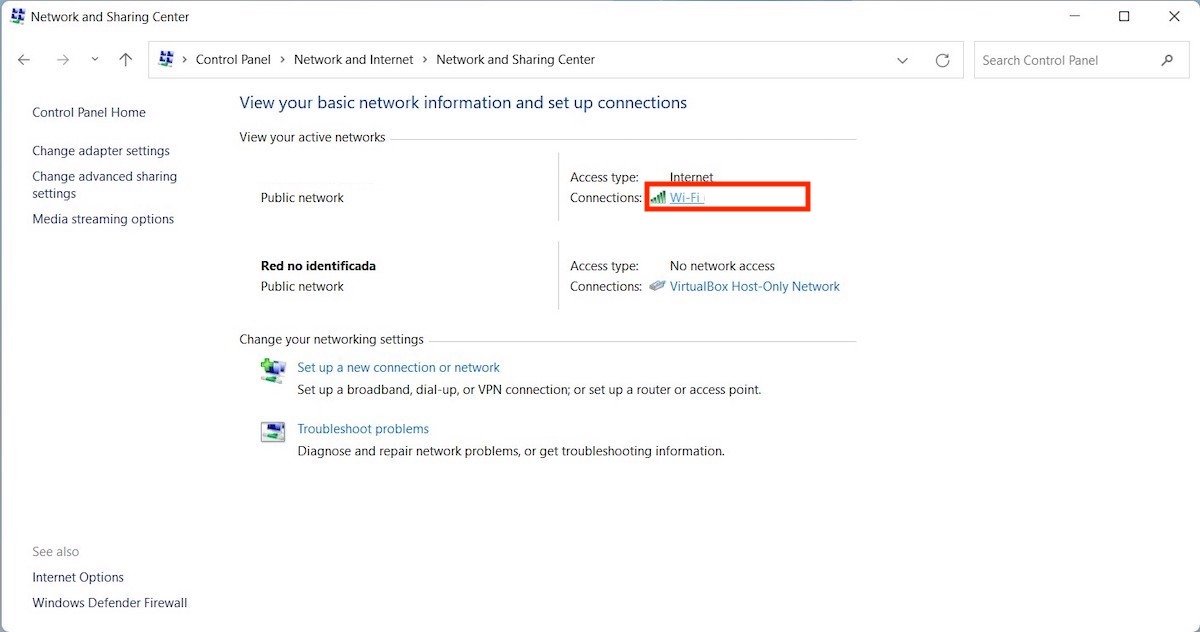
In the next window, click the Network and Sharing Center link.
 Network settings and other control panel options
Click on the name of the network you are currently connected to.
 Select DNS options
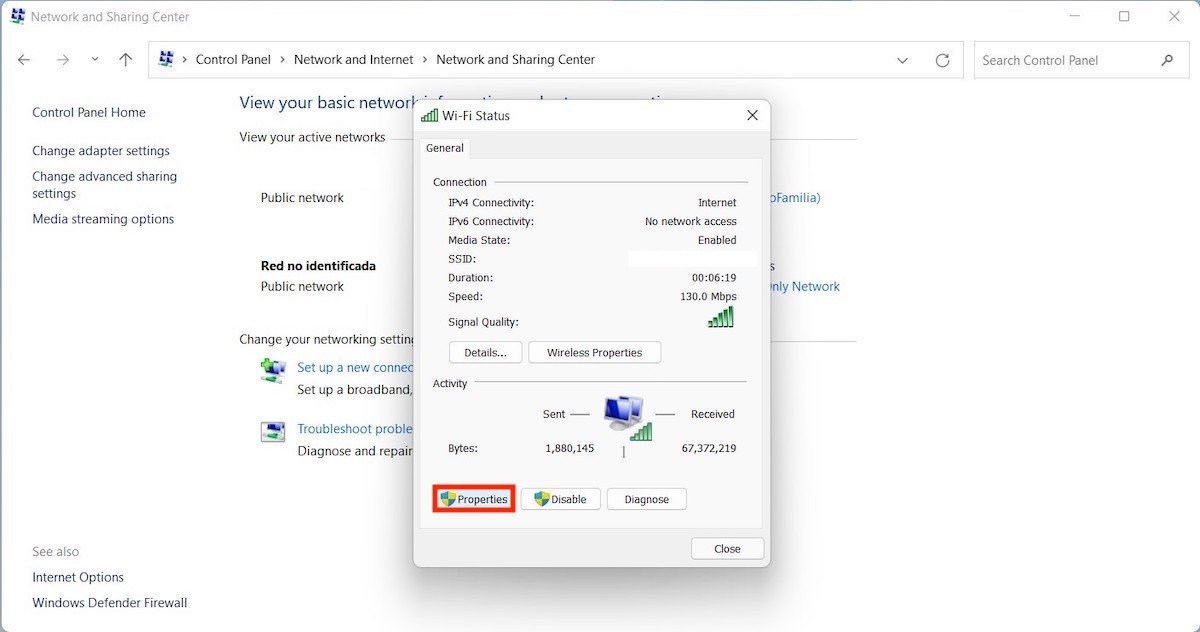
In the dialog that will appear, use the Properties button
 Network properties
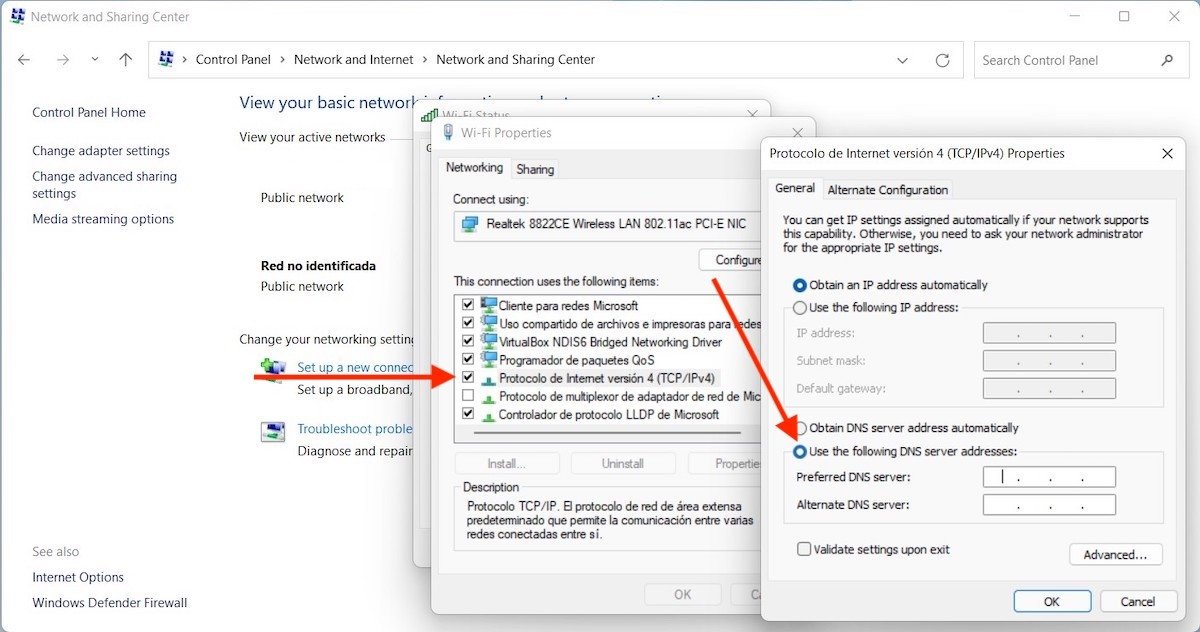
In the Wi-Fi Properties window, locate the Internet Protocol version 4 in the list and open the preferences. Then, select Use the following DNS server addresses. When you do so, the text field below will become active and will let you change the DNS server IP.
 Indicate the DNS server
As in the previous case, it is also possible here to introduce a second address as an alternative to the first. We recommend that you do this if you want to reduce connection problems as much as possible.
How to change DNS IP address from PowerShell
Finally, we talk about changing the DNS server from PowerShell. If you opt for this method, you will need to know some specific commands. In addition, you must run the PowerShell as an administrator.
The latter can be done with the Windows search. First, locate Windows PowerShell, and then, click on Run as administrator.
 Go to PowerShell
Then, type and launch the following command:
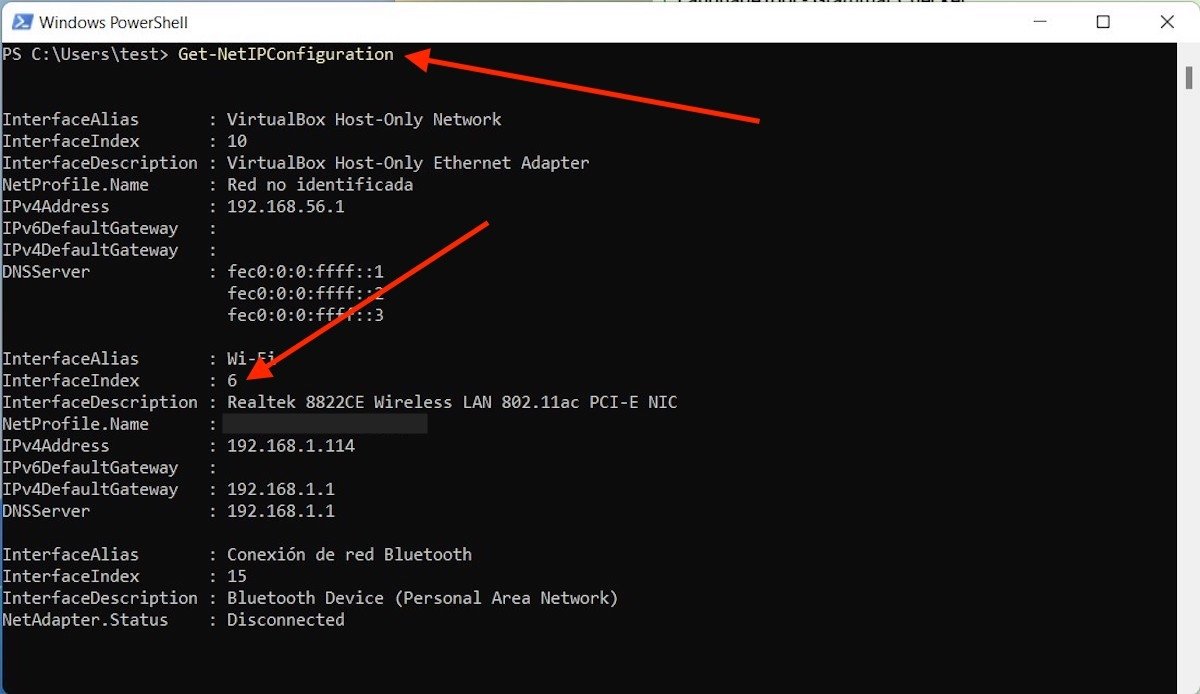
Get-NetIPConfiguration
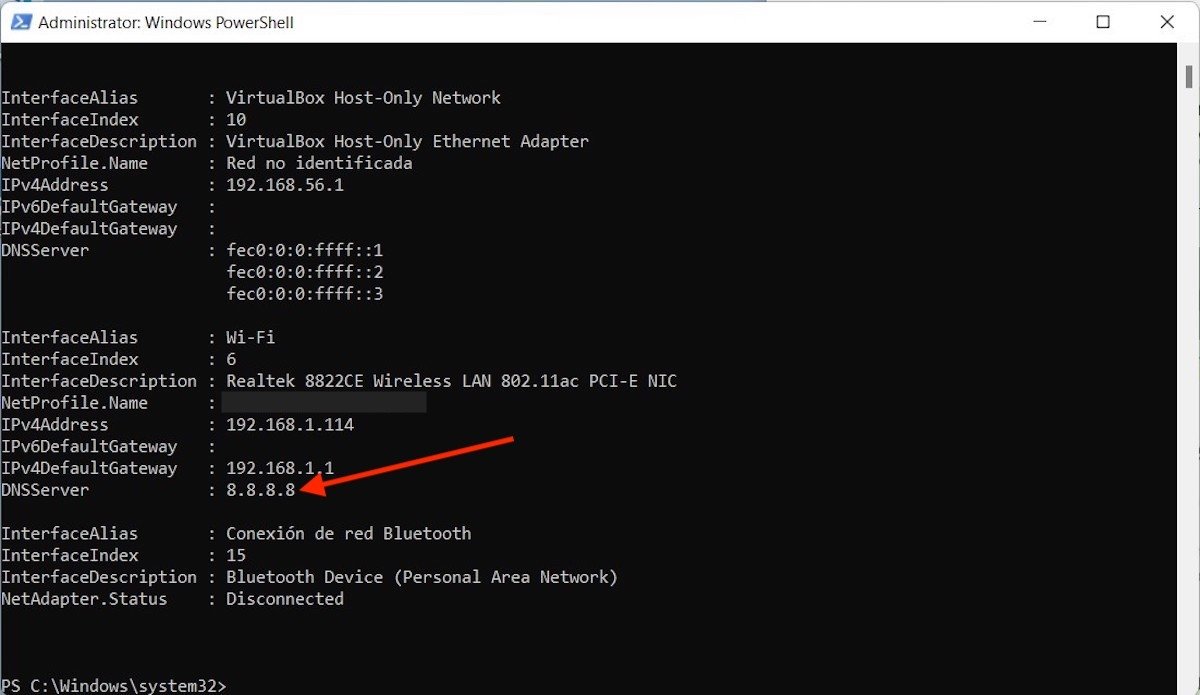
In the window, you will see a list of all the network adapters of the device. Identify the one you are using and look at the InterfaceIndex section. In our case, the wifi device is numbered 6.
 Access the network adapters
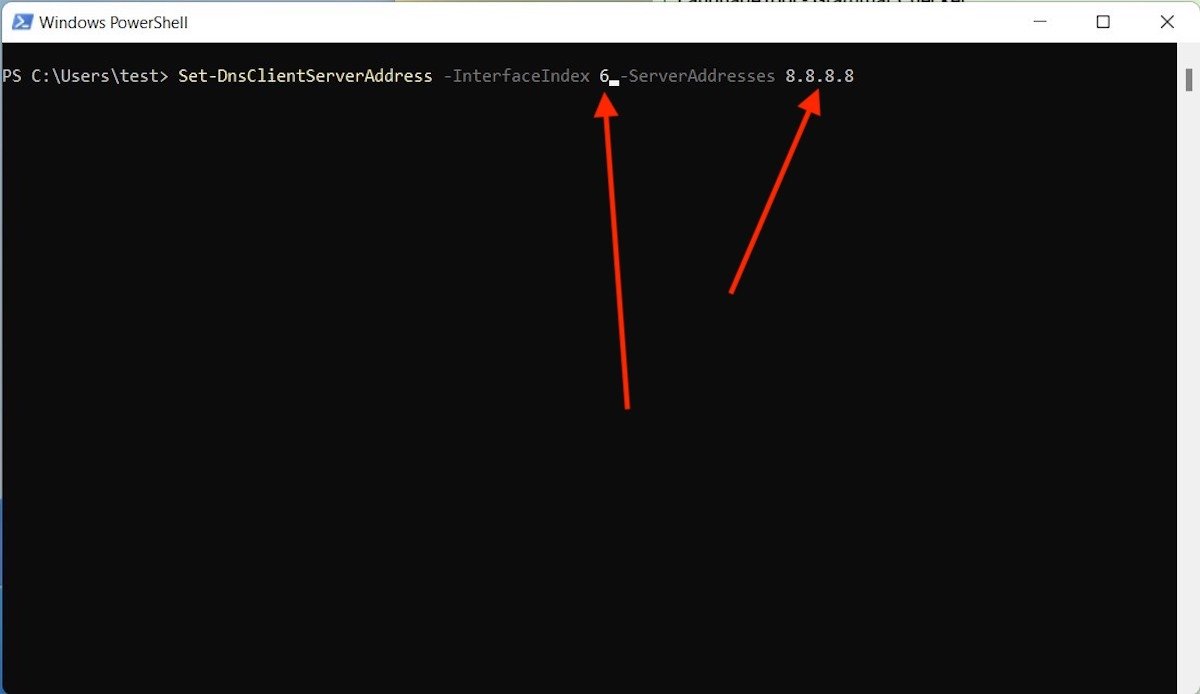
Well, keeping the above information in mind, type the following command.
Set-DnsClientServerAddress -InterfaceIndex 6 -ServerAddresses 8.8.8.8
Where we have written "6", it indicates the number that appeared for your adapter in InterfaceIndex. And, where we put "8.8.8.8.8", type the IP address of the DNS server you want to use. We have kept this data in the command so that you can easily see what the final format should look like.
 Modify the DNS of the selected interface
When you are done, run the Get-NetIPConfiguration command again.
 Check the modification
Doing so will serve to verify that the new DNS for the network adapter in use has been installed.
