
Changing your Windows 11 user name is easier than you think. There are up to three ways to change the name of an account in the system. Do you want to know them?
Differences between the displayed name and the user name
Before explaining how to change the user name in Windows 11, it is important to make a small clarification. When we use the expression "user name", we can refer to the name that Windows displays in sections such as the lock screen or the Start menu. However, it is also possible that we are referring to the name the system uses to identify an account.
For example, you can create a Windows profile in the name of Jon Doe and set the internal user name to jdoe. The first will be the visible user name and the second the internal one.
Changing the visible user name on a local account from the Control Panel
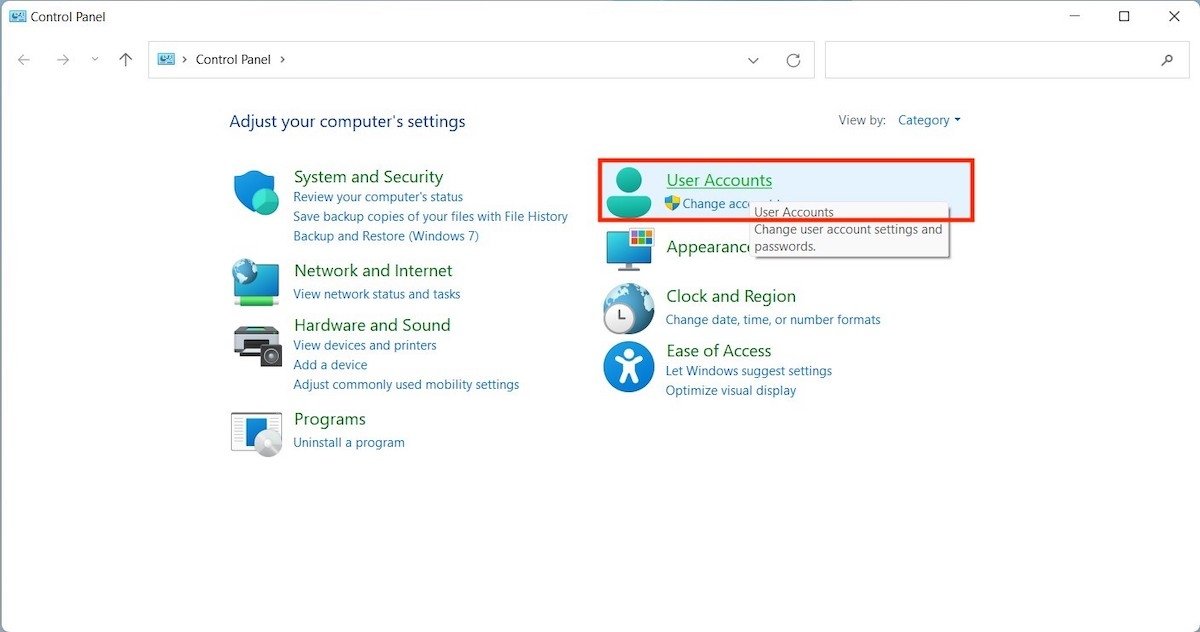
With the above clarifications, it is time to talk about the methods for changing the user name. In this case, we focus on the visible one, the one displayed on the lock screen and the Start menu. Go to the Control Panel and click on User Accounts.
 Open the local account configuration
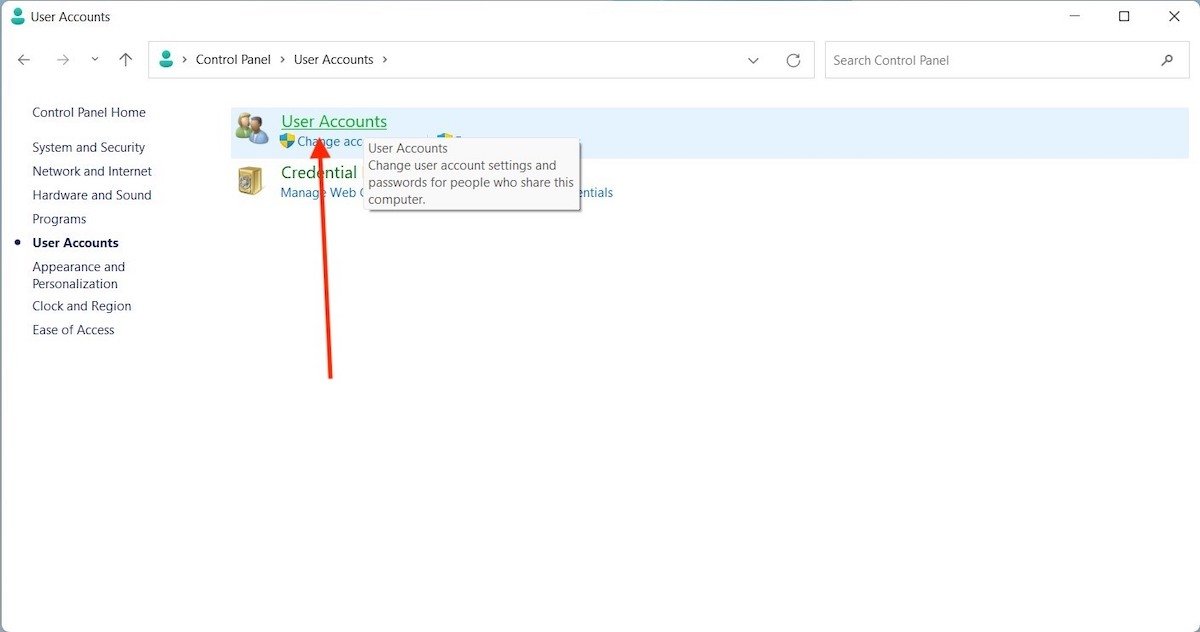
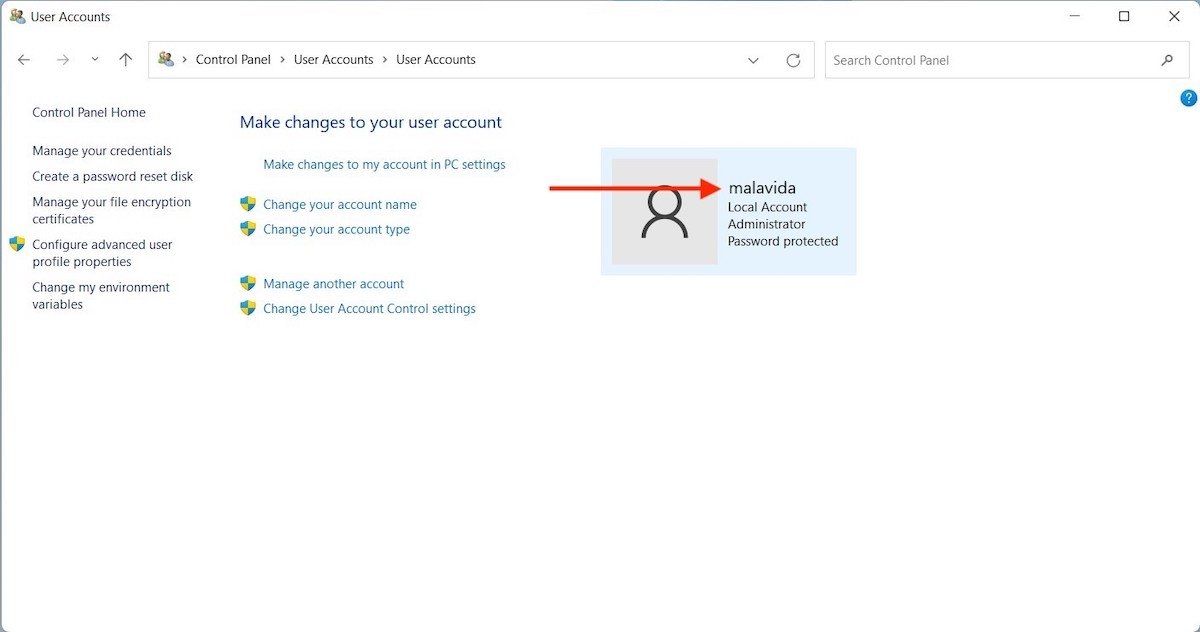
Click User Accounts again to display some additional options.
 Account information
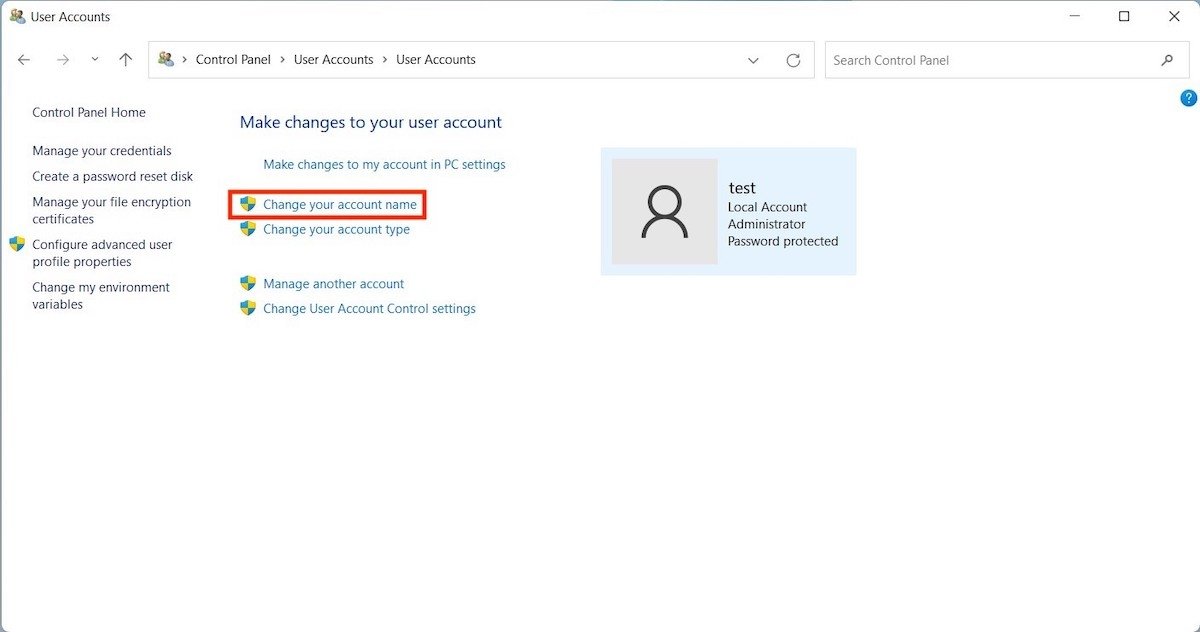
Choose the Change your account name option to start the user change process. Note that at this, point our account is called test.
 Change the account name
Enter the new user name and use the Change Name button to confirm the changes.
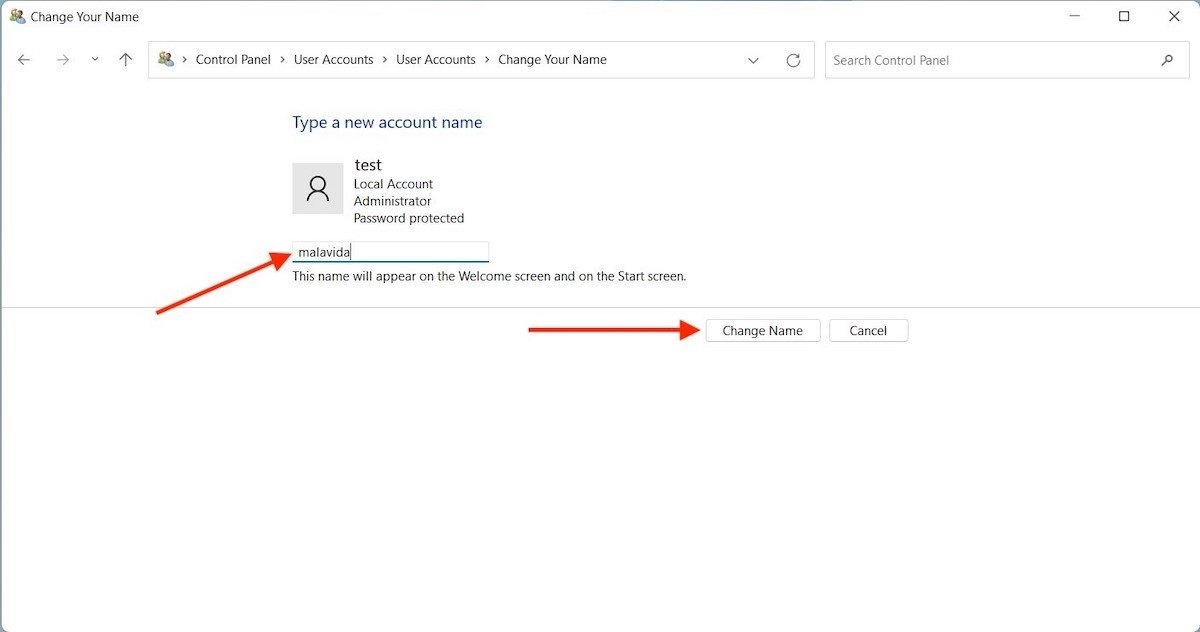 Enter the new account name
Now, the visible name of the account will have been modified.
 Account name changed
The account that previously used the name test, now uses malavida everywhere in the system where this information is displayed.
How to change the visible user name on a Microsoft account
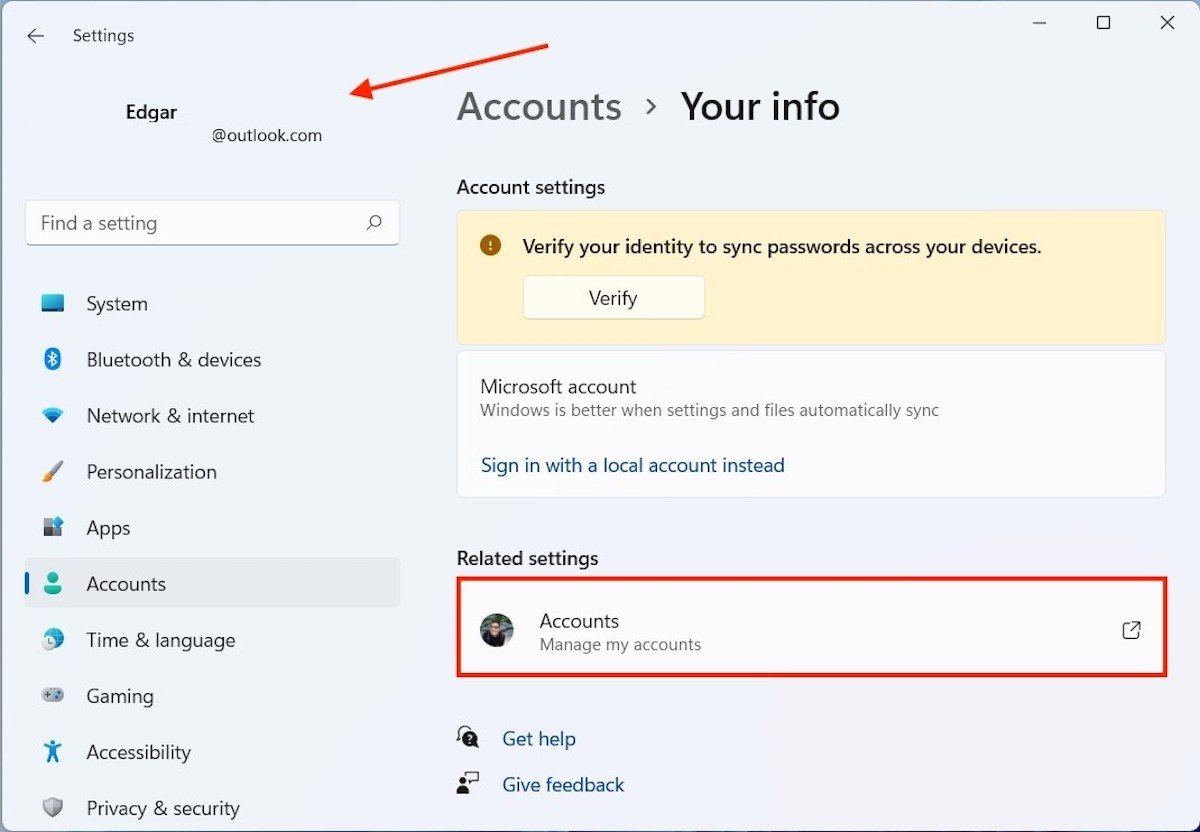
In case you have associated a Microsoft account with your Windows profile, the steps to follow will be different. First, open the settings and click on the account avatar in the upper left corner of the window. Then, go to Your info and click on Accounts.
 Account info
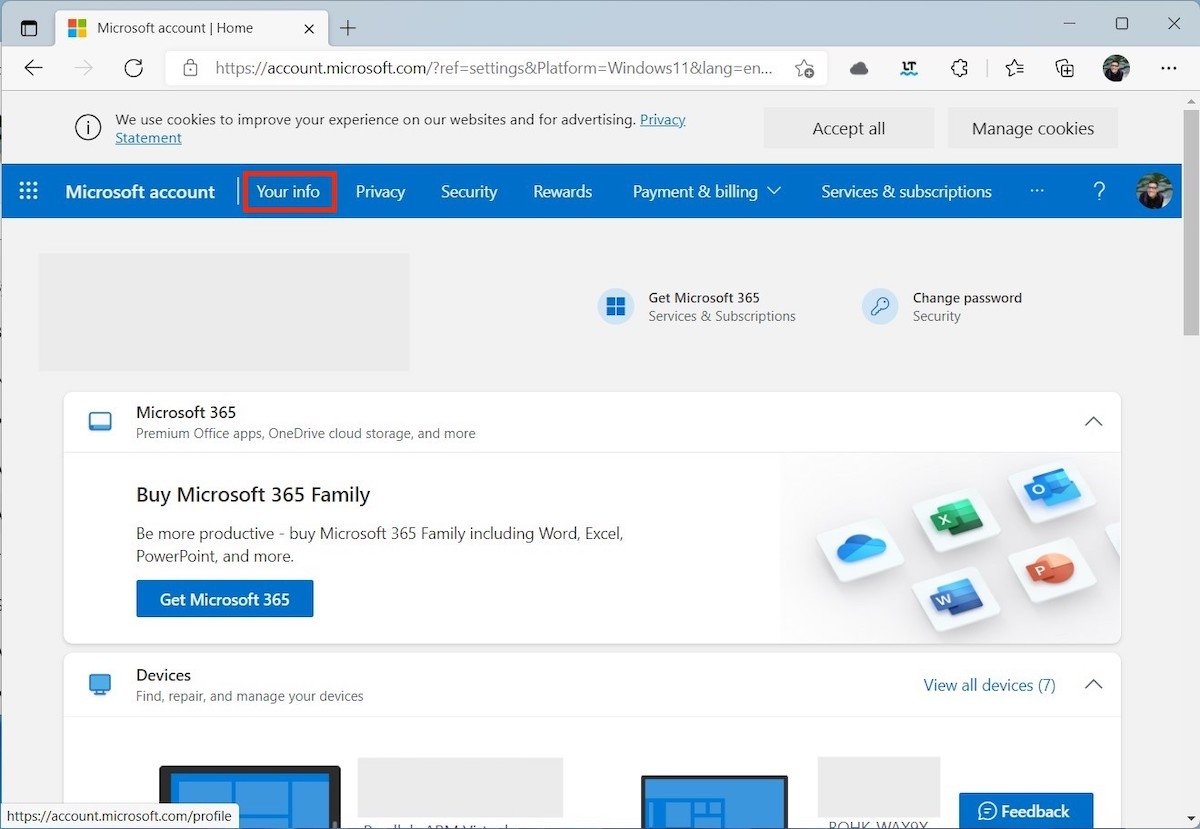
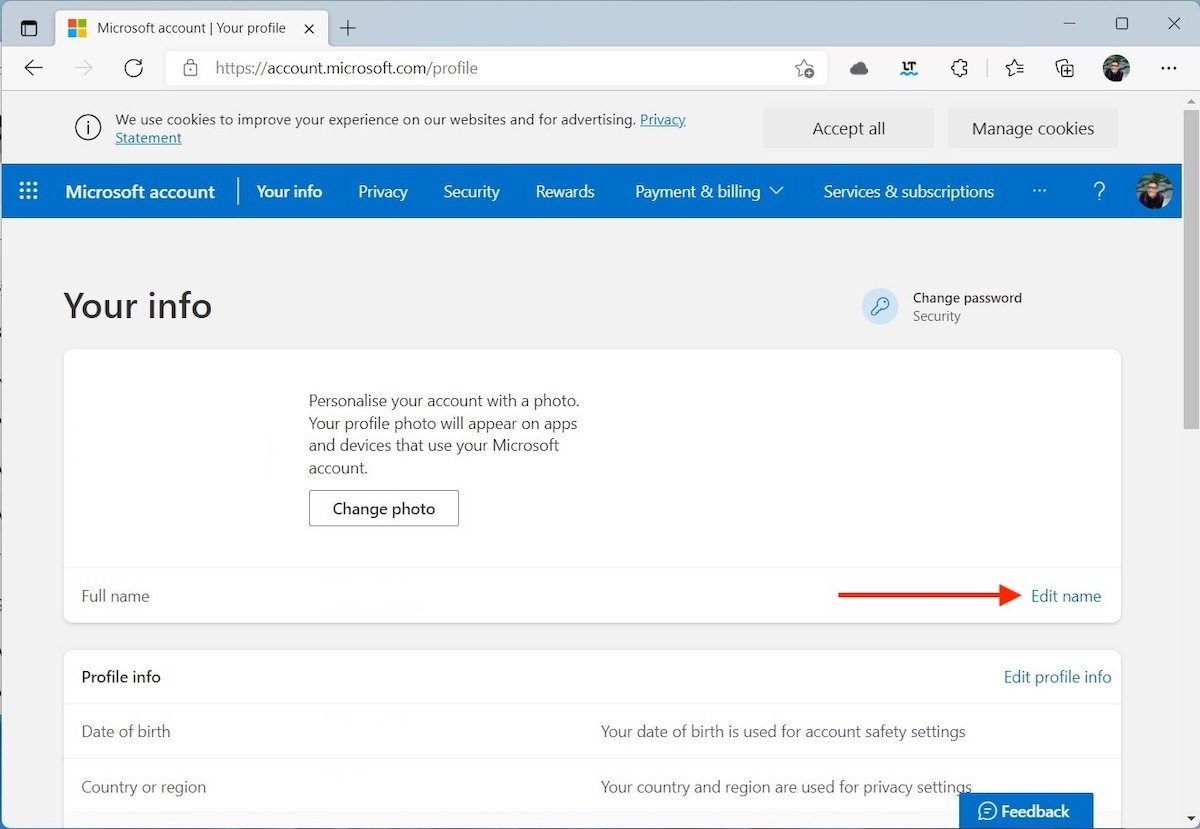
The next step must be taken from the browser. When your Microsoft account information opens on the Internet, click on the Your info tab
 Microsoft account information
Click on the Edit name link to continue.
 Edit the name
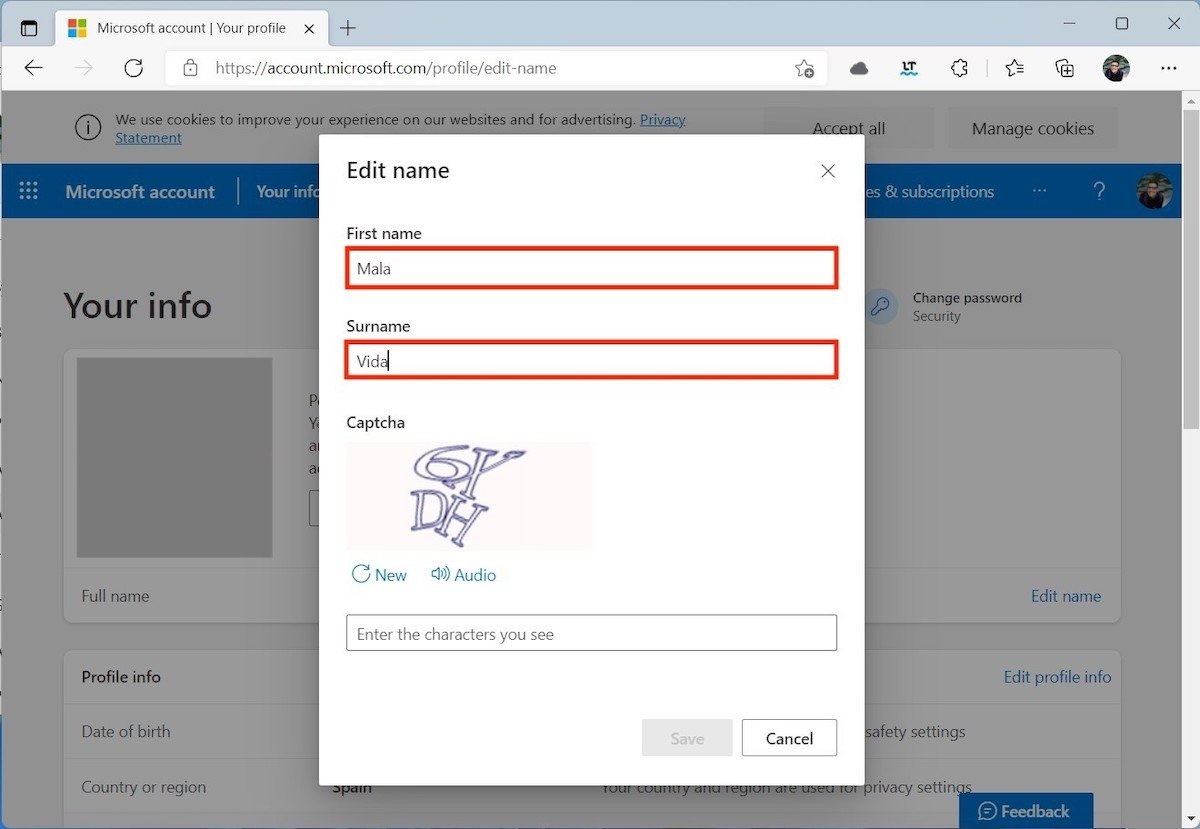
Indicate your name and surname. Complete the captcha and use the Save button to save the changes.
 Confirm the name change
You may need to restart your computer for your username to update correctly.
How to change the internal user name of your account
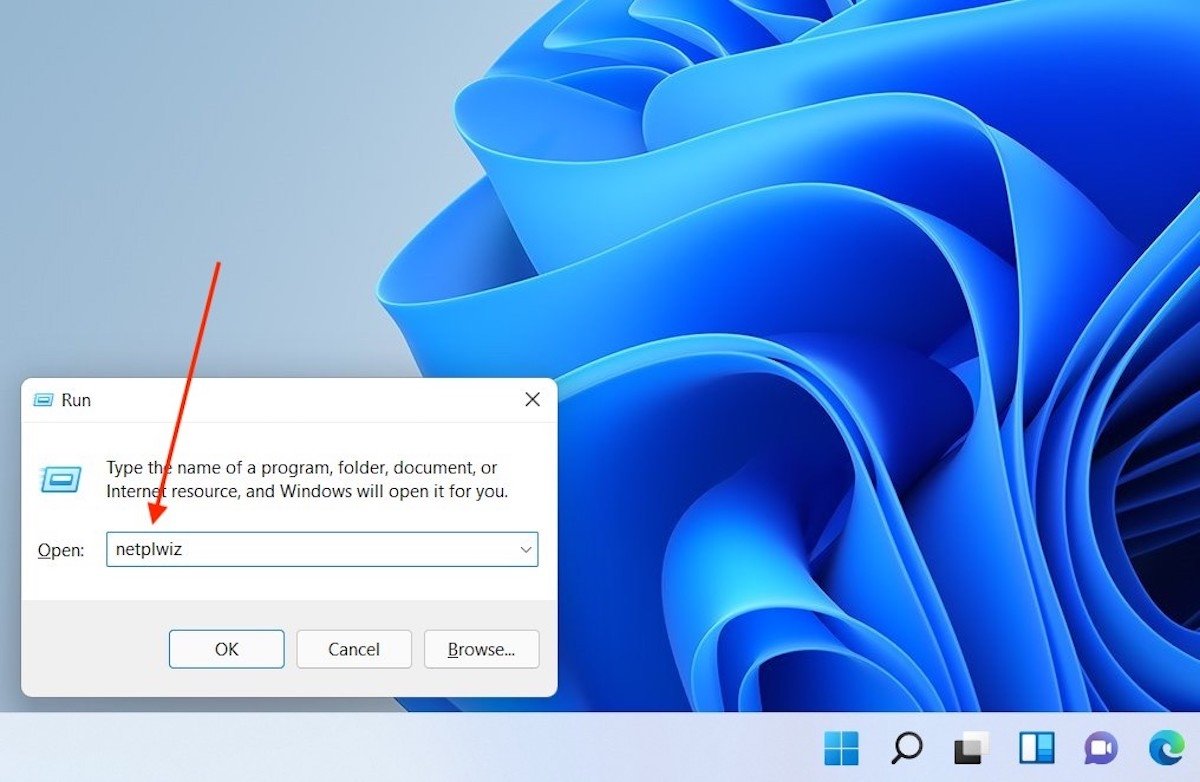
Finally, we talk about how to change the internal user name, that is, the one that Windows 11 relates to your account. Use the key combination Windows + R to open the Run dialog. In the text field, type netplwiz, and press the Enter key.
 Run the necessary command
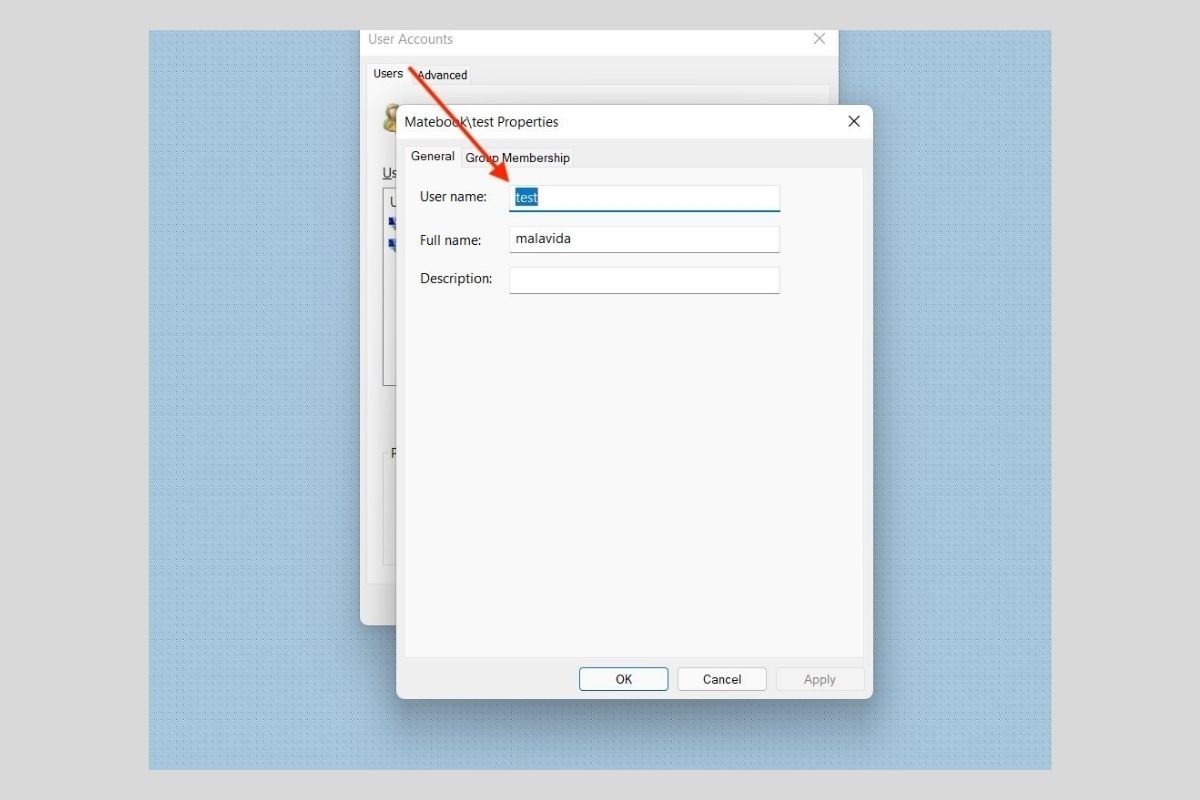
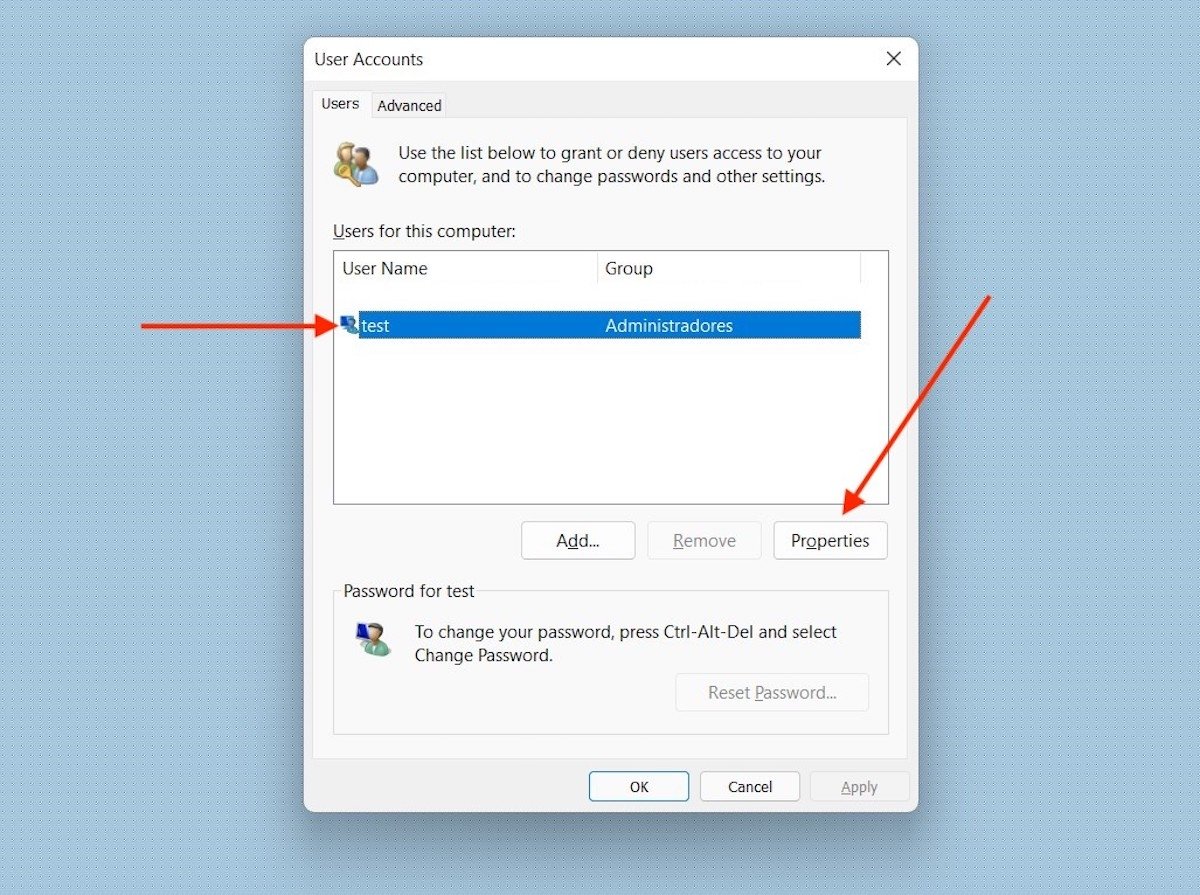
In the User Accounts window, select your account (as you can see, in our case, it was still test, despite the above changes), and click on the Properties button.
 Select account properties
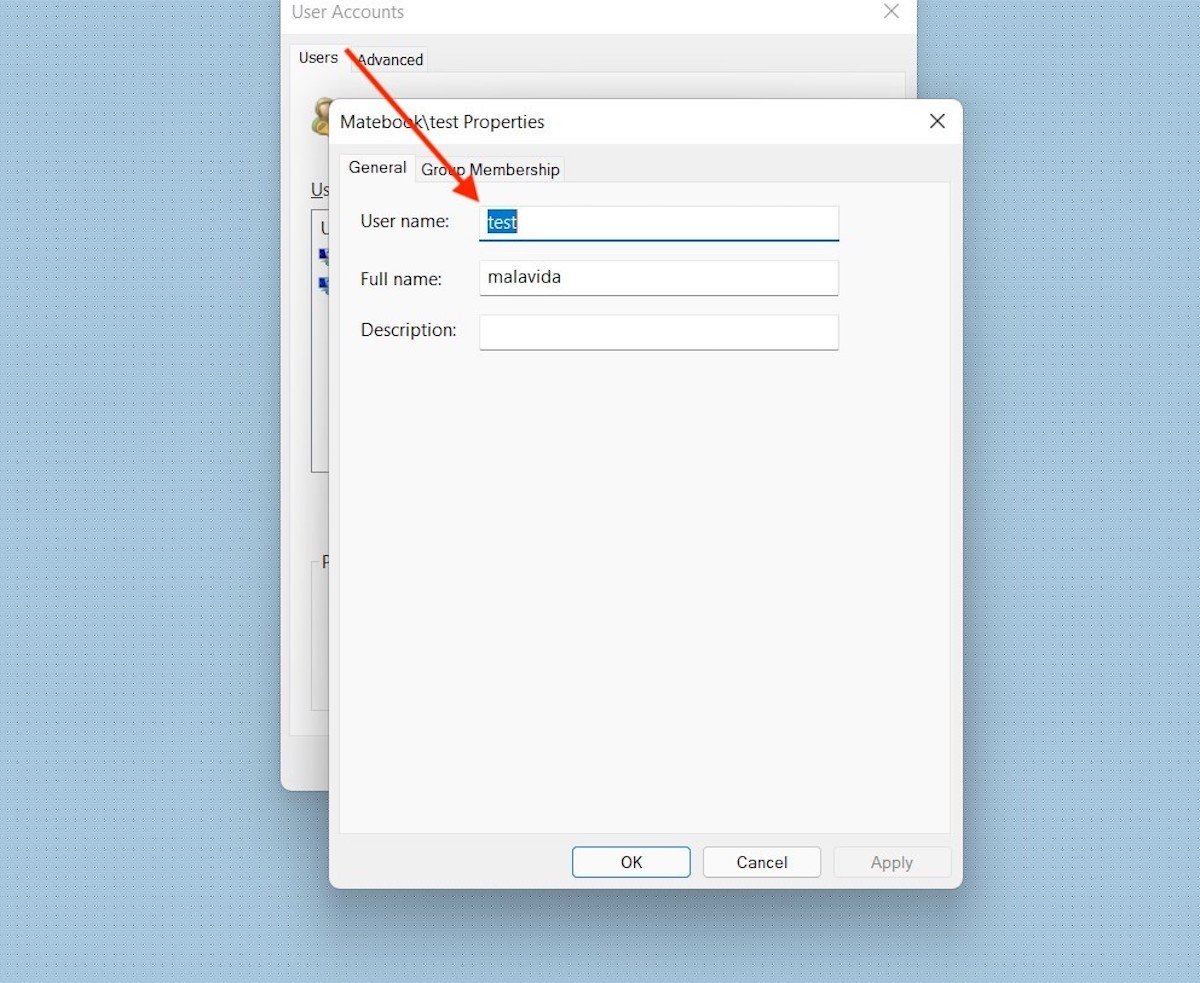
Modify your user name by altering the value of the User name field. Likewise, if you wish to change the visible name of your account from here, you can do so by typing it in the Full name text box.
 Modify the account name
When you are done, use the Apply button to save the changes. You may need to restart your computer. Changing the internal user of the account may cause some internal errors in the operating system.
