
Discord has become very popular as an alternative to talking and communicating with whomever you want over the Internet. Unlike WhatsApp or Telegram, you can create servers to chat via text messages, voice conversations, or even video calls. All of these features are available for free, and chats can have two or more participants.
The possibility of creating servers is one of its main advantages. This platform has public servers where you can meet people in thematic chats, but you can also create your own private server for your friends or online gaming partners. So this app helps you keep in touch with your friends from your computer, video game console, or smartphone.
How to create a Discord server for Android
To use Discord, you need to register as a user and install its official application. It is available for Android, iOS, Mac, Windows, and Linux. It also has a web browser version and integrates with Xbox and PlayStation. So if you do not have a Discord account yet, download Discord for Android and sign up for the service.
 Create a Discord server from Android
To create a server in Discord for Android, follow these steps:
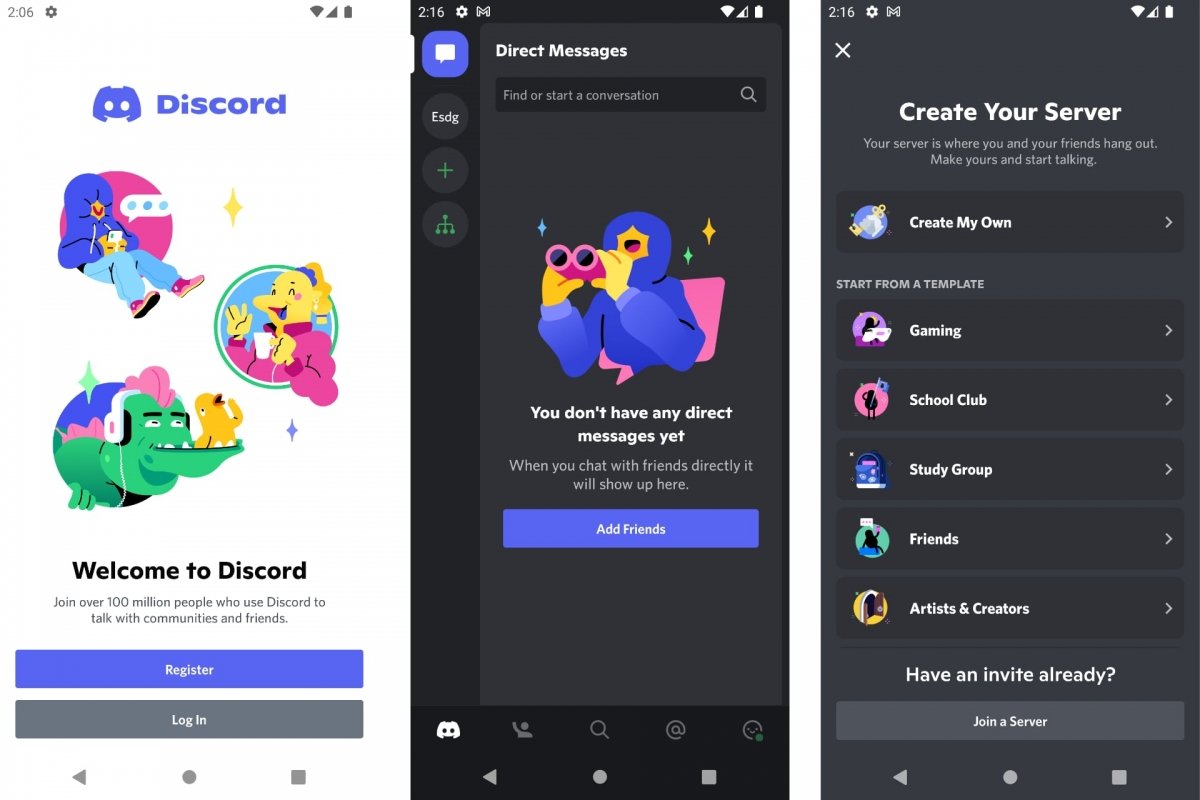
- Open the Discord app.
- Log in with your username.
- In the main tab, tap on the icon with the + symbol.
- Tap Create My Own to create a server from scratch.
- Tap on any of the available templates to create a themed server.
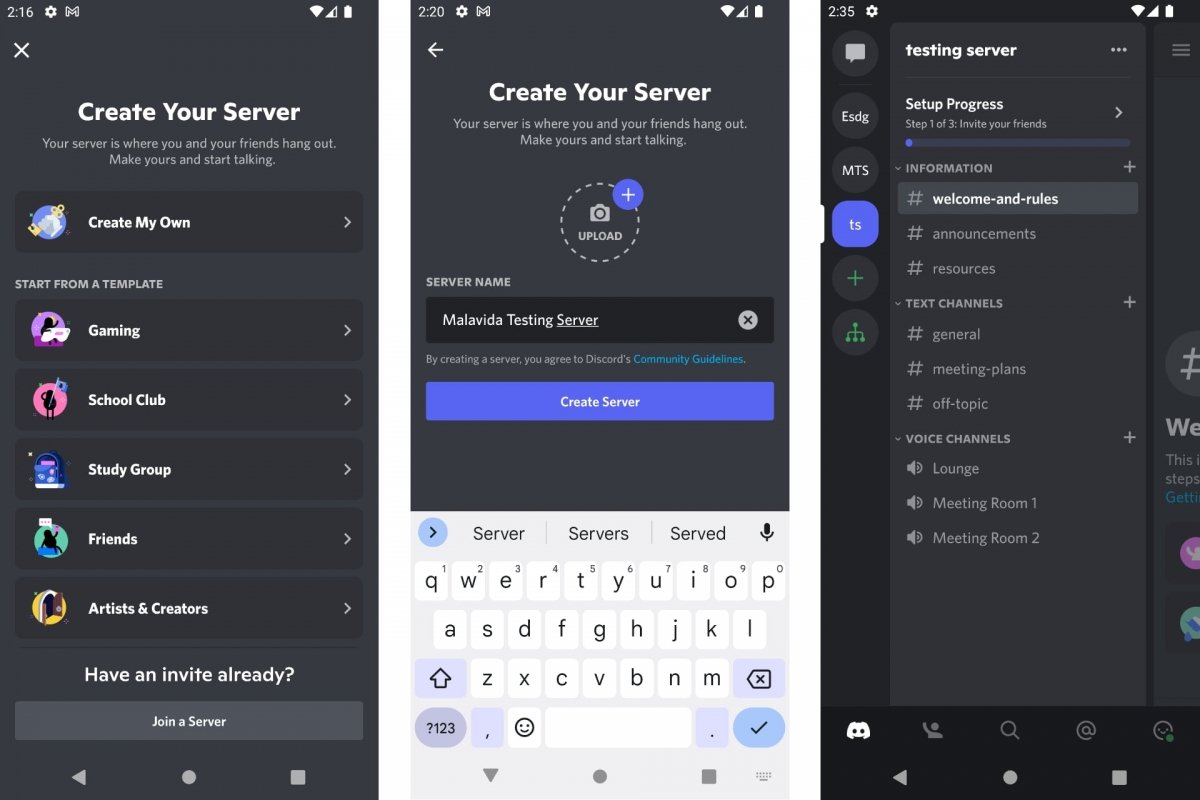
- Follow the wizard instructions, and note that they change on a case-by-case basis.
- Specify a name and/or an image for the server.
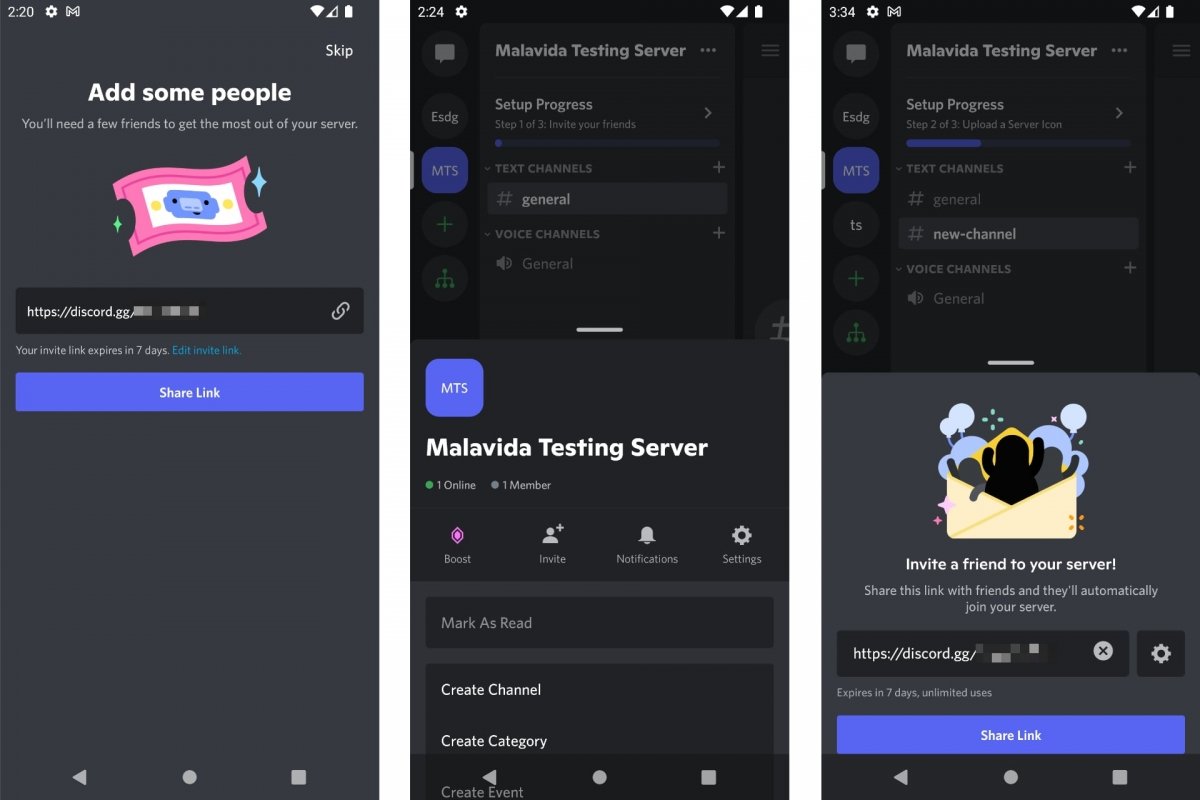
When you create the Discord server, you will get a custom link. You can share this link with whoever you want to join your server. When you finish creating your server, you will see that (by default) you have a general channel for chatting with text messages and another for voice messages. Now, you are free to create more channels and categories, invite people you want, and more whenever you want.
How to make a professional Discord server
If your goal is to create a professional Discord server to host a group of people and manage your communications in an orderly way, there are many things you can do to turn your server into a professional one. The fastest way is to choose a template during the server creation process.
 Create a professional Discord server
As we saw before, instead of tapping on Create My Own, you have a list of themes to choose from. Thus, you can create a server for gamers, for your school, high school, or university, for a study group, for your group of friends, for an artists and creators club, or for a local community. If you choose one of these templates, the server you create will include more elements than the default server.
For example, instead of having only a text and a voice channel, you will have several channels to discuss different topics. There will also be two or more voice channels and a lobby channel from which to select who can join the conversation and under what conditions. And finally, you will find information channels used to share the rules of behavior and what you can and cannot talk about. In short, they can be used as information boards with text threads created by the moderator, you, or whomever you consider appropriate.
How to create a Discord server with bots
A particularity of platforms such as Discord is that, in addition to physical people, you can find and add bots in the channels and conversations. Bots are programs that share information, respond to messages, or perform tasks at the request of users. There is a wide variety of them, and you can easily include them in your server.
 Invite a bot to your Discord server
To add a bot to your Discord server:
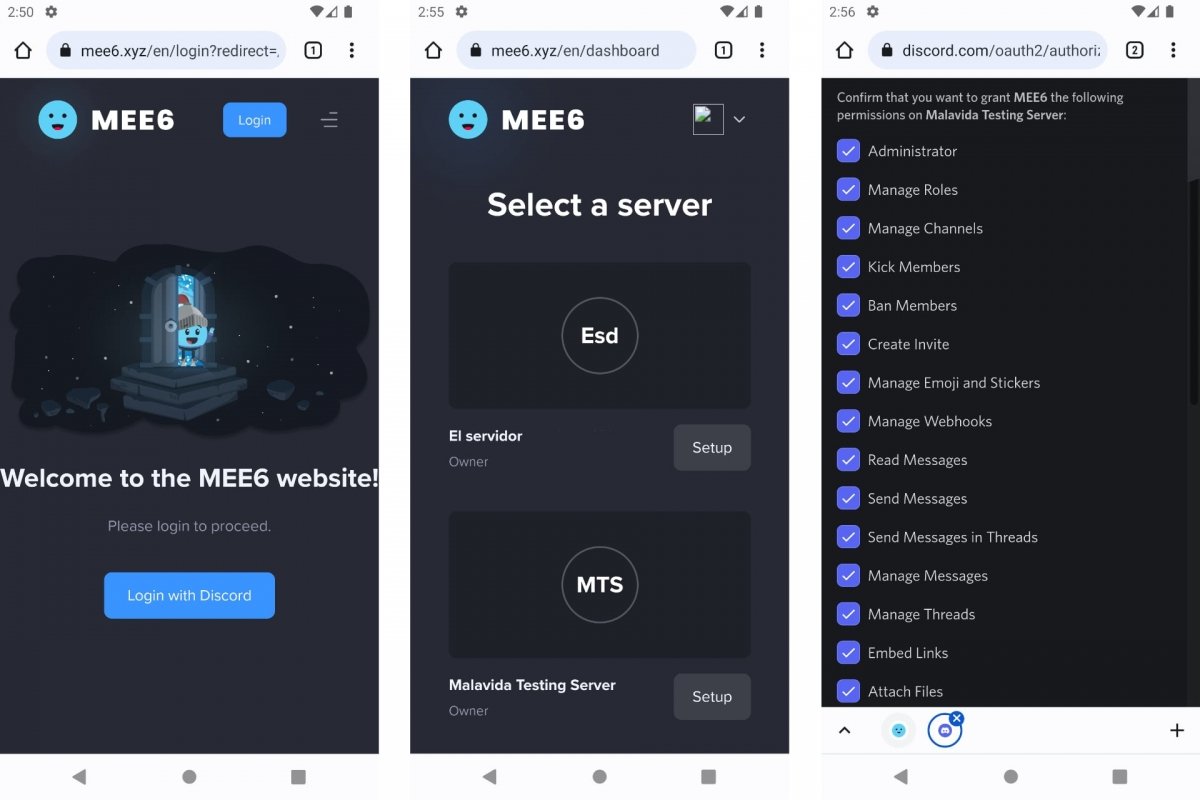
- Go to the page of the bot you want to add. For example, MEE6.
- Tap on the Add to Discord or Invite to Discord button.
- A window will open asking you to allow the bot into your server.
- Then, a list with all your servers will appear.
- Tap on Setup under the server of your choice to add your bot.
- Check or uncheck the permissions that the bot will have on your server.
- Tap on Authorize to confirm the permissions.
The example bot, MEE6, will help you manage your server when you are away. It acts as an administrator and is in charge of everything that has to do with message moderation, user permissions, and, in short, keeping order in your Discord server. It is a real lifesaver if you are managing a large group. Please note that a server can host a maximum of 5,000 different users.
You will find more bots on pages such as:
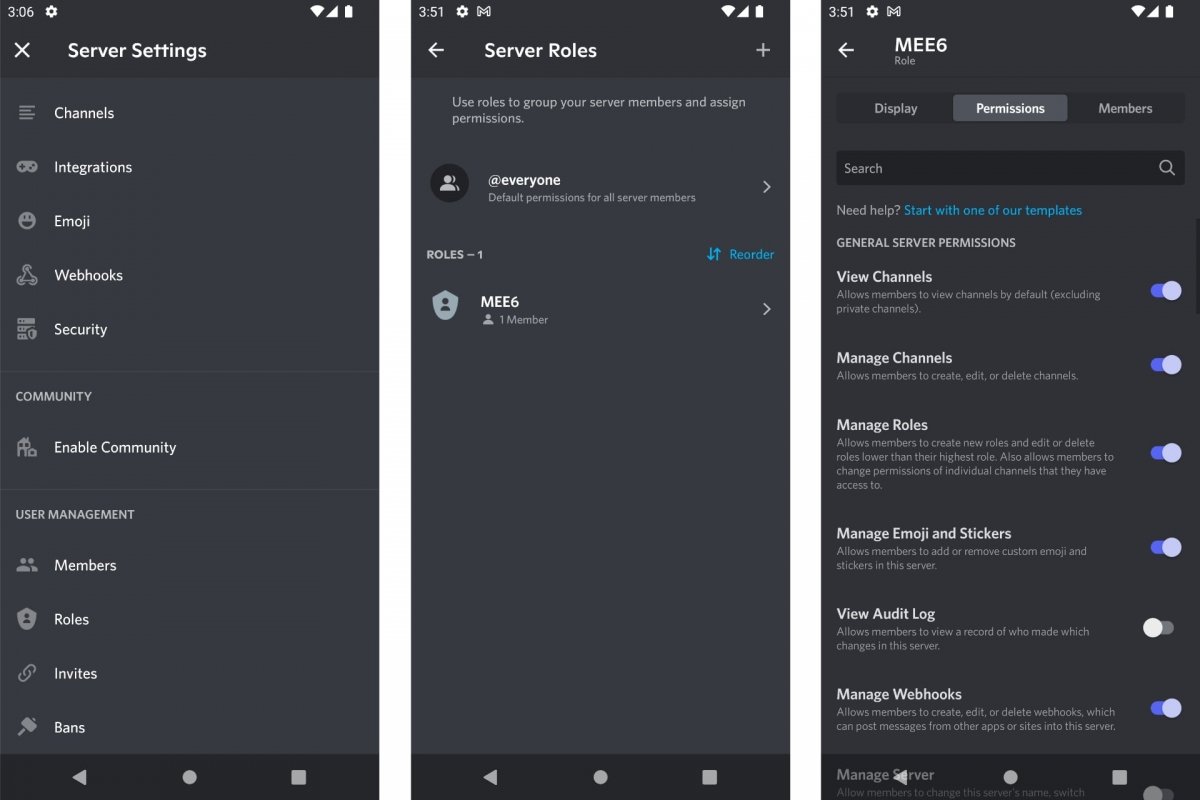
Once the bot is on your server, you can customize it to your liking. For example, in the server configuration (Settings), you will find the roles of each user and bot. Go to Roles, then to the bot section, and customize its features. Pay special attention to the Permissions section. It works the same for bots as it does for users.
How to set up a server in Discord for Android
Discord lets you configure your server to make the experience as satisfying as possible. A private server for a small group of friends is different from a public server for dozens of users. It is necessary to organize the server by creating several channels ( both for text and voice), assigning roles, assigning permissions to different users, and so on.
 Configure your Discord server
To configure your Discord server:
- Tap on its icon in the sidebar.
- Then, scroll through the drop-down menu and tap on Settings.
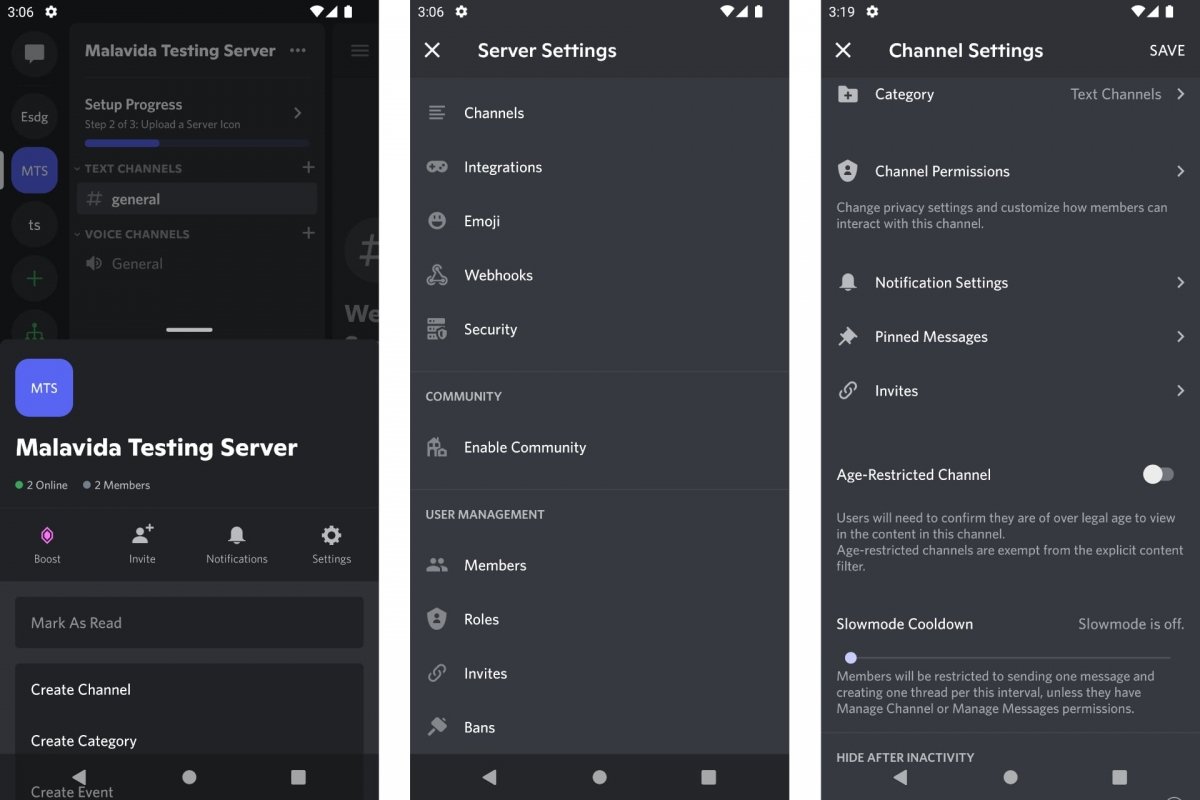
In Settings, you will find several sections. The most important ones are the following:
- Channels: you can configure each text and voice channel and reorder them. Its settings include permissions, notifications, pinning messages, limiting entry by age, and more.
- Emoji: you can create custom emojis to use on your server.
- Members: you can block users, assign them a name, a color, and more.
- Roles: you can decide which users moderate, moderation levels, and so on.
- Invites: you can share invitations to your server and find out who accepts them, among other functions.
- Bans: here, you will see which users are removed from your server for bad behavior.
Finally, if you need more tools to manage your Discord server, you can do it from Settings > Activate Community. On servers with many users, you can enable this option to give more visibility to the server if it is public, view server usage statistics, and more.
How to add voice and text channels to your Discord server
Creating a new voice or text channel on your Discord server is very easy:
- Select the server you want to configure.
- Tap on the + icon for text channels or voice channels, depending on what you want to add.
- Give your channel a name and choose what type of channel it will be: text, voice, or pre-event.
- Also, check if you want to make your channel a private one.
Once you have created your channel, you can enter it and customize it by tapping Edit Channel:
- Select a category for the channel.
- Customize permissions for each kind of user.
- Decide which ads to show and which to mute.
- Specify if you want an age limit on the channel.
How to invite users to your Discord server
There are several ways to invite new users to your Discord server. As we saw before, during the creation process, the platform generates a personalized link you can copy, save, or share on social networks. This link expires after 7 days and has no user limit. After this, you can create more and/or cancel them prematurely from your server configuration section.
 Invite new members to your Discord server
When the server is up and running, you will find the option to invite by tapping on the drop-down menu indicated by three horizontal dots. Among the available options, you will see an Invite button. Tap it, and you will see the link to copy or share. If you access the Settings button, you can change the link duration and the maximum number of users allowed.
You can also invite new users to your server using text or voice channels. Just tap on the icon with two busts, and you will see an Invite Members link. When you select it, the invitation link we saw before will appear.
How to adjust the verification level of your Discord server
To prevent anyone from entering your server and posting comments or sending messages indiscriminately, Discord includes a verification or moderation system. You can activate it from the Server Settings.
 Verification level of your Discord Server
To adjust the verification level of your server:
- Select your server.
- Tap on the drop-down menu (three horizontal dots).
- Select Settings.
- Go to Moderation.
- Choose one of the four verification levels or leave it at None.
The verification levels are:
- Low: the user must have his account email verified.
- Medium: must have been registered for at least 5 minutes.
- High: you must have been a member of this server for at least 10 minutes.
- Highest: You must have a verified smartphone associated with your account.
How to manage the roles or privileges of your Discord server members
Discord allows you to choose who can write or speak in a channel and who can tell others to shut up or let them talk. In other words, it allows you to manage the server and organize a hierarchy to make sure everything works as intended and that chats are useful and not a chaos of meaningless noise. This is the purpose of roles, permissions, and privileges for server members.
As we saw before, you will find the Roles section in the Server Settings. By default, there is a single privilege level, but you can create more levels by tapping on the + button. Thus, on one side will be the users (represented by @everyone), and on the other side, the administrators with different role levels.
 Roles of the members of your Discord server
If you configure each level, you can color-code those users. And, perhaps the most important feature, from Permissions, you will decide what they can and cannot do in the channels and on the server. Take your time, as there are many options to check or uncheck depending on whether you want users with access rights, users who can do or undo things, or users who can manage other members. And from the Members tab, you can add or remove members at each available role level.
It is also possible to manage roles and privileges within each channel. Be careful not to overlap general permissions with channel permissions.
- Enter a text or voice channel.
- Tap on the name of the channel.
- Go to Settings.
- Go to Channel Permissions.
