
Kodi is a very feature-rich entertainment center. This application was designed to streamline the playback of audiovisual content. Including those saved on your Android device and those you find on the Internet. One of its greatest advantages is its ability to get online content with the help of its add-ons. With them, you can make Kodi do virtually anything.
But its versatility comes at a price. Sooner or later, Kodi may stop working as it should. Either its performance suffers, or the application doesn't behave as it should. In other words, it becomes a nuisance. The solution? Return Kodi to its default state to make it work perfectly again. This process is known as resetting, and on Android, you have several ways to use it to get Kodi back up and running smoothly.
How to restore Kodi to its default state to make it work as it did on day one
If Kodi crashes, doesn't run properly, or some add-on has caused it to malfunction, you can fix it by resetting Kodi. There are several methods to do so.
First, if you locate the problem and discover it is related to some Kodi configuration, you can reset the changes to the default ones in each section. You will find the configuration options by tapping the gear cog-shaped button between the off and Kodi search buttons. Once there, in each section, you will see a section that says Reset previous settings to default ones.
 Delete Kodi's cache and storage
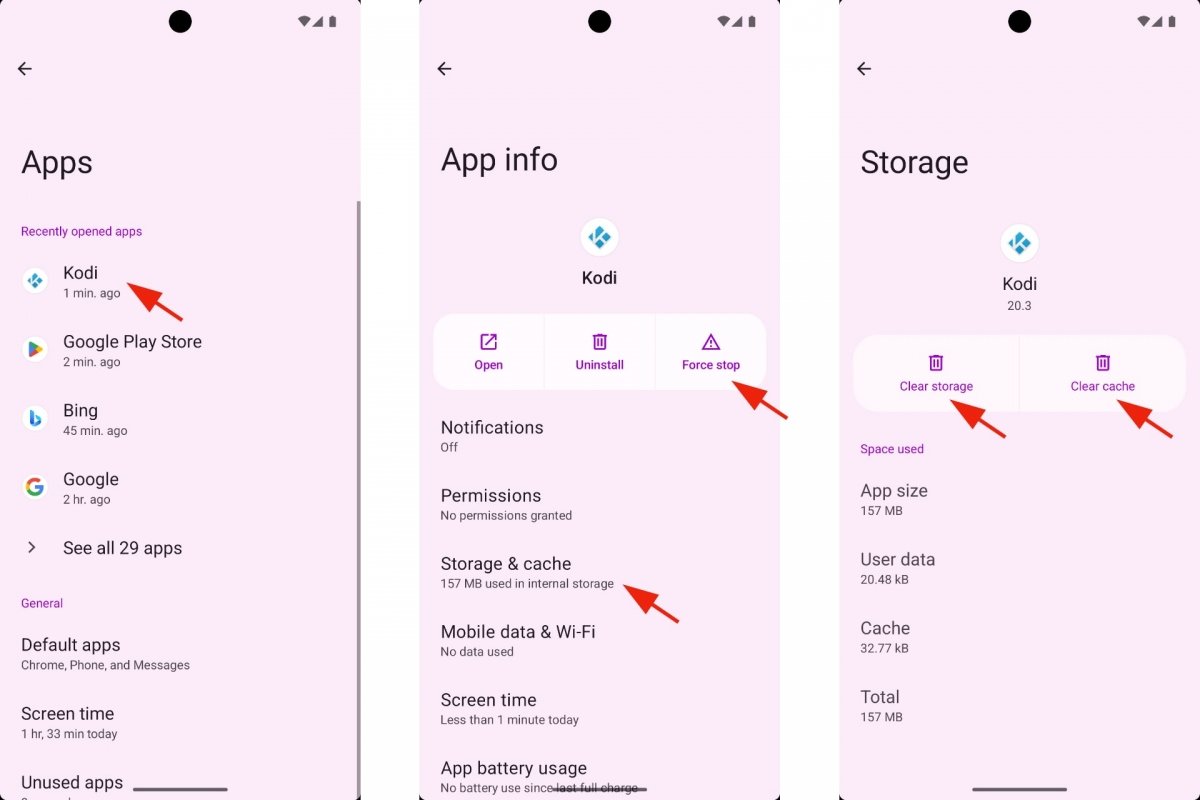
However, more often than not, we don't know why Kodi doesn't work as it should. In that case, if you are on an Android device, you can wipe its data and cache. This solution often works well to solve any problem with any Android application, not just with Kodi. To do this:
- Open your Android Settings.
- Go to Applications.
- Select Kodi.
- Tap on Force stop.
- Now, go to Storage and cache.
- Tap on Clear cache.
- Then, tap on Delete storage.
- You will see a warning: "The data in this application, including files and settings, will be permanently deleted from this device."
- Confirm the process by tapping on Delete.
- Now, open Kodi again and check if it is working as expected.
- The only drawback is that you will have to configure the app again.
The best add-ons to reset Kodi on Android
Another method often suggested by Kodi users to reset this application is to install a dedicated add-on to do this task. Since Kodi's configuration options do not include a button to reset the entire application, we must install an add-on for this. Kodi's add-on installation process is always the same. The only thing that changes is the repository link from which we will download the installer.
The most popular add-on for resetting Kodi is Fresh Start. However, due to legal issues, its repository, Ares Wizard, is no longer online. Although it is possible to find an installer, the installation fails because of a dependency related to the Python version used on the latest Kodi version. Another popular add-on that is now out of service is Indigo.
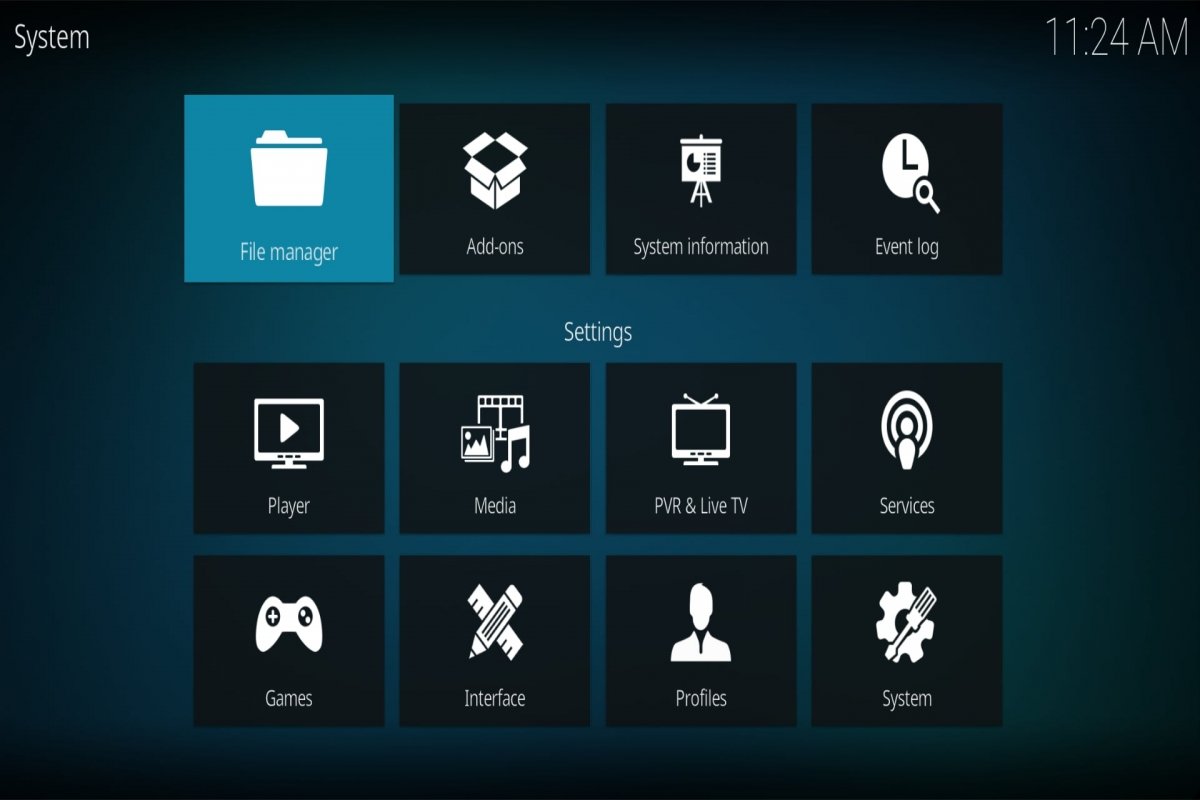 Kodi's settings menu
But as you will see, there are endless add-ons for all kinds of tasks. For example, clearing Kodi's cache. As we saw above, wiping Kodi's cache can solve performance issues, whether you do it from the app options, with the help of an add-on, or from the Android Settings.
To install an add-on in Kodi:
- Open Kodi.
- Go to the Settings section. It is the gear cog-shaped icon.
- Go to the File manager.
- Tap on Add source.
- Tap on None.
- Enter the repository link.
- Assign an easy-to-remember name and tap on OK.
- Now, go to Add-ons.
- Tap on the open box-shaped icon. This is the Add-on Browser.
- Select the option Install from zip file. You may need to enable the third-party installation option.
- If you see the warning message, tap Settings, enable the Unknown sources option, and confirm again.
- Go back to the Add-on browser, and go to Install from zip file.
- Choose the source you added before.
- Now, select the ZIP file shown in the repository and tap OK.
- Once the repository is installed, go to Install from repository.
- Select this repository.
- Once inside, you can choose the add-on to install.
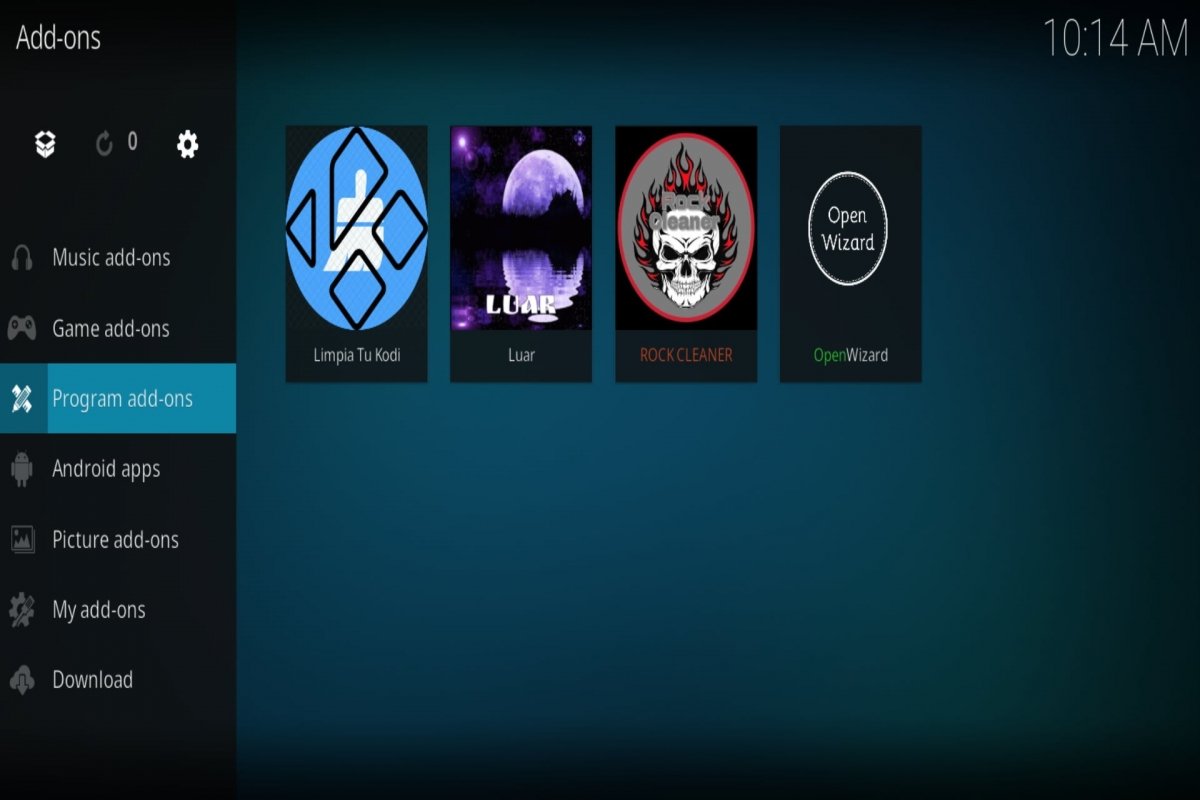
- When the installation finishes, you will find the add-on under the Add-ons section in the main menu.
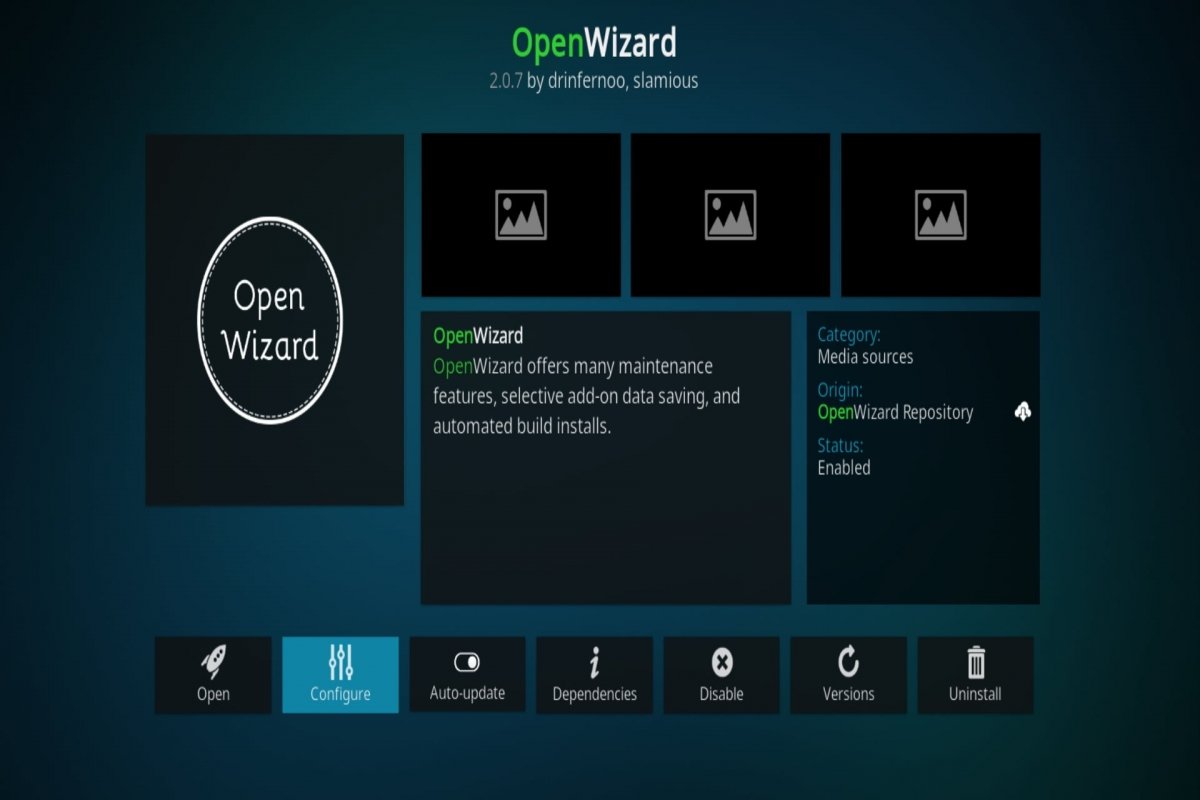
Open Wizard
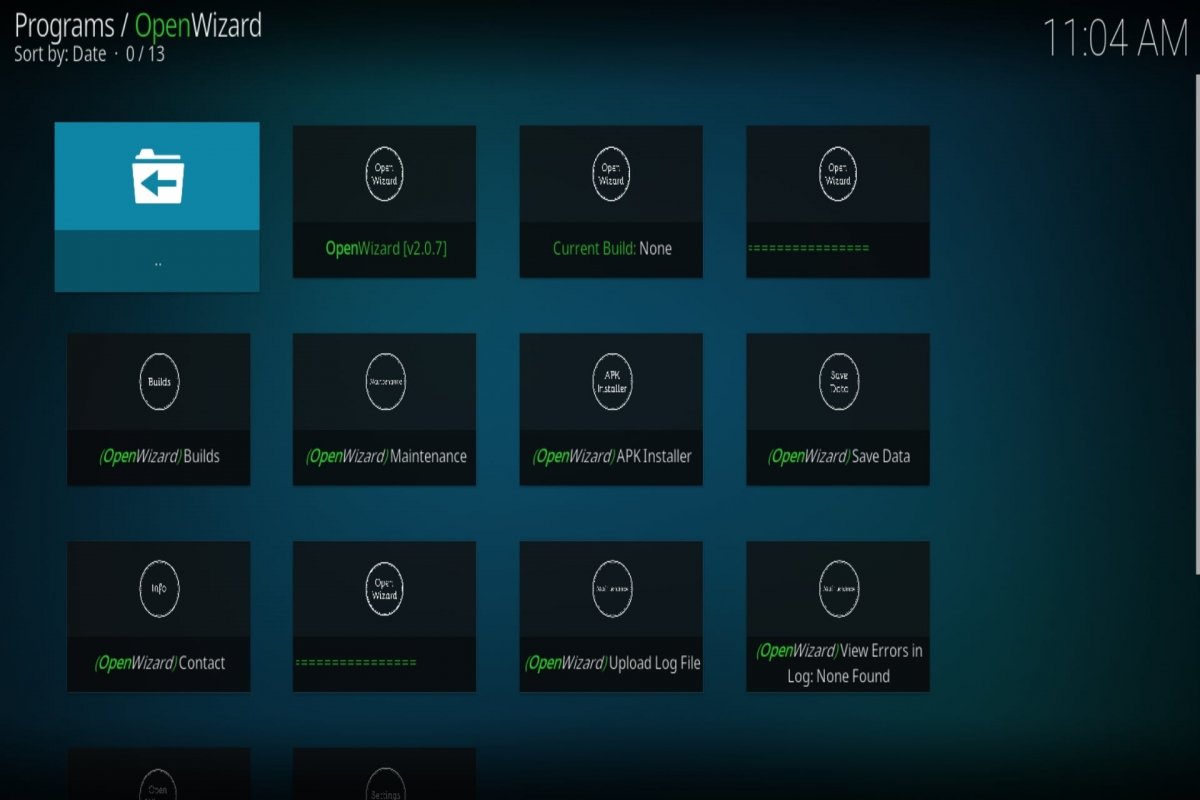 Opening Open Wizard for Kodi
We will begin with Ares Wizard's and Indigo's natural heir. This add-on offers several cleaning options for cleaning Kodi files that might be causing its errors, such as the cache, previously downloaded packages, databases, etc. In addition, it also lets you access the log files to see the error in detail. However, we are particularly interested in the option of resetting Kodi completely.
 The Open Wizard installer
To install Open Wizard on Kodi:
- Open Kodi.
- Go to Settings.
- Go to the File Explorer.
- Tap on Add source.
- Tap on None.
- Add the https://a4k-openproject.github.io/repository.openwizard/ repository and give it a name.
- Go back to the main menu.
- Go to Add-ons.
- Tap the Add-ons Explorer icon.
- Go to Install from zip file.
- Tap the repository name.
- Select the zip installer.
- Now, go back to Install from repository.
- Tap on OpenWizard Repository.
- Go to Program Add-ons.
- Tap on OpenWizard.
- You will find the Open Wizard app under Add-ons.
Rock Cleaner
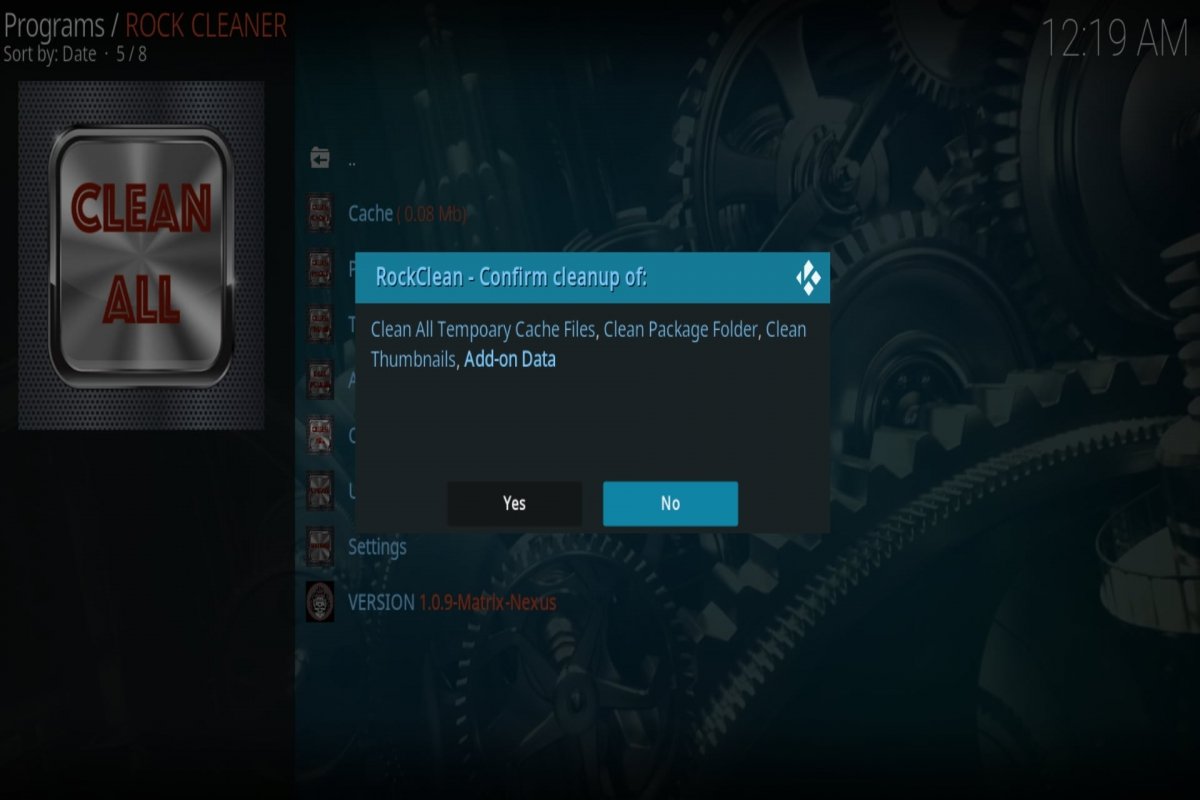 Rock Cleaner for Kodi's menu
Another useful cleaning add-on for Kodi is Rock Cleaner. This is a program add-on for deleting cache, packages, thumbnails, and other files and data. It offers a way to undo the changes done and return Kodi to its default settings. Plus, you'll recover storage space on your Android smartphone.
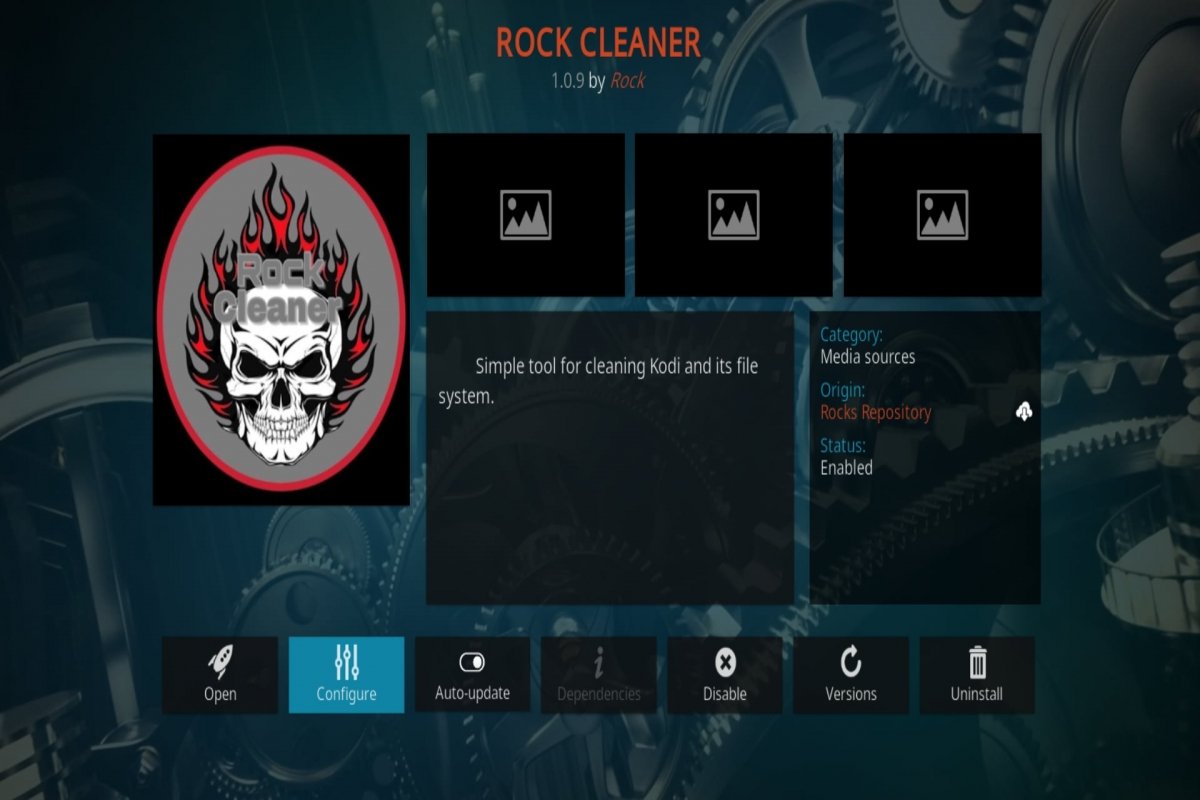 The Rock Cleaner installer
To install Rock Clean on Kodi:
- Open Kodi.
- Go to Settings.
- Go to the File Explorer.
- Tap on Add source.
- Tap on None.
- Add the https://rockodi.com/ repository and give it a name.
- Go back to the main menu.
- Go to Add-ons.
- Tap the Add-ons Explorer icon.
- Go to Install from zip file.
- Tap the repository name.
- Select the Rockcrusher zip installer.
- Now, go back to Install from repository.
- Tap on Rocks Repository.
- Go to Program Add-ons.
- Tap on RockCleaner.
- You will find the Rock Cleaner app under Add-ons.
Limpia Tu Kodi
 Opening Limpia Tu Kodi
As a third option, we recommend this add-on to wipe the cache and other elements that may interfere with Kodi's performance. Thanks to this add-on, you can reset Kodi and make it run smoothly again.
To install Limpia Tu Kodi on Kodi:
- Open Kodi.
- Go to Settings.
- Go to the File Explorer.
- Tap on Add source.
- Tap on None.
- Add the https://luarsource.github.io/Fuente/ repository and give it a name.
- Go back to the main menu.
- Go to Add-ons.
- Tap the Add-ons Explorer icon.
- Go to Install from zip file.
- Tap the repository name.
- Select the Luar zip installer.
- Now, go back to Install from repository.
- You will find Luar in Program Add-ons, under Add-ons.
- Once inside, you will see several tools you can install.
- The one we are looking for is called Limpia Tu Kodi.
- You will find it inside Scripts, under Addons, scripts, and repositories.
- Once installed, you will find it in Program Add-ons, under Add-ons.
