

There are several ways to install MODs in Minecraft for PC, it all depends on the type of MOD you got. They are available through third-party websites and are not officially supported by the creators of Minecraft, so their installation involves a risk that the user assumes since in many cases, they modify and change the content of the game.
Some MODs are self-installable (less and less) while others require third-party launchers such as Minecraft Forge or Liteloader. You will have to pay attention to the particular instructions of the MOD you want to install.
Below, we will explain the main ways to install MODs, but there is one thing to keep in mind first. Each MOD is developed for a specific version of the game. Pay close attention to the installation instructions provided by its developers as they may have specific requirements. You may be able to install a MOD on a version of Minecraft that is not compatible at first, but you expose yourself to problems and bugs. Remember that they are not a native function, and therefore, do not have official support beyond that offered by their own creators or other users of that MOD.
How to install Minecraft MODs with Minecraft Forge
Minecraft Forge is currently the most popular tool for installing MODs. It is a modified version that facilitates the installation of MODs, and at the same time, avoids that if we have more than one, they conflict with each other.
Note that you will need to have Java installed, and we are not talking about the version that installs the game by default, but the full version. You can download it by clicking on the button below. In the archive, you will find the 32-bit and 64-bit versions of Java, be sure to install the one that corresponds to the architecture of your operating system.
Close Minecraft if it is running. Once Java is installed, double click on the Minecraft Forge JAR file. Select Install client and click on Ok at the bottom (make sure you have an Internet connection to download the necessary libraries).
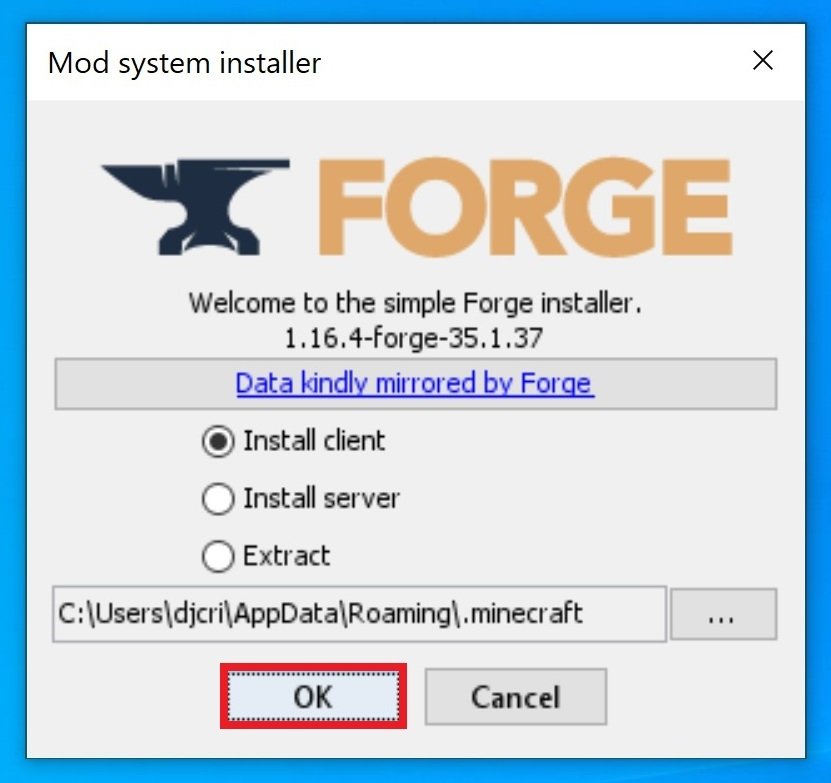 Installing the Forge client
When the download and installation process is complete, you will receive a notification, click on Ok.
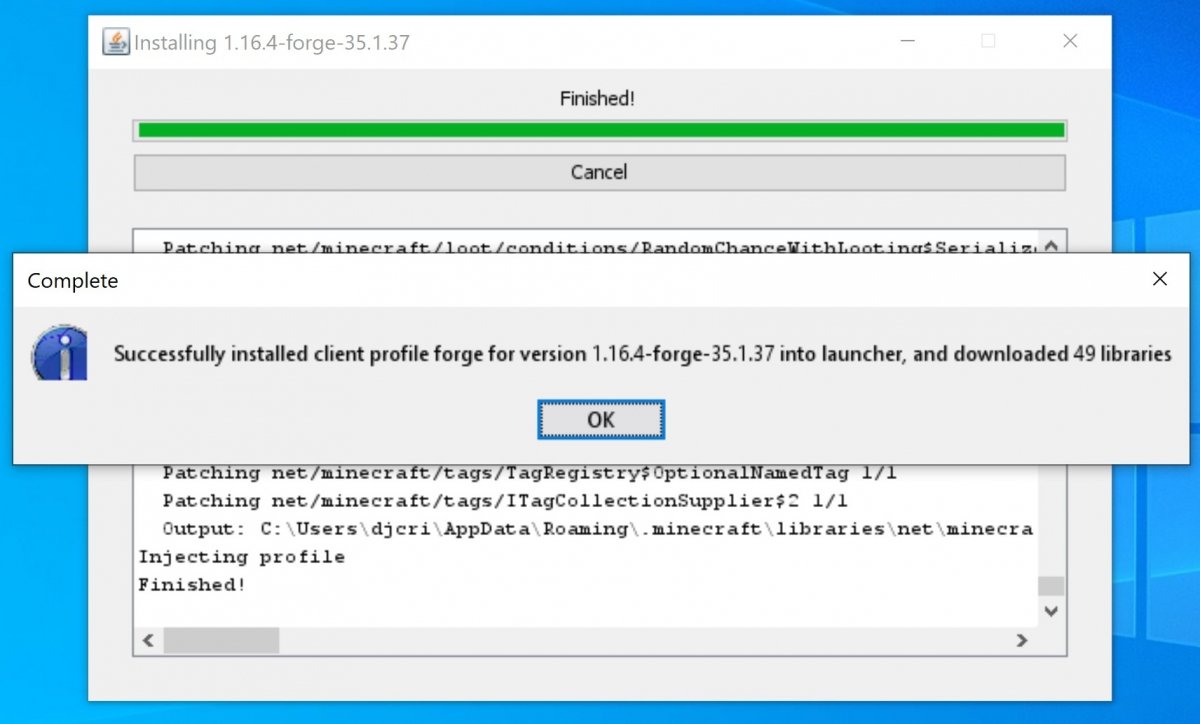 Minecraft Forge installed
Now, go back to the usual launcher or client. Just to the left of the Play button, you should see a new Forge profile installed, so far so good.
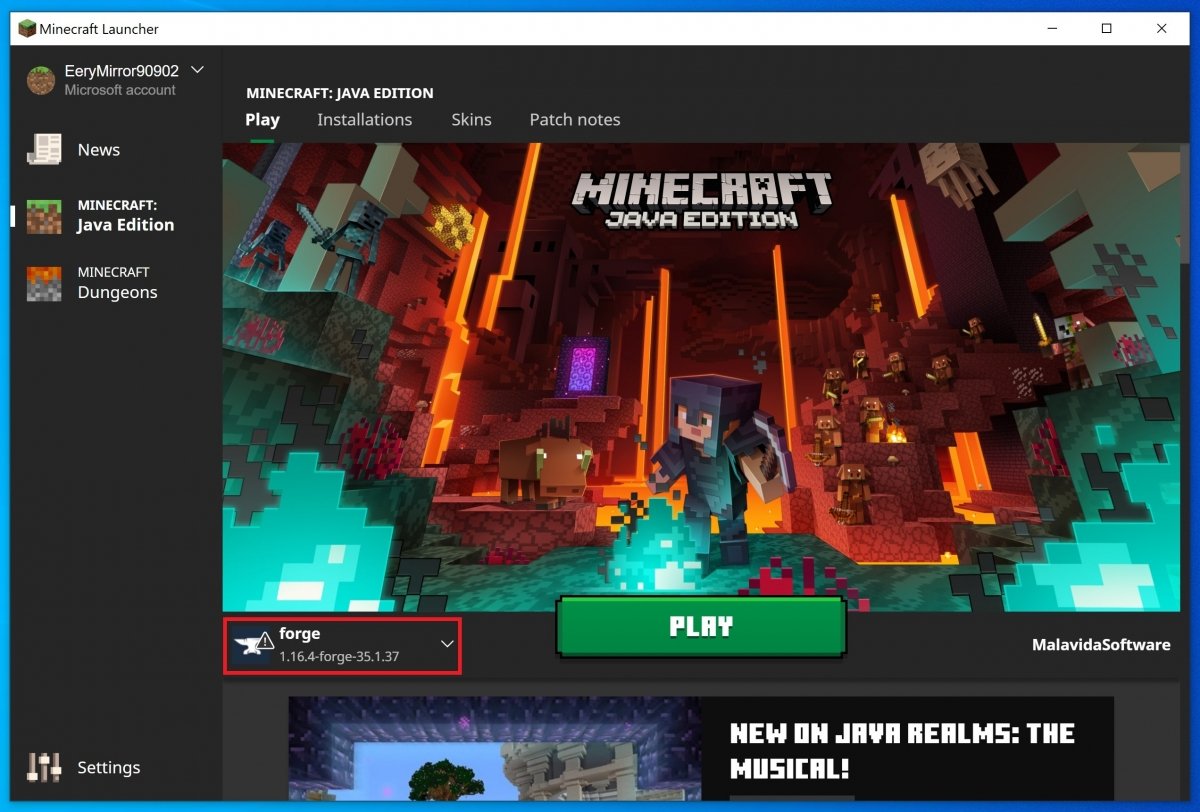 Make sure that the Forge profile is available
Your next step is to download the MOD you want to install. There are plenty of web pages of third party developers from where you can download them. Some of the most popular websites for this are Minecrafteo, Planet Minecraft, Minecraftmods, or Zonacraft. There, you will find the MOD you are looking for, they all offer MODs compatible with Forge.
What you will download will be a new JAR file that needs to be placed in the mods folder of the game. How to locate this folder? First, press the Windows key on your keyboard to open the Start menu. Type directly %AppData% to search: you will get this directory as a result, enter it.
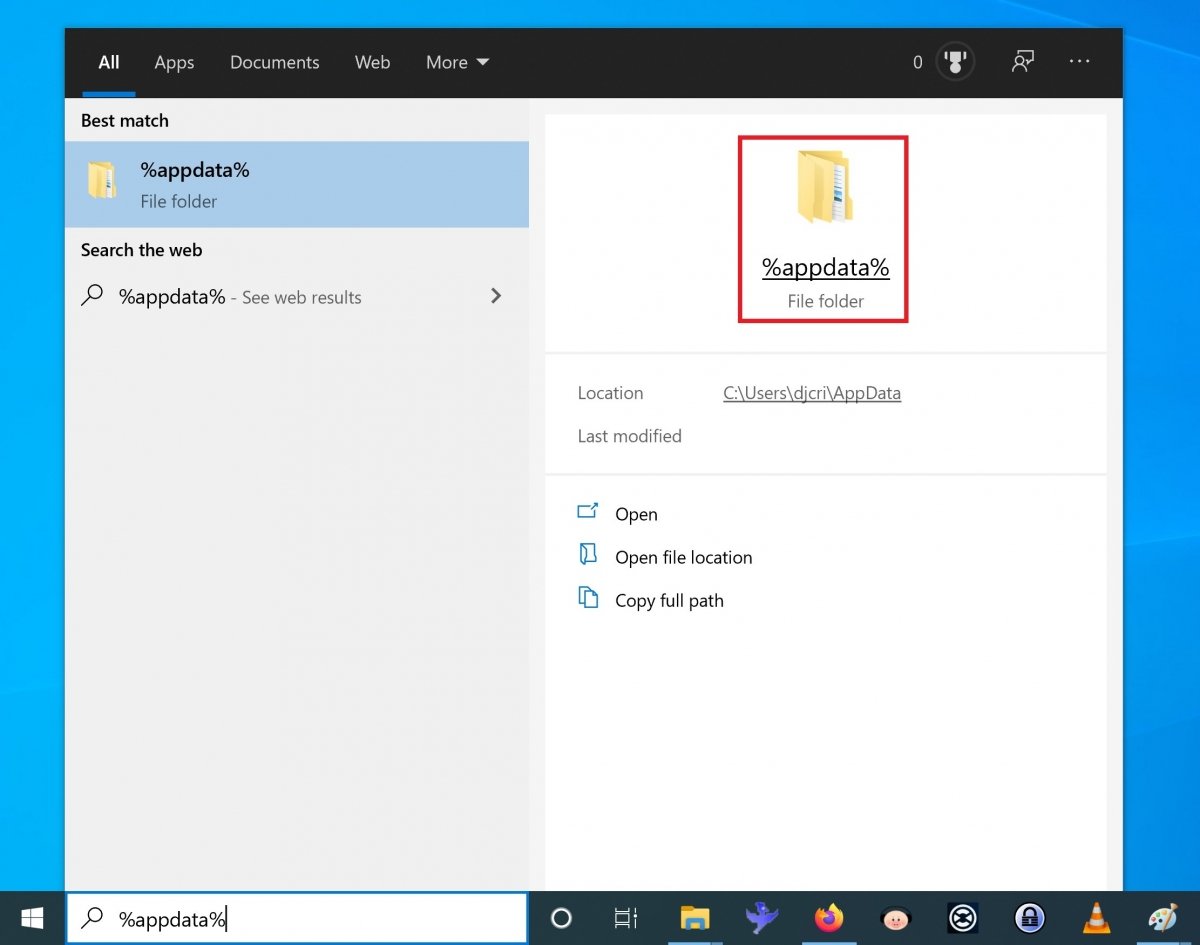 Locate the data folder
Look for the Minecraft folder among all available folders and access it.
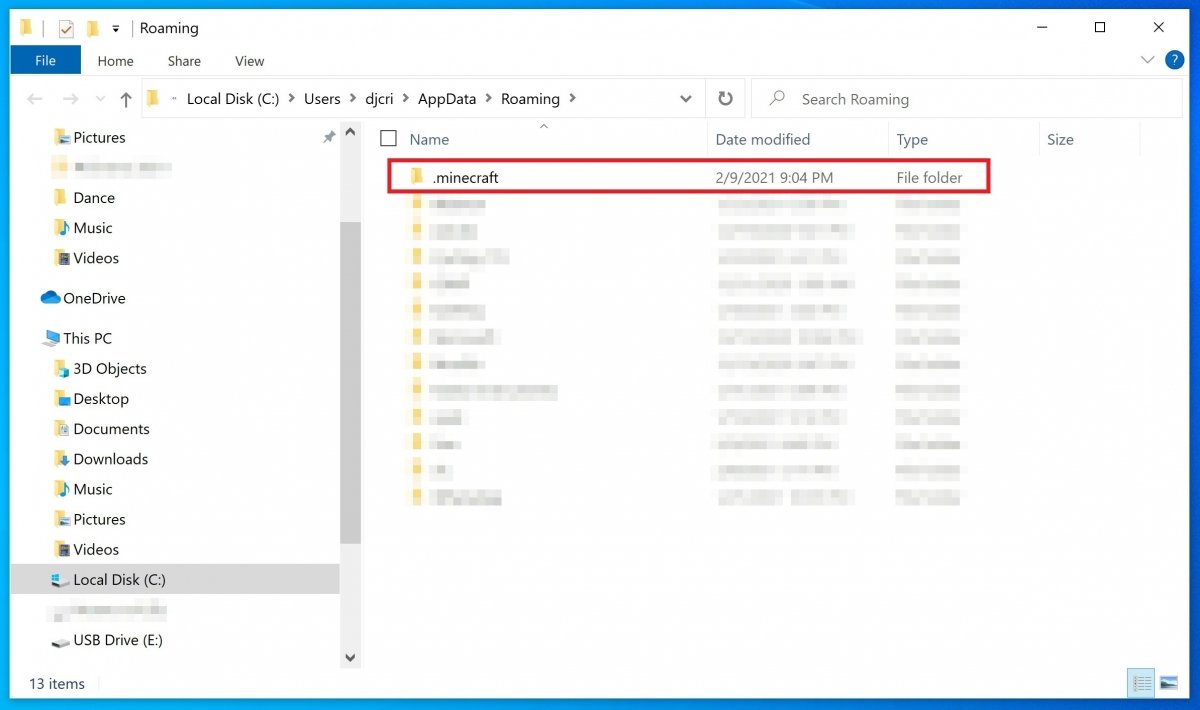 Access the Minecraft folder
Inside this folder, you must look for the mods folder. If you cannot find it, create it yourself manually.
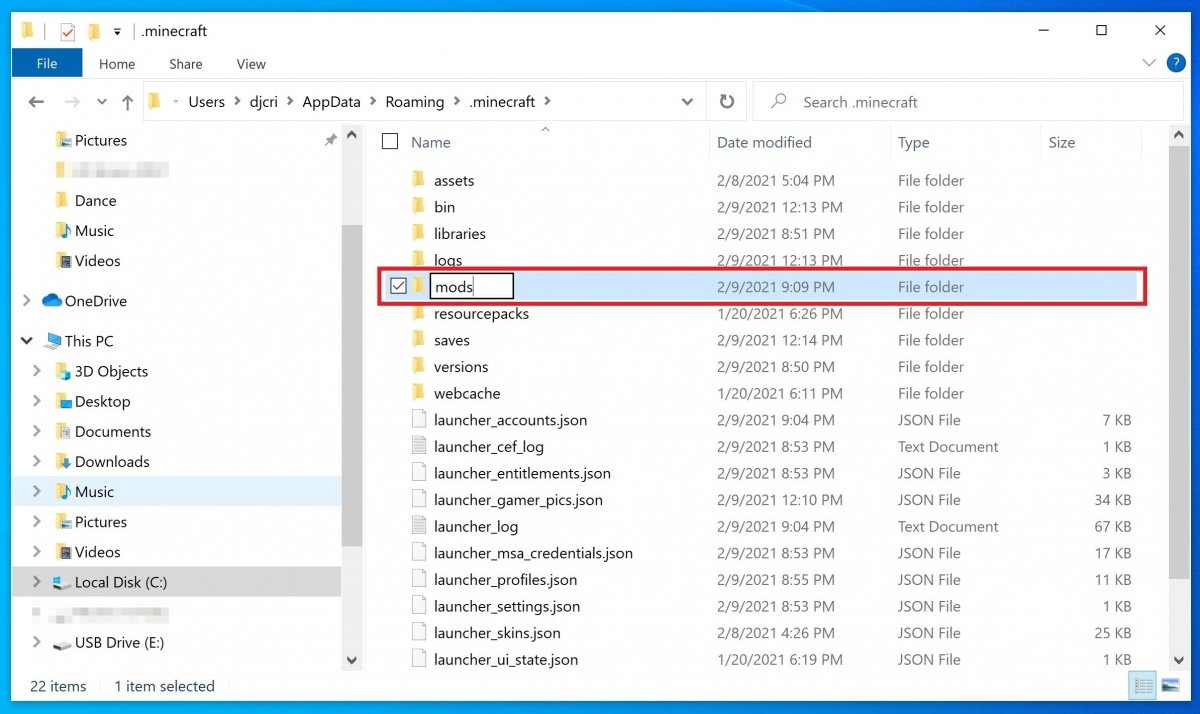 Access mods or create the folder if it does not exist
Now, take the JAR file of the MOD that you have previously downloaded and put it inside this folder.
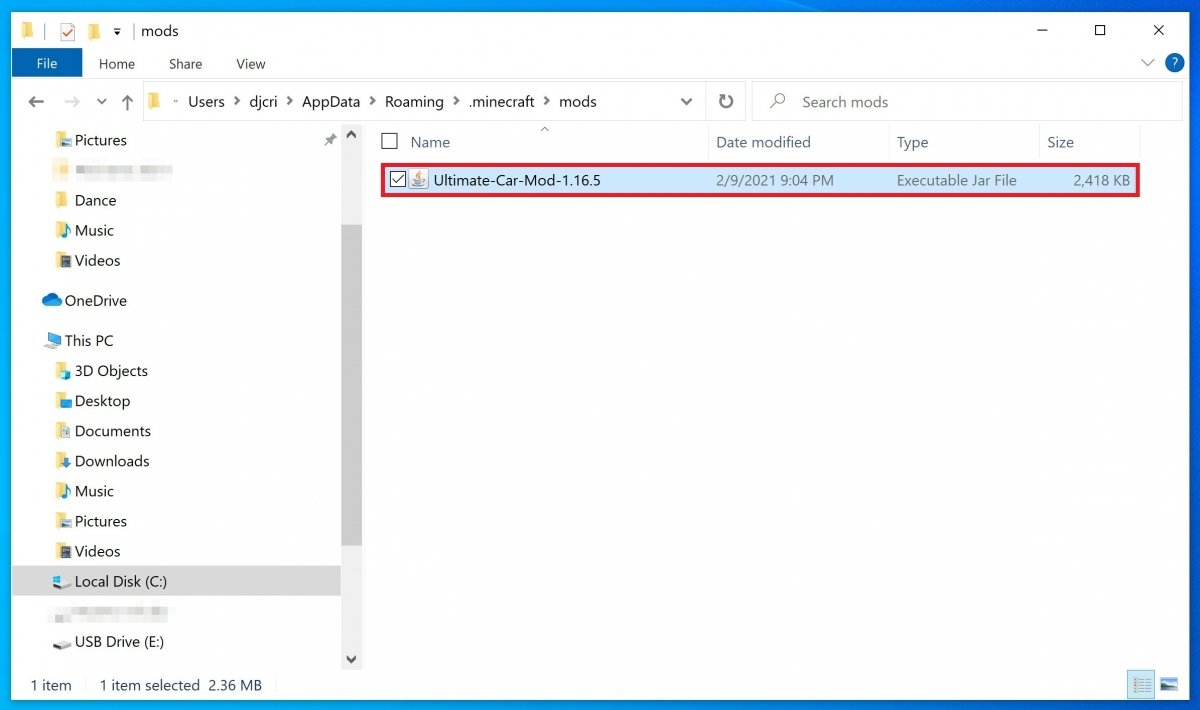 Save your MODs here
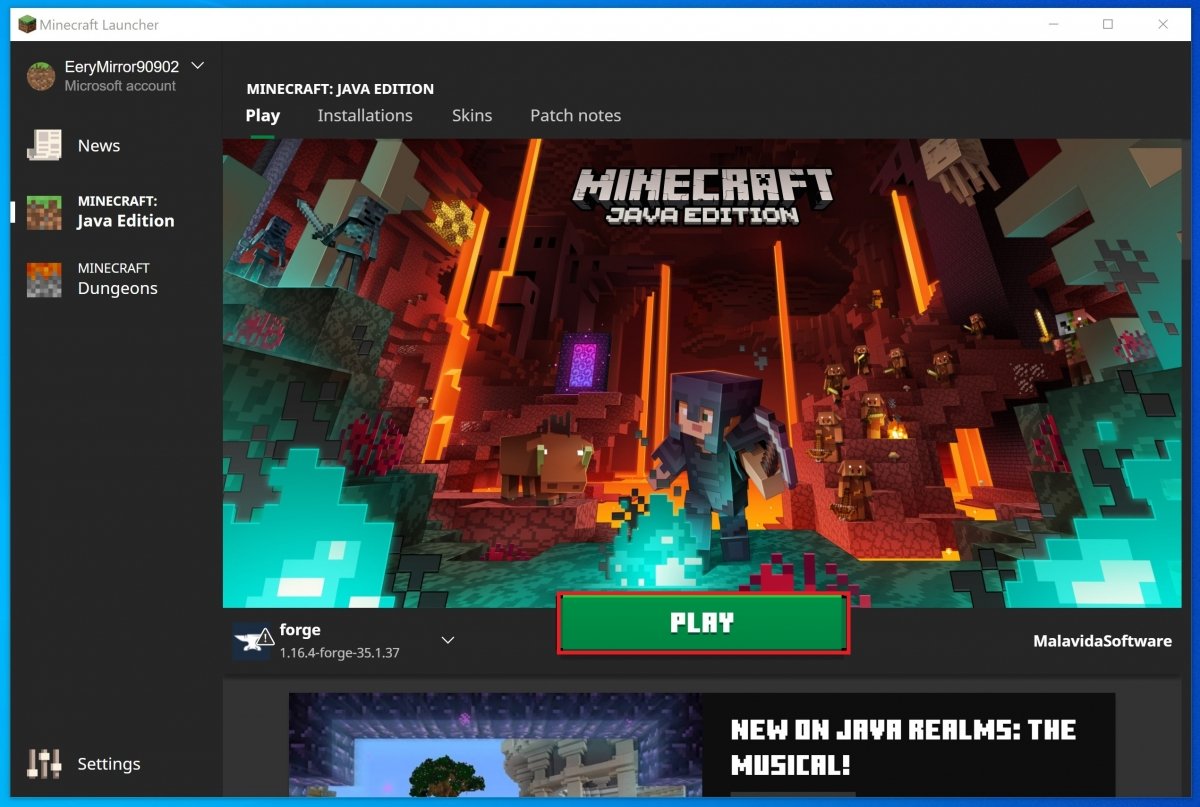
With all these steps completed, return to the Minecraft client. Make sure you have selected the Minecraft Forge profile, and click on Play.
 Press Play to start the game
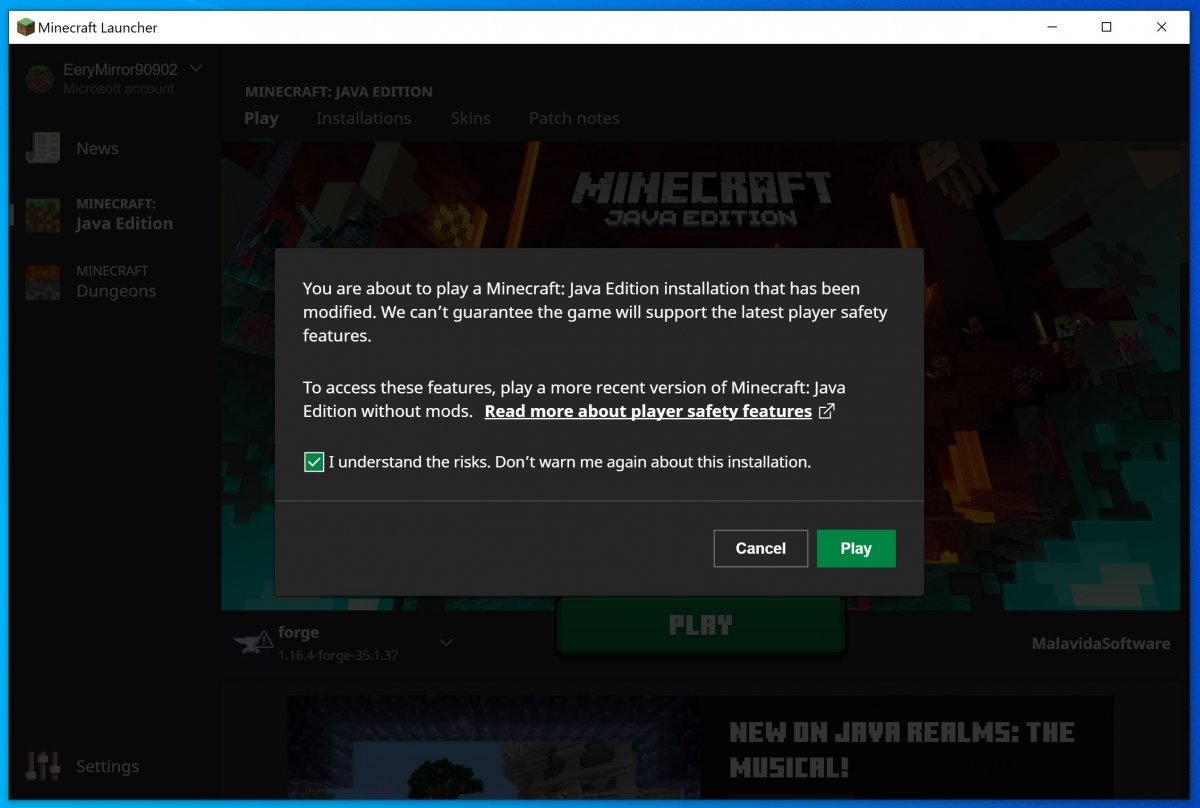
A warning window will inform you that the game configuration has changed and that it is not possible to ensure 100% correct operation of the game, risks derived from the installation of new MODs. Click on Play to continue.
 Notice about possible bugs in the game
You will get to the usual game preview window. If you notice, at the bottom, you have a Mods button.
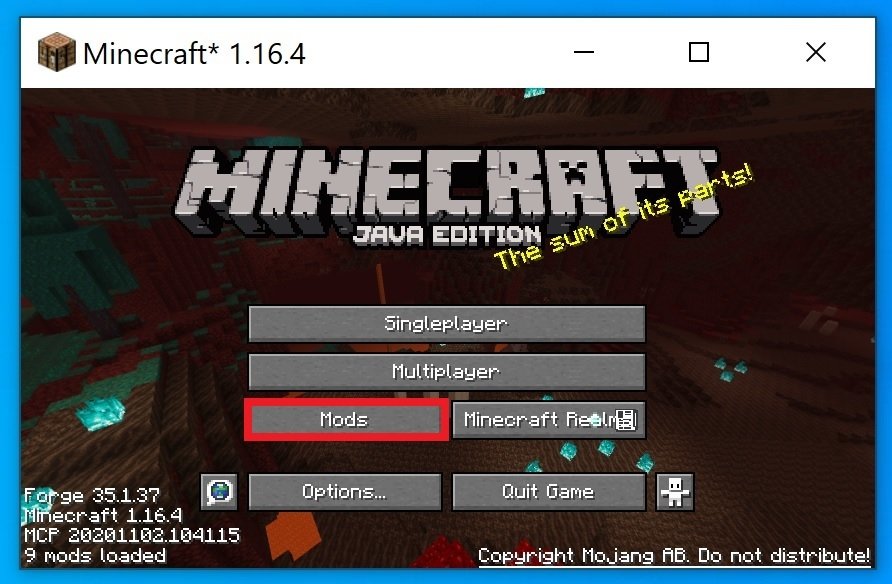 Press Mods to see which ones are installed
By clicking on it, you will be able to see all the installed MODs. Here, you will see if there is a problem with any of your MODs, such as a missing library or file needed to function properly. It acts as an information and warning screen.
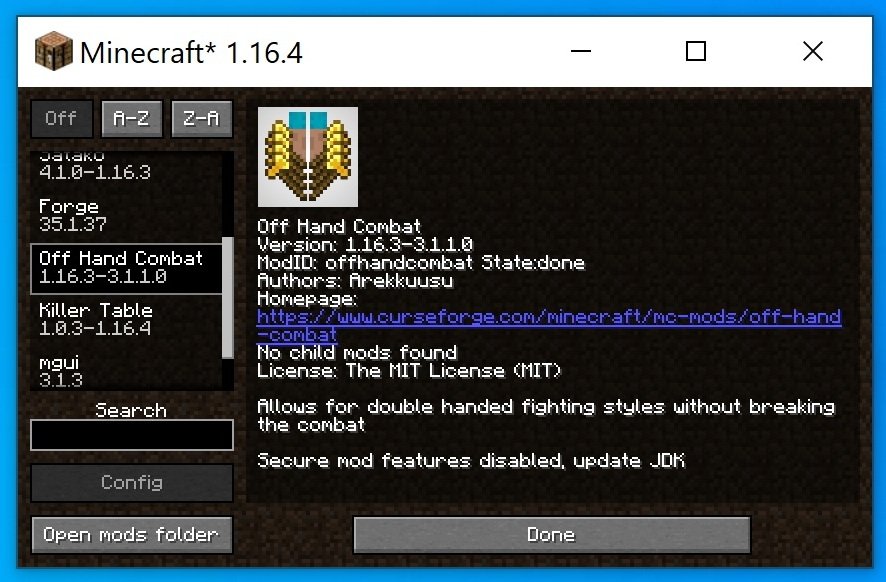 Information about the different MODs available
When you have finished making your checks, just click on Done to return to the previous screen and start your game. If you have done everything correctly, the Mods will be active.
Self-installing MODs
As we have seen, there are several types of MODs. The simplest are those that can be installed on their own in Minecraft. However, there are not many Mods of this type, and those that exist, tend to focus on some minor aspects of the game, so their usefulness is decreasing.
In these cases, all you have to do is download the MOD file, run the JAR file, and follow the instructions on the screen. Usually, you will find a small installation window, click on Install and wait a few seconds for the process to complete. Then, launch the Minecraft client and start a game. If everything went correctly, the MOD should be available for the game.
Versions lower to Minecraft 1.6
In older versions of Minecraft, the installation of MODs is different:
- Step 1: First, download the MOD you want to install in your version of Minecraft. Make sure it is compatible with your version of the game, and keep in mind that many need other MODs to be installed. You will need an archive decompressor such as WinRAR, and you will also need to configure in the Windows folder options the display of hidden archives and system files.
- Step 2: Go to the Windows Start menu, select Run... and type in the pop-up box "%appdata%". When you click OK, you will see a directory with different folders, including one called .minecraft. Inside it, there should be another directory called bin. Search inside it for the minecraft.jar file. Use the context menu to open this file with your usual file decompressor.
- Step 3: Inside the JAR file, you must locate and delete the META-INF folder. If you do not do so, it will be impossible to open the game once the MOD is installed. Note that if you have installed any other MOD before, this folder may have already been deleted.
- Step 4: Now, go to the folder that stores the files of the MOD you want to install. There, you will find a series of files with .class extension, either in the main folder or the bin subfolder.
- Step 5: Drag them into the minecraft.jar file. If there is any Readme file, it is a good idea to take a look at it, as it might contain important indications on how to operate to install that particular MOD. Check that there are no other files that also need to be included in the specific installation of your MOD. Some also require a specific configuration that you can find on the author's website or the download page of your new MOD.
Once these steps are done, close the minecraft.jar file and launch the game. If everything went ok, your new MOD will be installed and ready for use.
