
Windows Defender, now called Windows Security, is a security solution integrated into the Microsoft operating system. Although keeping this tool active is beneficial, there are times when it is better to disable it. In this article, we explain to you how to do it.
How to temporarily disable Windows Defender in Windows 11
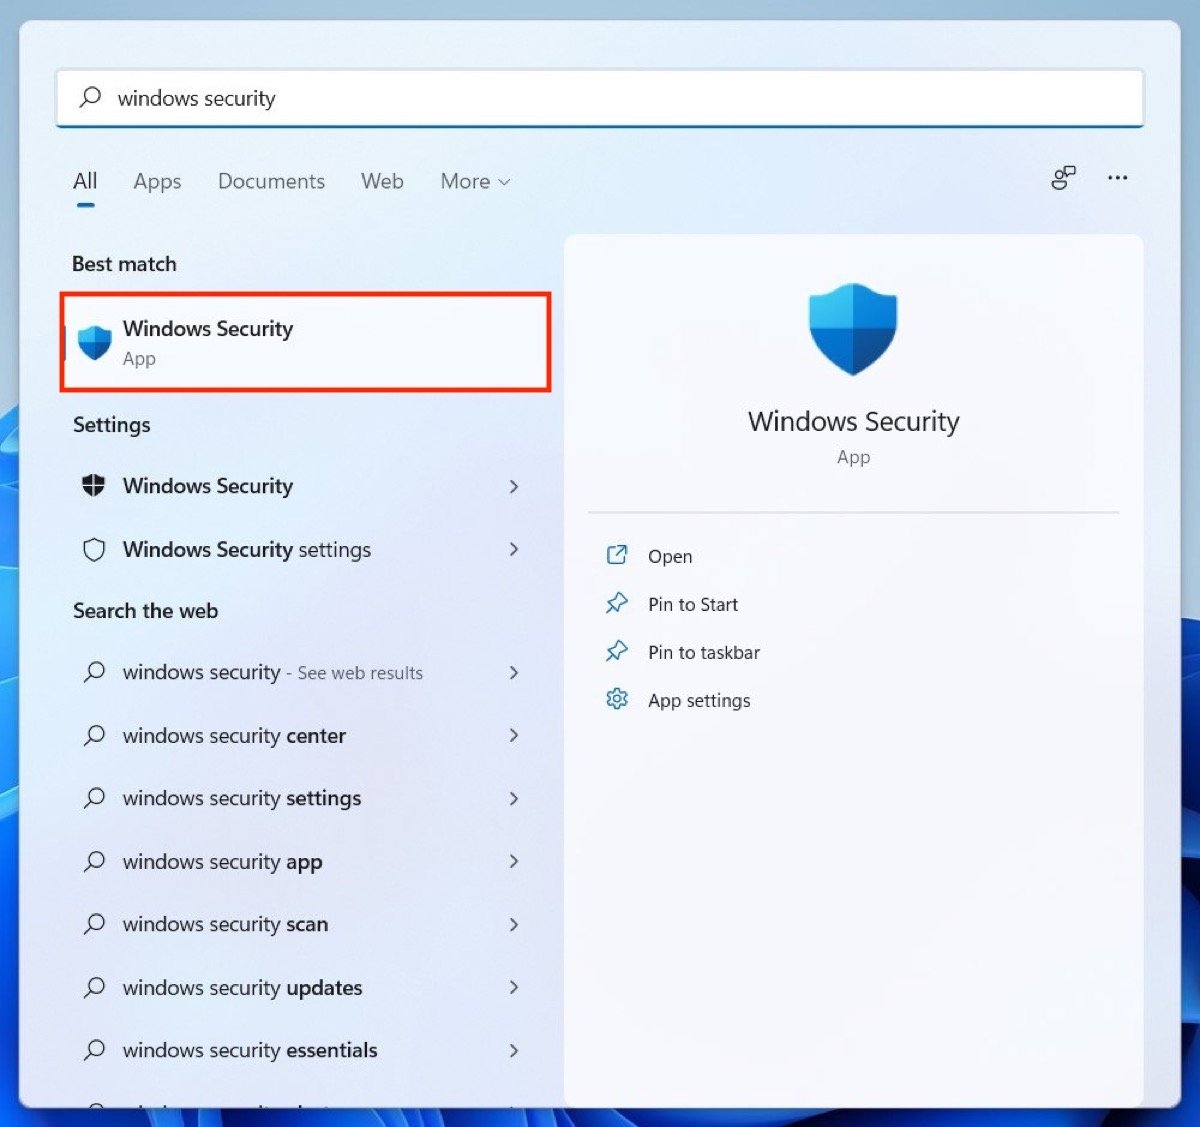
Windows 11 antivirus can be temporarily disabled in a very simple way. Simply locate Windows Security in the Windows search and click on the first result.
 Open the Windows Security option
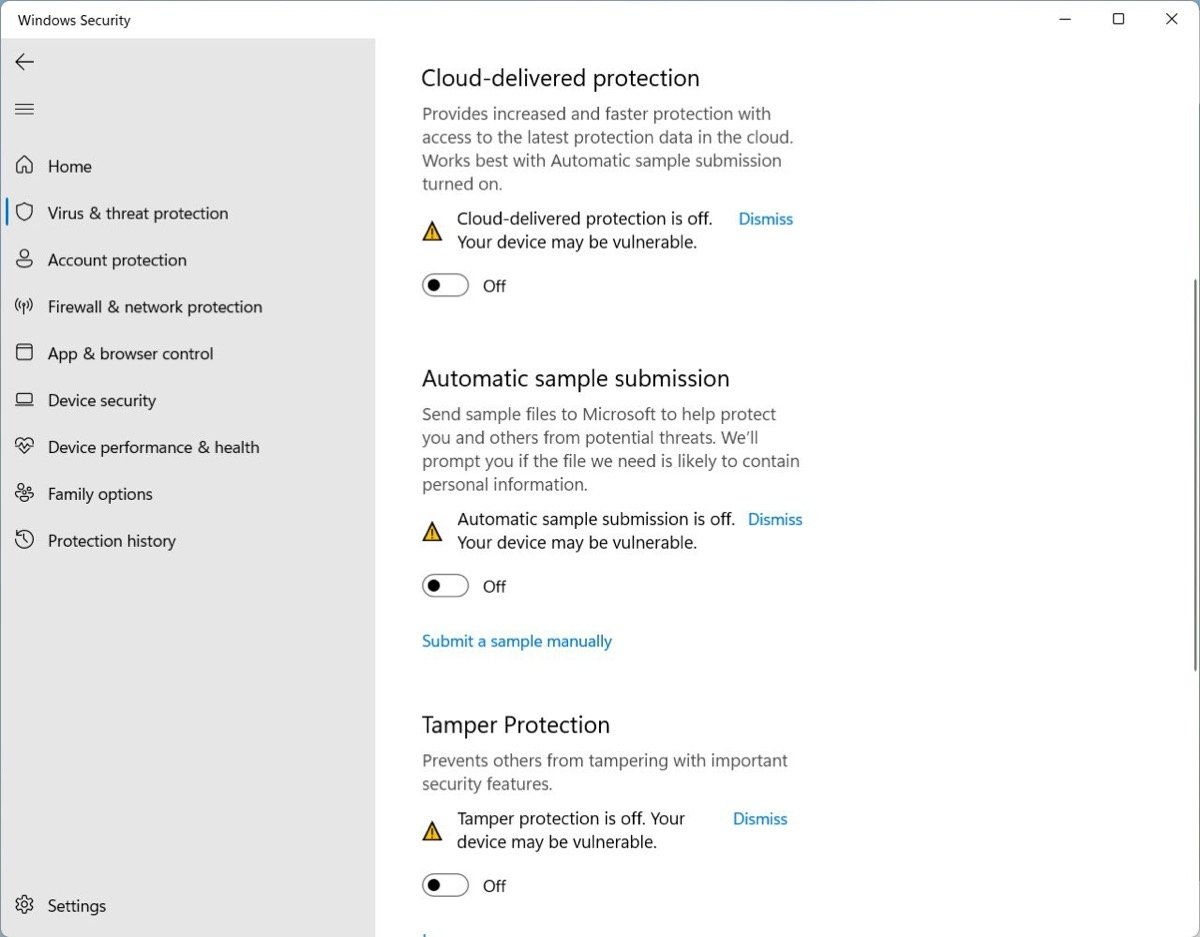
Next, open the Virus & threat protection section to view the related options.
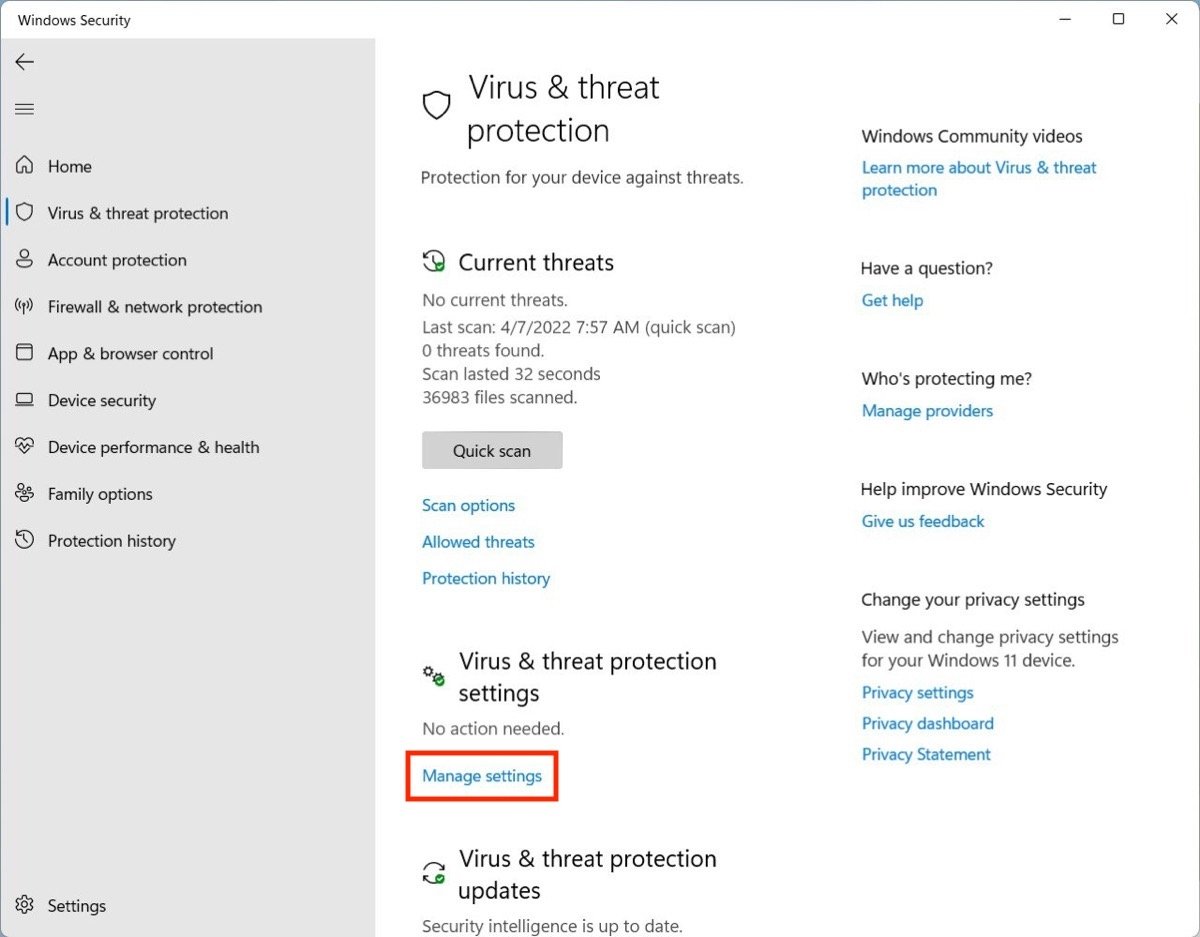 Access the advanced antivirus protection options
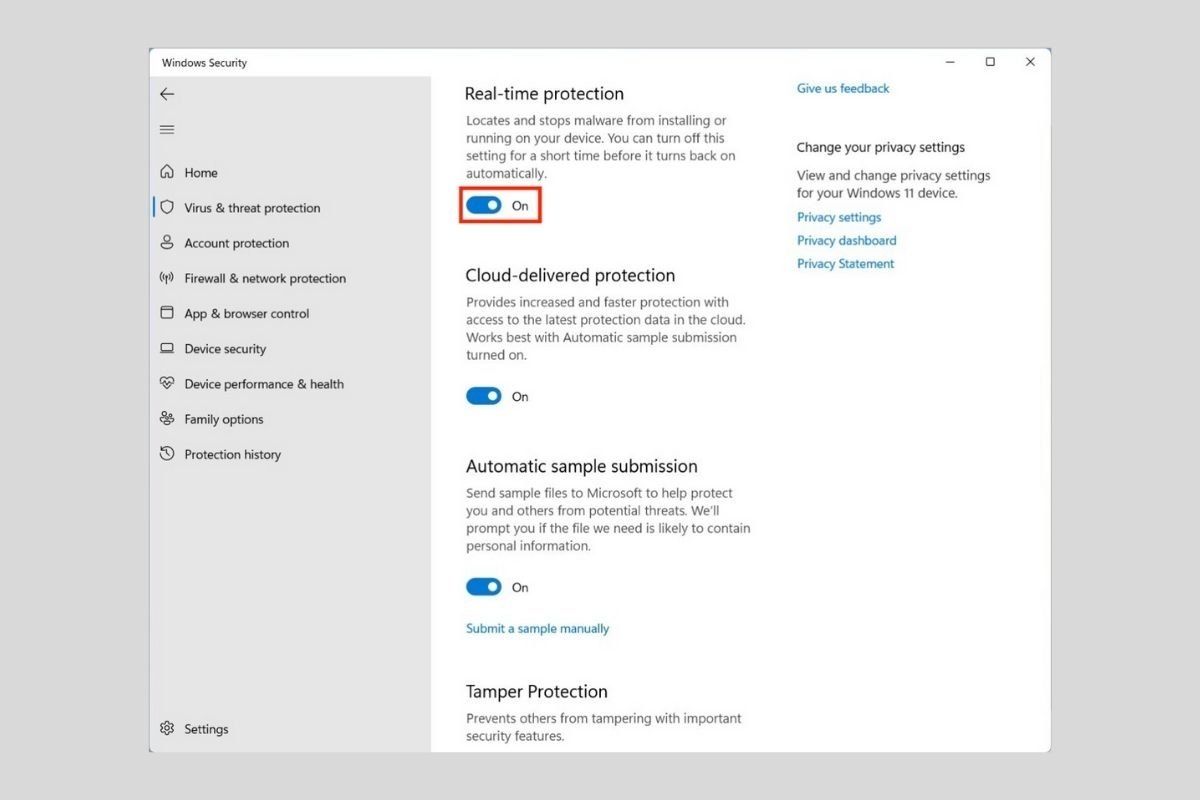
Under the Real-time protection section, you will see a slider. Click on it to disable Windows Defender and its real-time protection.
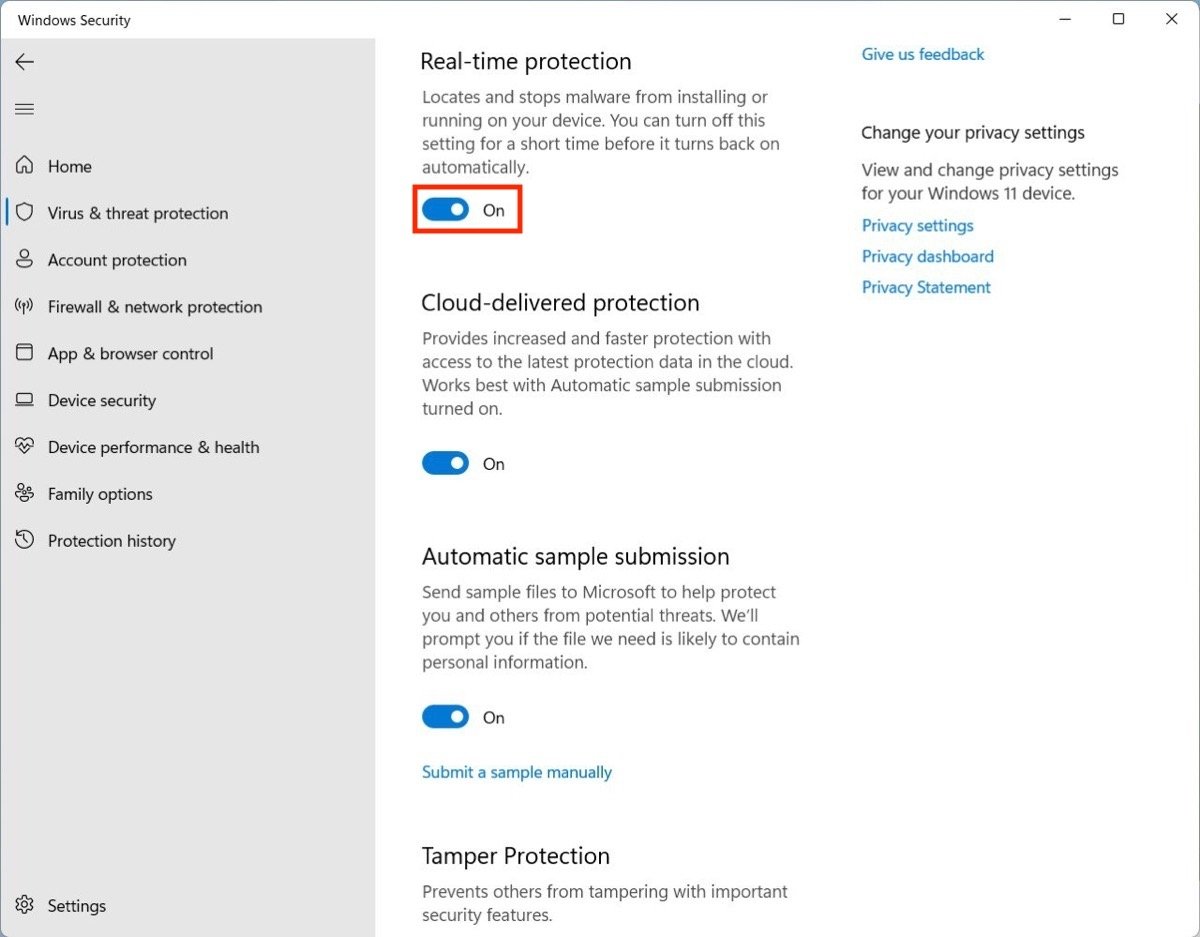 Disable the real-time protection
In addition, it is possible to switch off other safety functions. Next to each of them, you will see a warning symbol reminding you that it is not recommended to do this.
 Turn off the rest of the Windows Security options
When finished, close the window, and use the computer without Windows Defender protection. Remember that, after a while, all the features you have disabled will be automatically re-enabled. This is the step-by-step summary of how to temporarily disable the native antivirus:
- Search for Windows Security in the Windows search box and click the first result.
- Go toVirus & threat protection.
- Deactivate Windows Defender with the Real-time protection slider
How to disable Windows Defender in Windows 11 completely
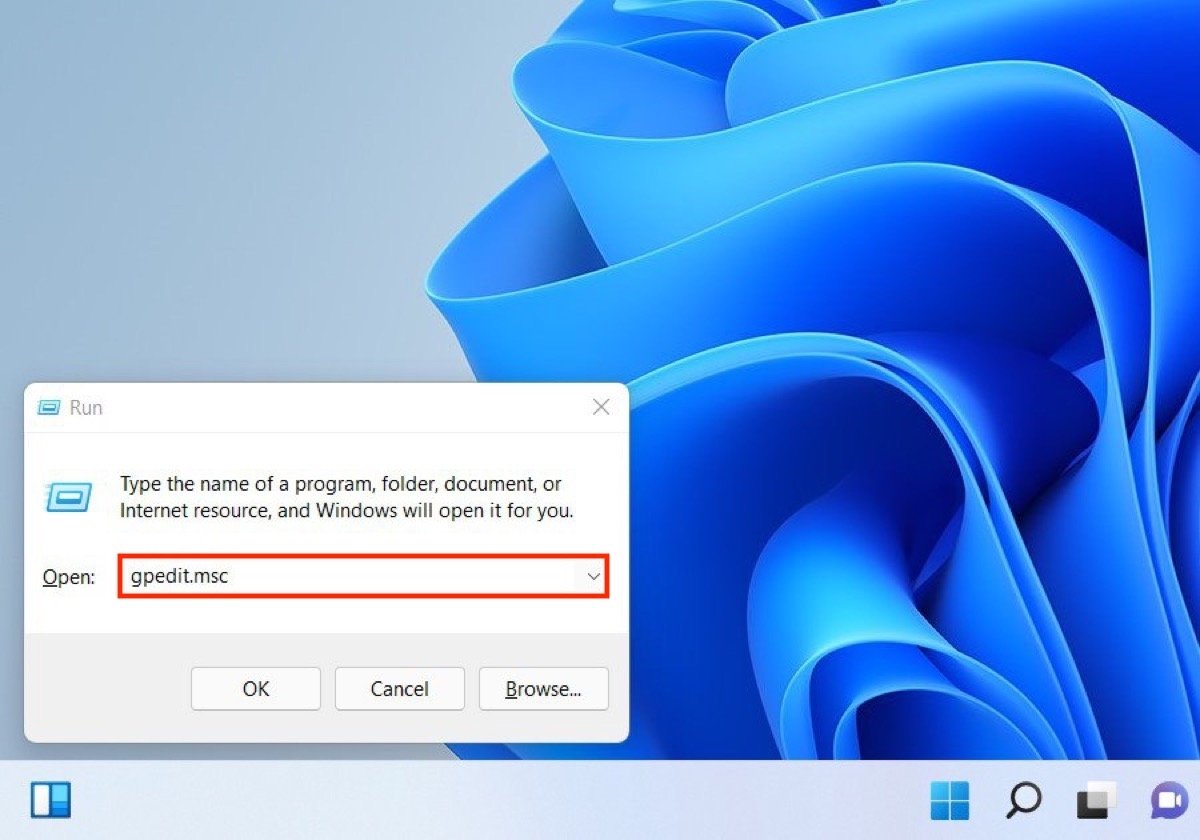
If you want to completely disable Windows Defender, you will need to perform some advanced steps. In this case, you must have the Pro version of Windows 11 to continue. What we explain below corresponds to a method that is not available in Windows 11 Home.
With the keyboard shortcut Windows + R, open the dialog for executing commands. In the text field type gpedit.msc, and press Enter.
 Run the command to modify the group policies
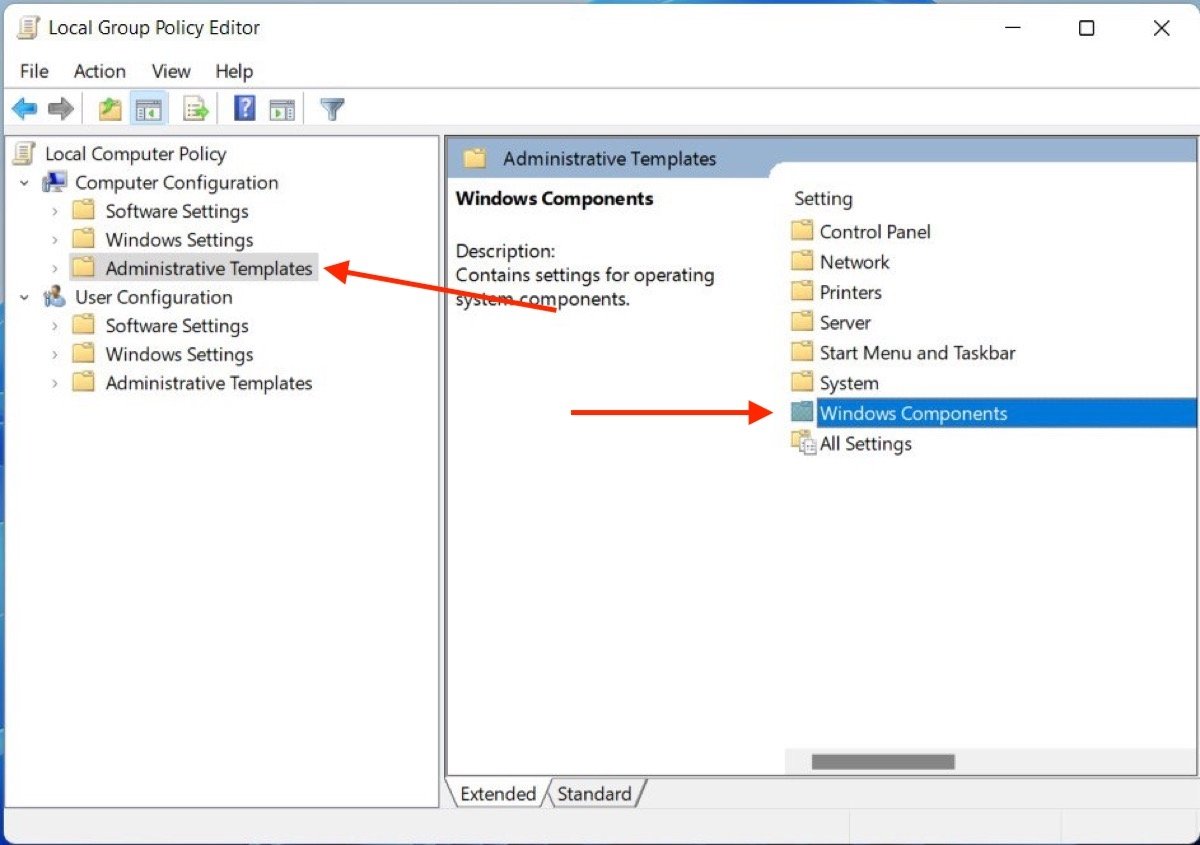
In the window, go to Administrative Templates, and then, to Windows Components.
 Open the Windows components policies folder
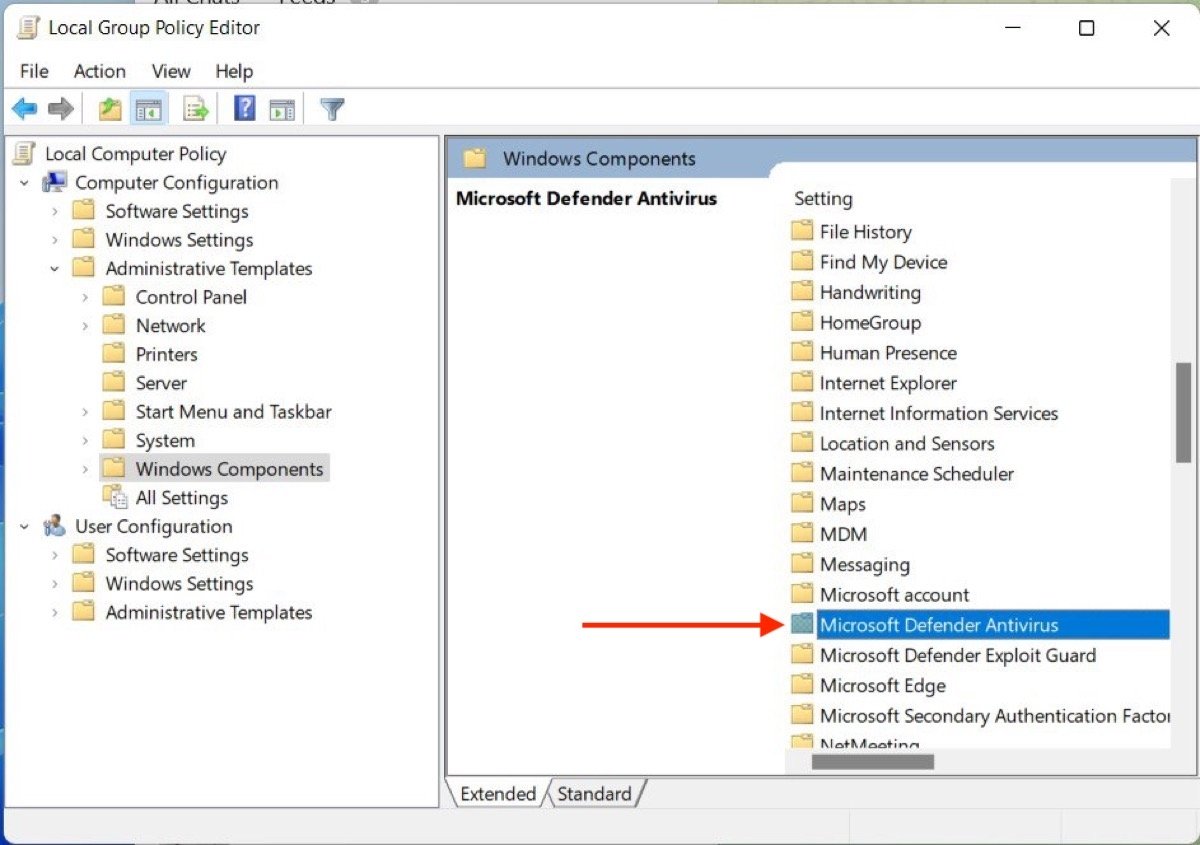
Take a look at the list of folders that will appear on the right side of the window, and try to find the one named Microsoft Defender Antivirus. Open it with a double-click.
 Access Windows Defender’s folder
Finally, access Turn off Microsoft Defender Antivirus.
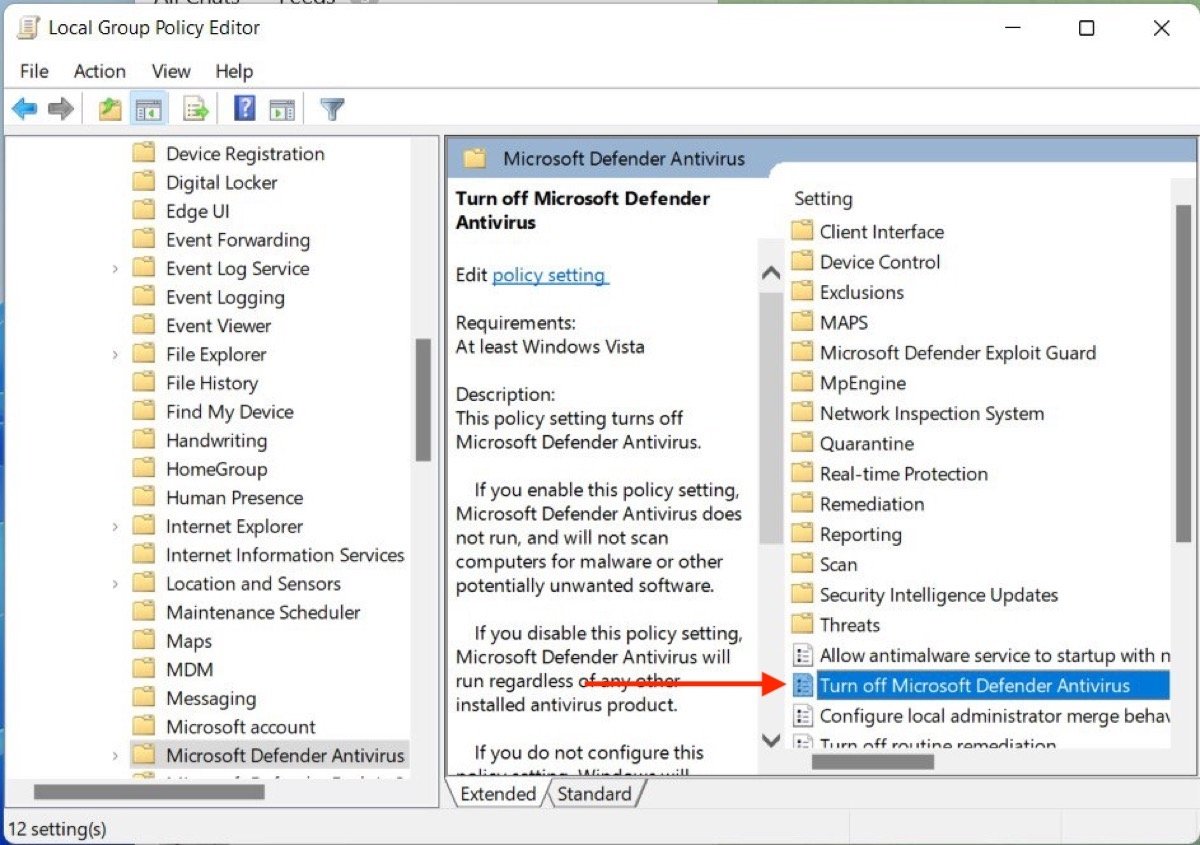 Select the option to turn off Windows Defender
Choice Enabled in the pop-up window that appears.
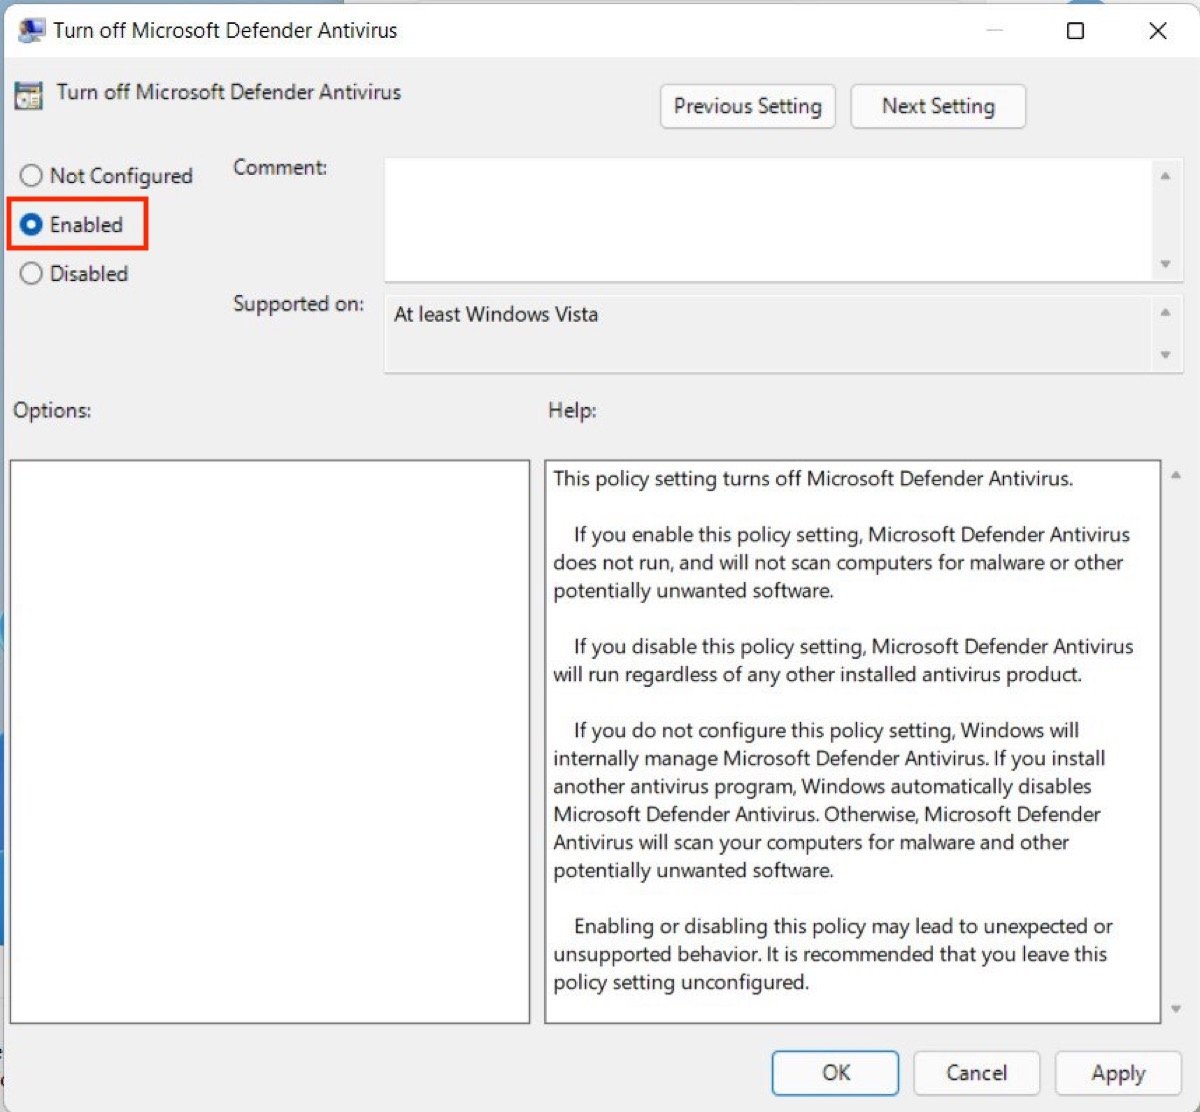 Enable the switch-off option
By clicking on Ok, Windows Defender will be permanently disabled. If you want to re-enable virus protection, repeat the above steps and check the Not Configured option. In short, to make it clear to you:
- Only if you have Windows 11 Pro, press Windows + R, type gpedit.msc and click Enter.
- Go to Administrative Templates, and then, to Windows Components.
- Open the folder Microsoft Defender.
- Go to Turn off Microsoft Defender Antivirus
- Click Enabled, and then, Ok.
