
One of the most important new features of Windows 11 is its minimum requirements. They are now higher compared to its predecessor, Windows 10, making the system incompatible with a wide variety of computers. However, there is still a way to install Microsoft's new Operating System on unsupported computers. Do you want to know about it? Let us tell you about it in this complete guide.
But before we continue, just a small clarification. The steps described above will only work with computers that have a 64-bit processor. Microsoft has not released a 32-bit version of Windows 11. Therefore, here we will help you to install the system on unsupported computers, as long as they are compatible with 64-bit architecture.
Minimum requirements to install Windows 11
Knowing the minimum requirements of Windows 11 means that you will be able to know if your computer is among those that support its installation.
- Processor. Clock frequency of 1 GHz or higher. CPUs with two or more with 64-bit architecture.
- RAM. 4 GB or more.
- Storage. At least 64 GB are required. It may require additional space for downloading updates and enabling specific features.
- Graphic card. It must support DirectX 12 or later and have a WDDM 2.0 driver.
- System firmware. UEFI with secure boot.
- TPM. Secure platform module in version 2.0.
- Screen. 720p resolution or higher. Monitor 9 inches or larger with 8 bits per color channel.
- Internet connection. Required for Windows 11 Home edition
In case your computer meets all these requirements, then we advise you to install Windows 11 normally, following the official methods. Otherwise, keep reading.
Create a bootable Windows 11 USB to install on your computer
The first step you must take to install Windows 11 on your unsupported computer is to create a bootable USB. Do this with the media authoring tool provided by Microsoft. On this page, you have a download link that will help you to get it.
Then, execute it and accept the terms and conditions.
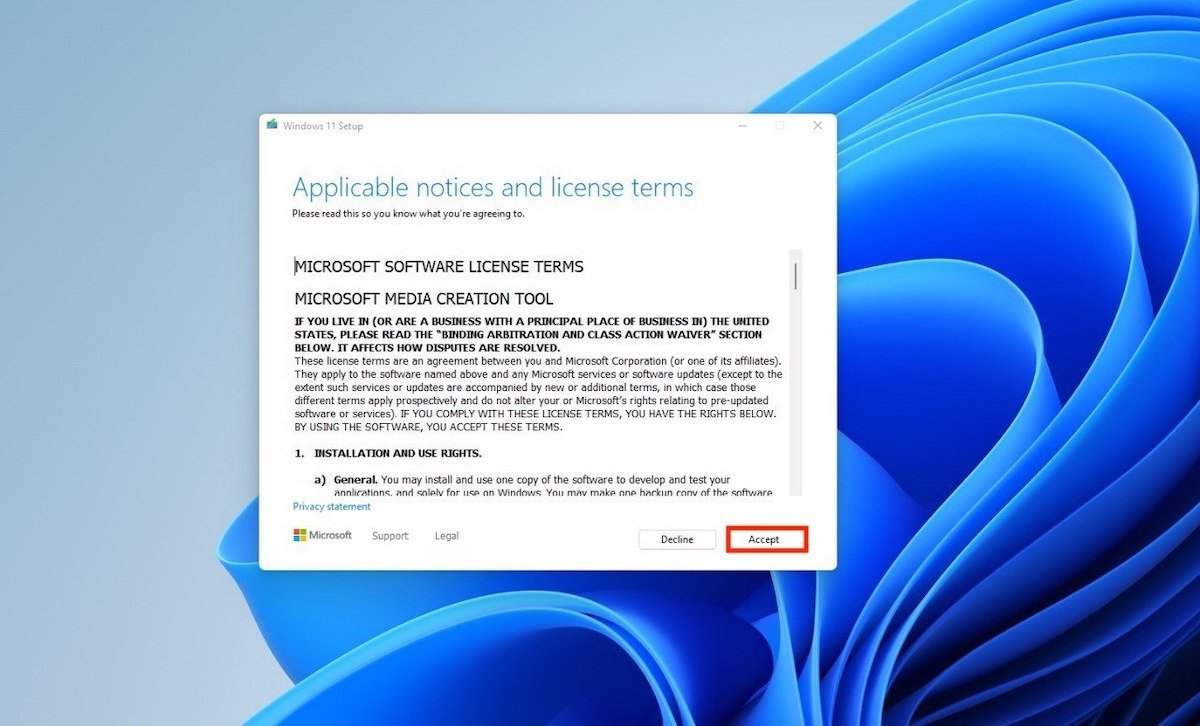 Accept terms and conditions
Choose the language and Windows edition or let the utility do it by itself.
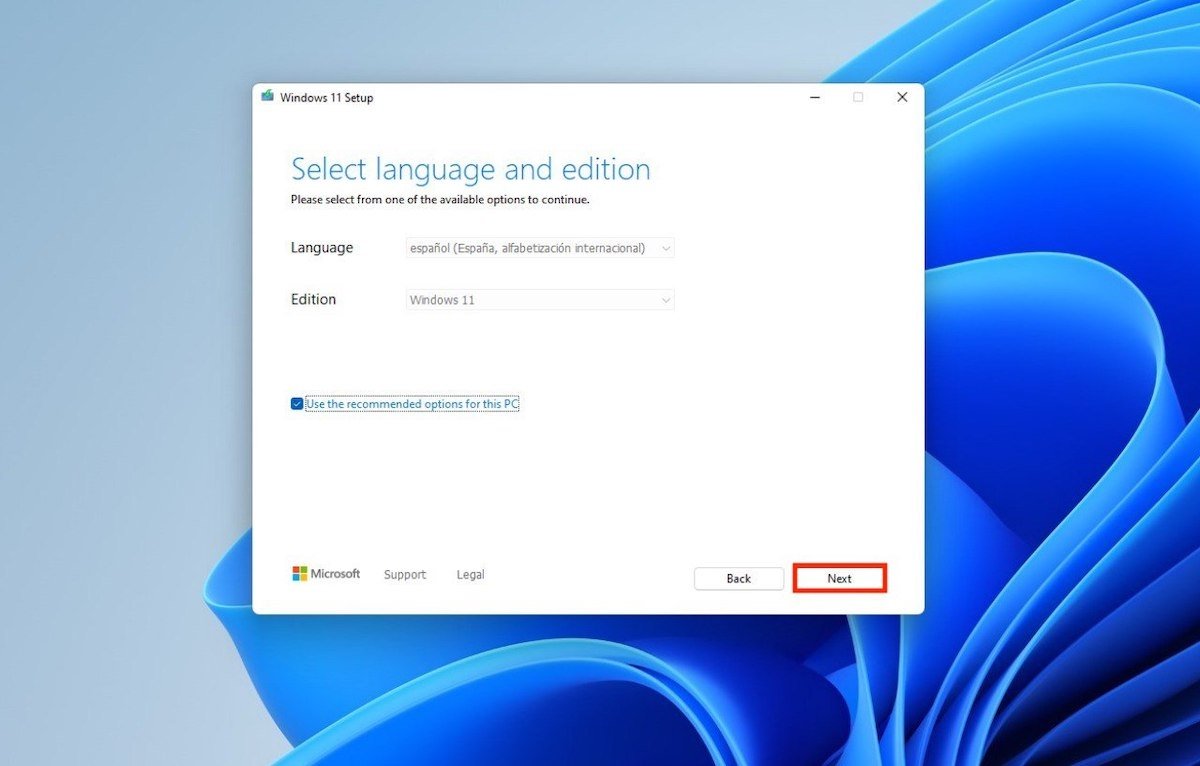 Select the Windows 11 edition
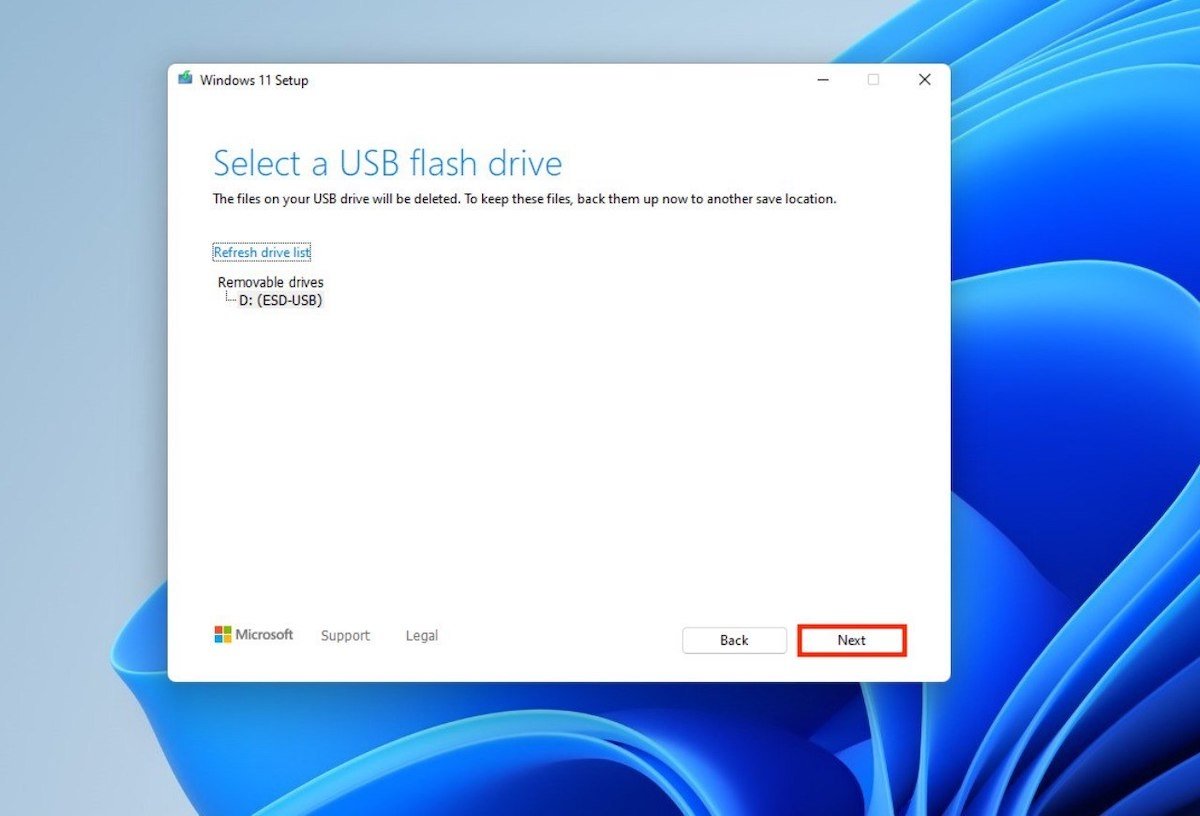
Connect a USB to your computer with at least 8 GB. Select the USB flash drive option.
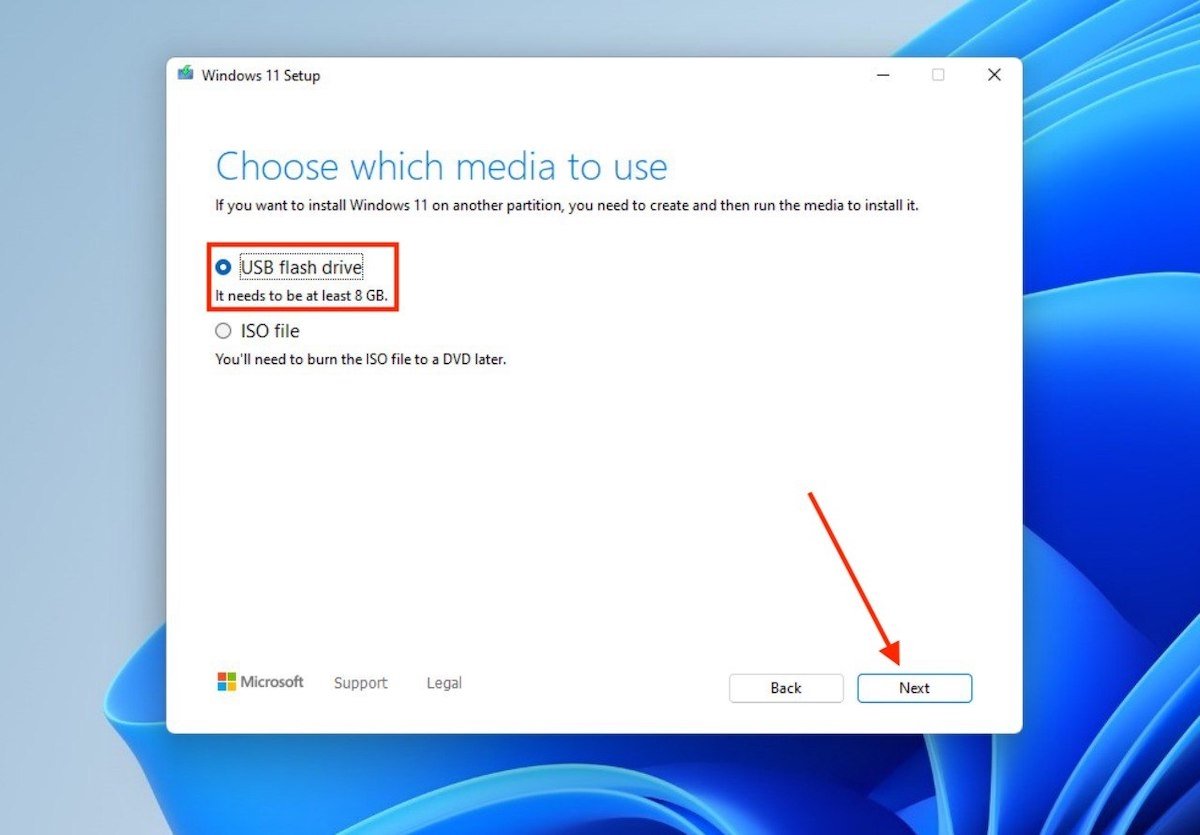 Create a USB drive
Specify the drive you want to use to generate the installation USB.
 Select drive to create the USB
Finally, wait for the tool to finish.
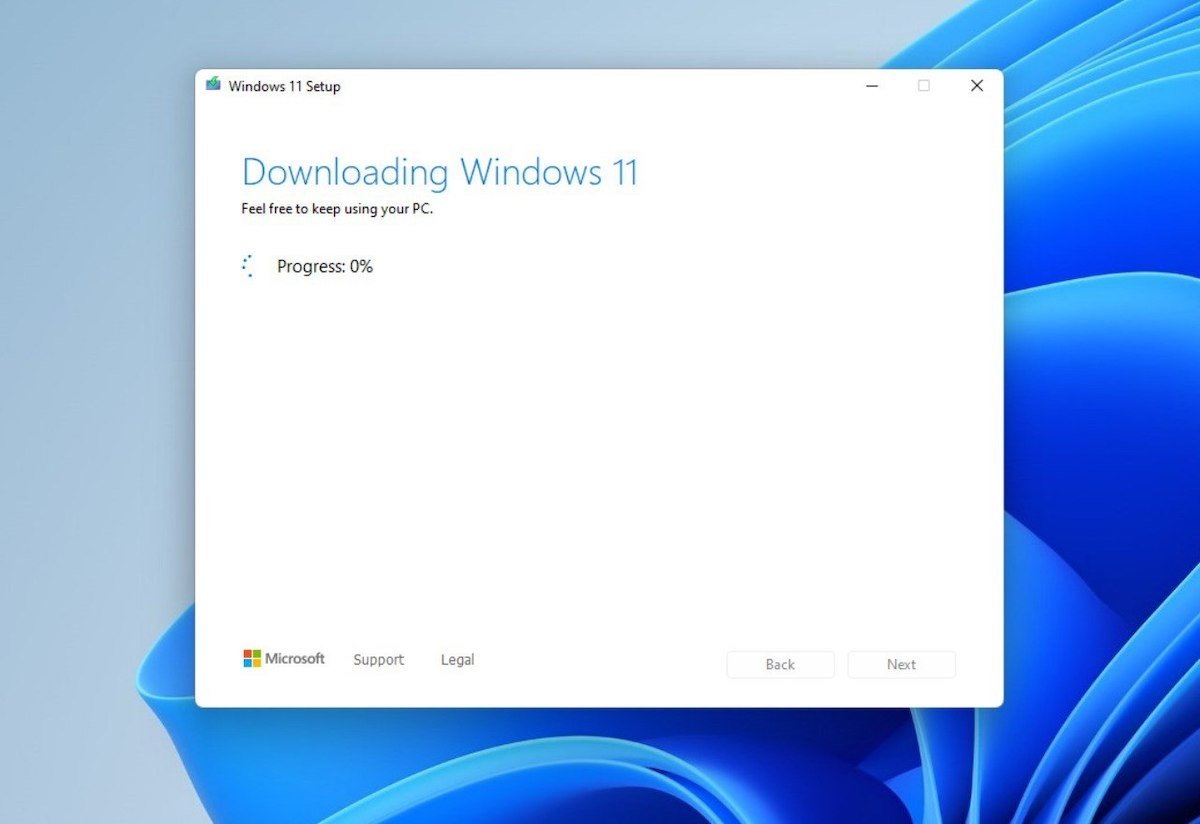 USB creation process
When it is finished, you will have a bootable USB to install Windows 11 on your computer. Now, restart the computer and keep the flash drive connected. Be sure that the BIOS uses it to boot the system and follow the steps mentioned in the next section.
Installing Windows 11 on an unsupported PC
After startup, the first thing you will see is the language selector.
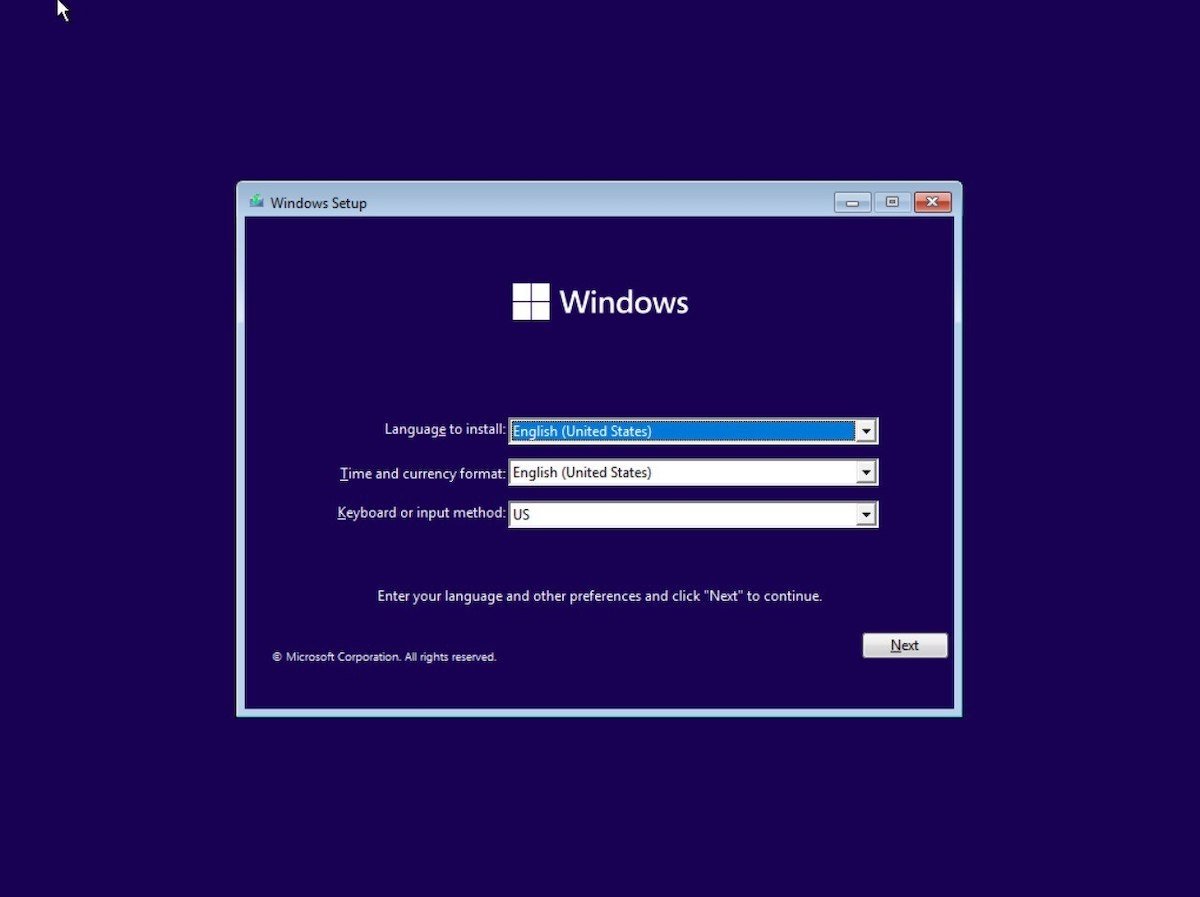 Start screen
Before proceeding, press the keys Shift + F10. This will open the command prompt. There, type the following command and press Enter to launch it:
regedit
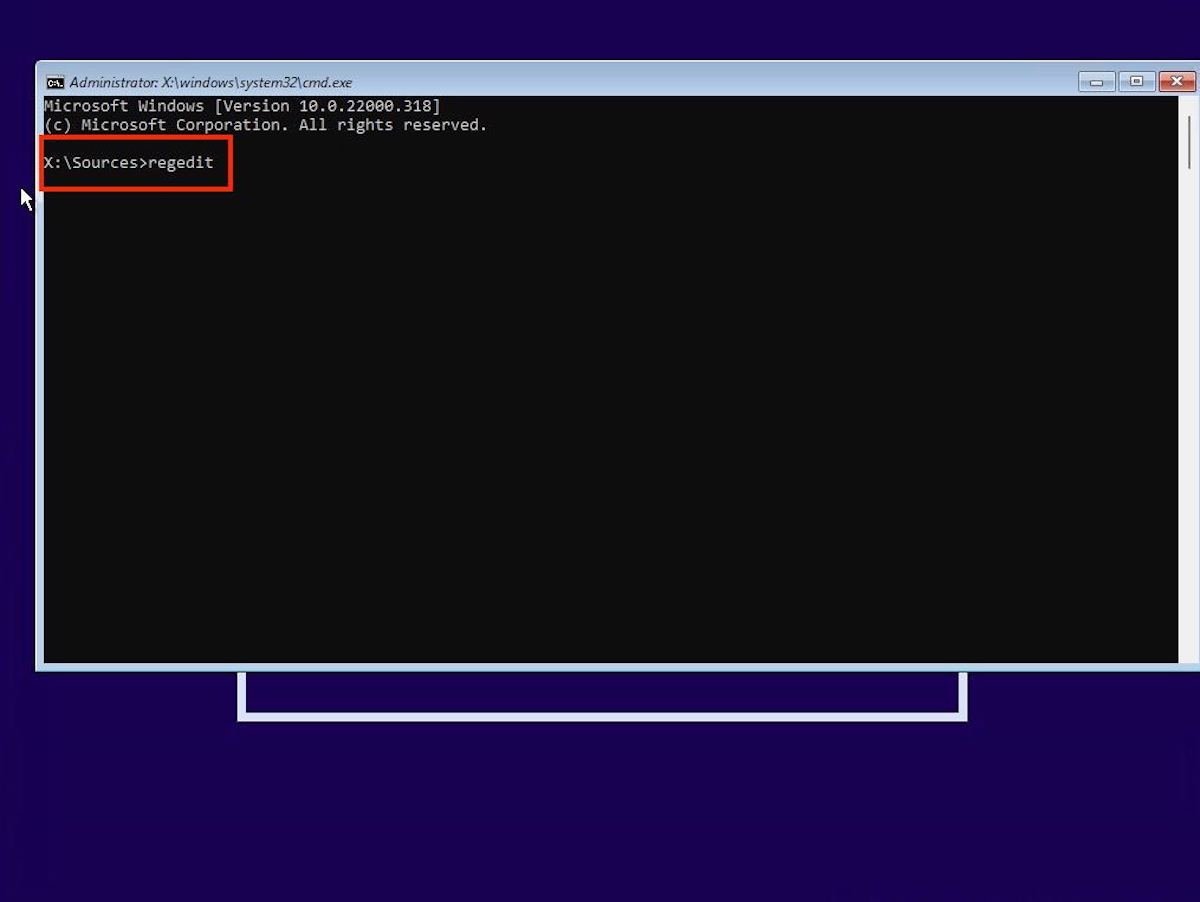 Command prompt during the installation
With the registry editor open, browse with the side browser to this path:
Computer\HKEY_LOCAL_MACHINE\SYSTEM\Setup
Then, right-click on the Setup key and create a new key named LabConfig.
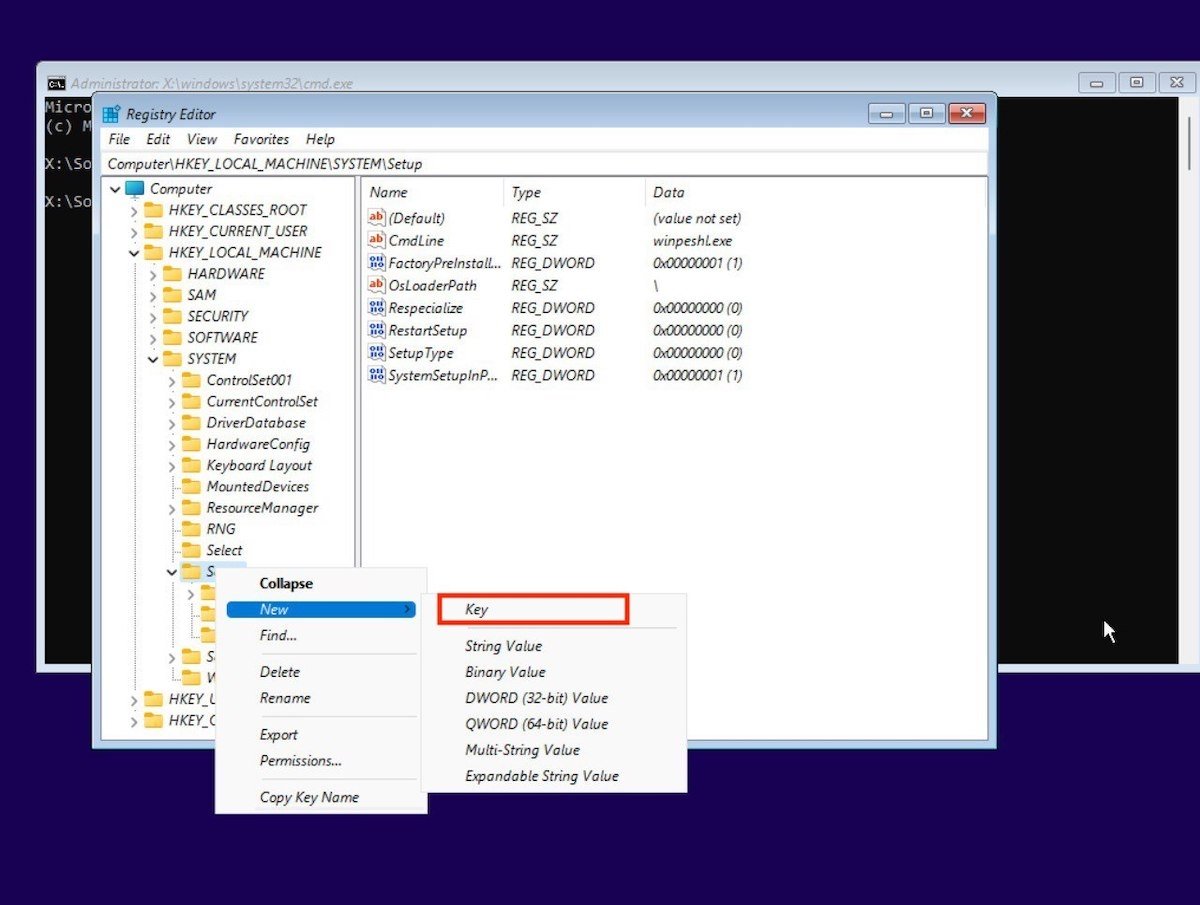 Create a new key
Within the LabConfig key, right-click to create four new DWORD (32-bit) Value values.
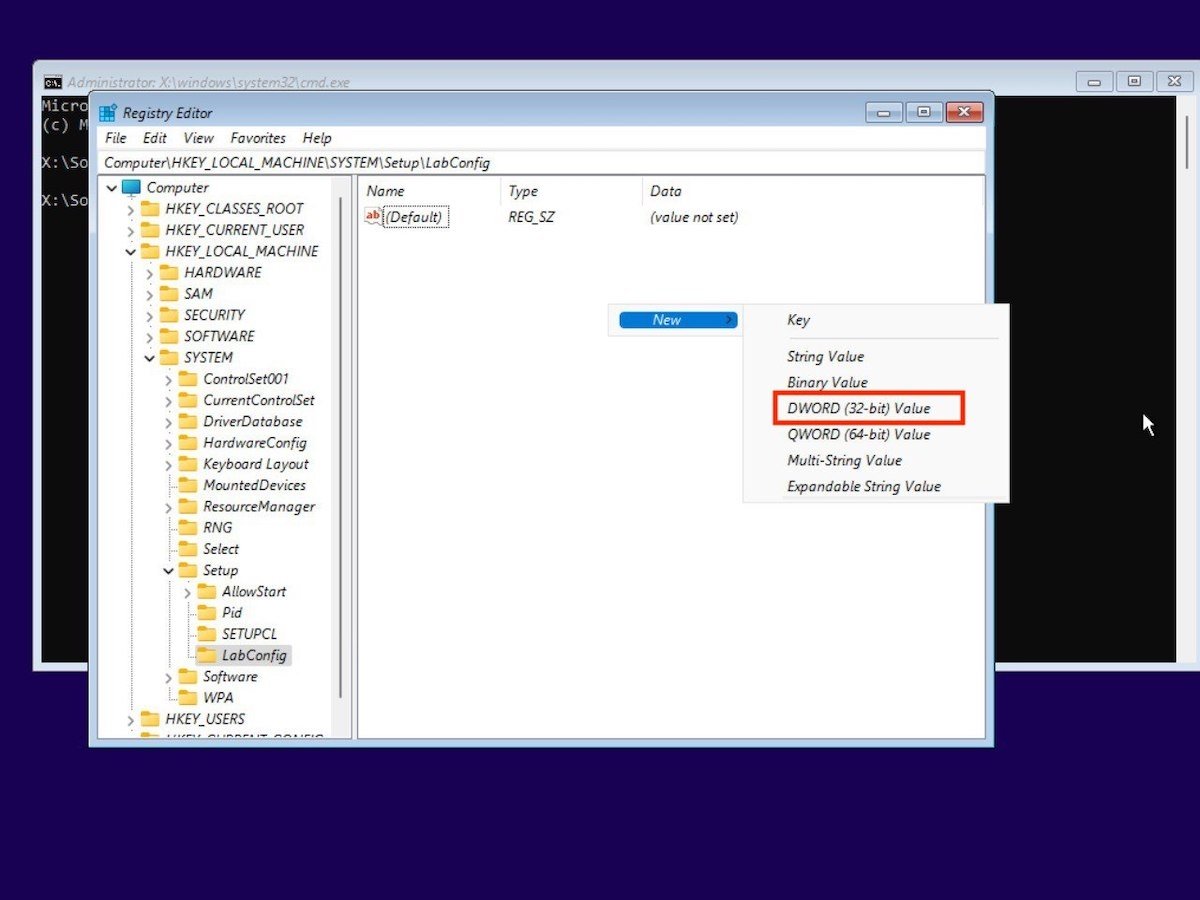 Create new values
The names of the 32-bit values should be these:
- BypassTPMCheck
- BypassCPUCheck
- BypassRAMCheck
- BypassSecureBootCheck
Next, double-click to change the value to 1 for each of the entries you have just generated.
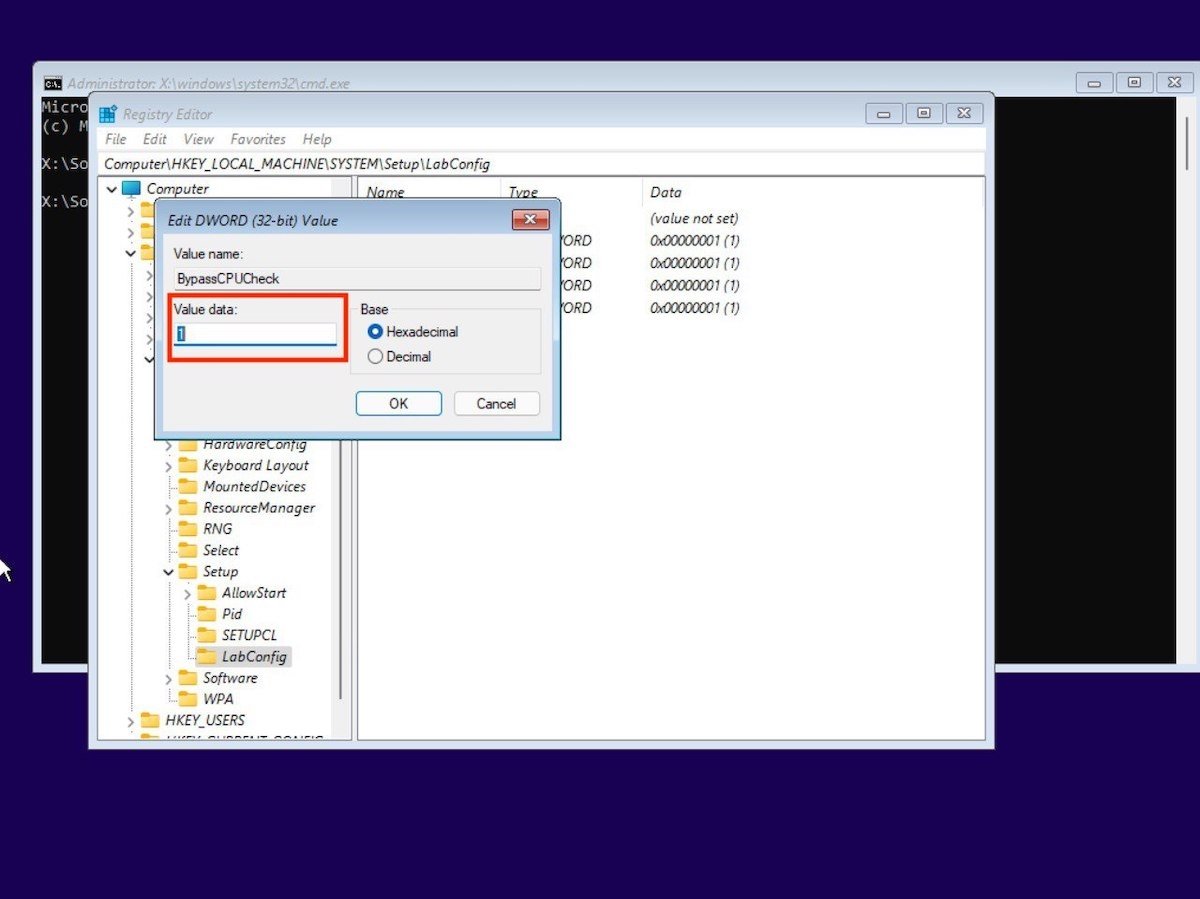 Change value to 1
The LabConfig key must look like this for the trick to work:
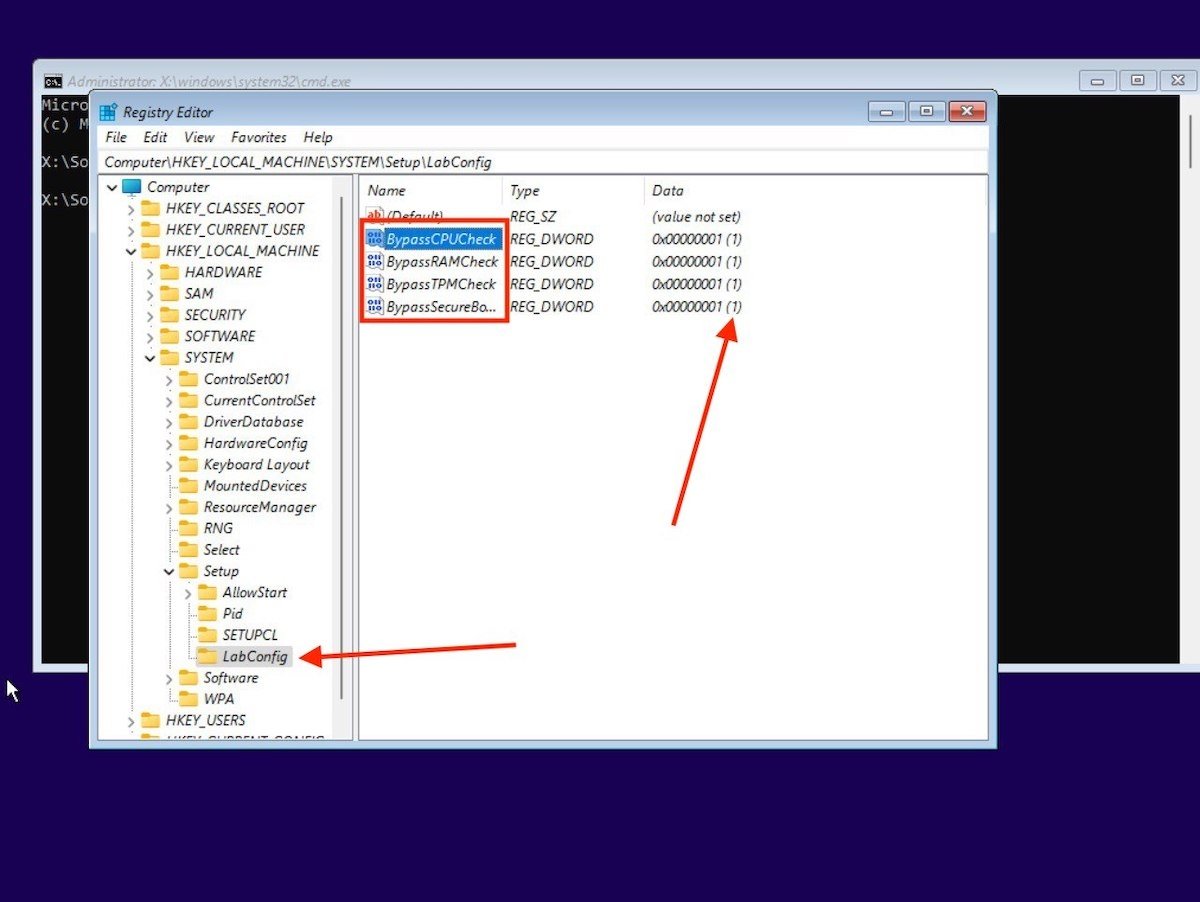 Final result of the changes to the registry
If you have made it this far, you have already done the hardest part. It is time to close the registry editor and the command prompt. Then, choose your language and click on Install now.
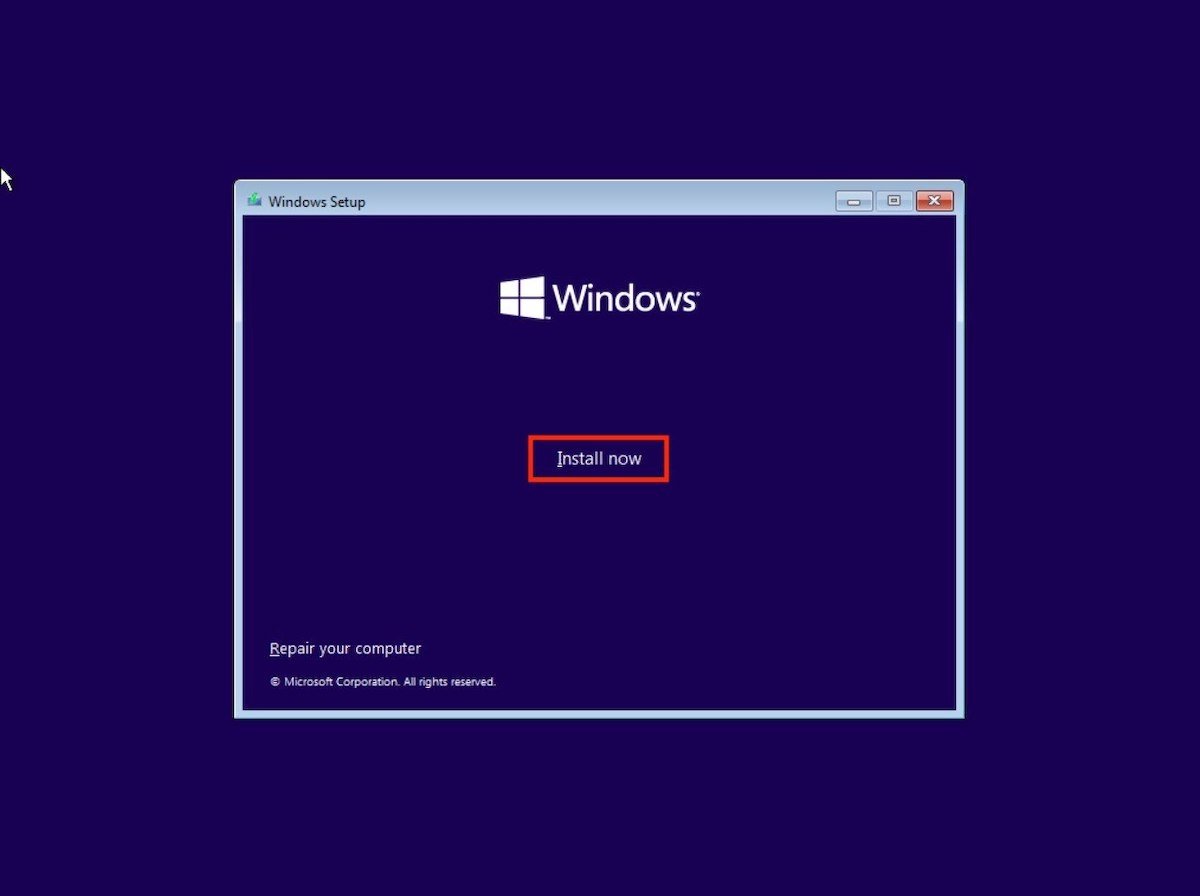 Install Windows 11
Enter the Windows 10 key you were already using or click on I don't have a product key if you don't have one.
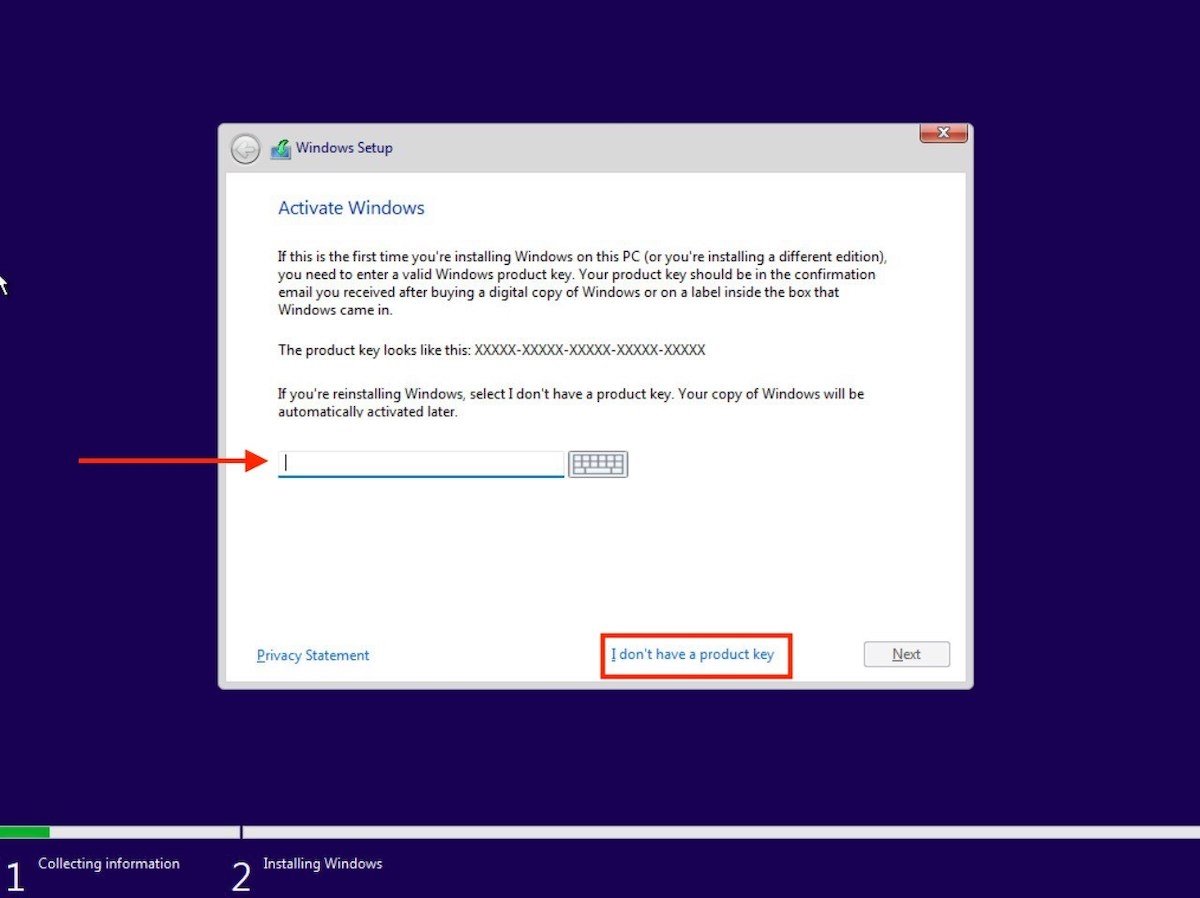 Enter the Windows key
Indicate the version of Windows 11 that you want to install and click on Next. It is recommended that you install the corresponding to the one you already have activated in Windows 10.
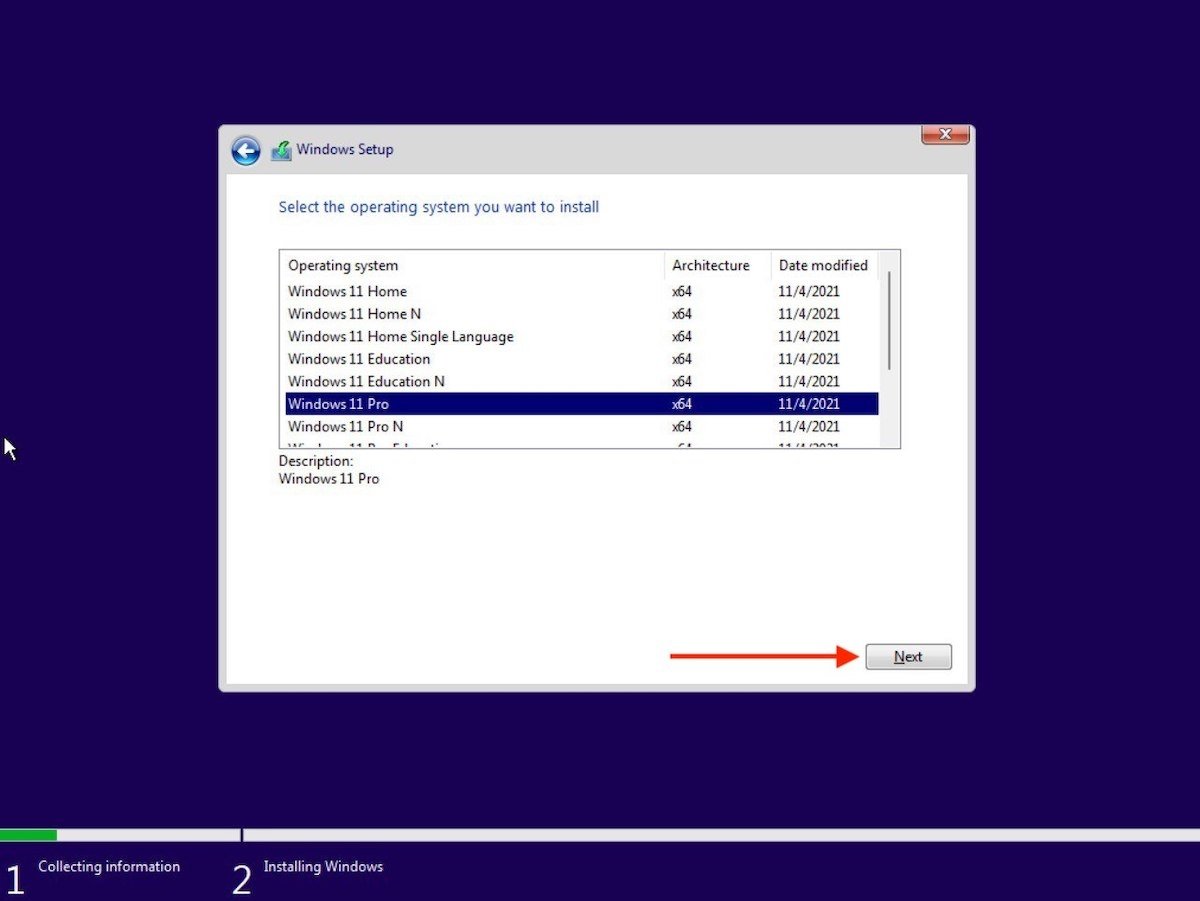 Select the system edition
Accept the terms and conditions to proceed.
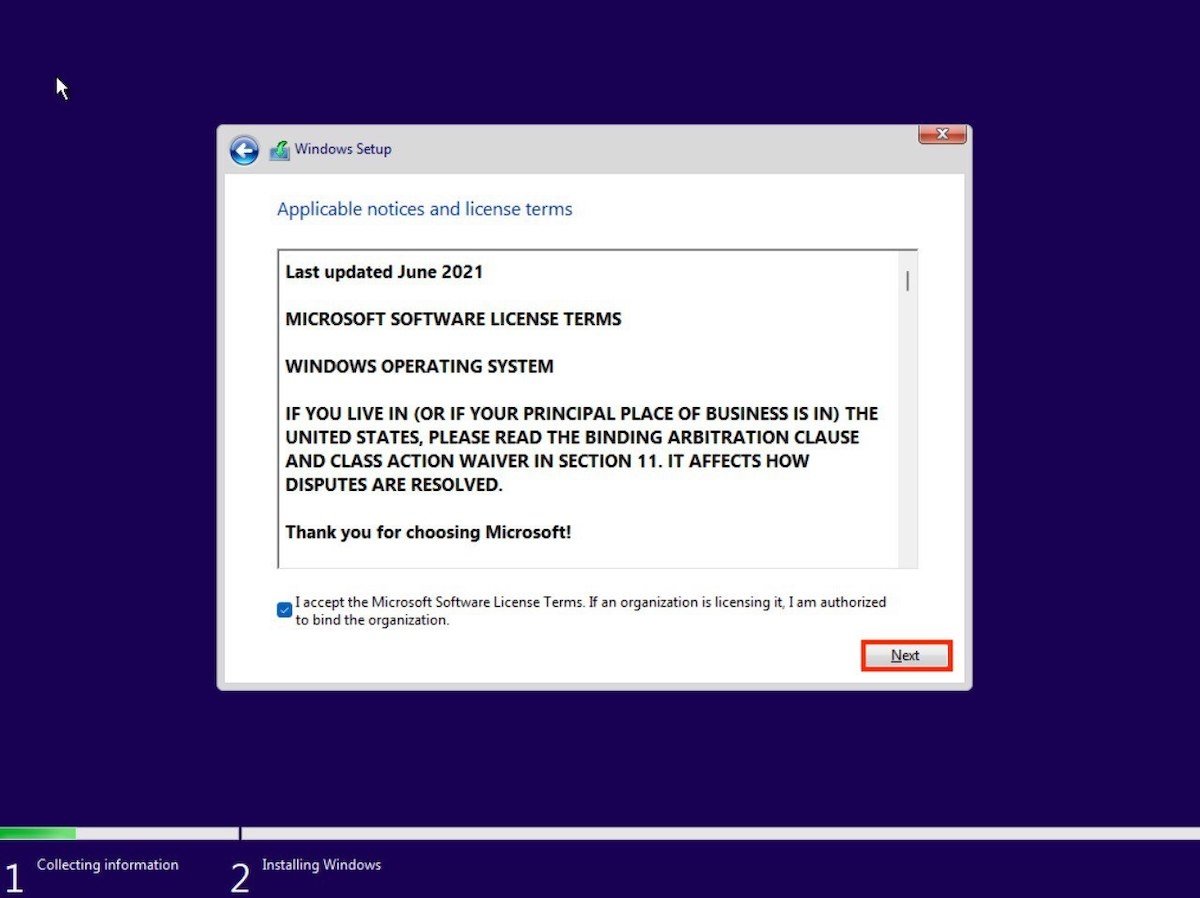 Accept the Windows 11 conditions
Choose the Custom: Install Windows only (advanced) option.
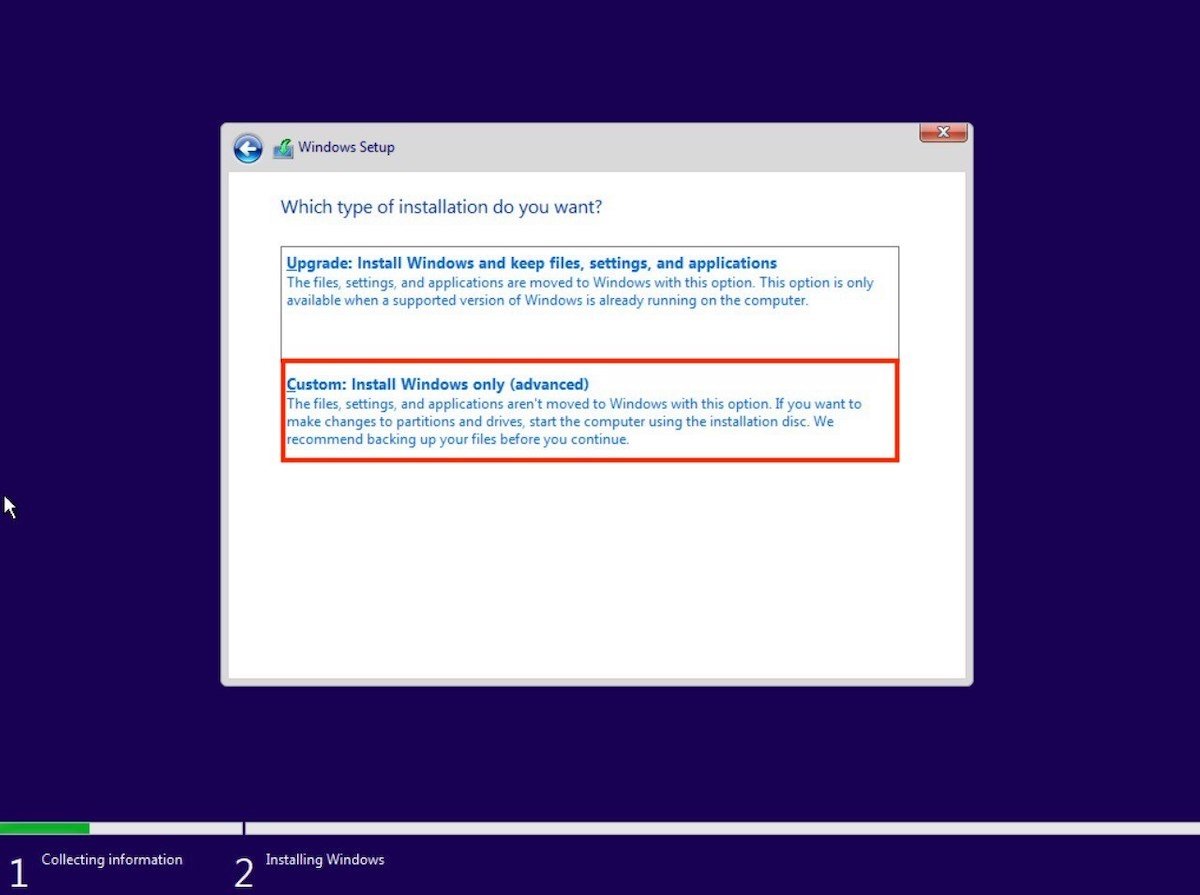 Customized installation
Format the storage drive and create the needed partitions. Remember that this will erase all the content you have saved on the PC.
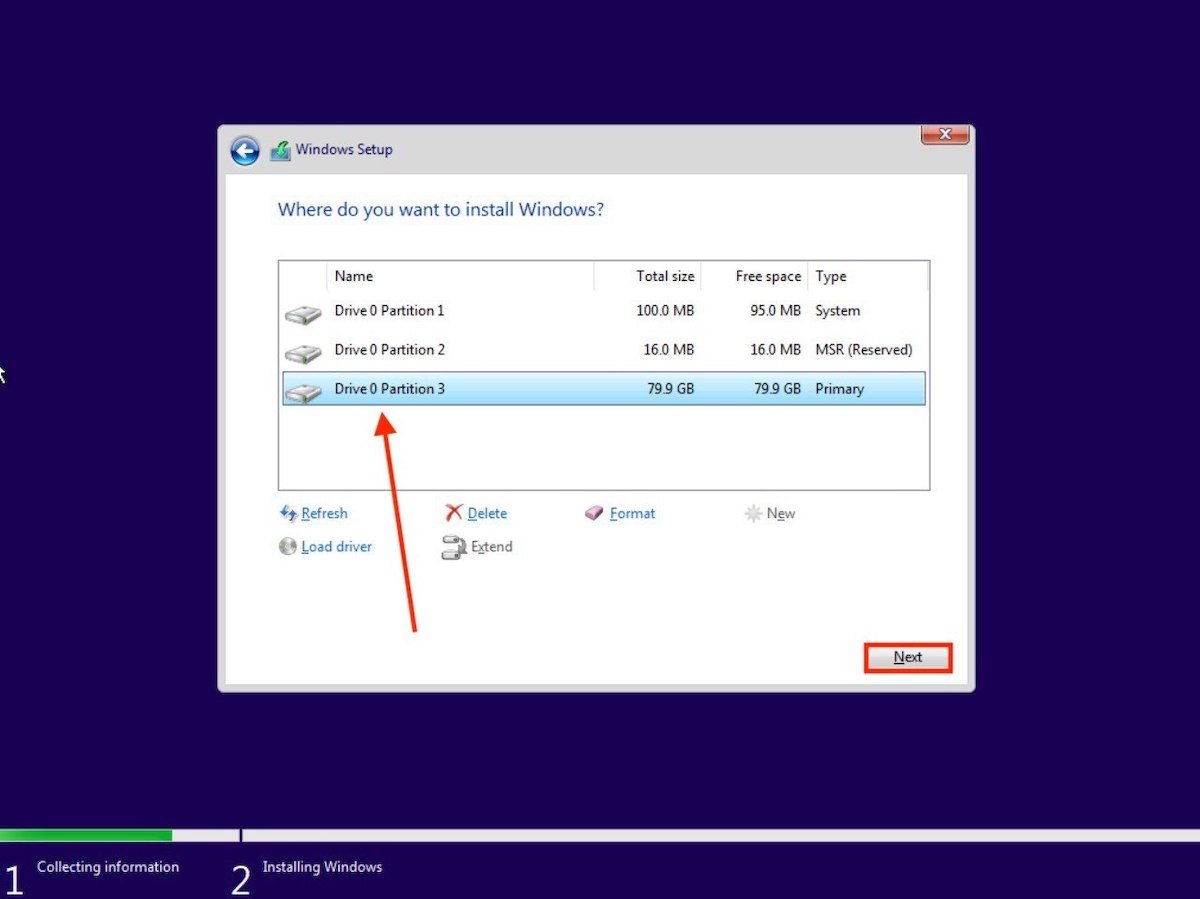 Create partitions
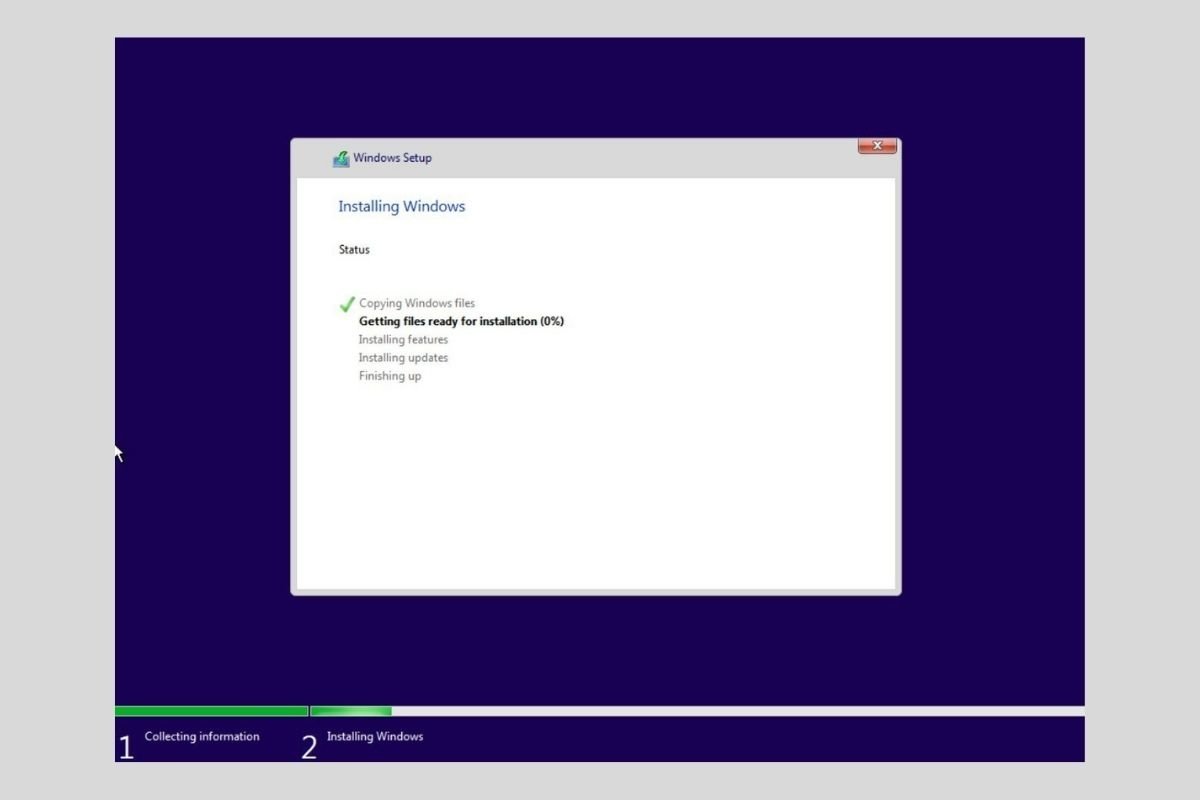
Finally, Windows 11 will install normally.
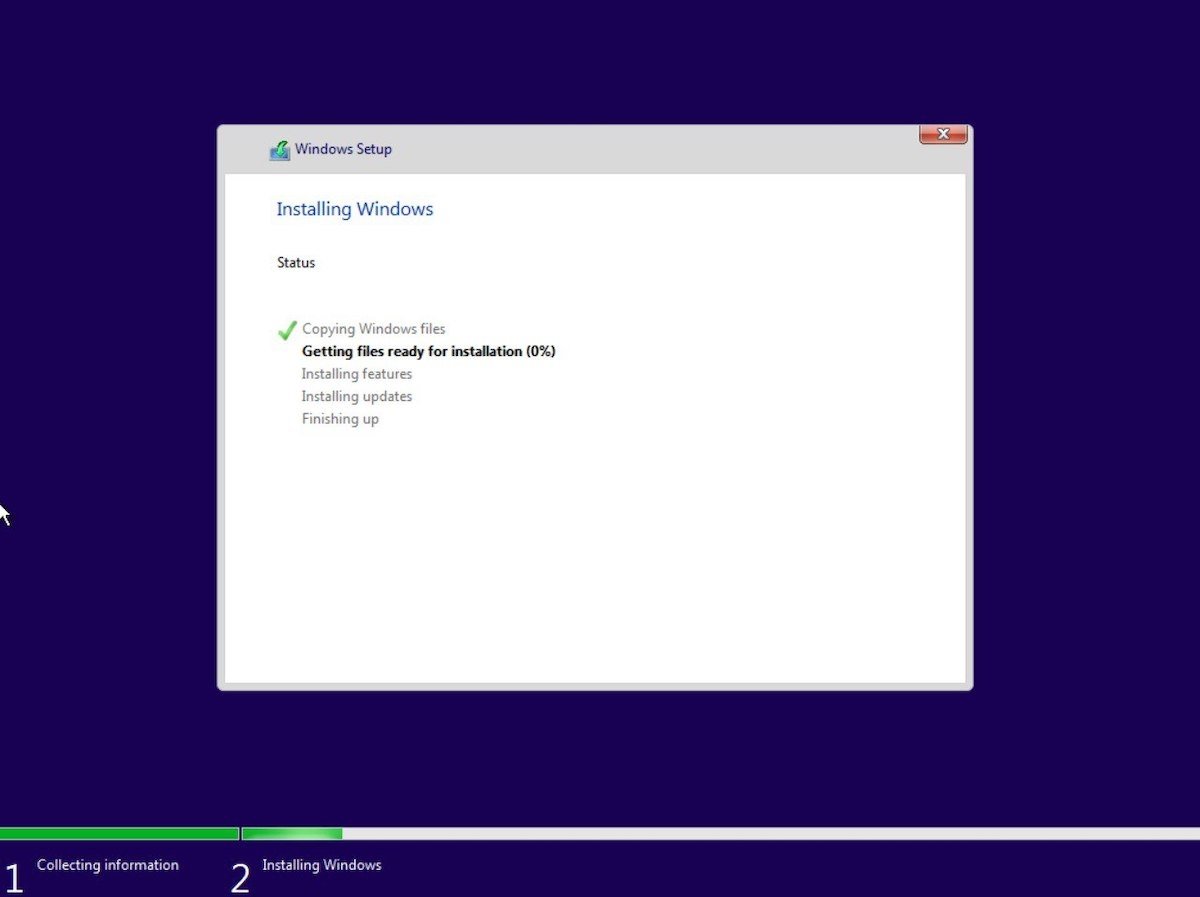 Windows installation in progress
All you have to do is wait for the computer to restart automatically. To complete the configuration, you will have to enter your Microsoft account and customize other options related to the operation of Windows 11.
