
Windows 11 includes a tool that lets you restore the system to a previous point in the event of serious errors in the operation of the computer. In this guide, we explain how to use restore points in Windows 11. We also explain exactly what they are and how to delete them on your computer to free up space.
What is a restore point in Windows 11?
Windows 11 restore points are exact copies of system settings and hard disk contents. Its main purpose is to return the equipment to a previous state in case of system failures and errors after applying a new configuration. They can be created manually and automatically. For example, the system itself generates one when applications are installed or other modifications are made.
When is it advisable to create restore points? Mainly, when performing sensitive operations in Windows 11, such as applying registry changes or updating drivers. And if you have just installed the system from scratch, you may also find it useful to create a restore point in case something stops working during the initial setup.
How to create a restore point in Windows 11?
Now that you know a little more about this Windows 11 feature, we will tell you how to create your own restore points manually. The first thing to do is to open the system search. Then, type sysdm.cpl. Click on the first result that appears on the screen.
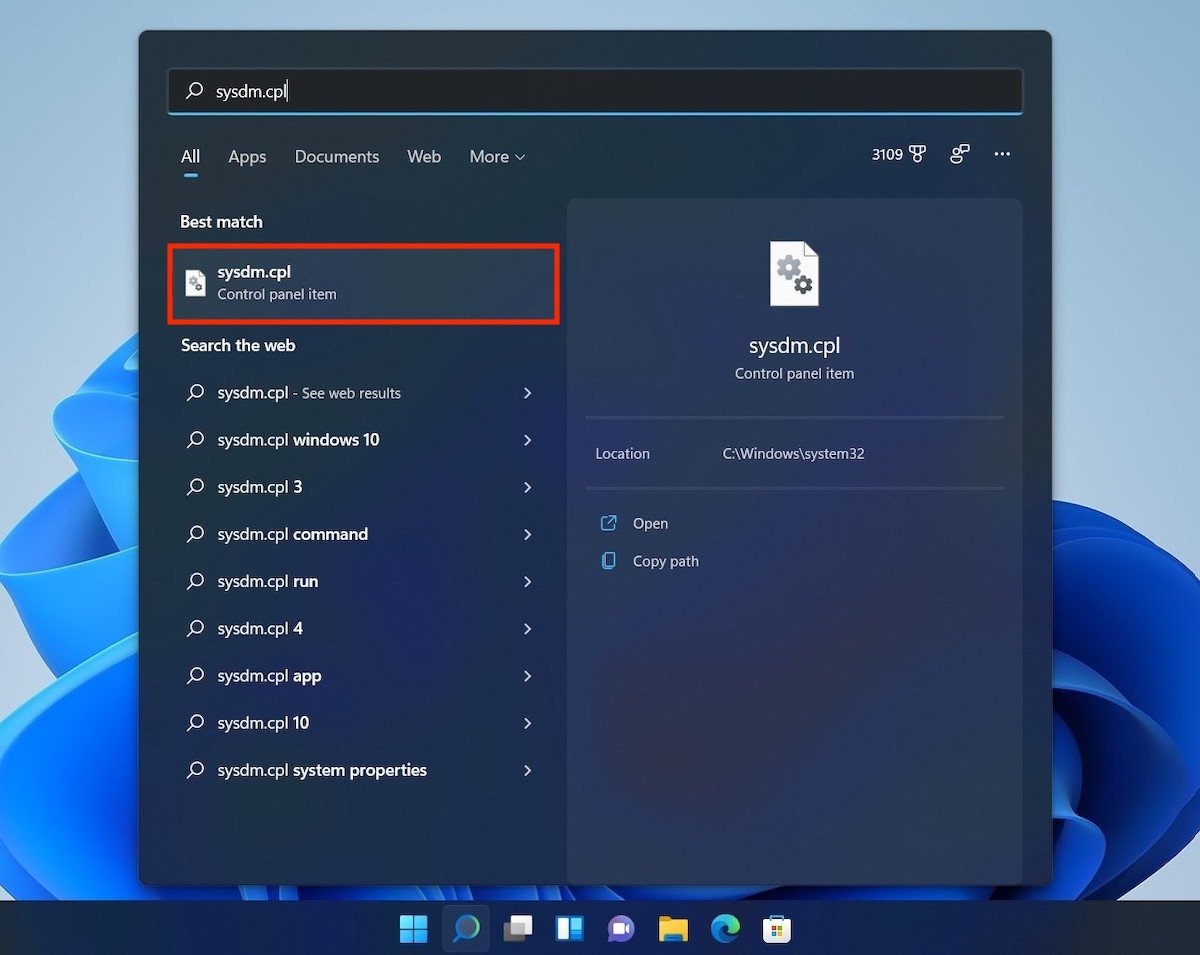 Open system information
In the pop-up window, open the System Protection tab.
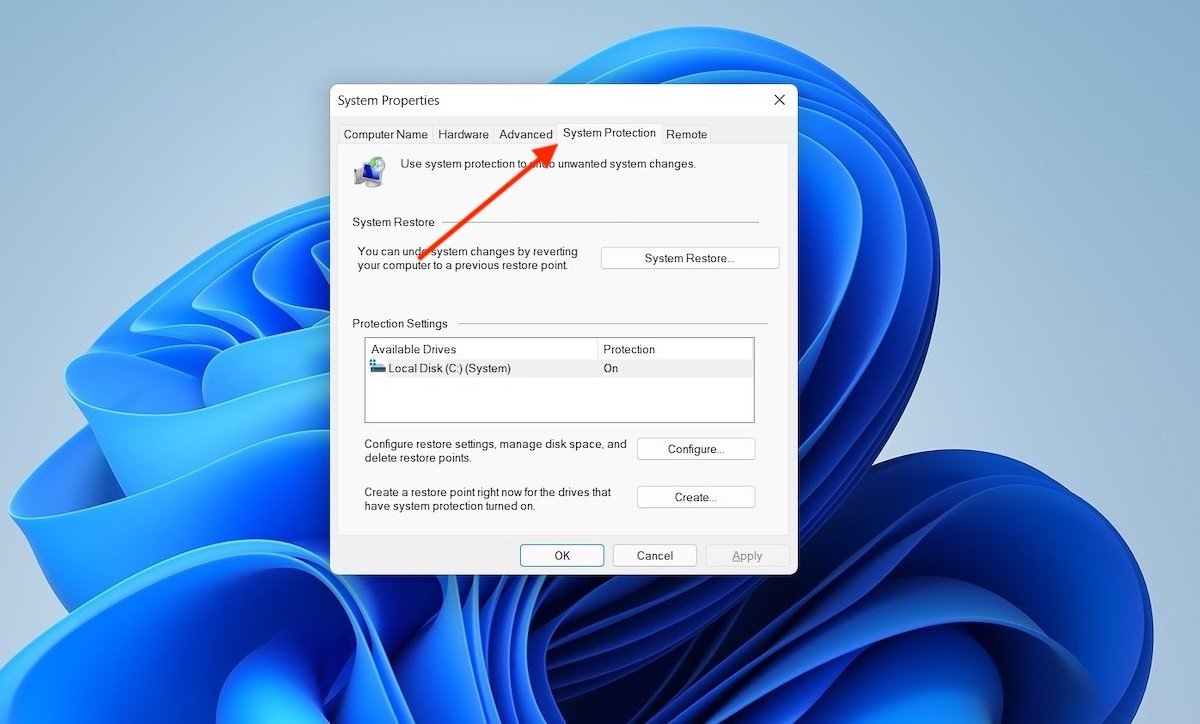 System protection
Then, click on the Configure button.
 Configure the drive
Make sure that the Turn on system protection checkbox is correctly enabled. If so, click OK to exit.
 Enable system protection
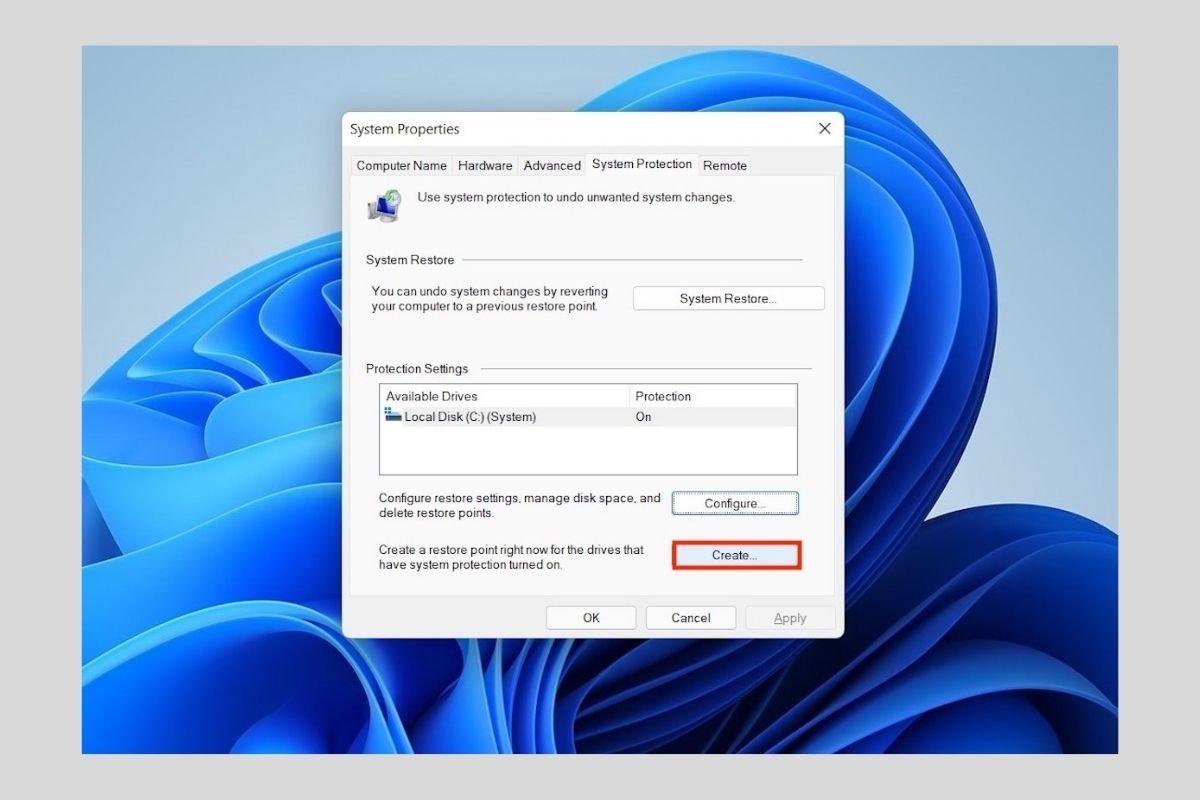
Now, it is time to create a manual restore point. Click on the Create button.
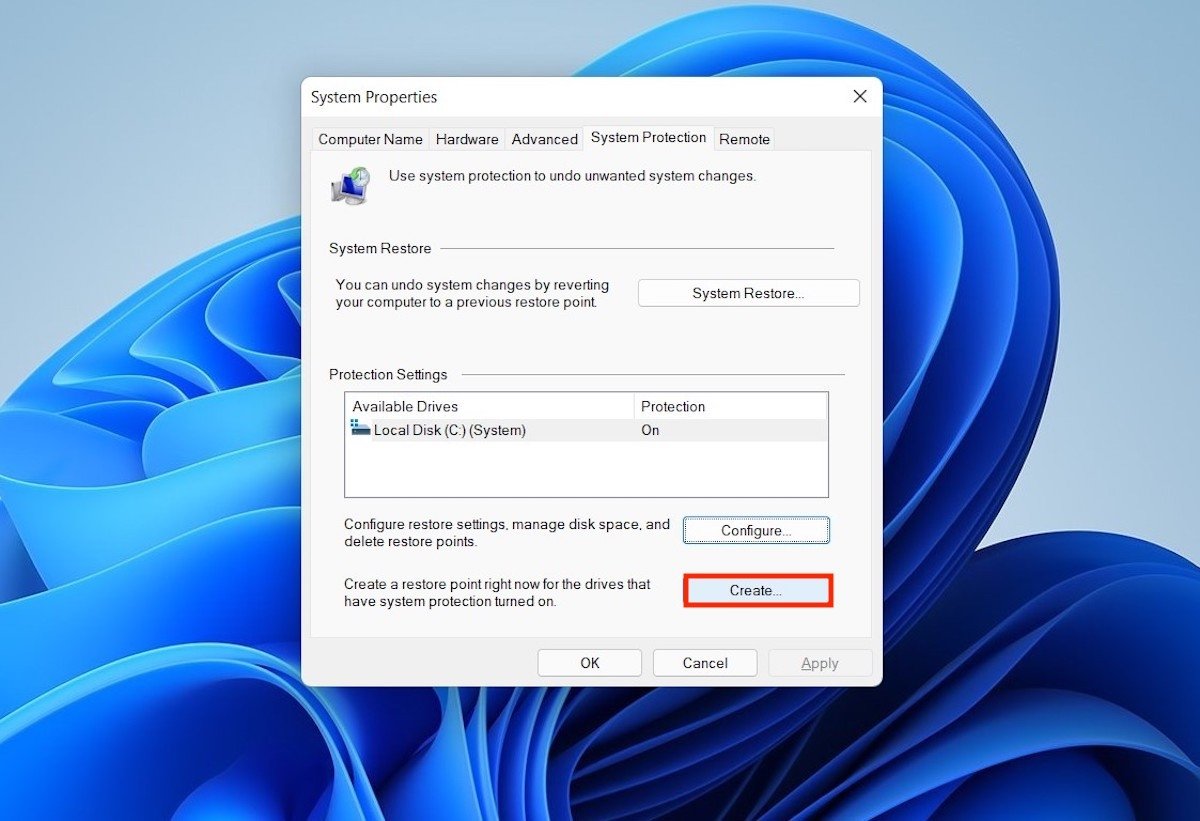 Create a restore point
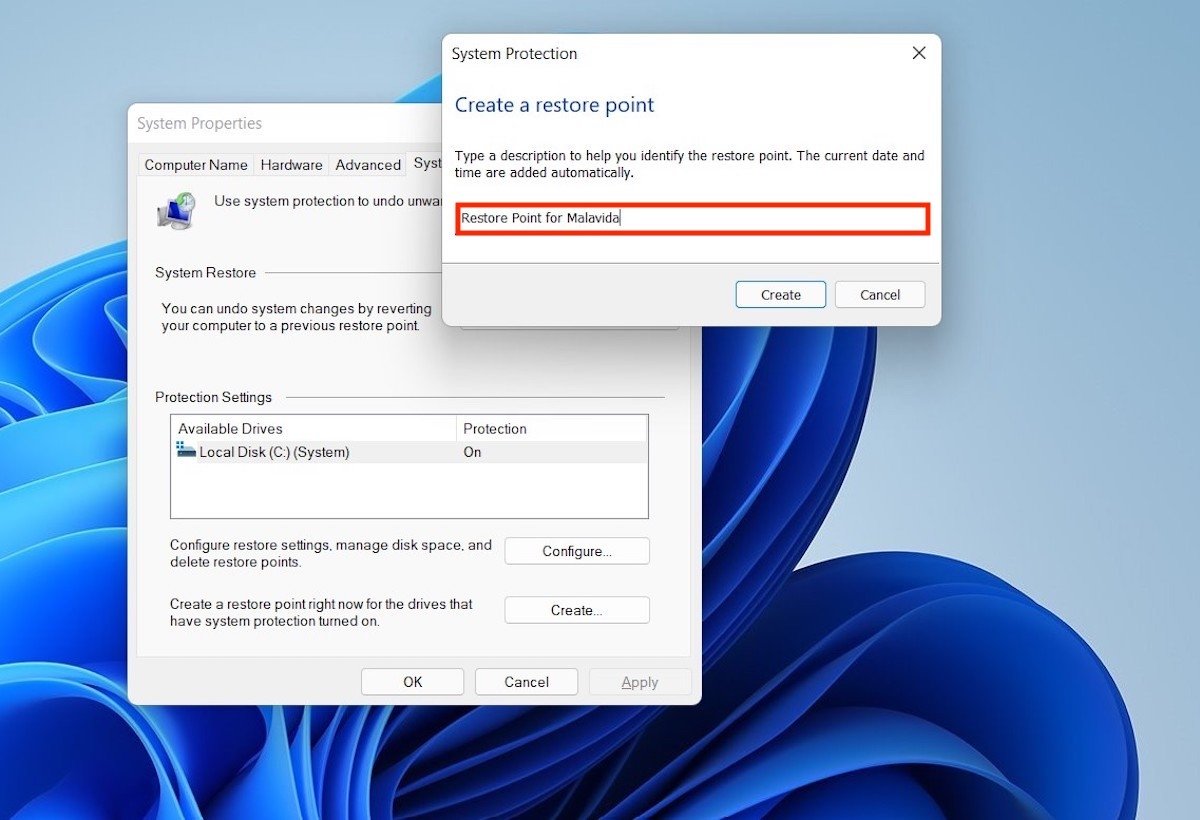
Assign a label to your restore point. We recommend that you be descriptive in this field so that you can easily identify it in the future. Use Create to start the process.
 Add a description to the restore point
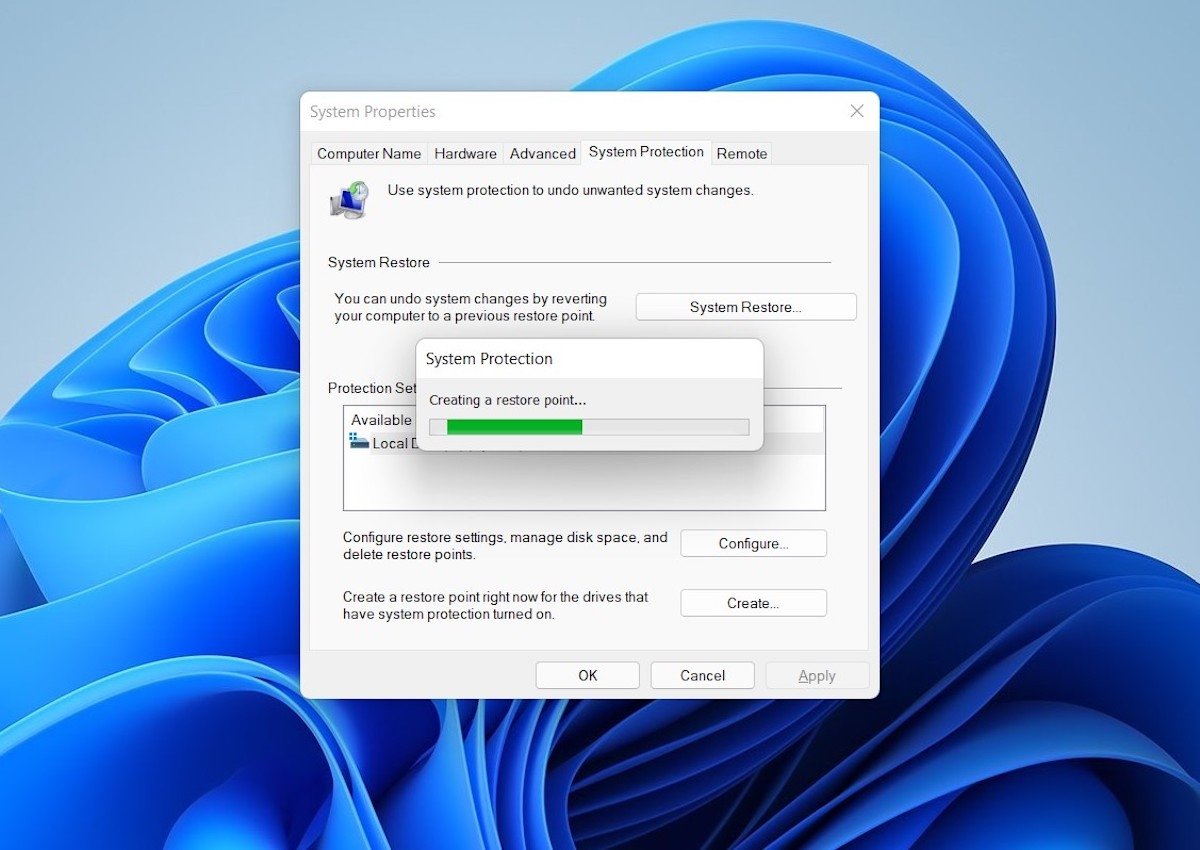
Wait for the creation of the restore point to finish.
 Creation process started
From that moment on, you can make the planned changes to the system with peace of mind. If you find any error during the configuration you are going to apply, the only thing you have to do to recover the previous state of the system is to reset the recovery point. But how to do it?
How to reset the computer with a restore point?
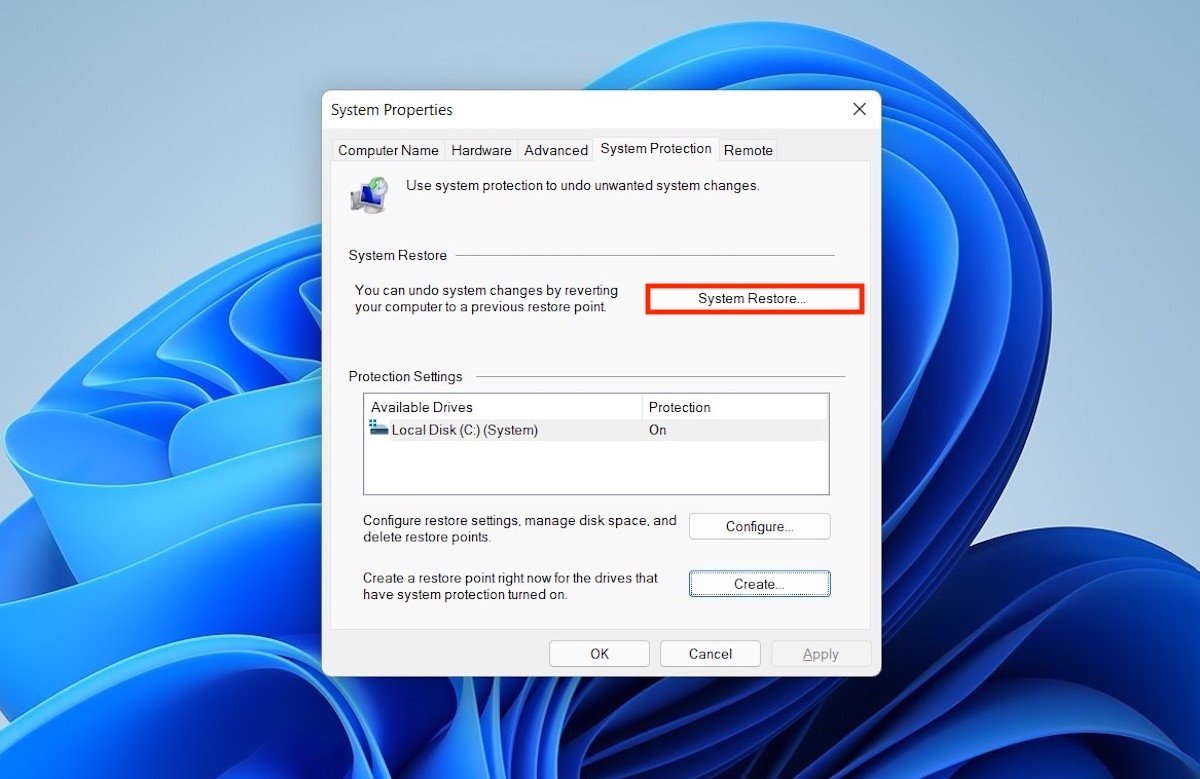
Restoring a restore point is almost as easy as creating one. In the same window as before, System Properties, click on the System Restore button.
 Start restoring a previous point
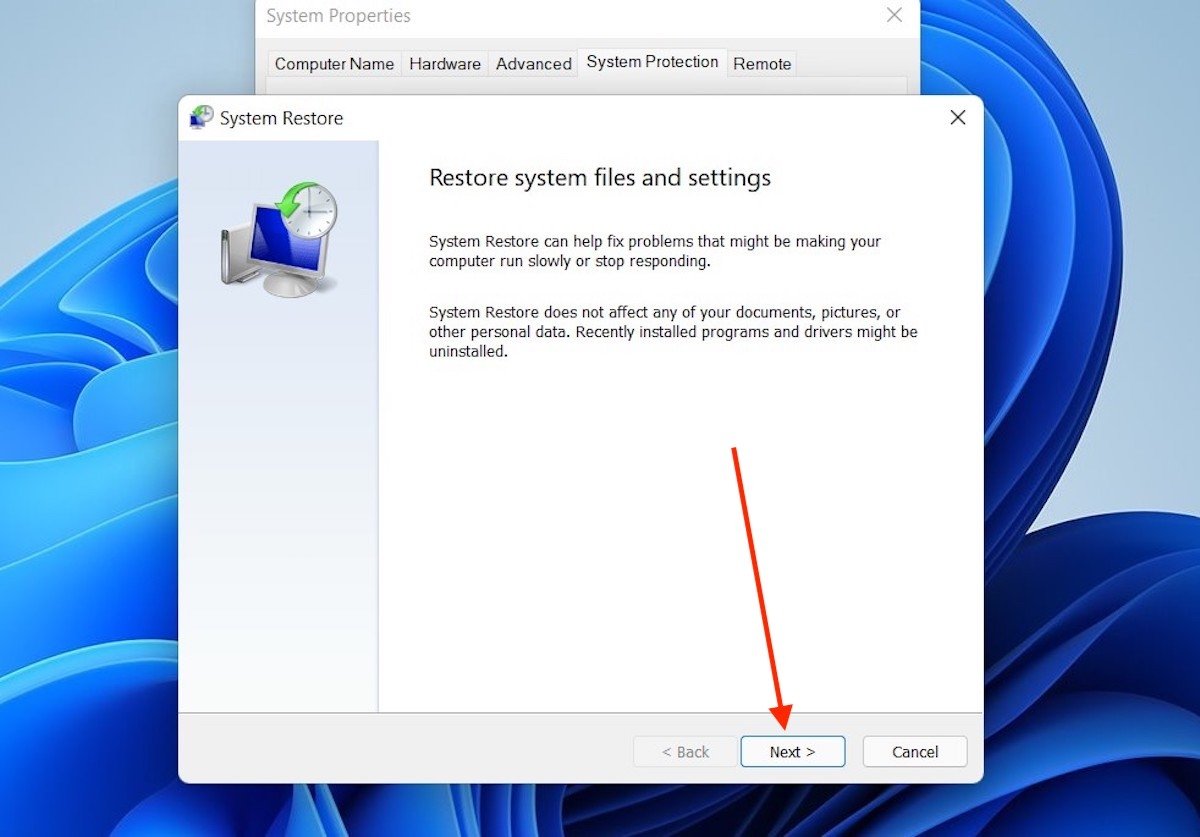
Use Next to skip to the next step of the wizard.
 Restore wizard
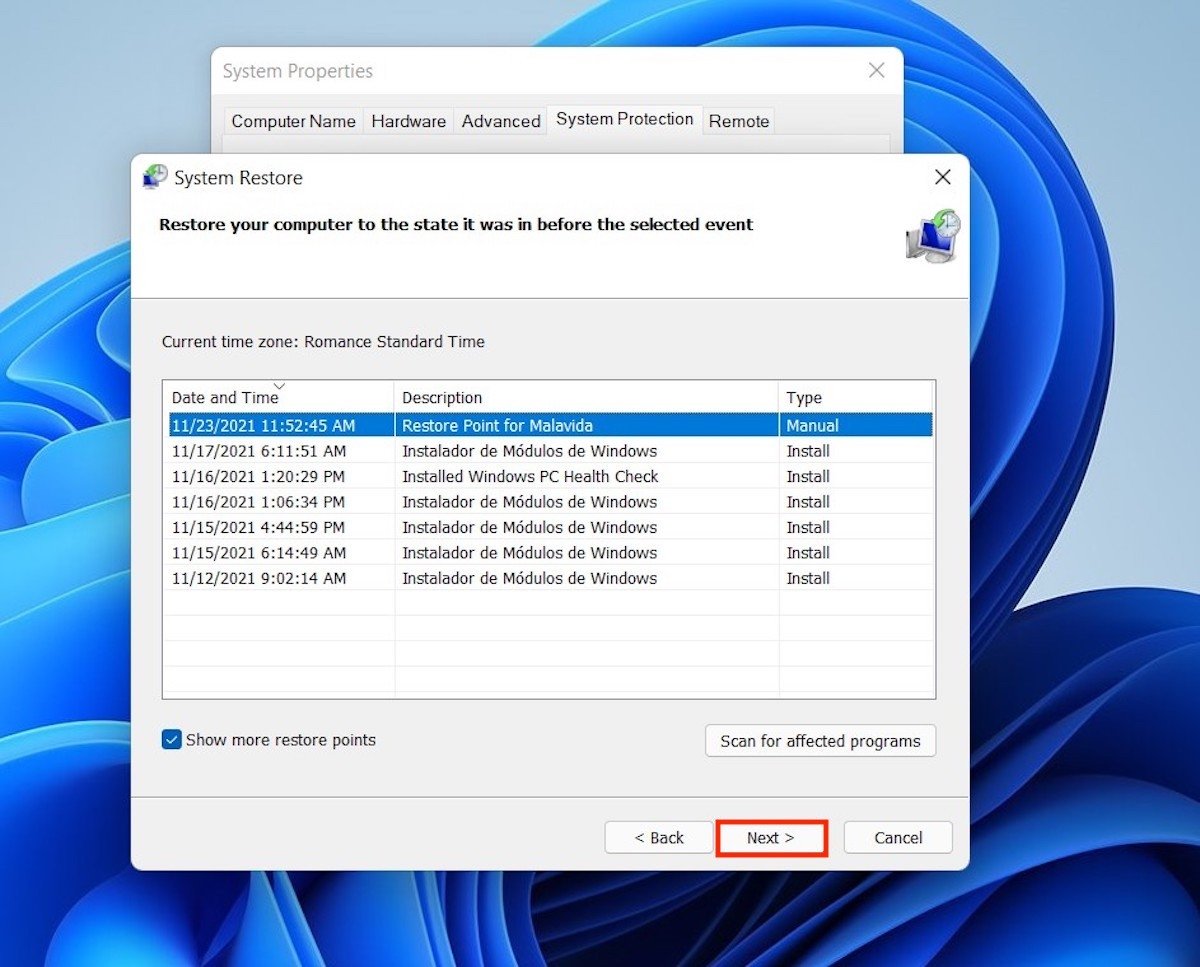
Select the restore point you want to recover To see all available restore points, check the Show more restore points checkbox. You will notice that, in addition to the point you created manually, Windows 11 created others automatically. Click on Next to continue.
 Restore a previous system point
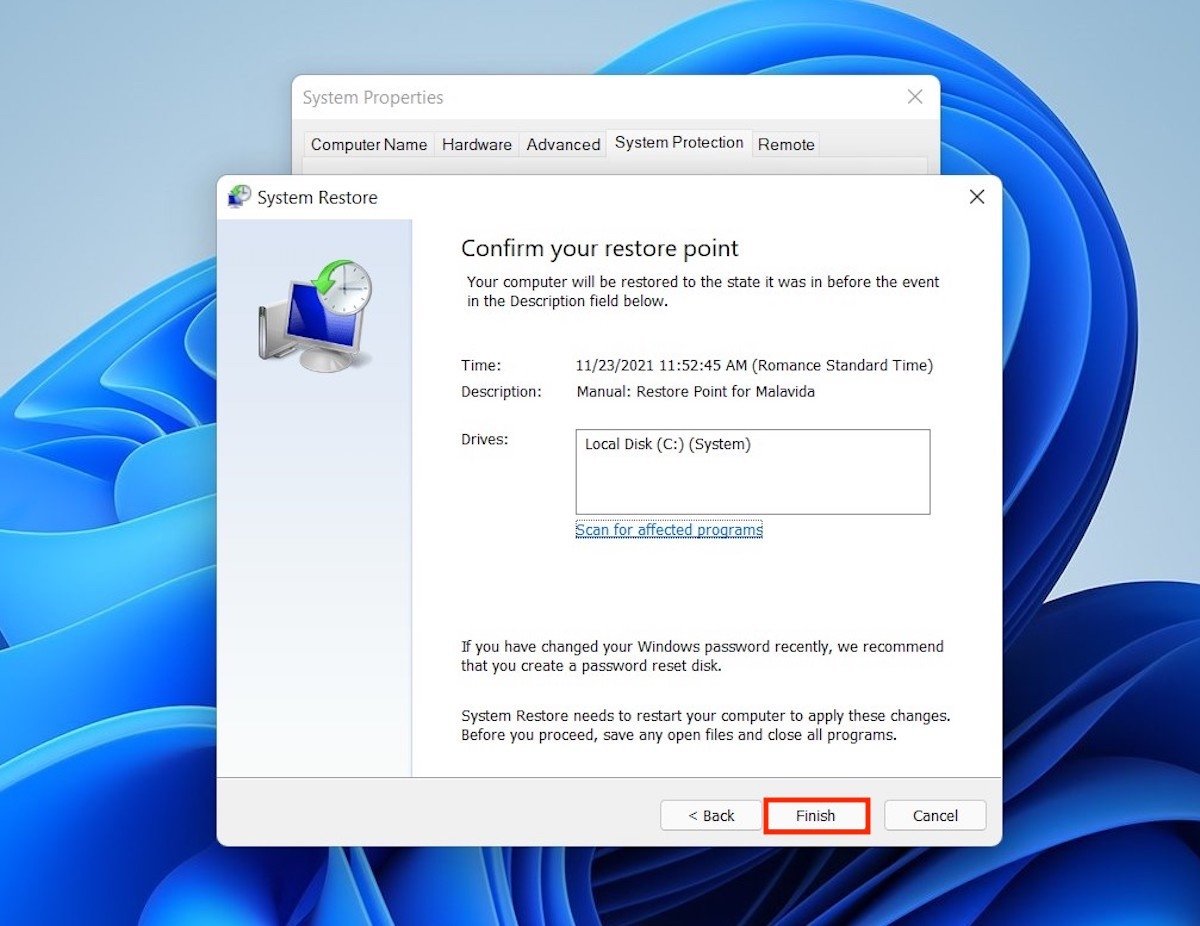
Check which applications will be affected with the Scan for affected programs link. If you are satisfied, confirm the point restoration with the Finish command.
 Confirm the restore
The computer will restart and return to the exact state it was in when the restore point was created. This could include deleting some files and uninstalling certain applications.
How to delete all restore points?
If for some reason, you want to delete the restore points on your computer, perhaps because you are running low on hard disk space, go back to System Properties and open the System Protection tab. Then, click on Configure.
 Configuration to delete restore points
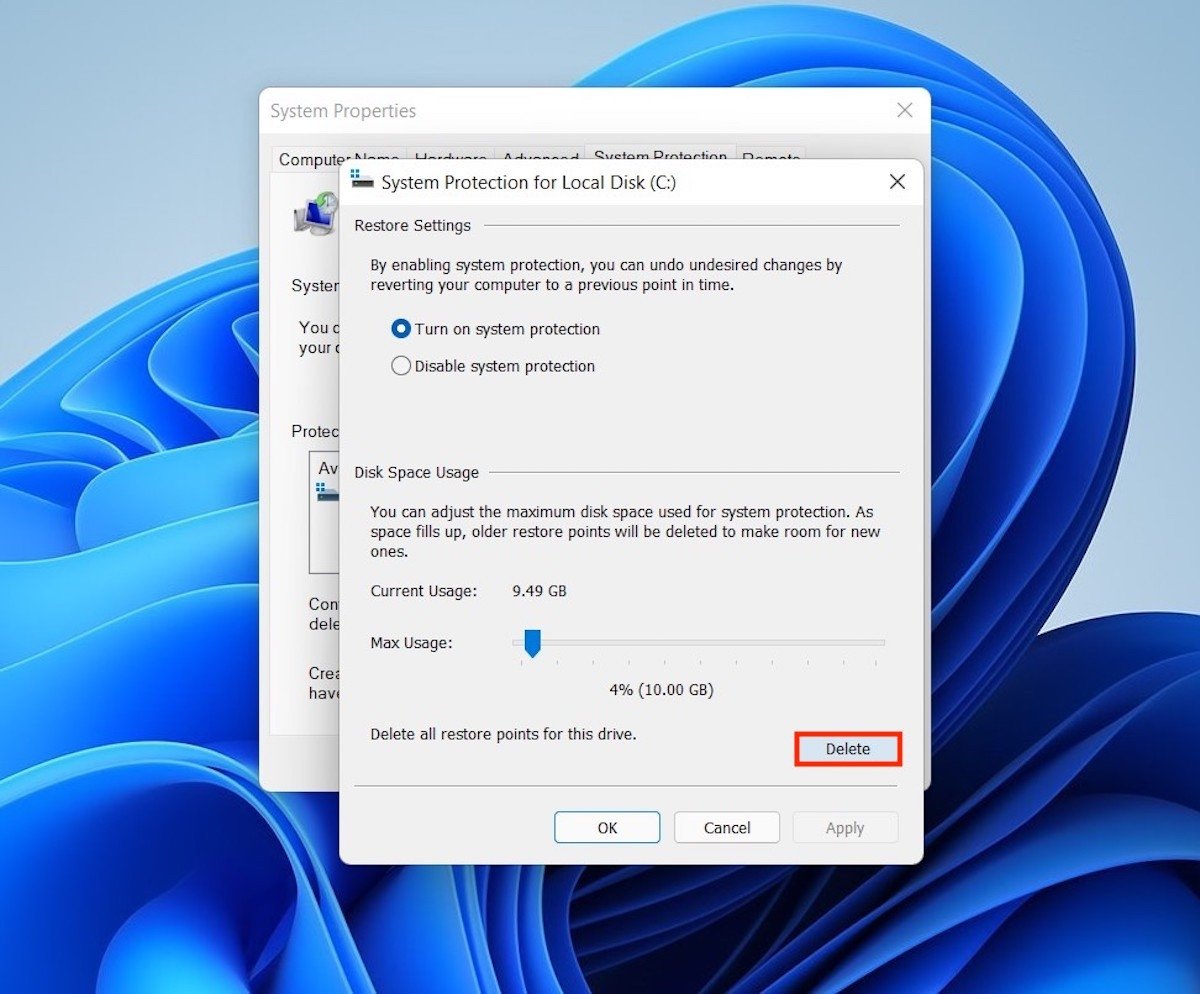
In the pop-up dialog, click on Delete.
 Delete all the restore points
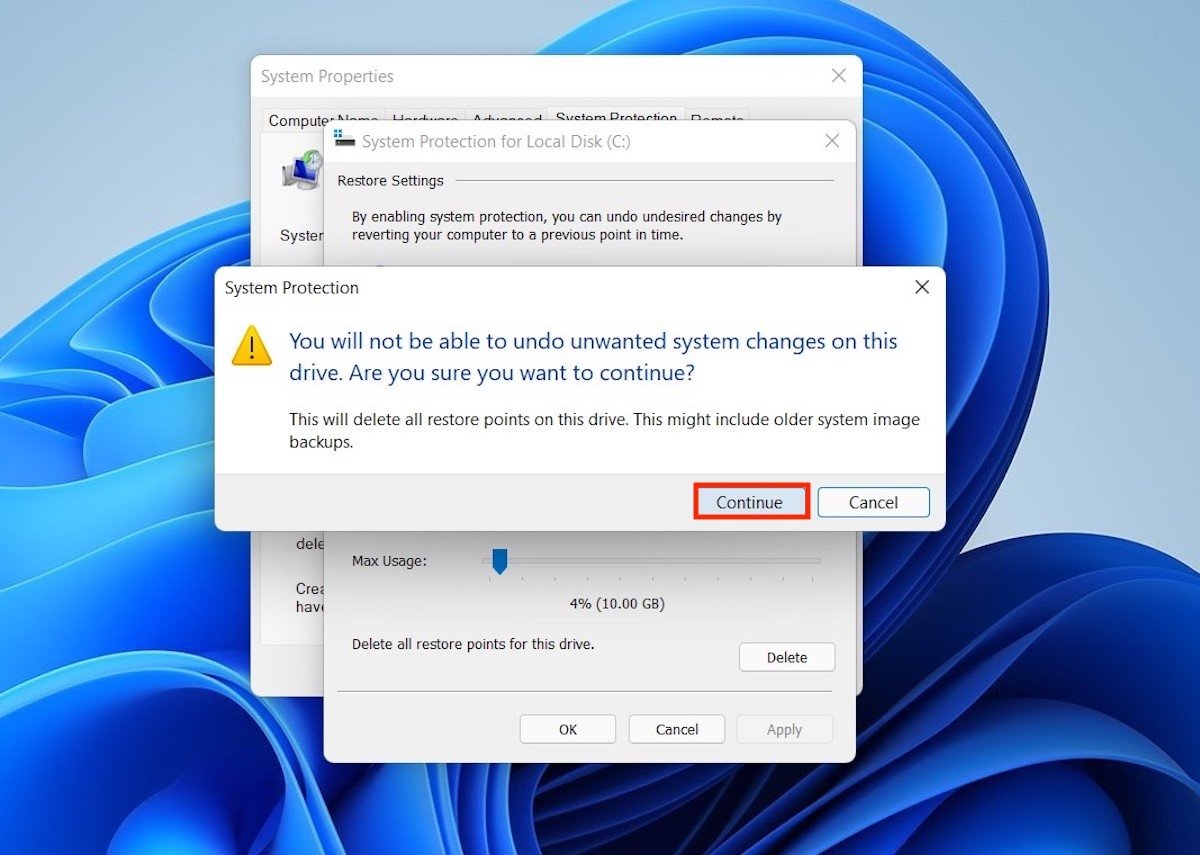
Use the Continue button to confirm the deletion of all restore points.
 Confirm the deletion of all restore points
In this simple way, you will have deleted all the points created so far. You should know that Windows 11 will automatically recreate them when for example, you install an application. If you do not want this to happen, select the Disable system protection option.
