
In this guide, we will explain how to move files from BlueStacks to Windows. We will show you the easiest method to extract the files you have created inside the virtual machine and store them in the internal storage of your PC. Do not miss it!
How to export files from BlueStacks to your PC
BlueStacks is a virtual machine that lets you run Android games and apps on Windows computers. Although it is a virtualization platform specialized in video games, you can use it to run any application developed for Android devices. Because of this, sometimes you will create files you would rather have on your Windows computer.
However, you must know that, as it is a virtual machine, the BlueStacks file system is isolated from Windows. This means you cannot access the files on the virtualized device directly from your computer's file explorer; you must export them first.
 Option to export to Windows from the Media Manager
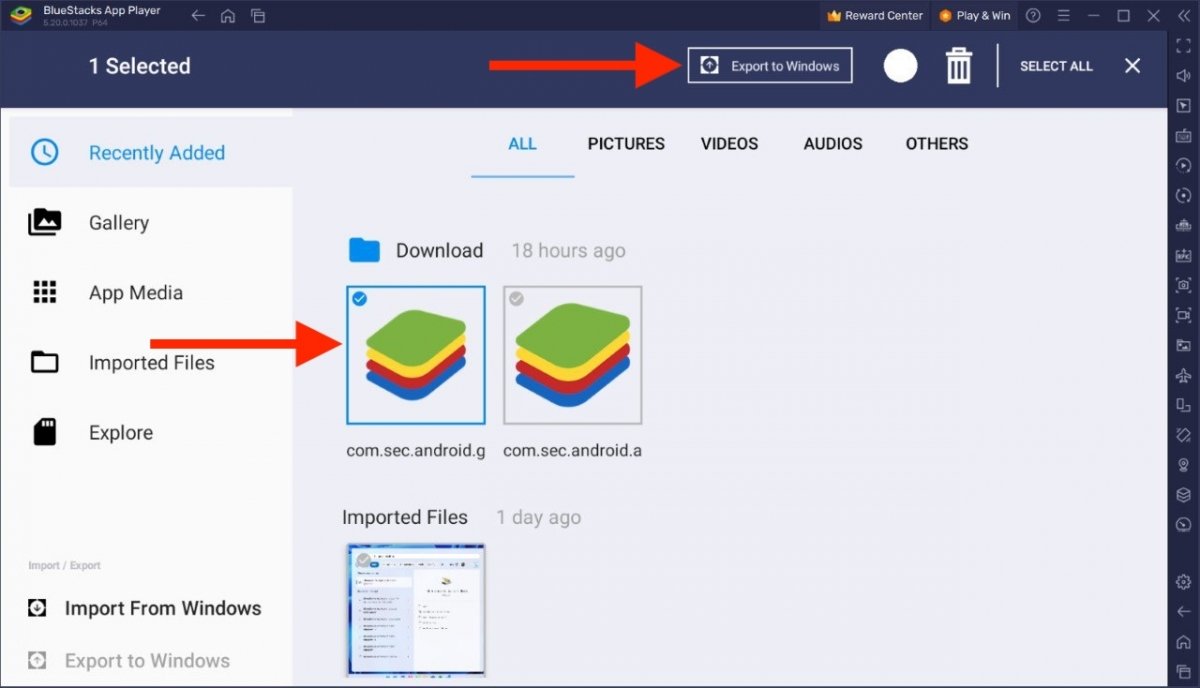
This whole procedure, and its opposite, moving files from Windows to Bluestacks, is done with the Media Manager installed by default on the virtual machine. This is a file explorer app with special functions to transfer files between the virtual device and the host: your PC. It is used as follows:
- Locate the file you want to export to Windows.
- Long-click on it with the mouse.
- Once selected, click on the Export to Windows button at the top of the screen.
- Select the destination folder with Windows Explorer.
- Or, you could first click the Export to Windows option in the lower left corner and then select the files.
The file will be transferred immediately to the directory you have selected. Now, you can do whatever you want with this file, just as you would with any other file on your computer. You can send it to someone, upload it to the cloud, or share it on social networks. What you do with your files is up to you.
How to move files from BlueStacks to Windows with Media Manager
BlueStacks Media Manager is the built-in application that helps you manage files on the Android virtual machine where you install games and apps. You have already seen how easy it is to export files using it. But how do you access this tool?
 Location of the Media Manager in BlueStacks
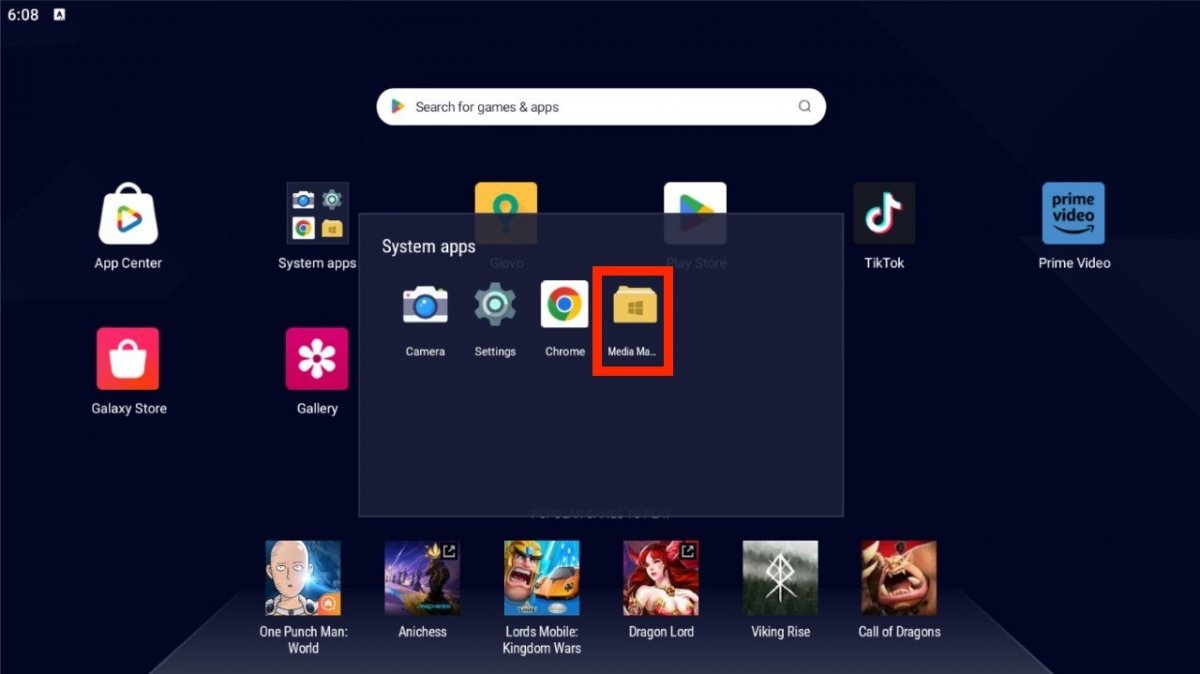
Well, the tool is easy to find and use:
- Locate a folder called System Applications in the application launcher (where the icons for games and apps are).
- Click on it to see all the apps inside.
- Click on the folder icon with the Windows logo. Although its full name is not visible, it is called Media Manager.
- Follow the steps mentioned in the previous section to move your files from the virtual machine to Windows.
You might find yourself in several situations where it will be useful to leverage this tool to send files from the Android virtual machine on BlueStacks to Windows. Here are some of them:
- Save game data. Undoubtedly, this is one of the most common uses of this tool. Some games you run on BlueStacks store important data (such as game data or progress) on the virtual machine. Transferring this data to Windows can be useful for backup purposes or to continue playing on a different device.
- Keep a backup of your files and documents. You may have created files with the applications you use within BlueStacks. For example, you may have installed Photoshop Express to edit images on your computer with this tool. In such cases, you will want to backup your projects on another device, especially if you have finished them.
- Edit images or videos in Windows. Have you taken screenshots while playing? If you have captured images or videos within BlueStacks and want to edit them with specialized tools in Windows, you will need to transfer those files.
- Download personal files. You can use BlueStacks to download files from websites or emails using apps such as Chrome or Gmail, to give just two examples. Transferring these files to Windows can facilitate access and management.
- File sharing with your smartphone apps. You may have been experimenting with some applications in BlueStacks and want to replicate your results on your smartphone. Downloading the app's files to your PC storage can help you do this, as you can then transfer them to your Android device.
These are just some examples of what you can achieve by using BlueStack's file transfer feature to move files between BlueStacks and Windows.
