
Virtual drives are often used to mount an image file, thus avoiding the need to burn it to a CD or DVD. Image files are similar to compressed folders and contain a structure of folders and files necessary to carry out the installation of a software. They are usually represented by the extensions BIN, IMG, ISO, or CCD.
Although it is necessary to use specific software for the creation of virtual drives, their uninstallation can be done from the operating system. You may have installed a virtual drive for a very specific purpose and now you do not need it. We show you how to remove it from your PC once and for all.
First, open the Windows 10 device manager. To do this, click on the Windows key and type Device Manager. If the result is the same as you see in the image, click on the first item in the list.
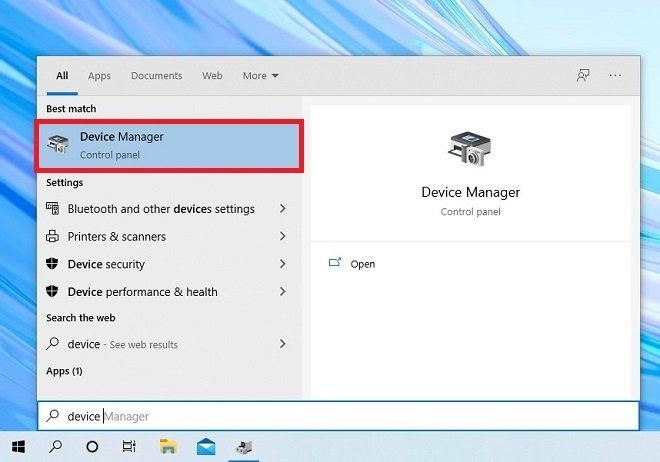 Search for the device manager
A window will then open with a complete list of all the devices connected to your computer. Then, locate the DVD/CD-ROM drives section. Click on the arrow to display it.
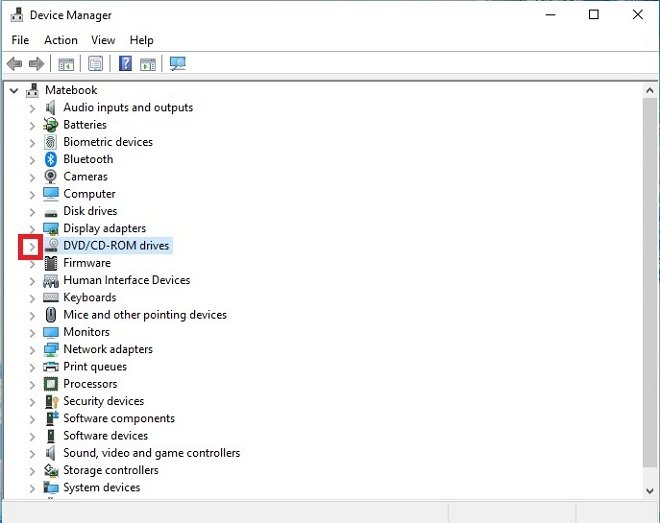 View list of connected CD units
The devices shown in the list are all those that Windows 10 detects as having been physically connected. Obviously, virtual units emulate precisely that, and therefore, are also included in the list. In the following screenshot, you can see that there are two virtual units connected to the computer.
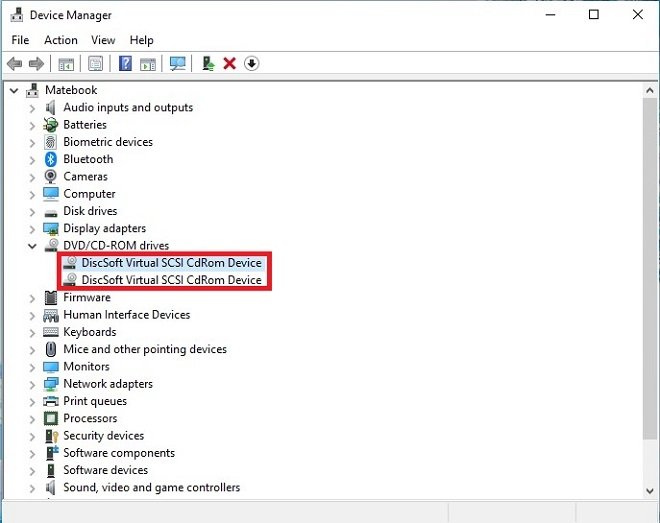 List of units
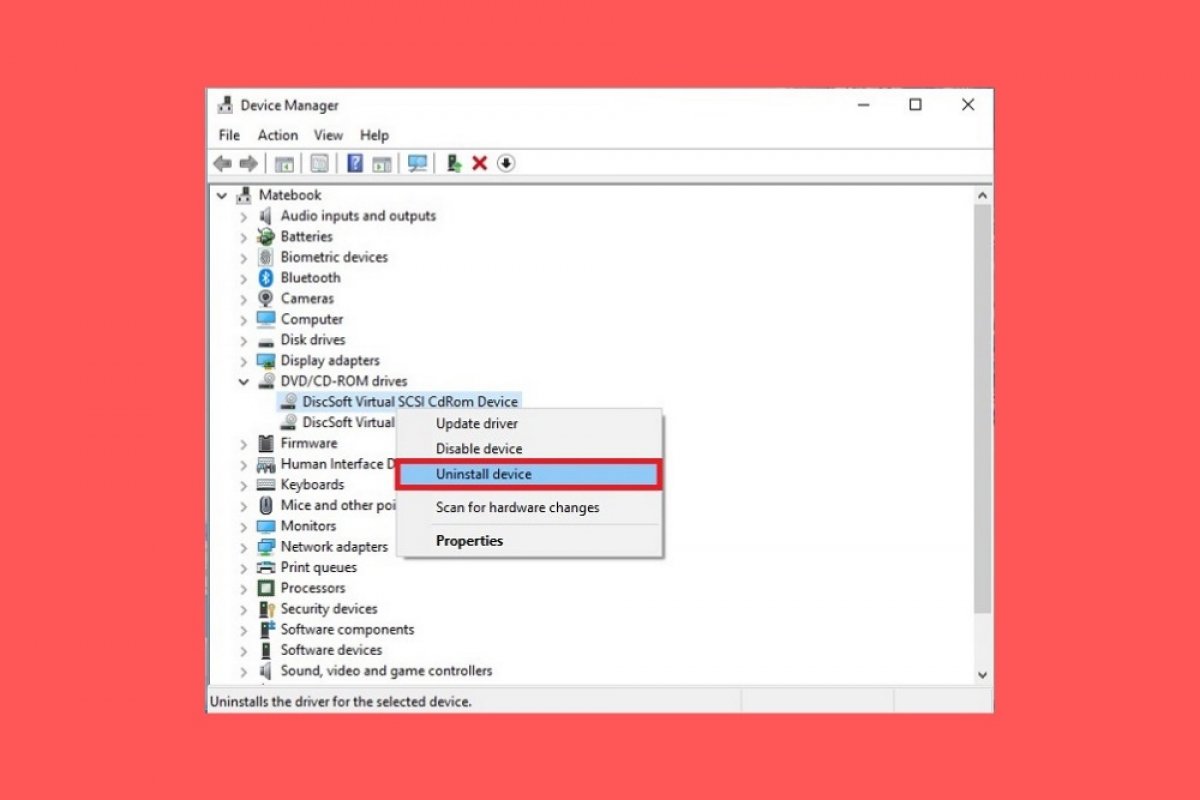
To remove them, right-click on them and then choose the Uninstall option.
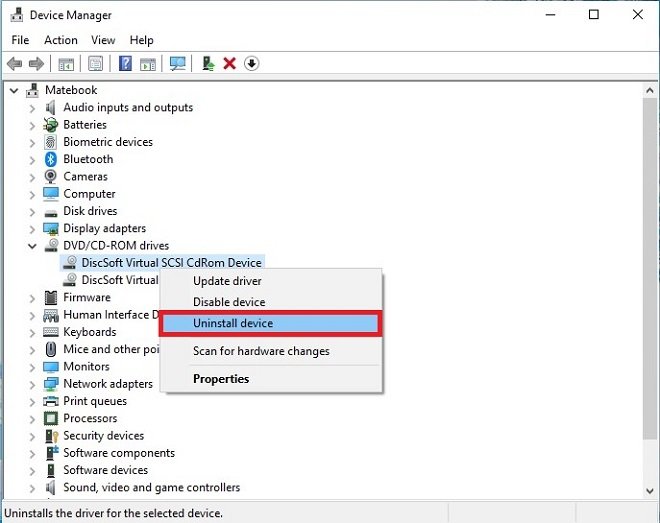 Uninstall the device
After that, the unit will have been uninstalled. You must be very careful not to uninstall a real drive. This may cause you to lose access to it and have to install it again on your PC.
