

Cortana is the voice assistant for Windows 10, but you might not want to use it for different reasons. In that case, it is possible to disable its functions through the Windows registry.
Click the Start button on your Windows menu and type in regedit. Select the first option in the search results:
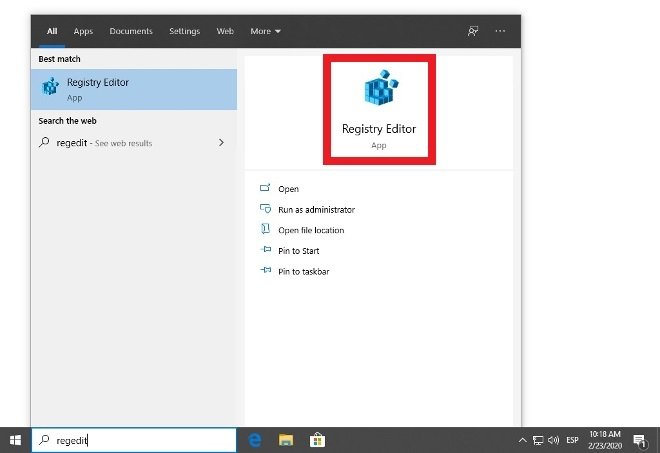 Access to the registry editor
If you are asked for administrator permissions, grant them so you can make changes to the system.
 Give the software permissions to make changes
Browse to the route HKEYLOCALMACHINE\\SOFTWARE\\Policies\\Microsoft\\Windows. Once there, click with the mouse right button on the blank right space and select New>Key to create a new folder.
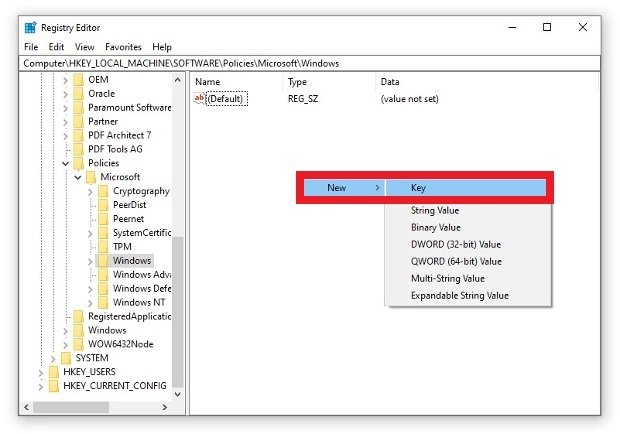 Creation of a new folder in the registry
A new subfolder will be created in the folder tree in the left menu and you can name it. Be sure to name it Windows Search.
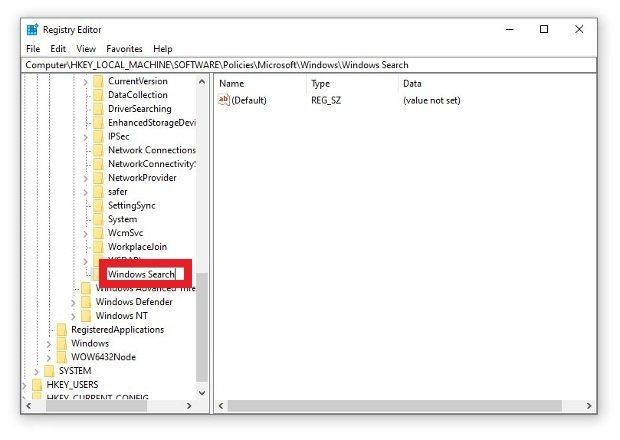 Creation of the Windows Search folder
Click on the new folder and in the white space on the right side, right-click and select New>DWORD (32-bit).
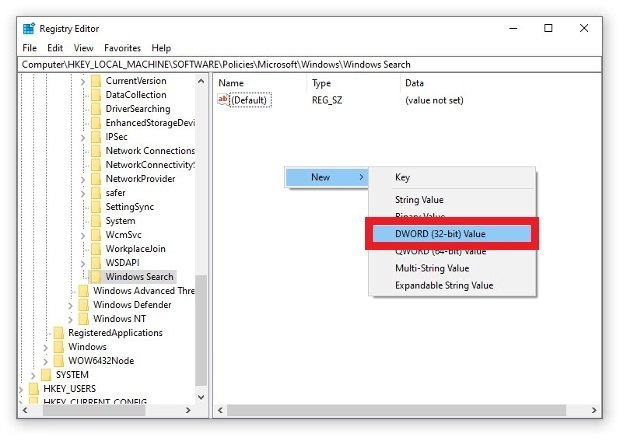 Creation of a new DWORD entry
Set AllowCortana as the name.
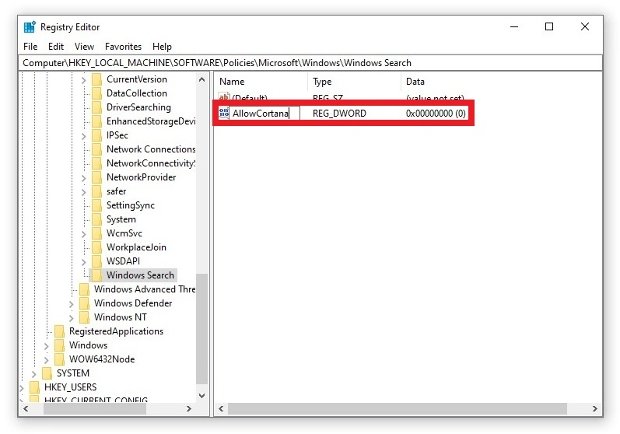 The new registry must be called AllowCortana
Finally, double click on that new file to edit its values. Make sure you set the Value Data field to 0 and press Ok.
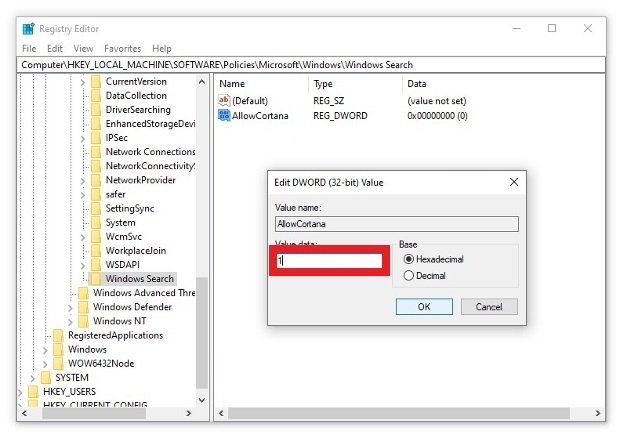 Edit the values of AllowCortana
After rebooting Windows 10, Cortana will have completely disappeared from the system and you no longer have to worry about it. If you want to revert the change at any time, just follow these same steps in reverse and set the value to 1, it will return Cortana and all its functions to your screen.
