
Defragmentation lets you sort the contents of your hard drive, taking up space that has been left empty when you delete files. In this way, the unit is reorganized allowing faster reading speeds. To start the defragmentation tool in Windows 10, do the following.
First, open This PC to see the full list of drives and partitions available on your computer.
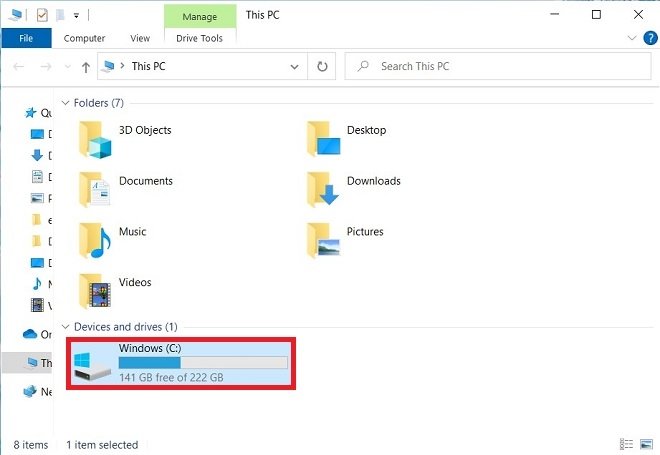 View disk units
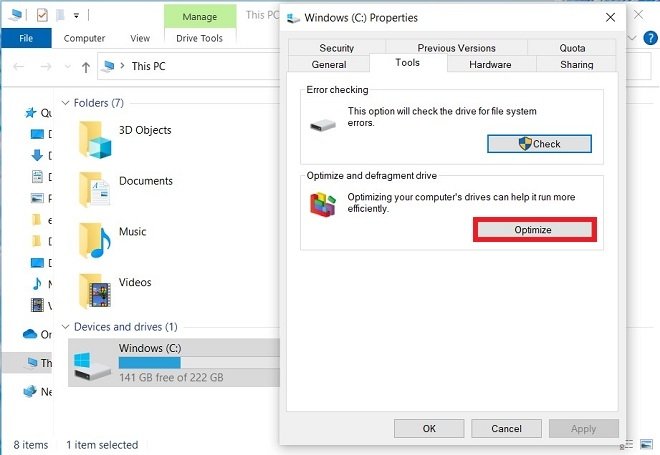
Then, using the right mouse button, open the properties of the selected unit.
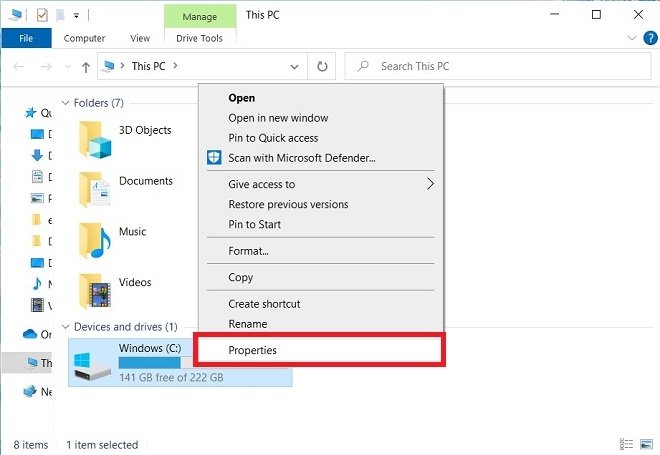 Disk properties
In the pop-up window, select the Tools tab.
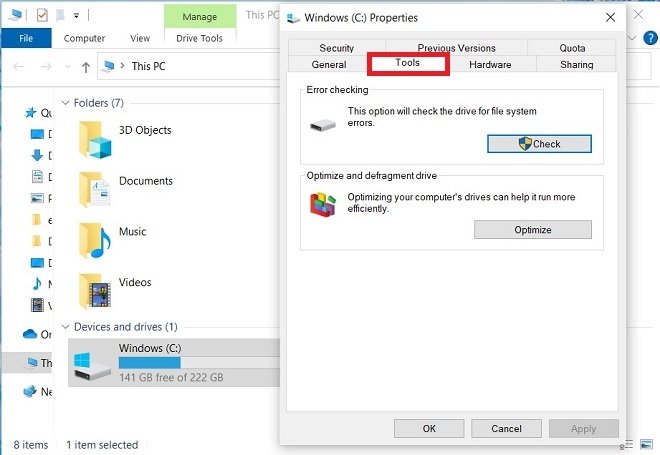 Tools tab
Then, access the disk optimization tool by clicking on Optimize. You will find this button in the Optimize and defragment drive section.
 Disk optimization tool
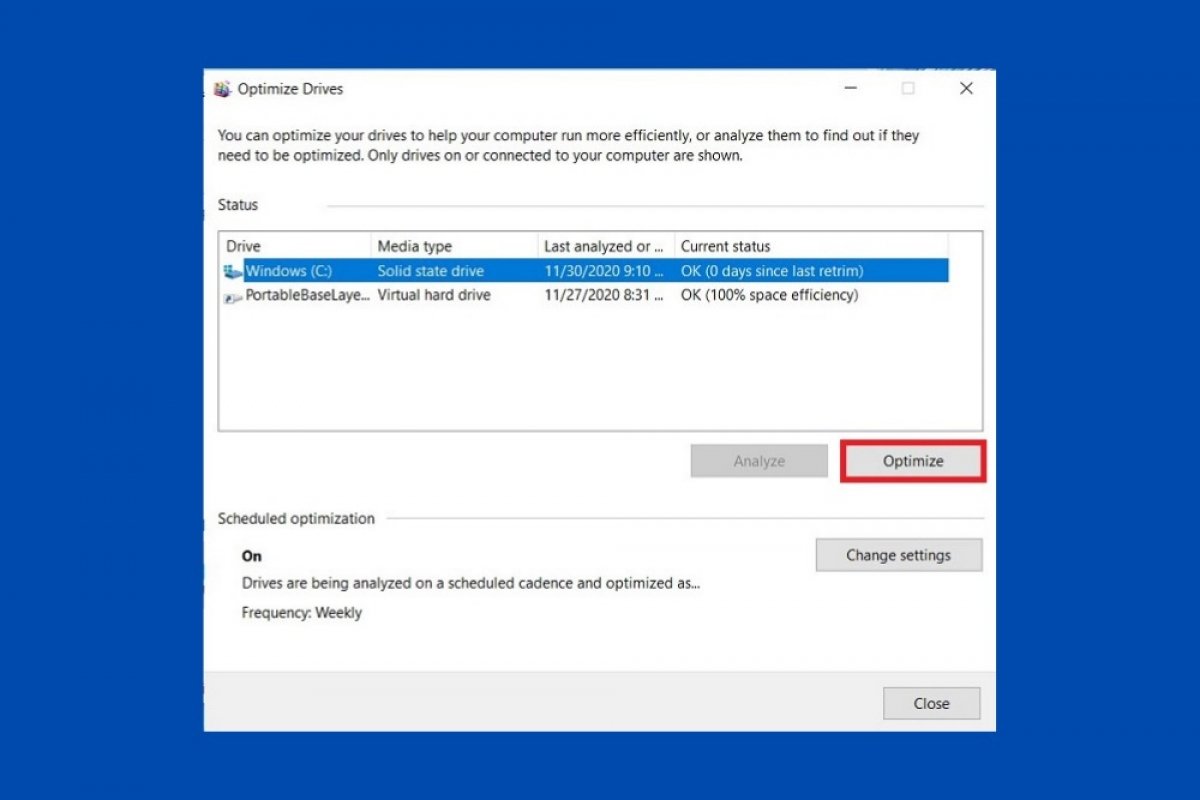
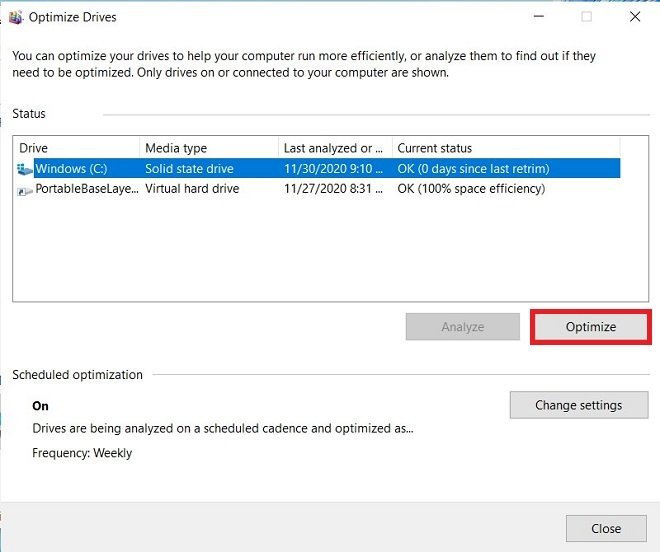
Once the optimization utility is launched, choose a unit from the list to start the defragmentation or optimization. Use the Optimize button to start the process.
 Start optimizing the drive
Depending on the type of disc, the total time spent may vary. Usually, in mechanical disks, commonly known as HDD, optimization, and defragmentation is usually slow. On the other hand, solid-state disks, also called SSD, are quickly optimized.
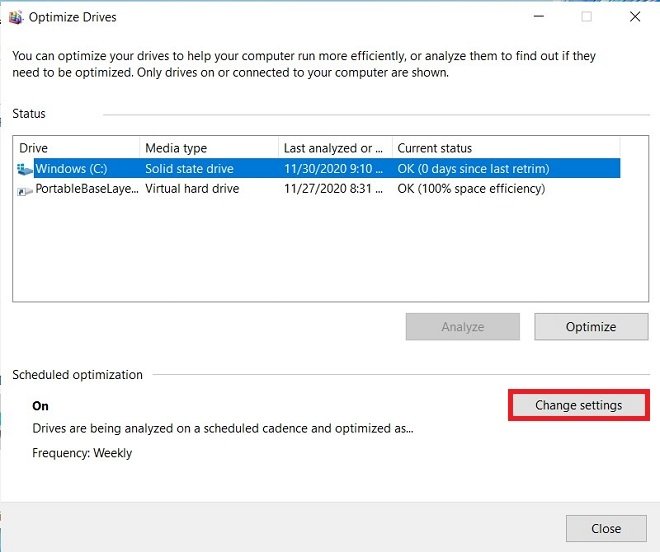
We recommend that you perform this process regularly to improve the performance of your computer. You can also automate it, using the Change settings button, located in the Scheduled optimization section.
 Schedule the disk optimization
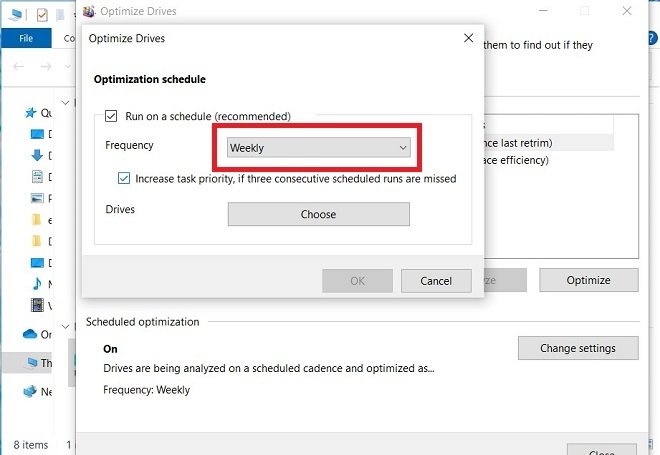
Now, specify the frequency of automatic optimization by choosing one of the options from the drop-down menu.
 Change the optimization frequency
You can ask Windows 10 to optimize the hard disk daily, weekly, or monthly. Maintaining an optimized hard disk does not in any way improve processing speed. Rather, it lets the system access the data more efficiently and improves the overall performance of the equipment.
