

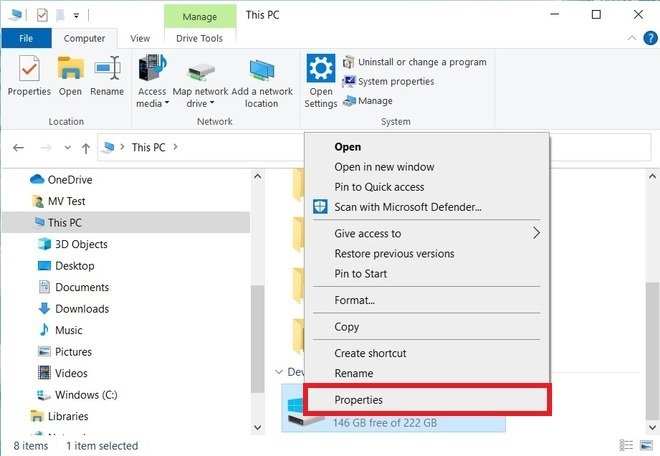
You can fix the most common errors in Windows 10 thanks to the disk error checking wizard. Accessing it is very easy. Simply open the file browser and go to This PC. Locate the drive or partition where the system is installed. With the right mouse button, open the context menu and click Properties.
 Open the disk properties
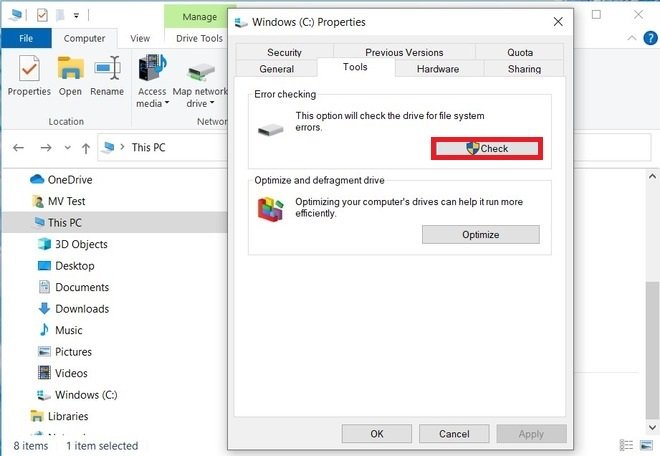
In the pop-up window, access the Tools tab. There, you will see a button called Check. Use it to scan your hard drive for errors.
 Tools tab
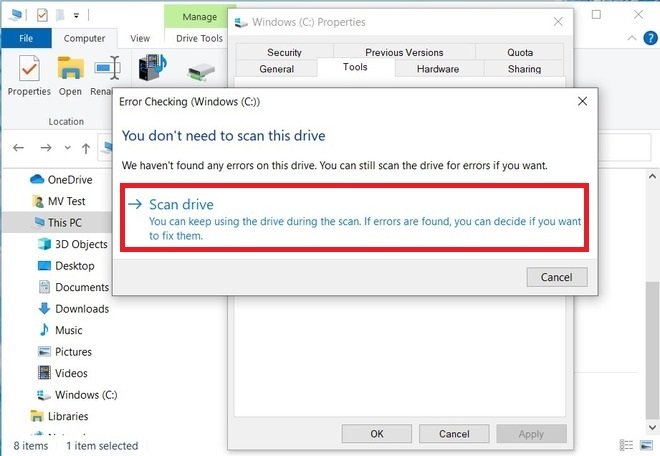
Use the Scan drive option to start scanning.
 Scan the hard drive
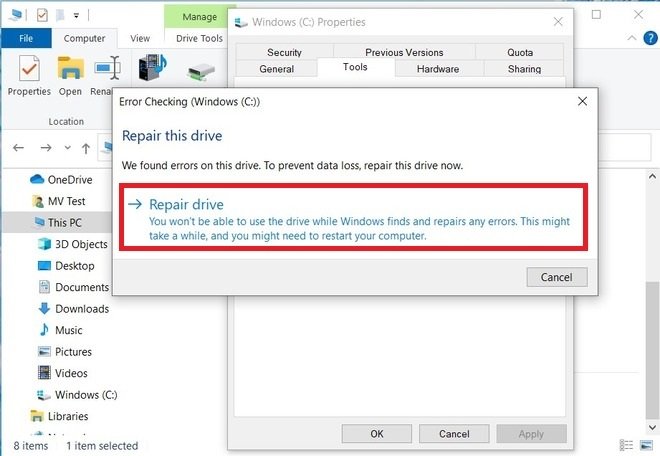
Wait for Windows to finish checking for errors. This process may take several minutes. The total time spent on this task depends on several factors, such as the type of disk or its size. If errors are found, you will receive the message We found errors in this drive. Click Repair drive to repair the disk.
 Fix errors
A restart is required to complete the disk repair. Therefore, choose when to do it with the button Repair on next restart, to repair the disk the next time the computer is started, or with the button Restart and repair now, to do it immediately. If you choose the second option, do not forget to save the changes of any open document.
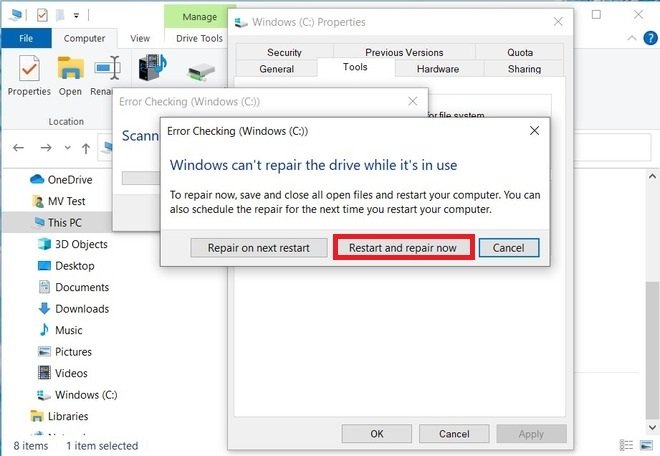 Choose when to fix the disk
Similarly, you can schedule disk repair by executing the chkdsk command C: /f at the command prompt. Do this by using Windows search and typing cmd. Select the Run as administrator option.
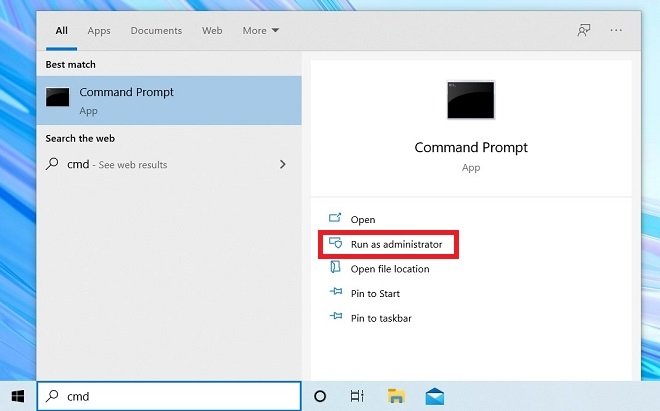 Open the command prompt
Launch the command, and confirm with the letter Y.
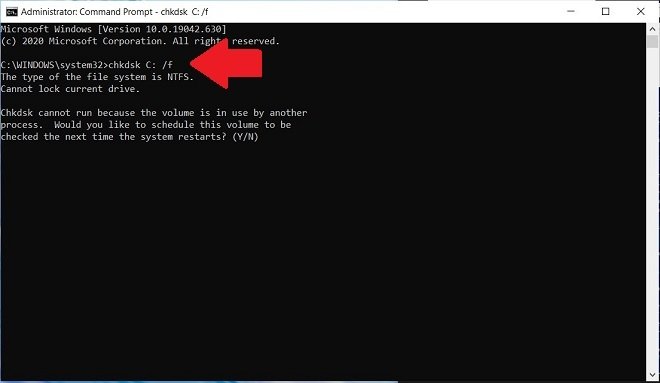 Fix errors from the command prompt
The next time you start your computer, Windows will repair any disk errors that have been found.
