
Making a backup copy is an action that we recommend you undertake from time to time, especially if you store important information on your Windows 11 computer. Do not forget that at any moment, your equipment could suffer a mishap that could cause an irreparable loss of data. There are indeed some methods to recover lost files in Windows, but they are not always effective. So, what can you do to keep your documents safe? Here, we tell you about it.
How to create a Windows 11 backup manually
Creating a backup copy manually is one of the simplest ways to generate duplicates of your documents and protect them against possible data loss. Follow these steps to do it yourself:
- Connect the external hard drive or USB stick to your computer.
- Open two Windows Explorer windows and split the screen in two with them.
- In one of the windows, access your hard disk. Add a specific folder for the backup if necessary.
- Locate the files you want to copy using the second file explorer window.
- Drag the documents from the original location to the location on the hard disk.
Repeat the process as many times as necessary to generate a complete backup.
Pros and cons of following this method
Pros:
- It is very simple to perform.
- You do not need programs.
- Any storage device will do, from a hard disk to an SD card.
Cons:
- It is not an automatic process. You need to remember to create a backup frequently.
How to create a scheduled backup in Windows 11
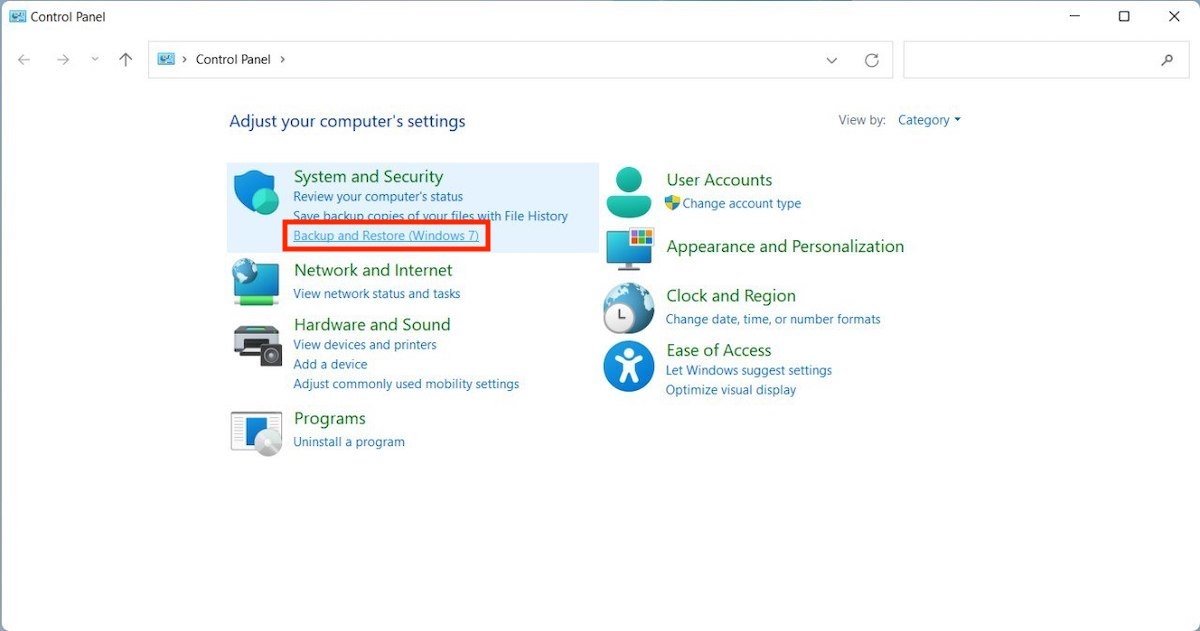
The second way to produce a backup in Windows 11 is to use the tool that you will find in the Control Panel. Once there, click on the Backup and Restore (Windows 7) link.
 Open the backup tool
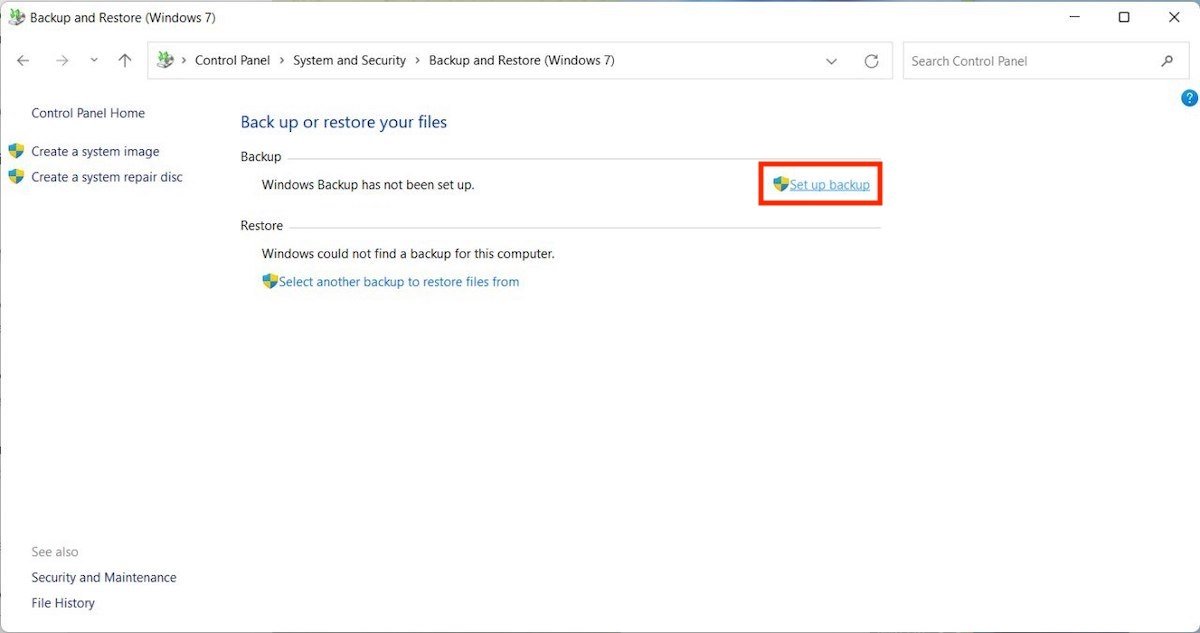
Click on the Set up backup button to launch the scheduled backup wizard.
 Start a backup
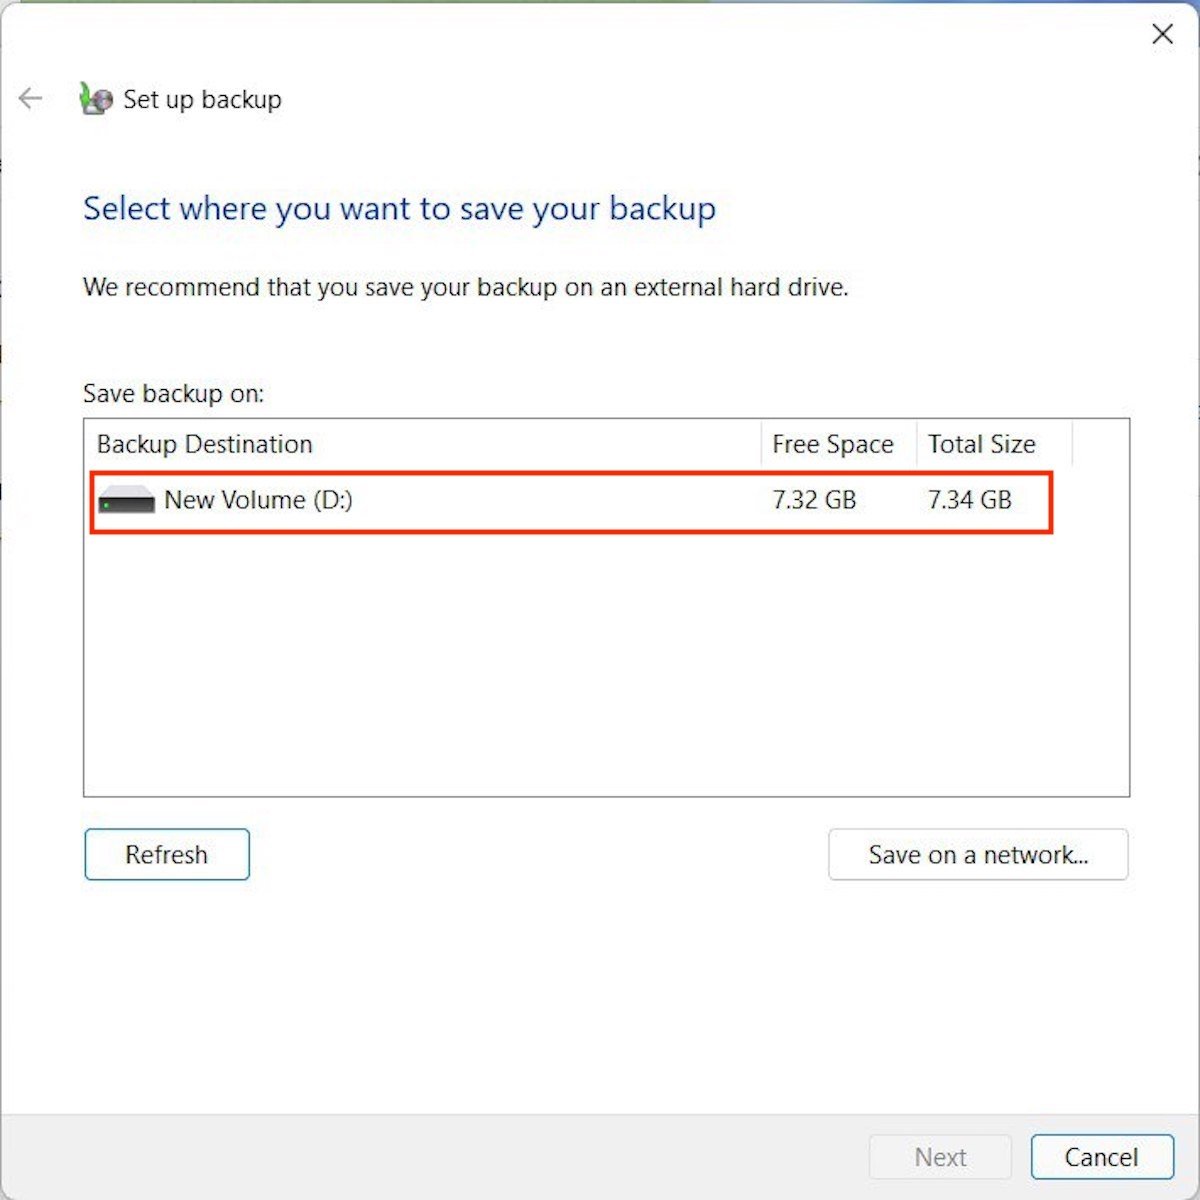
Select the unit you want to use and click Next to continue.
 Select the volume
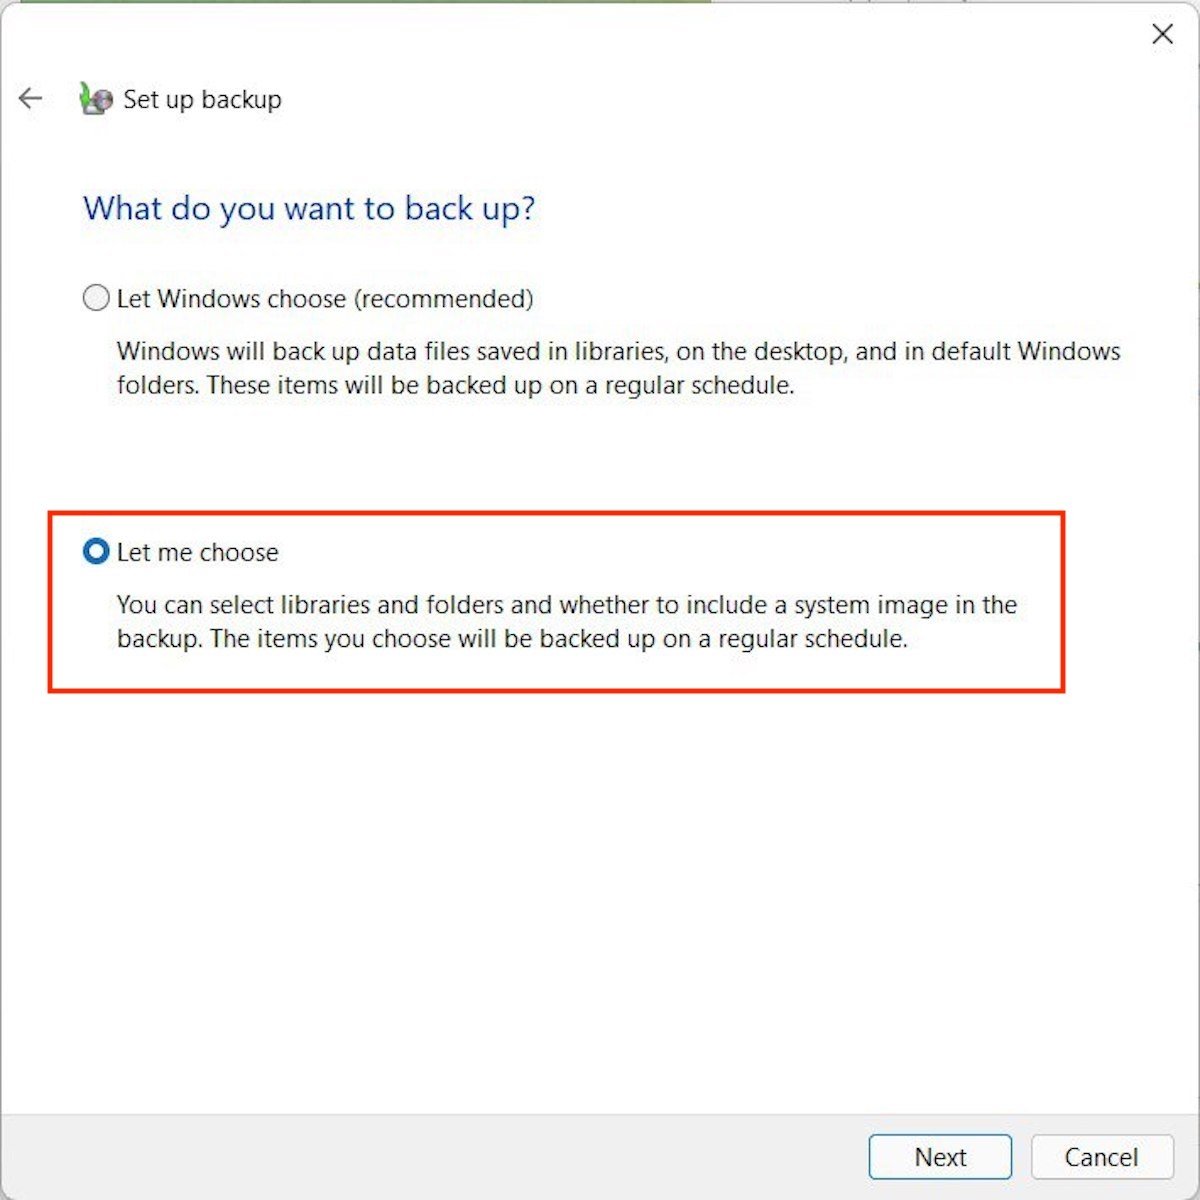
Decide whether to allow Windows to choose which files to copy or not. Generally, by selecting the Let Windows choose option all your important files will be copied. However, if you want to add a specific folder, check Let me choose.
 Choose the folders to copy
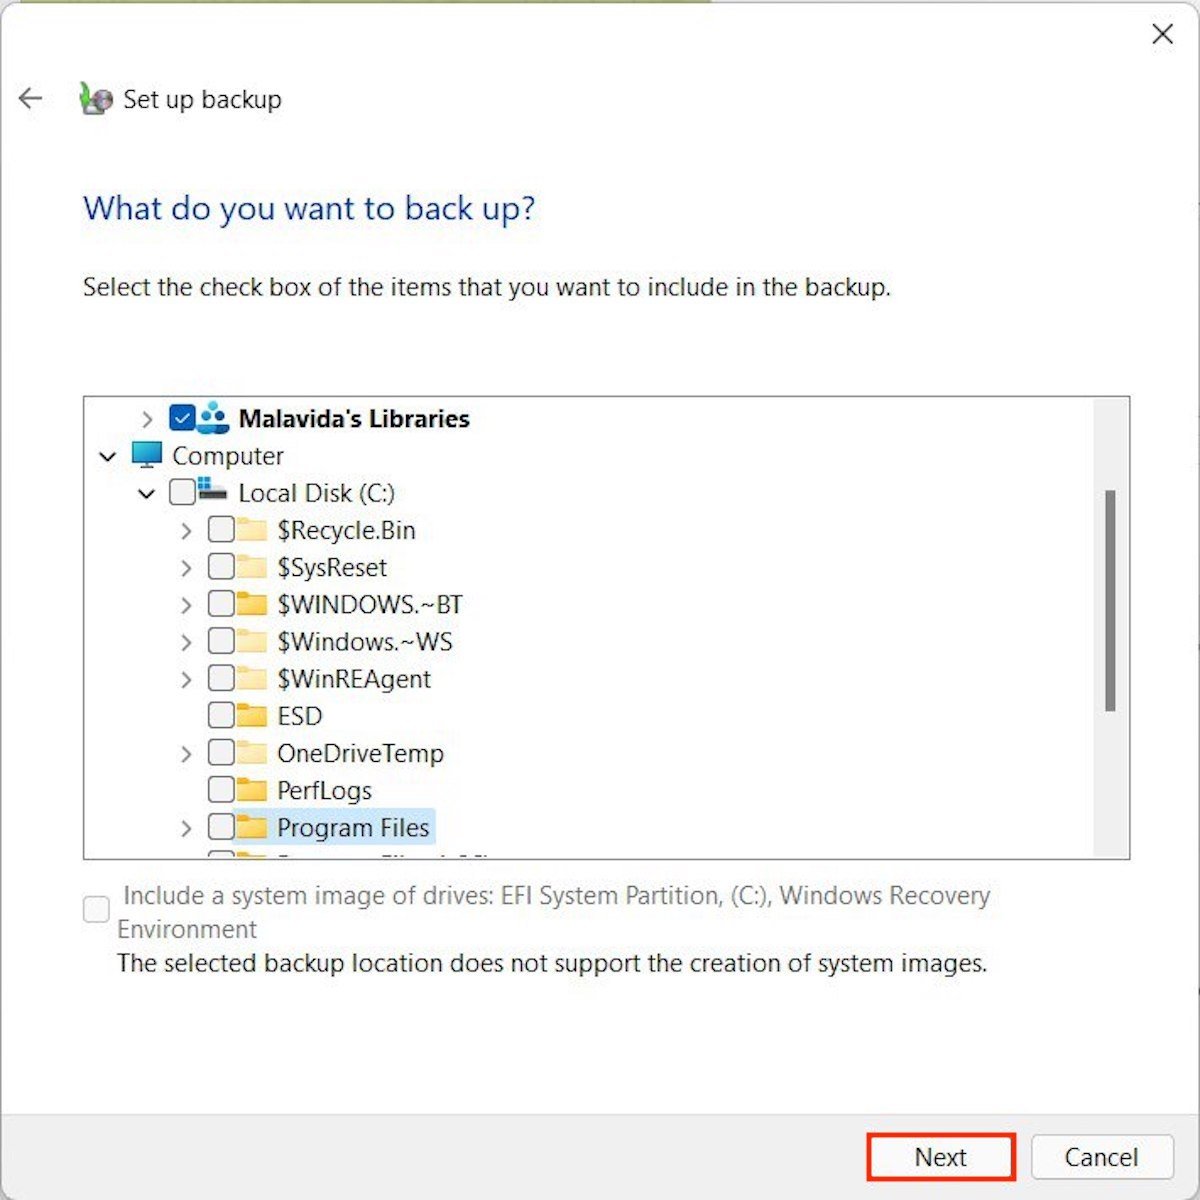
Check the boxes next to each directory to tell Windows to include it in the backup.
 Select specific folders
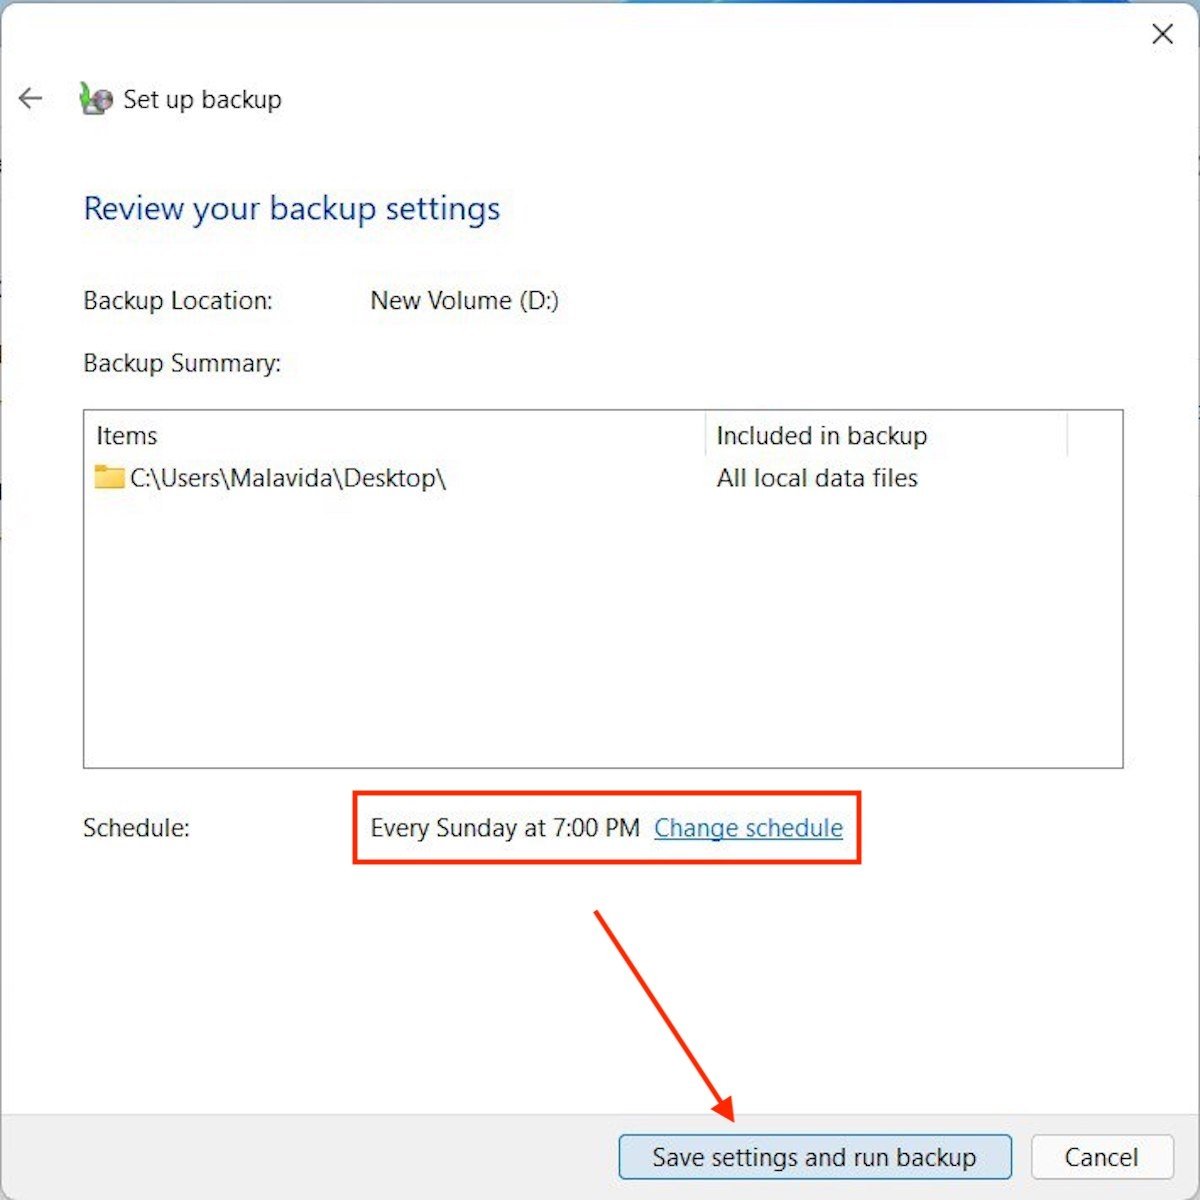
In the next step, set the backup to be performed automatically. Do not forget to keep the disk you have selected connected to your computer.
 Schedule and start the backup
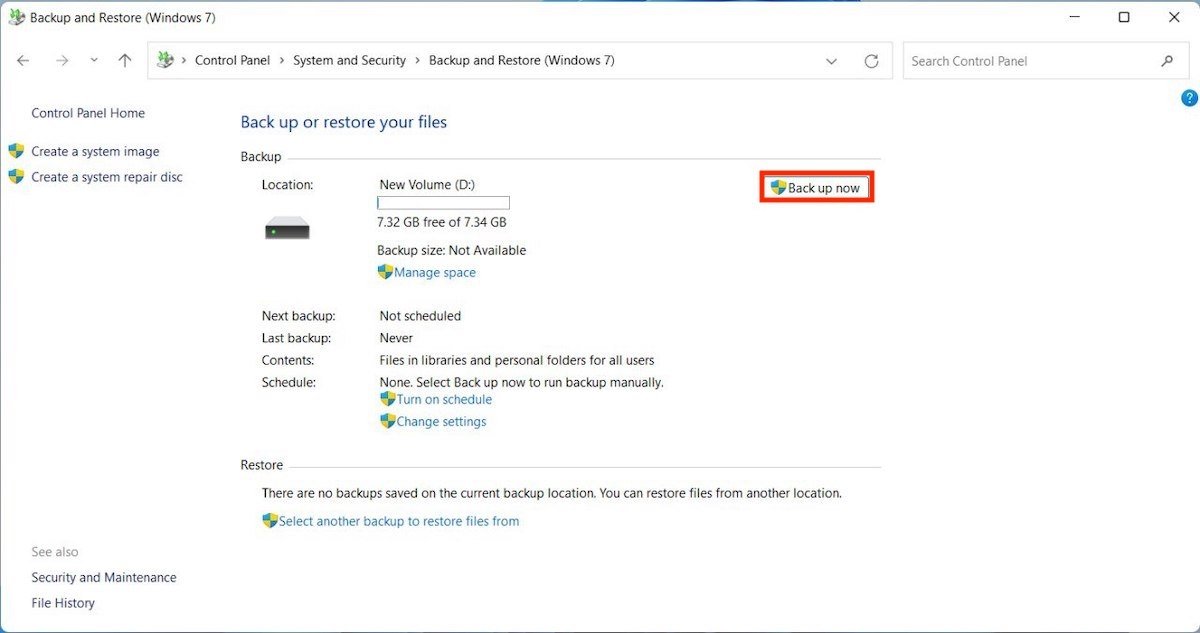
In any case, to start a backup immediately, click on Backup now.
 Start the backup right now
Close the Control Panel and wait for the copies to be made at the selected time.
Pros and cons of following this method
Pros:
- Allows you to create a selective copy of the files.
- It supports copy scheduling, helping you not to worry about it.
Cons:
- If you set the copy, you must remember to connect the hard disk at the time of startup.
How to create a full disk backup in Windows 11
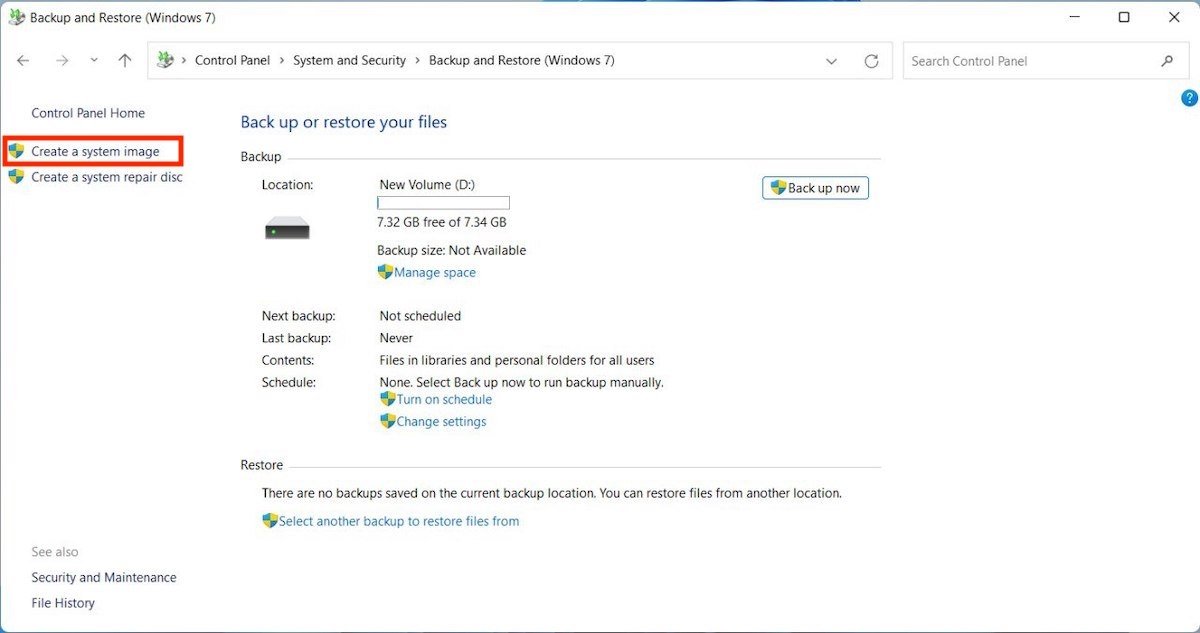
Everything mentioned so far corresponds to tricks aimed at safeguarding your personal files. However, Windows 11 also offers a way to completely copy the system hard disk. And best of all, it is located in the same section we visited earlier. In this case, it is necessary to click on Create a system image.
 Create a system image
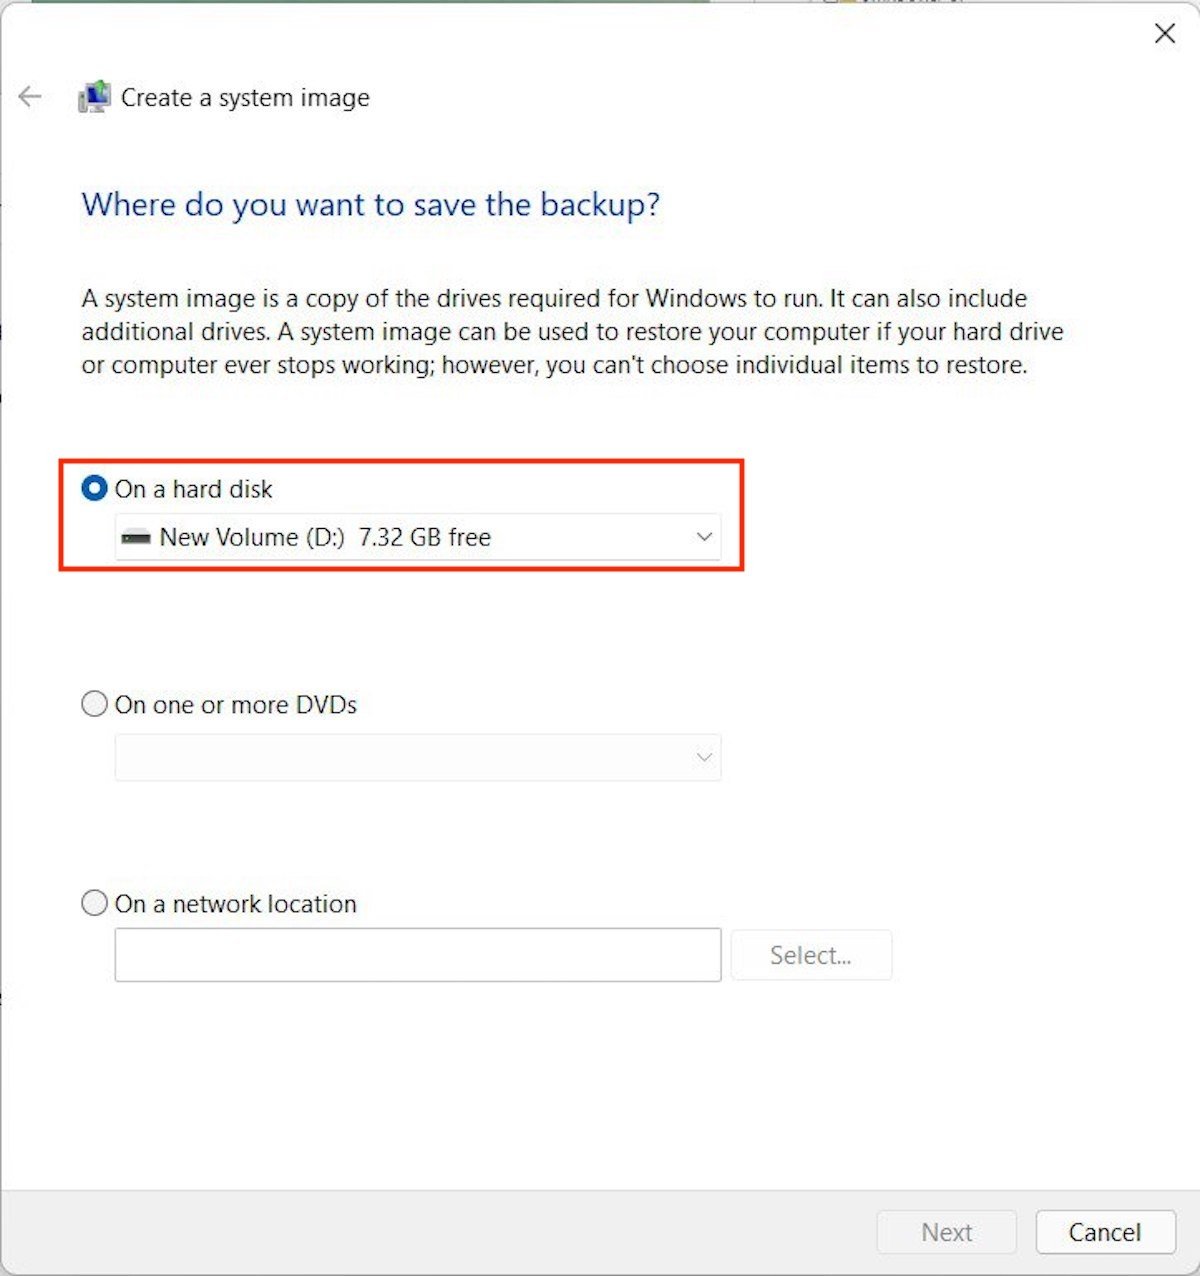
In the pop-up window, select On a hard disk and choose the drive where you want to run the backup process.
 Select a unit to make a copy of the drive
Follow the steps in the wizard to generate a copy of the system drive. If at any time you need to reset it, visit the Restore section in the Backup and Restore (Windows 7) section of the Control Panel.
Pros and cons of following this method
Pros:
- It creates an exact copy of the drive, including system and personal files.
Cons:
- You need a large hard disk to follow these steps.
- The total time to make the copy can be high.
How to create a backup with OneDrive in Windows 11
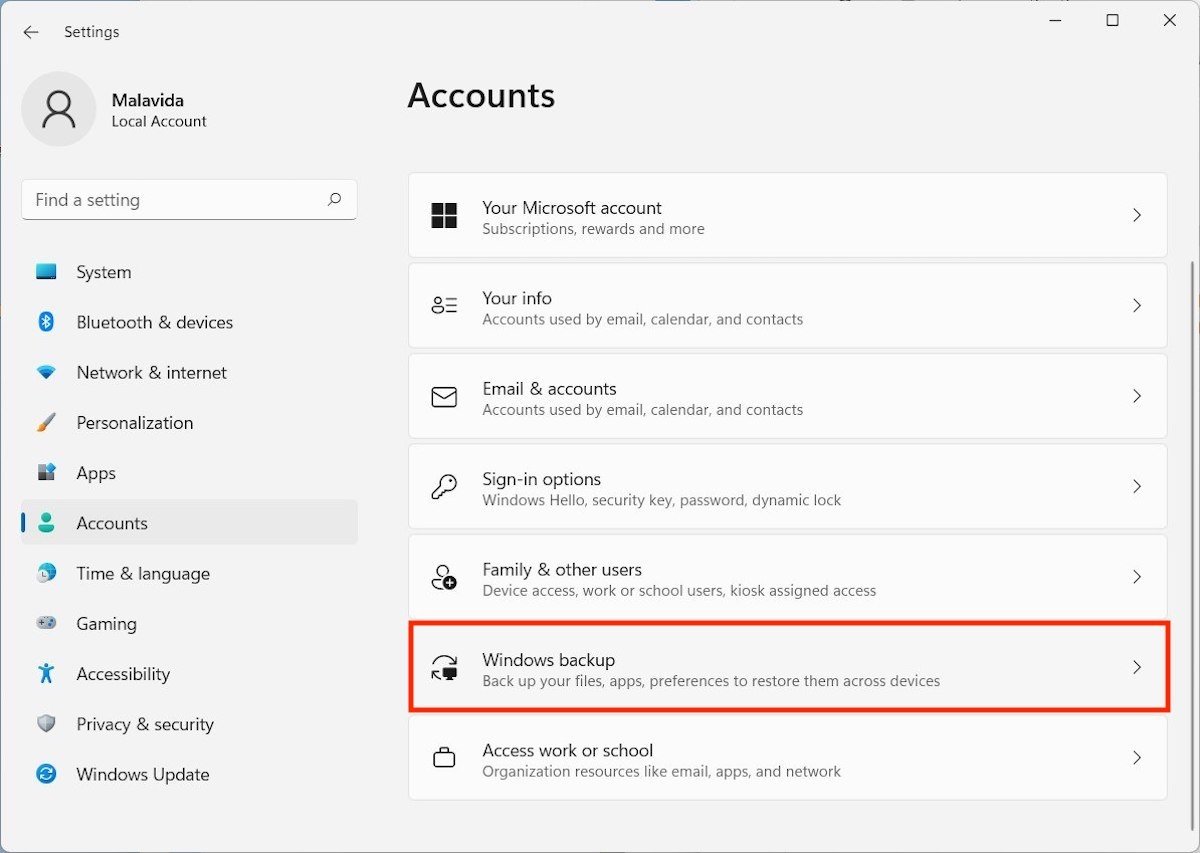
Finally, we provide you with instructions on how to make backup copies in Windows 11 thanks to the cloud. The service best integrated with the Microsoft system is none other than OneDrive. Visit the settings and click on Accounts. Then click on Windows backup.
 Cloud backup options
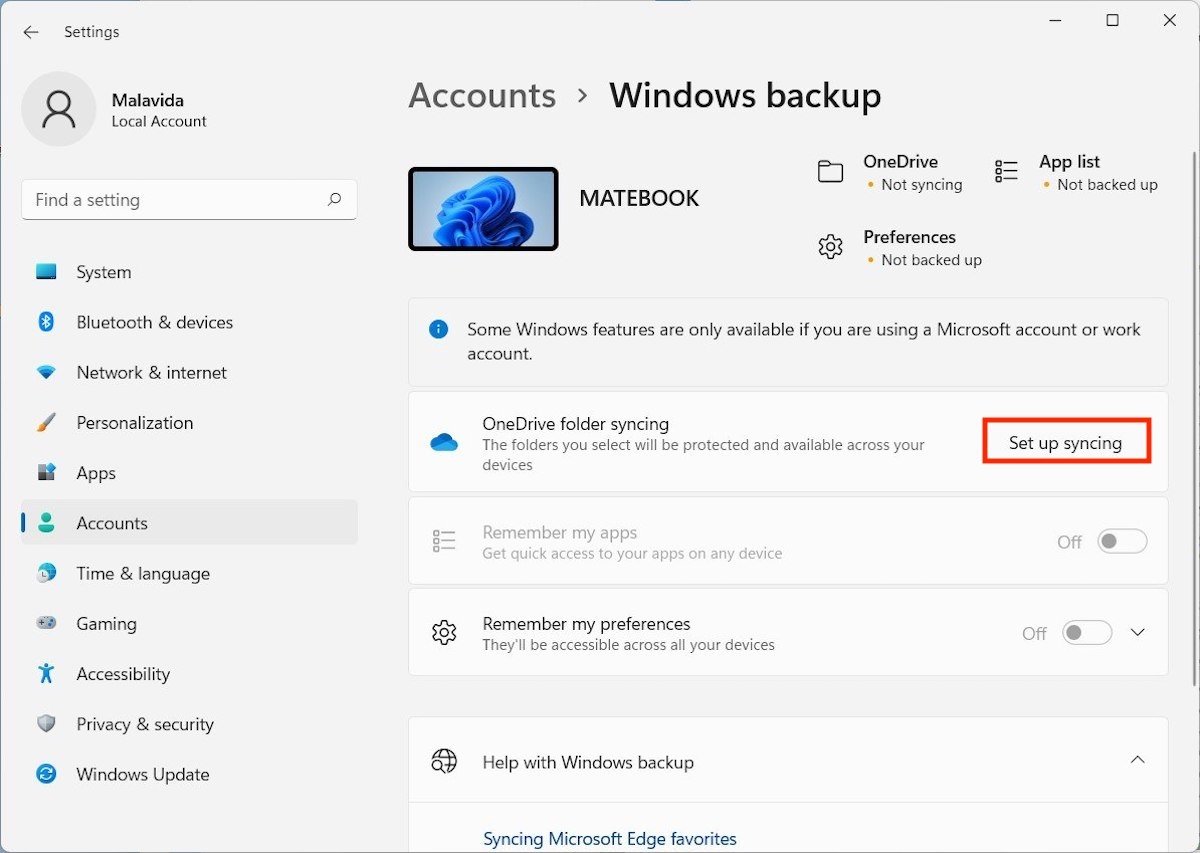
Click on the Set up syncing button to sign in with your Microsoft account.
 Start the configuration
Enter your profile credentials to continue
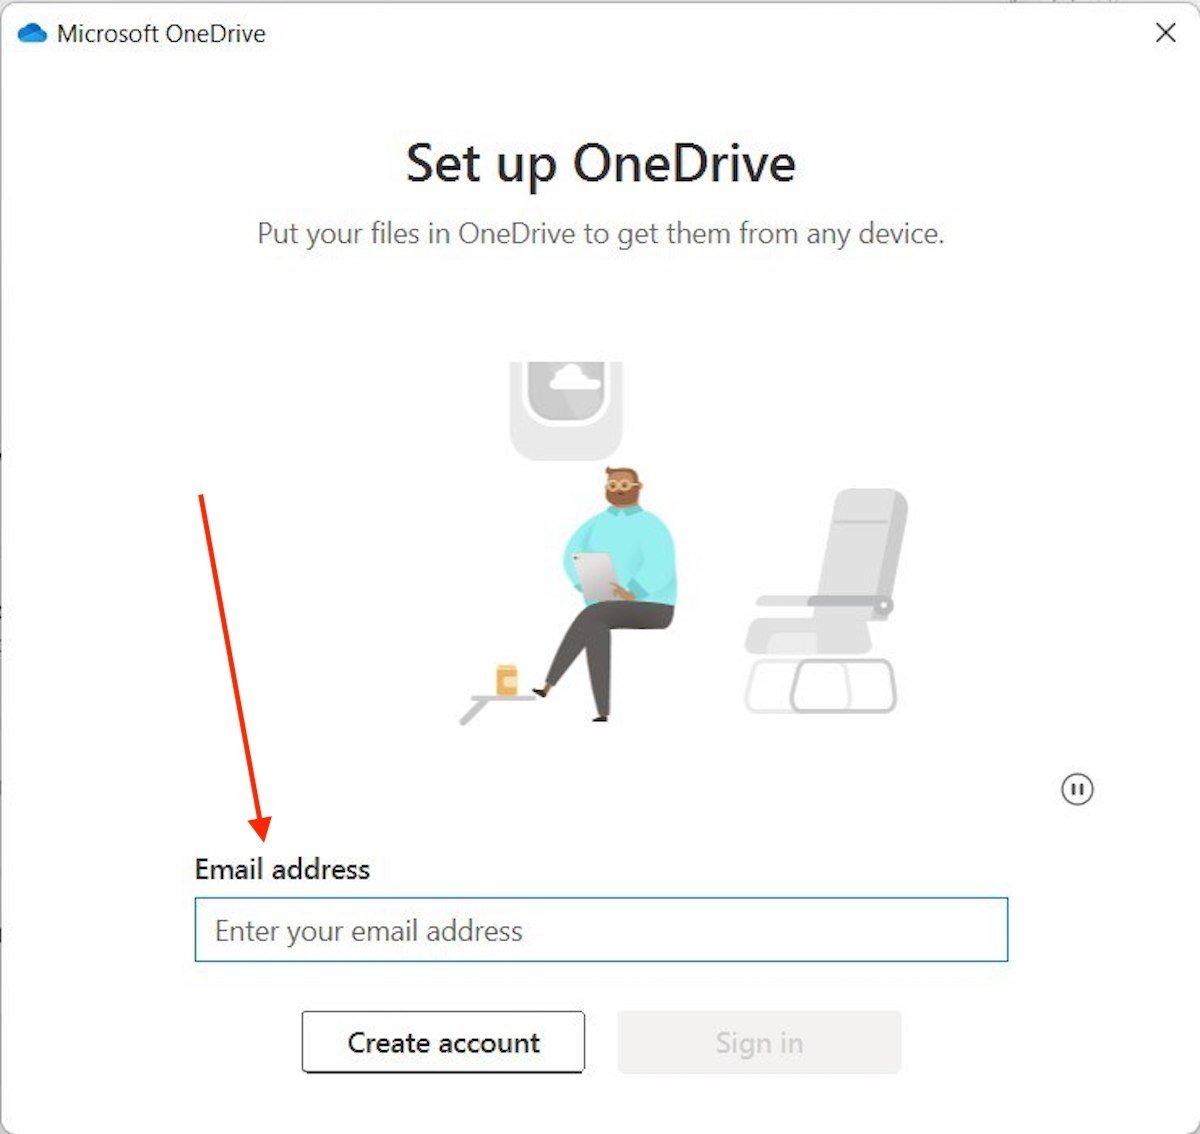 Login with your Microsoft account
During the process, the wizard will inform you which folder it will use to synchronize your files. If you click on Change location, you will be able to modify the route.
 Folder that will be copied to the cloud
Finally, select the additional folders you want to synchronize, such as Documents, Desktop, or Pictures.
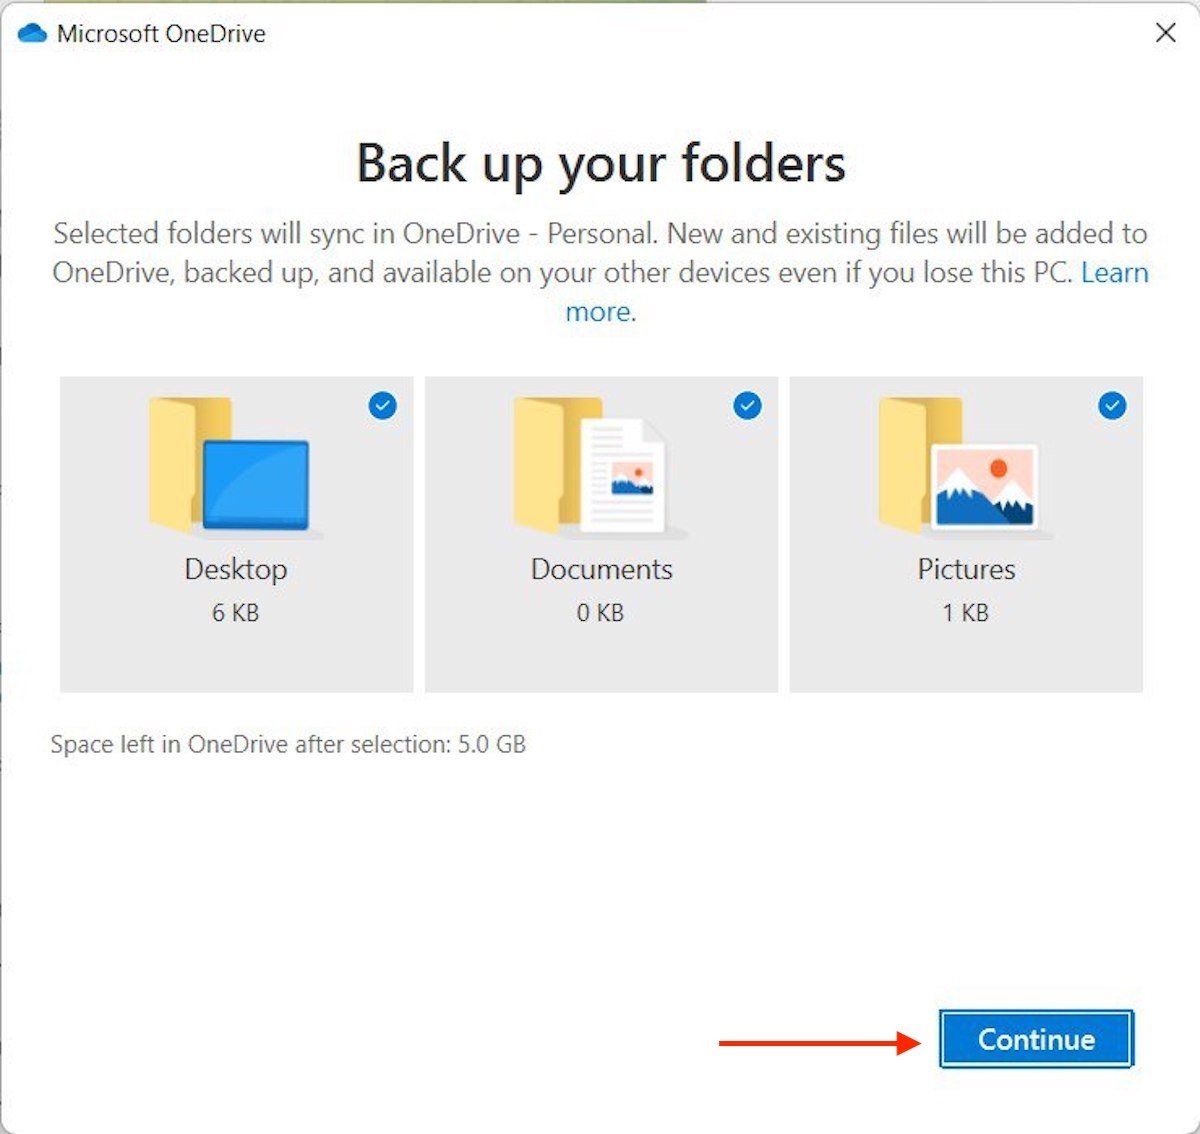 Create a copy of other folders
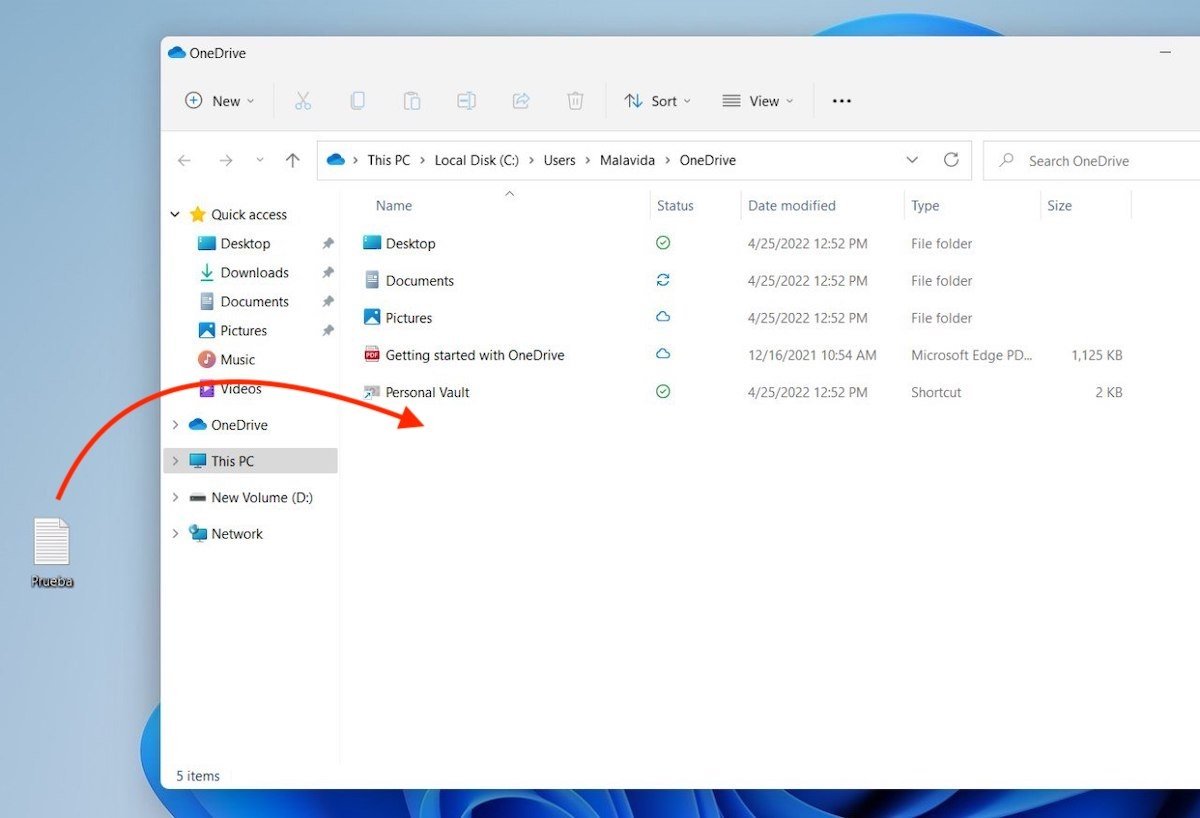
Remember that to keep a file safe, simply drag it to the OneDrive folder. Without delay, a copy will be created in the cloud.
 Upload a file to OneDrive
Of course, if you have enabled synchronization of the Documents, Desktop, or Pictures directories, it will still be useful to take your files there for backup in Windows 11.
Pros and cons of following this method
Pros:
- It is one of the most convenient methods. Any changes made to documents are synchronized with the cloud.
- It is used to have the same files on several computers.
Cons:
- Depends on a Microsoft account.
- Free space is scarce, only 5 GB.
