
The DNS is one of the network settings that Windows 10 lets you modify. Although they are usually obtained automatically, it is also possible to use a specific DNS server. If you want to change it by yourself, keep reading. Let us tell you how to do it.
First, go to the Windows 10 settings application. Among the categories shown, you will find Network & Internet. Click on it to continue.
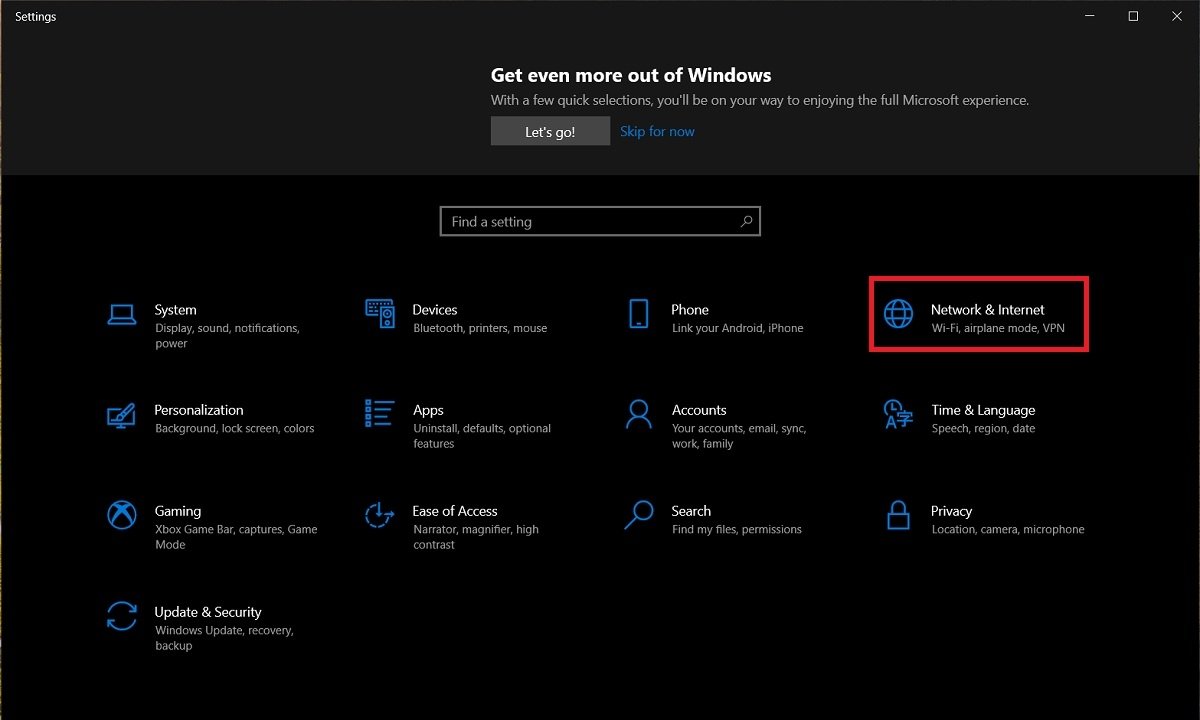 Network options
In the side section listing, click Wi-Fi. If your computer is connected by cable, the word Ethernet will appear in the list.
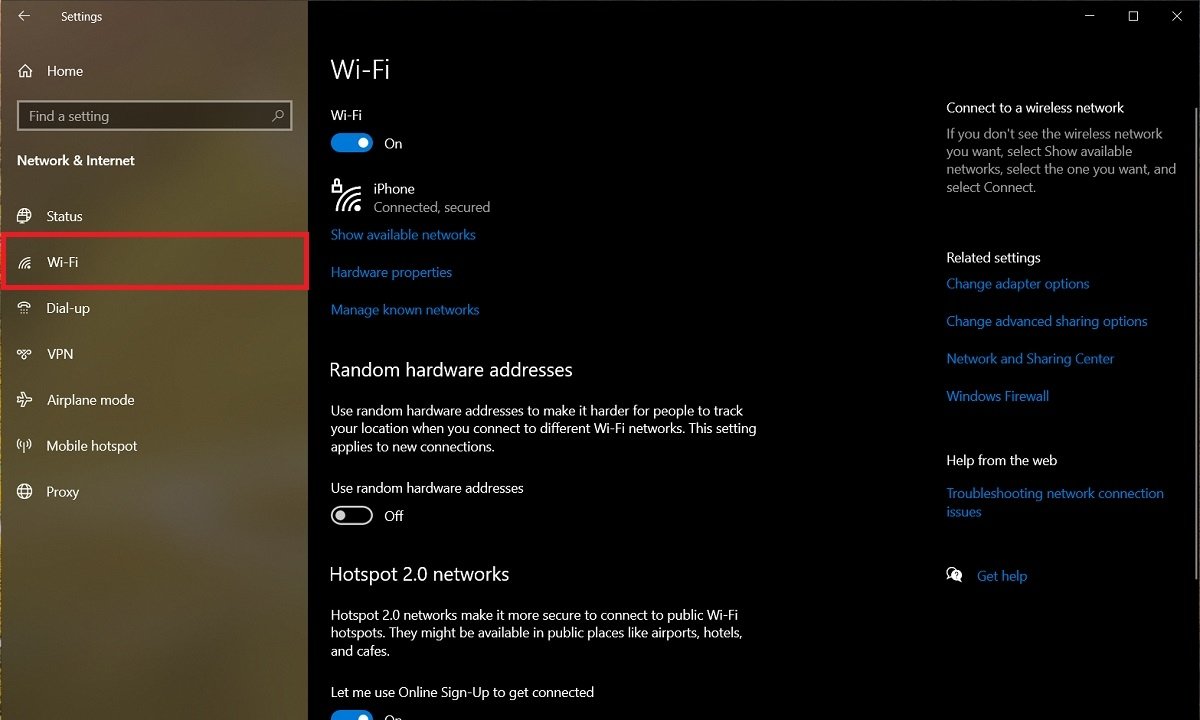 WiFi options
In both cases, the Change adapter options link will be available on the right side of the window. Select it to access the options for the different network adapters installed on your computer.
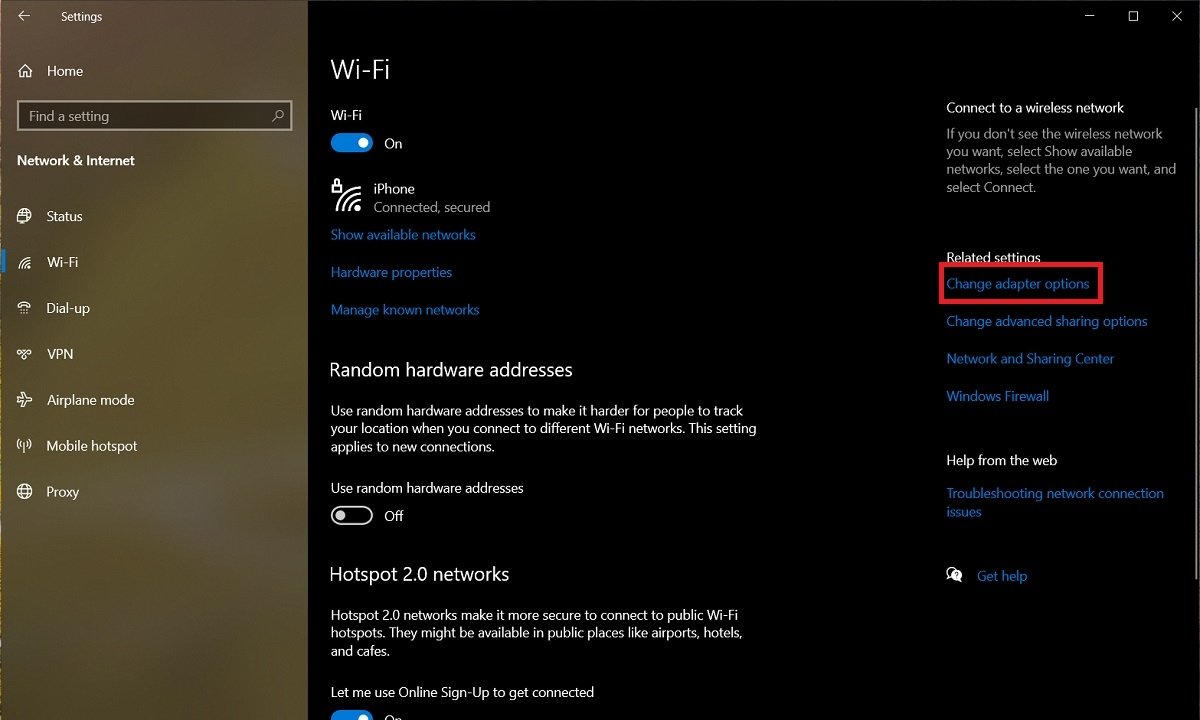 Change the adapter’s options
A new control panel window will open. Now, select the adapter you want to change the DNS server on. With the right mouse button, bring up the context menu and click Properties.
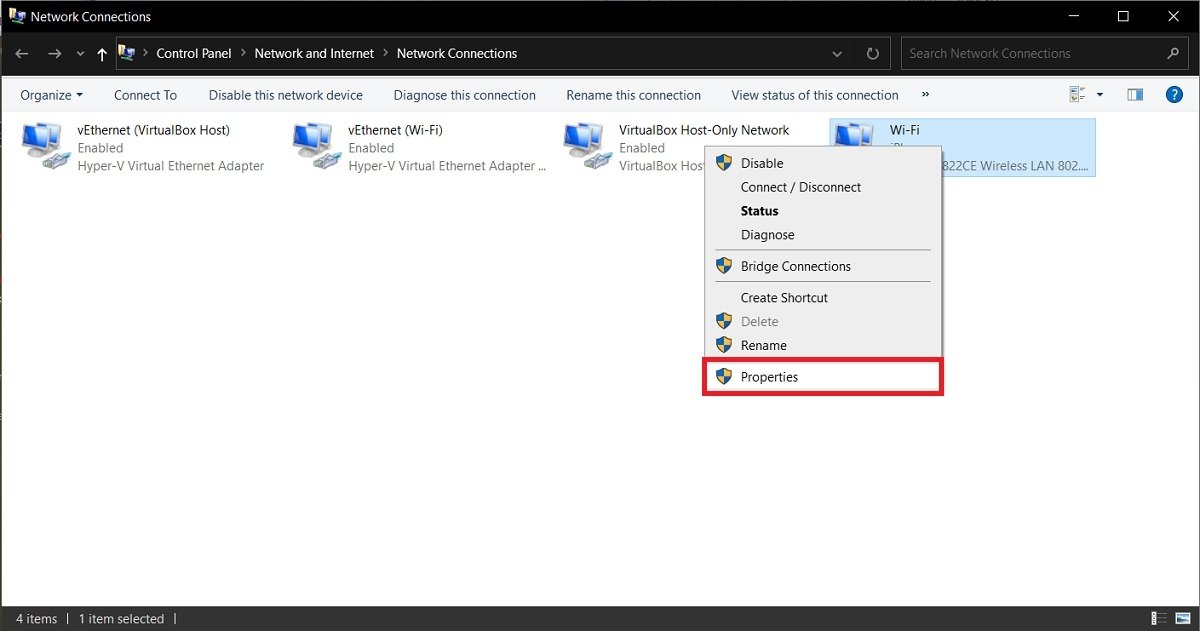 Adapter properties
In the properties dialog, you will find a list of different elements. The one you are interested in finding, in this case, is Internet Protocol Version 4 (TCP/IPv4). Once selected, click on the Properties button. You must not uncheck the box on the left side.
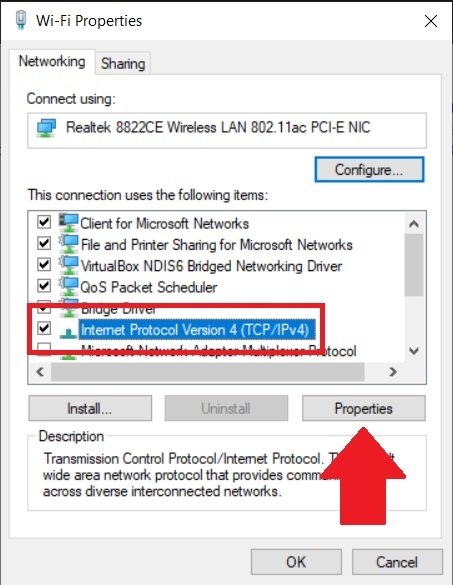 TCP properties
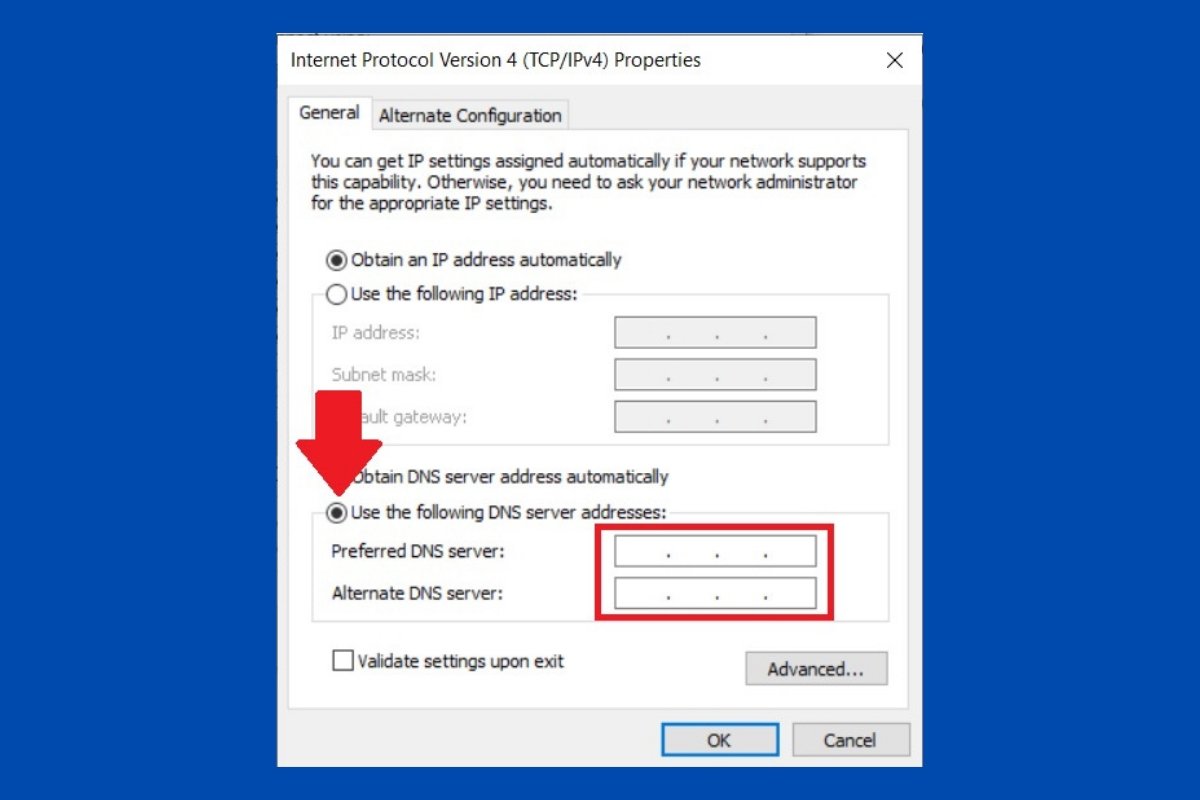
Finally, in the new window that opens, check the Use the following DNS server addresses option. Doing so will enable the lower text fields. There, you must specify the IP of the servers, both the main and the alternate.
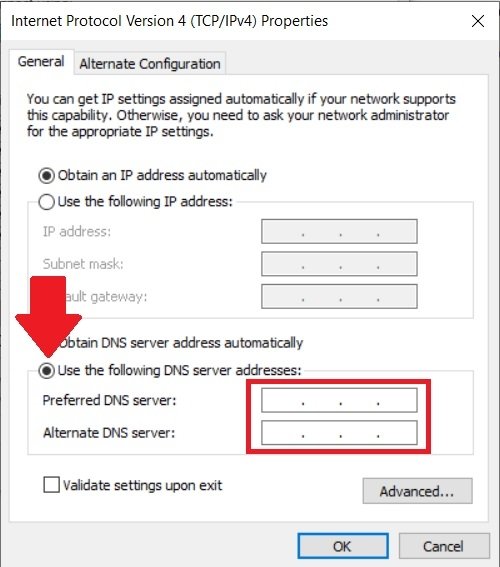 Change the adapter’s DNS
When you have finished the configuration, use the OK button to confirm the changes. Do the same in all open windows. Remember that this setting only applies to the adapter you selected. Therefore, if you have more than one network adapter, you will have to repeat the process for each of them.
