
If you have mistakenly deleted a document, you are probably wondering how to recover deleted files in Windows 11. In this guide, you will find all the methods available to you to achieve it. Let's get started!
Recover deleted files in Windows 11: all methods
There are different ways to recover files in Windows 11 once they have been deleted. It all depends on how they were deleted or how long ago they were deleted.
How to recover deleted files in Windows 11 from the Recycle Bin
As in previous versions, the latest version of Microsoft's operating system has a section called Recycle Bin. This is where files that have been deleted from the file explorer end up, with the following exceptions:
- You pressed the Shift key when deleting the element. In this case, the file was permanently deleted.
- The file weighed more than 10% of the total size of the partition where it is located. In that case, Windows informed you that it was not possible to send it to the Recycle Bin and asked you if you wanted to delete it permanently.
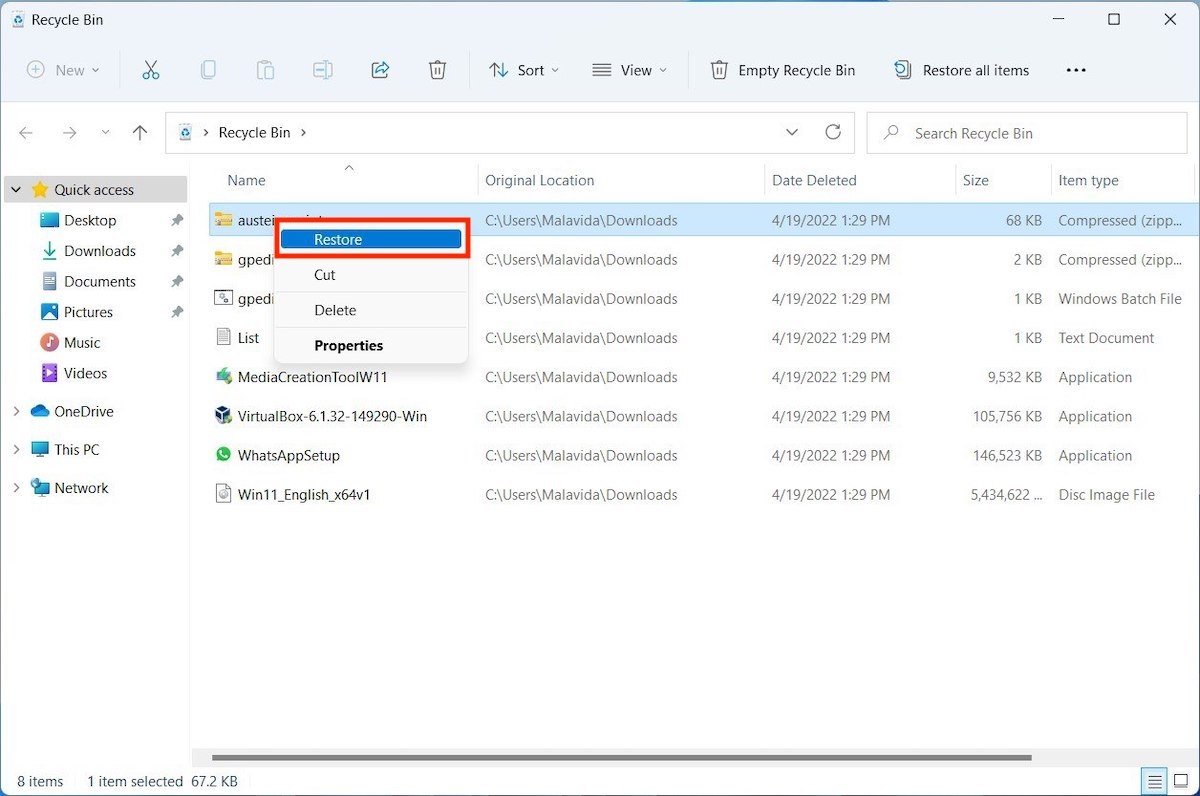 If you are lucky and your file is still in the recycling bin, you just need to click once to recover
If, indeed, the document is in the recycle bin, you can recover it:
- Open the recycle bin from the desktop or by locating it with the search.
- Right-click on the item you want to recover.
- Click on Restore.
- The file will be sent back to its source folder.
How to recover deleted files in Windows 11 with backups
In case you have been making backups with the tool included in Windows 11, recovering your files is really easy.
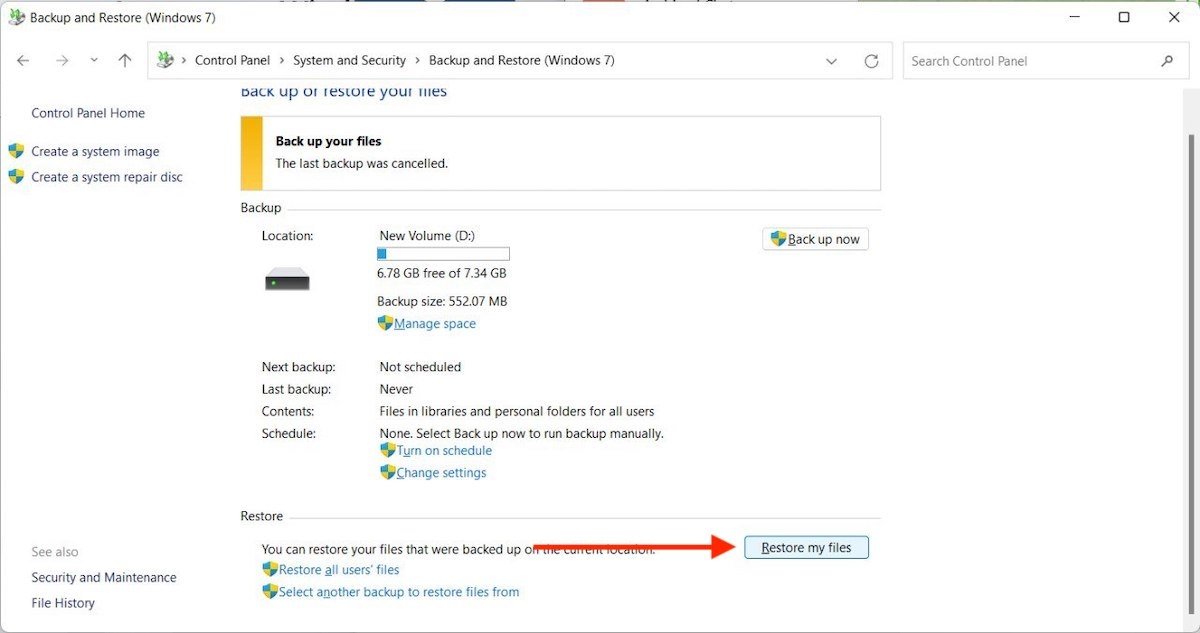 Recovering files from a previous backup is very easy thanks to Windows built-in tool
How to recover deleted files in Windows 11 from a backup? Here's how to do it:
- Go to the Control Panel.
- Go to System and Security and then click on Backup and Restore (Windows 7).
- Be sure to connect the device you have used to create the copies. Then, click on Restore my files.
- Select the folders you want to restore in the wizard you will see on the screen. Just select the root folder of the unit where the copies were made.
- Follow the steps shown to restore to its original location.
How to recover deleted files in Windows 11 with Recuva
In case you have permanently deleted a file and do not have a backup copy, Recuva is a good tool to try to recover it. It is not effective in all cases, but it can get you out of trouble. Download its latest version from Malavida and install the tool on your computer.
Then check All Files (or another more specific option) to list all the files that can be recovered.
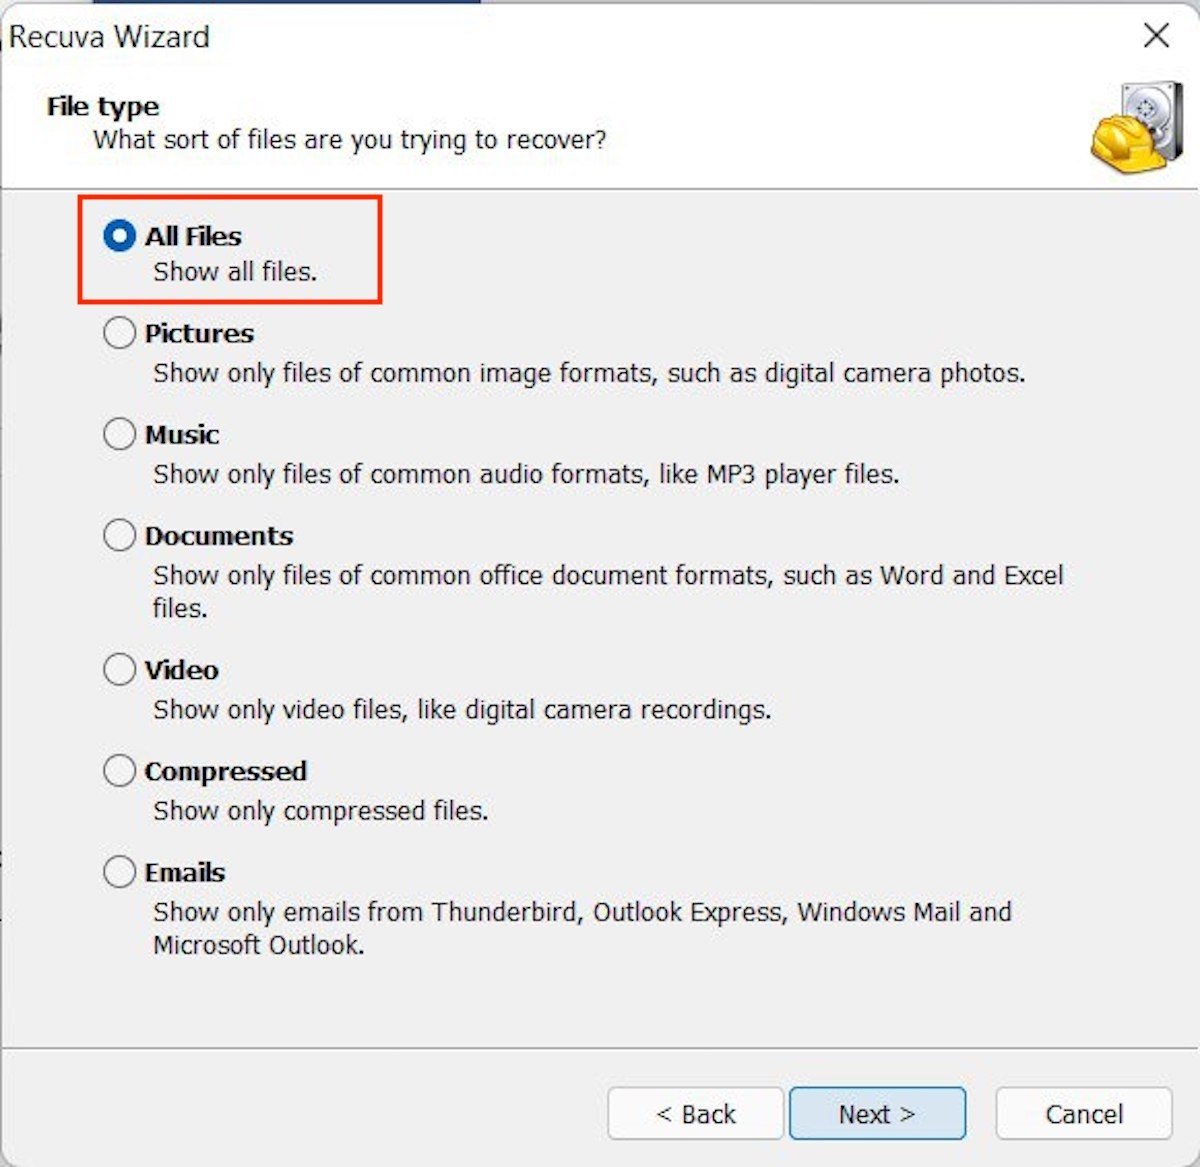 You can choose the type of content you want Recuva to scan
Specify a path that Recuva should search or choose the first option to scan the entire computer.
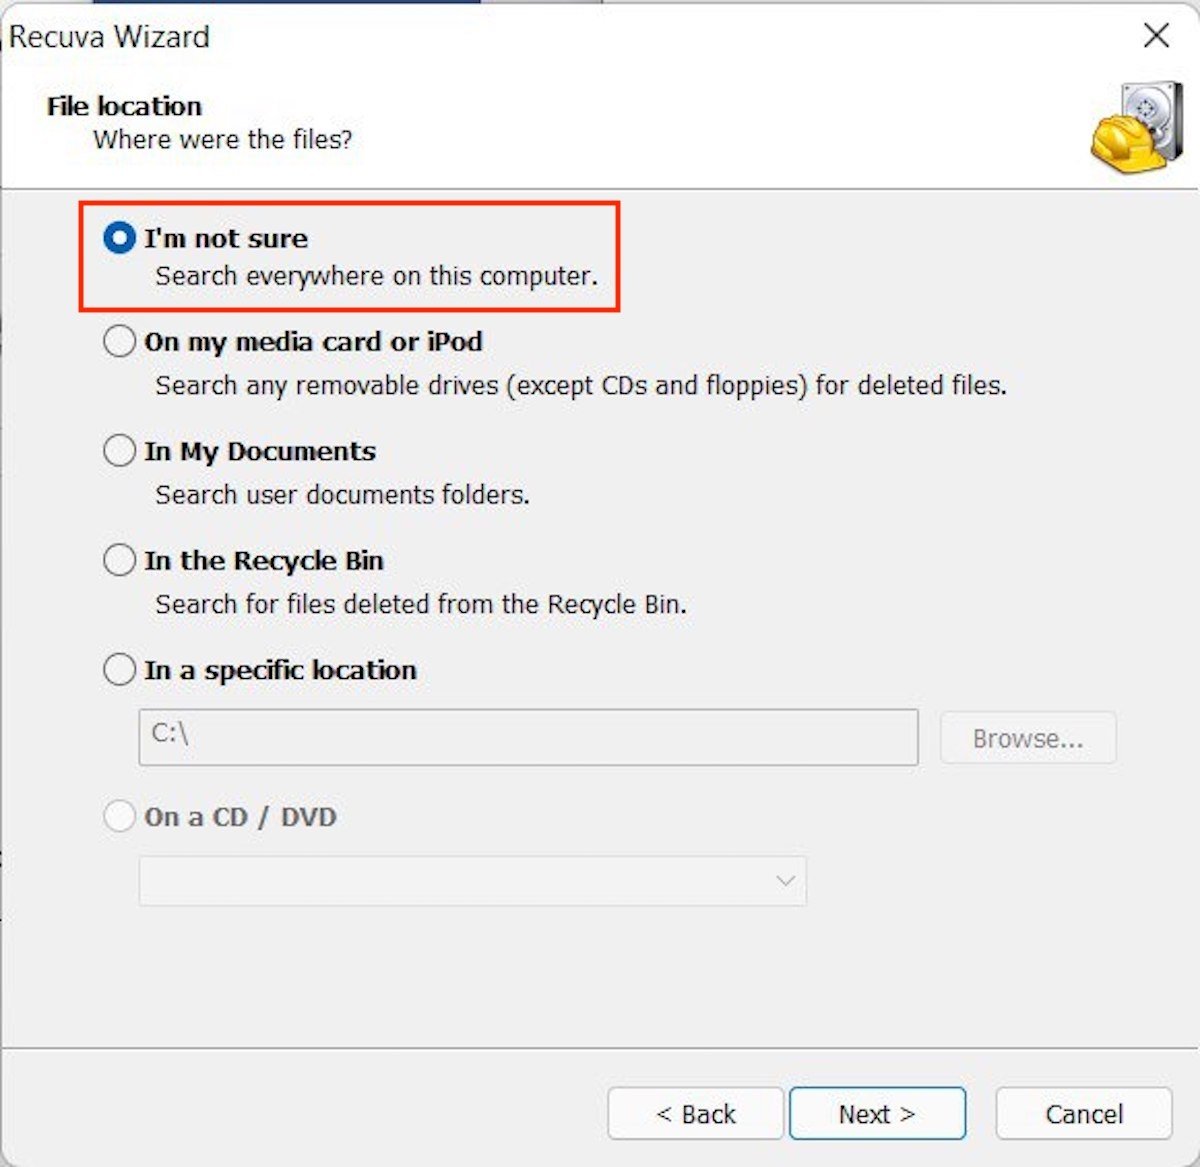 Specify the location where you want Recuva to search for deleted files
Turn on the Enable Deep Scan option to make the search deeper. It may come in handy if you deleted the file a long time ago. To start, click on Start.
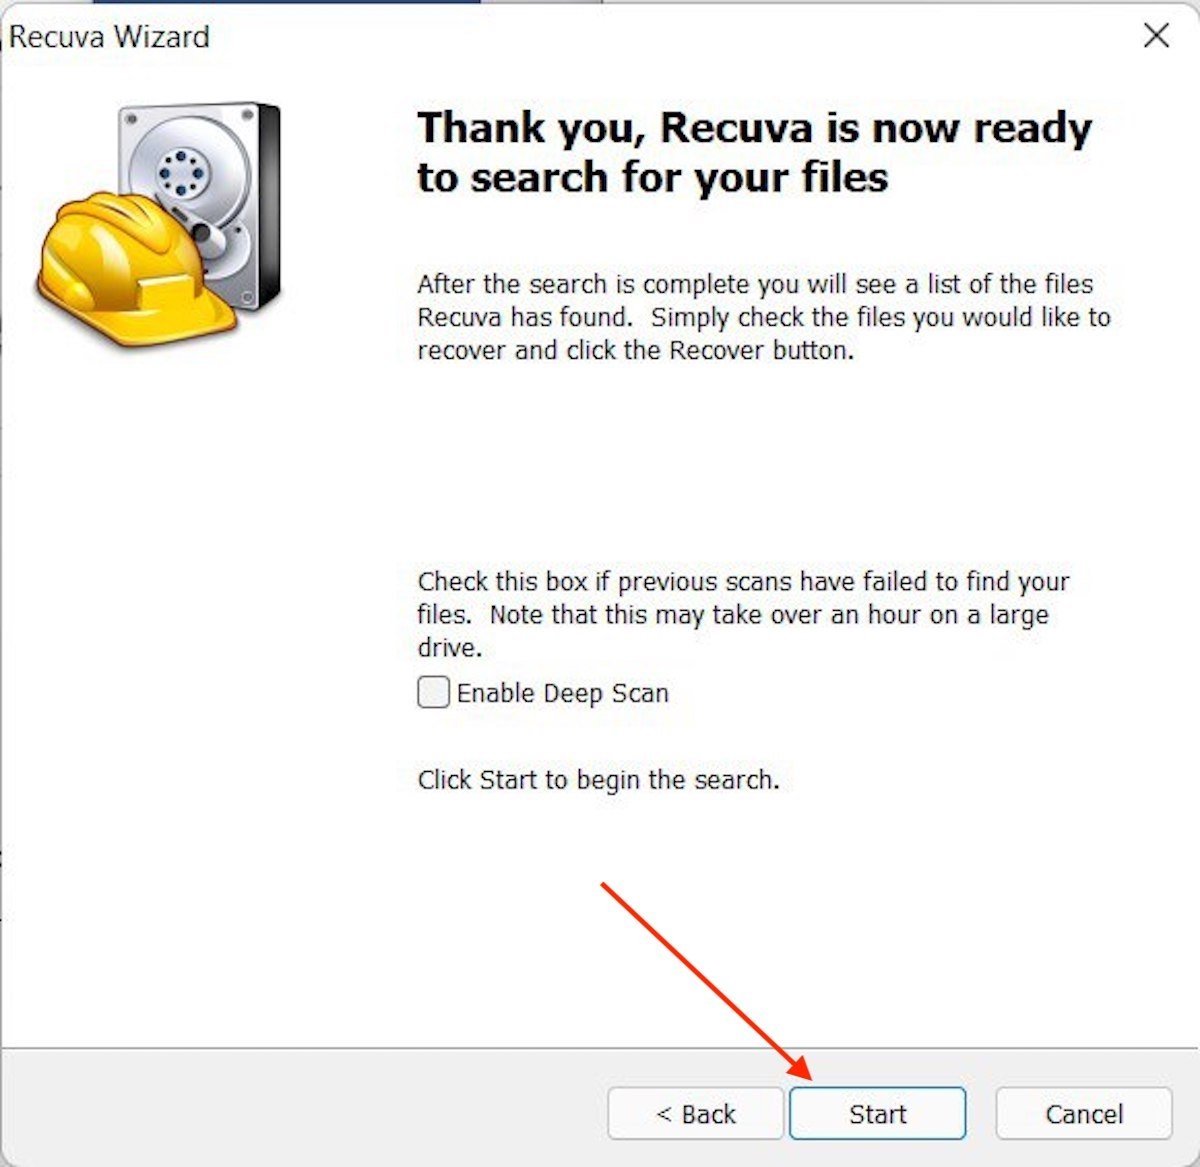 A great way to recover all sorts of files is enabling the deep storage scan
Select the file you want to recover from the list and click Restore.
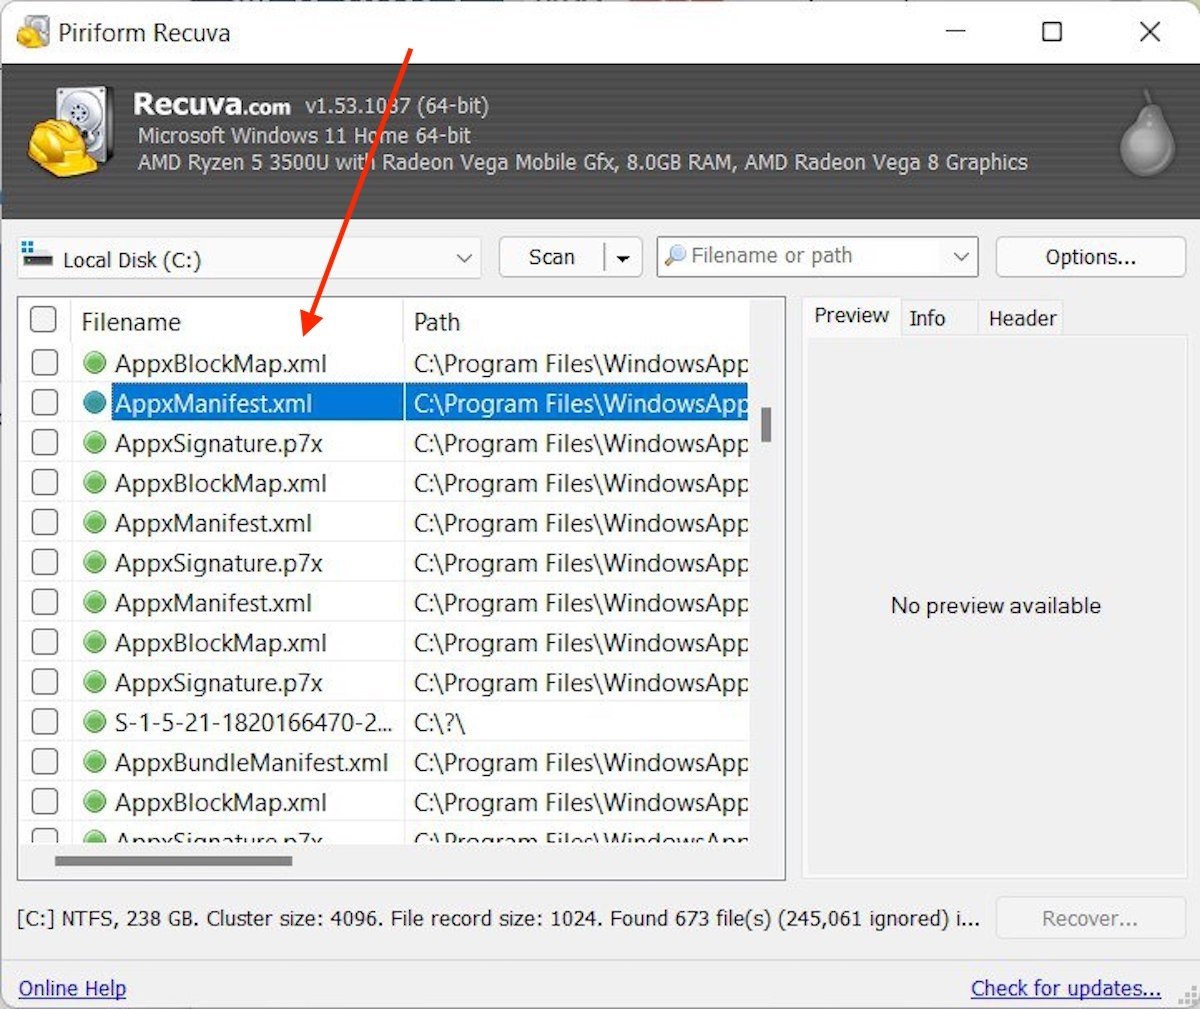 You can select a file from the list to try to recover it with Recuva
The application will ask you where it should send the recovered item.
