

Although it is not common, Windows 11 may crash when trying to boot the system. To solve this problem, Microsoft has added a safe mode to its operating system. However, you may be wondering exactly what it is and how it can help you fix boot errors on your PC. Keep reading this guide to discover all the answers to your questions about this system tool. In addition, we tell you how to turn on your computer in safe mode in Windows 11 step by step.
What is safe mode and what is it for?
The safe mode is one of the recovery tools included in Windows 11. It is designed to address problems related to booting the computer and loading the operating system correctly. Its main way to do so is to disable all programs, drivers, and components that are not strictly necessary. Thus, when a computer runs Windows in safe mode, it loads only the software that is essential for the computer to work.
The safe mode is used to detect the source of the error that prevents the PC from starting up normally. So it offers various modalities to help diagnose the problem and find possible solutions. It is also a perfect utility for accessing your computer's data and creating a backup copy. This may come in handy if, despite booting into safe mode in Windows 11, you are not able to solve the boot problem. The limited and basic access offered by this tool is quite enough to copy your important information to an external storage device.
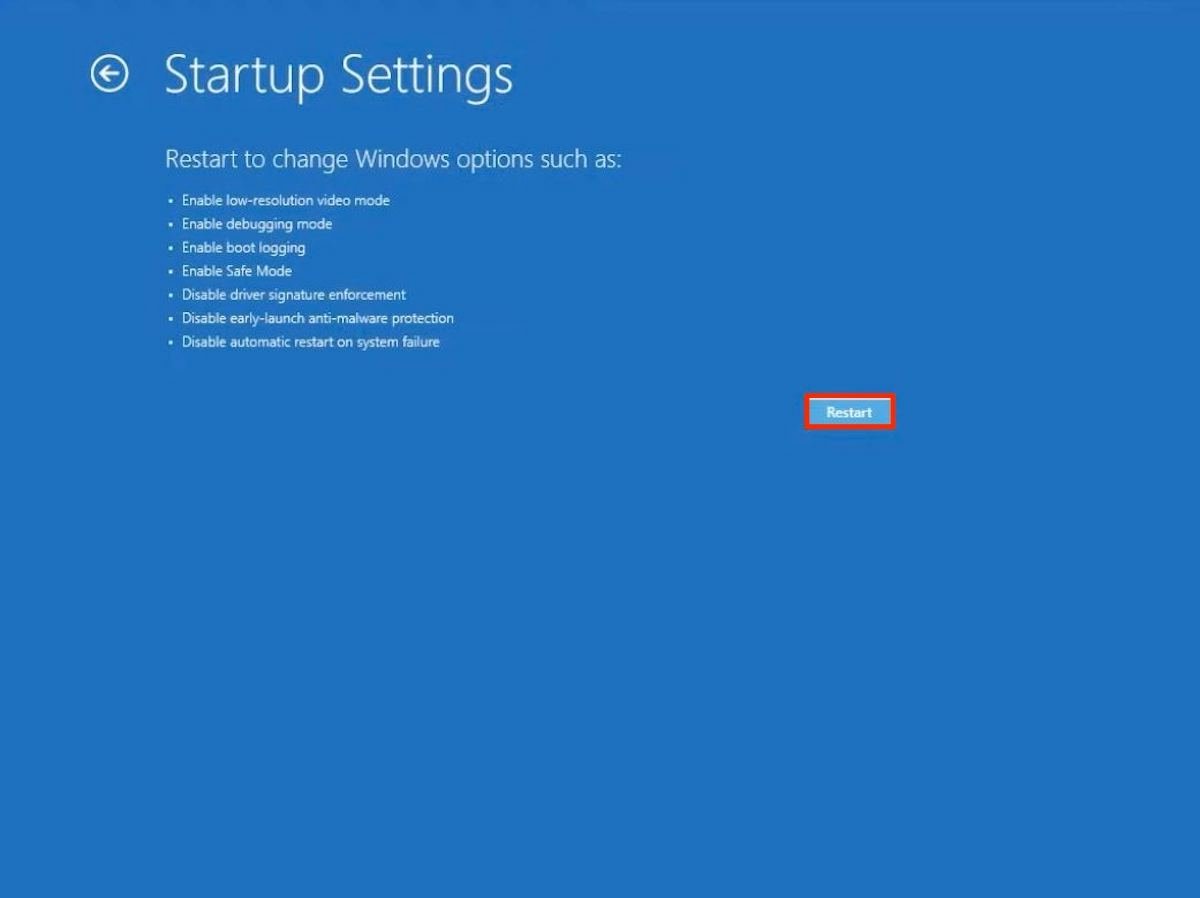
In total, Windows 11 offers a total of nine ways to boot into safe mode. They are the following:
- Enable debugging. Activates the system debugging tool
- Enable the boot log. It starts a log of everything that happens when the equipment is turned on.
- Enable low-resolution video. Reduces the screen resolution to help recognize problems with the adapter.
- Enable safe mode. Turns on the computer in the most basic mode of all, as it avoids loading any component that is not essential.
- Enable safe mode with network functions. It is exactly the same mode as the previous one, but with network access.
- Enable safe mode with command prompt. It only loads the computer with a CMD window.
- Disable the mandatory use of signed drivers. Enables the computer to start even if unsigned drivers have been installed.
- Disable early startup anti-malware protection. Eliminates the detection of malicious programs during startup.
- Disable automatic restart after error. Prevents the computer from automatically restarting when an error has occurred. This avoids an infinite start-up loop.
How to enter Windows 11 safe mode?
Now that you know everything you need to know about Windows 11 safe mode, it is time to know the most recommended methods to access it. Here you will find a total of three of them.
How to start safe mode from the settings
The first way to get to safe mode in Windows 11 is through the Settings application. Go to System, Recovery, and finally Advanced startup. Click Restart Now to enter advanced system startup.
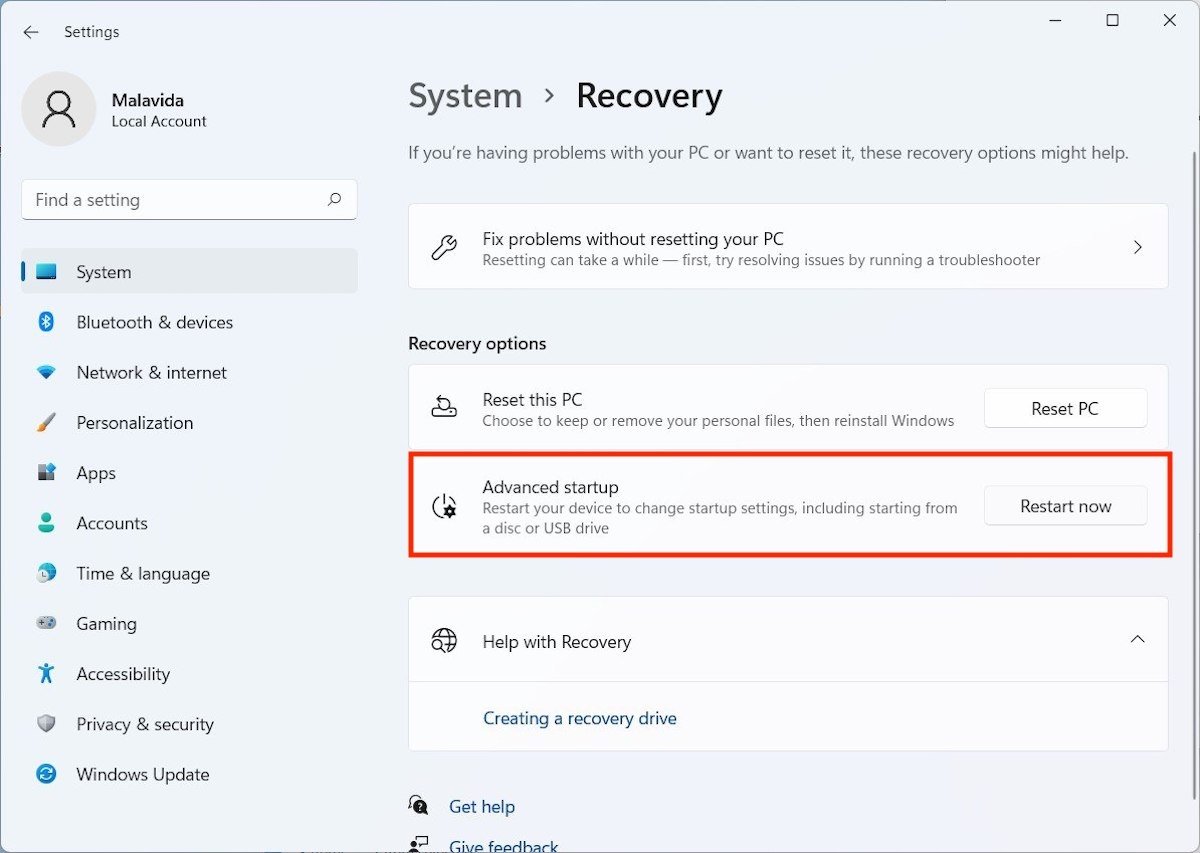 You can access the advanced startup from the configuration
On the blue screen, you will see, select the Troubleshoot category.
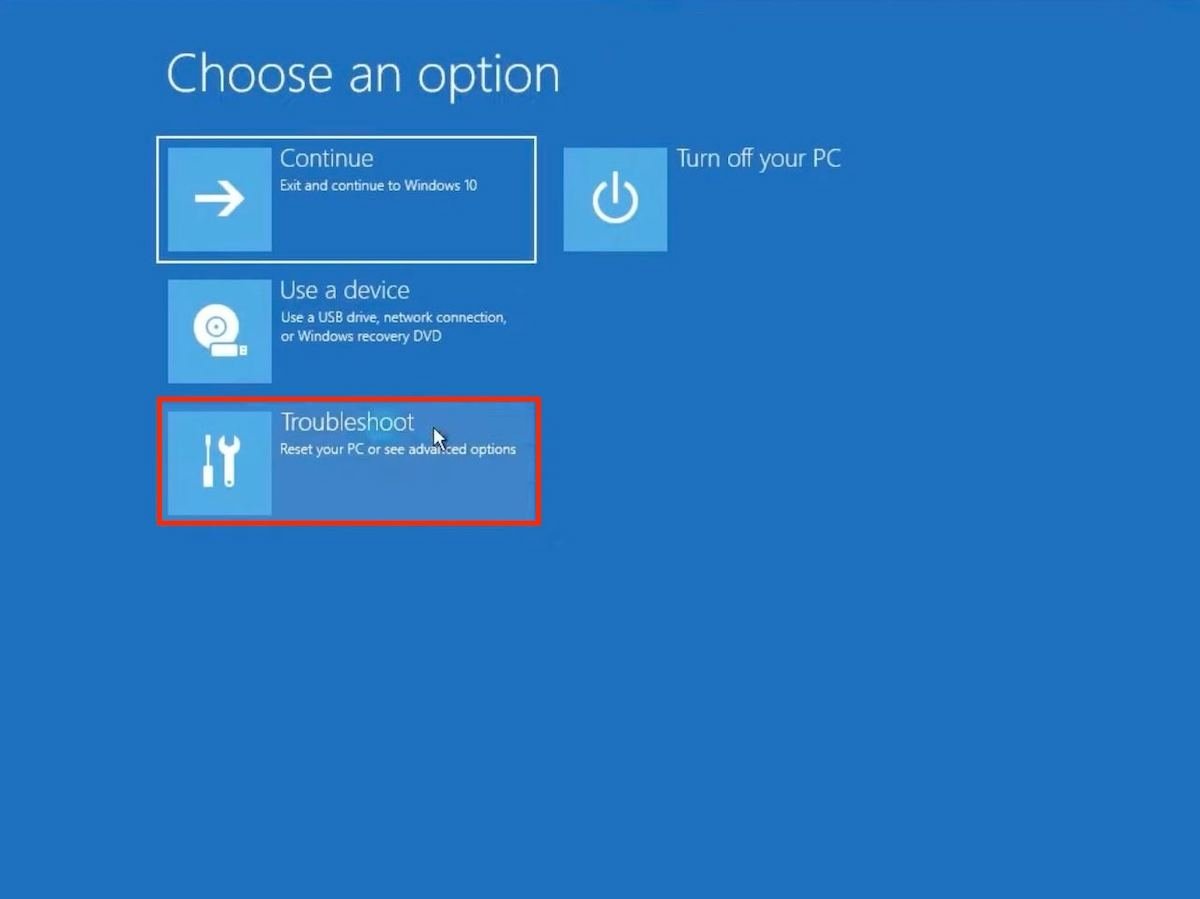 Among the options available, choose the one to fix problems
Then, click on Advanced options in order to display all additional parameters.
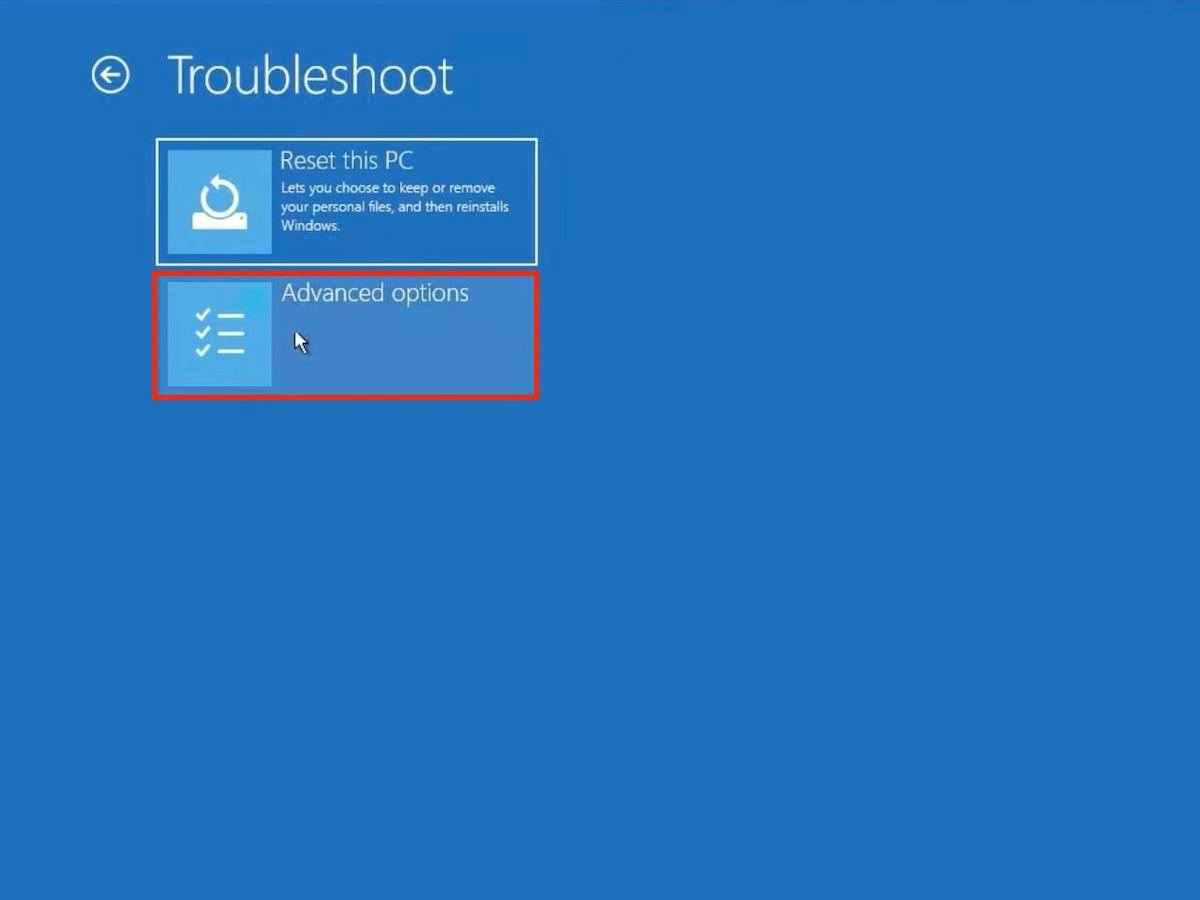 Within the area to fix problems, go to the advanced options
Click on Startup Repair to continue.
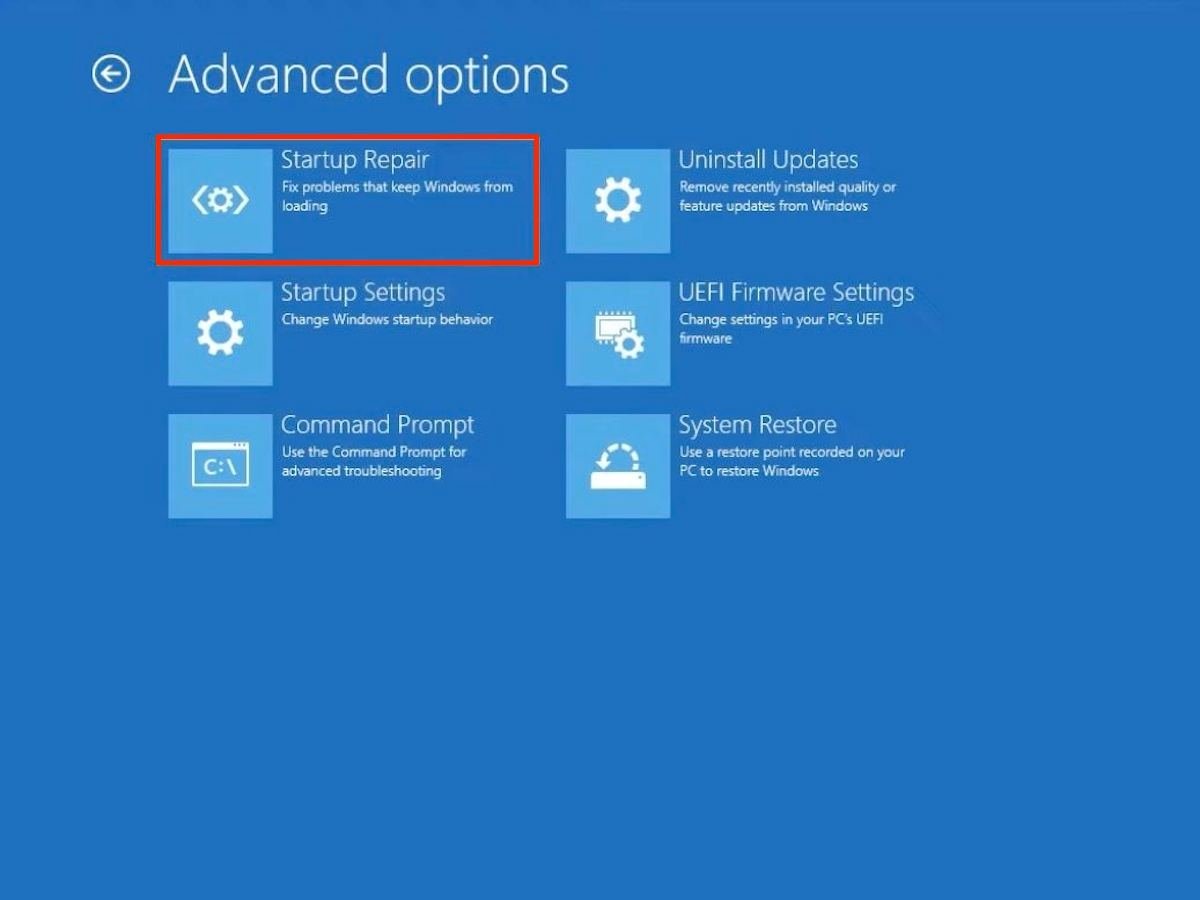 Access the startup repair section to enable the safe mode
Then, click Restart in order to reboot the computer in safe mode.
 Reboot the computer in safe mode and fix the startup problems
The last step is to select the option that best suits your needs. The possibilities available to you correspond to the list we have included in the previous section of this guide. The Safe Mode with network functions is usually chosen.
How to start safe mode from the lock screen or start menu
Let us propose to you an alternative to get to the advanced startup of Windows 11. It is as easy as pressing the Shift key while clicking Restart.
 Another way to access the advanced startup options is with the reboot button
This function is available in the following system sections:
- Reset button in the Start Menu.
- Reset button on the lock screen. Therefore, it is not a crucial requirement to be logged in to access the secure mode.
Once you are in the advanced Windows startup, the steps to follow are the same as shown in the previous section.
How to start safe mode with MSConfig
The msconfig command directs you to the System Configuration dialog. From it, you have the ability to enable safe mode without going through the fast boot.
 MSConfig is a great tool to access the safe mode in just a few clicks
Follow these steps to do it on your computer:
- Open the Run dialog box with the keyboard shortcut Windows + R.
- Type the msconfig command and press Enter.
- Go to the Boot
- Check the Safe boot box and select one of the available modes. If you check Network, you will start the safe mode with network functions.
- In the pop-up dialog that appears, confirm the restart in safe mode.
How to exit safe mode in Windows 11?
We hope that everything described in this article has helped you to repair the startup of your computer, or at least, to save your most important documents. In case you have achieved your goal, you may be wondering how to exit safe mode in Windows 11. This is the last issue we are going to resolve here. The only thing you need to do to disable safe mode on your computer is to restart. The next time the computer is turned on, the safe mode will be gone.
